Love this? Save it for later!
Share the inspiration with your friends
My neighbor Carla swore she hated energy balls. For years. Every time someone brought a batch to a block party or a playdate, she’d give them that polite, tight-lipped smile and say, “Oh, how… healthy.” Then she’d reach for a brownie instead. I didn’t blame her, honestly. Most of them taste like cardboard mixed with regret. But then I made this specific version of no-bake chocolate peanut butter energy balls one Sunday afternoon, just for myself, because I needed something quick before a hike. I left a small bowl on the counter while I went to change. When I came back, Carla was standing in my kitchen, mid-chew, with chocolate on her finger and this look on her face like she’d been caught sneaking cookies before dinner. She froze, swallowed, and said, “Okay. I need the recipe.” That’s the thing about these little bites—they don’t try to convince you. They just sit there, looking unassuming, and then suddenly you’re eating your fourth one and wondering where your self-control went. I’ve been making them ever since, for everything from backyard barbecues to holiday cookie swaps, and they always, always disappear first.
Why You’ll Love This Recipe
Let me tell you, I’ve tested a lot of energy ball recipes over the years. Some were too dry, some fell apart, and some just tasted like a sad compromise. This one is different. It’s the kind of recipe I bring to every gathering because I know it’ll work, and honestly, I like looking good without much effort.
- No baking required. Seriously. Zero oven time. You mix, you roll, you’re done in under 20 minutes.
- Simple pantry ingredients. Oats, peanut butter, chocolate chips, honey—you probably have most of this already. No weird health food store finds.
- Perfect for hosting. Make a double batch before guests arrive, and they’ll snack on these instead of raiding your fridge. I’ve seen it happen at every party I’ve brought them to.
- Crowd-pleaser guaranteed. Kids grab them. Adults grab three. Even my neighbor Carla, the former energy ball skeptic, now asks me to bring them to every potluck.
- Unbelievably satisfying. The texture is just right—chewy from the oats, creamy from the peanut butter, with little pockets of melted chocolate. It’s comfort food that happens to be good for you.
What makes this version stand out from all the others? It’s the ratio. I spent way too many afternoons tweaking measurements until the mixture held together perfectly without being sticky or dry. Plus, I add a pinch of sea salt that somehow makes the chocolate taste richer. It’s a small thing, but it’s the difference between “these are okay” and “I need the recipe.”
What Ingredients You Will Need
This recipe uses simple, wholesome ingredients that come together to create something genuinely delicious. No complicated shopping list, no trips to specialty stores. Just good, honest food.
- 1 cup old-fashioned rolled oats (not quick oats—they get mushy. I prefer Bob’s Red Mill for consistent texture)
- 1/2 cup creamy peanut butter (natural, no-stir kind works best. If your peanut butter is oily, stir it well before measuring)
- 1/3 cup honey (or maple syrup for a vegan option. Local honey adds a nice floral note if you have it)
- 1/2 cup mini chocolate chips (I use Ghirardelli semi-sweet mini chips because they melt evenly and don’t overwhelm the other flavors)
- 1/4 cup ground flaxseed (adds fiber and helps bind everything together. You can skip it, but the balls will be softer)
- 1/2 teaspoon vanilla extract (pure, not imitation—it makes a difference)
- 1/4 teaspoon sea salt (plus a little extra for sprinkling on top. This is my secret weapon)
- 2 tablespoons unsweetened cocoa powder (Dutch-processed gives a deeper chocolate flavor, but regular works fine too)
A few notes from my kitchen: If your peanut butter is too runny, the mixture won’t hold its shape. You can add an extra tablespoon of oats to balance it out. For a nut-free version, swap the peanut butter with sunflower seed butter—just know the color will be a little different. And if you’re using old-fashioned oats, give them a quick chop in the food processor for a finer texture that holds together better. I learned that tip after too many balls that crumbled in my hands.
Equipment Needed
You don’t need much for this recipe, which is honestly one of my favorite things about it. Here’s what I use:
- Large mixing bowl (any medium-to-large bowl works. I use a glass one because it doesn’t hold onto smells)
- Measuring cups and spoons (standard set is fine. For the peanut butter, spray the cup with cooking spray first—it slides right out)
- Rubber spatula or wooden spoon (for mixing. The spatula is better for scraping the sides)
- Baking sheet or large plate (lined with parchment paper for easy cleanup)
- Cookie scoop or tablespoon (for uniform balls. I use a small 1-tablespoon scoop—it makes them all the same size, which matters for even chilling)
- Plastic wrap or an airtight container (for storing. A mason jar works great if you’re taking them to a party)
If you don’t have a cookie scoop, just wet your hands slightly before rolling—it keeps the mixture from sticking to your palms. I learned that one after a particularly sticky batch that left me washing my hands four times.
Preparation Method
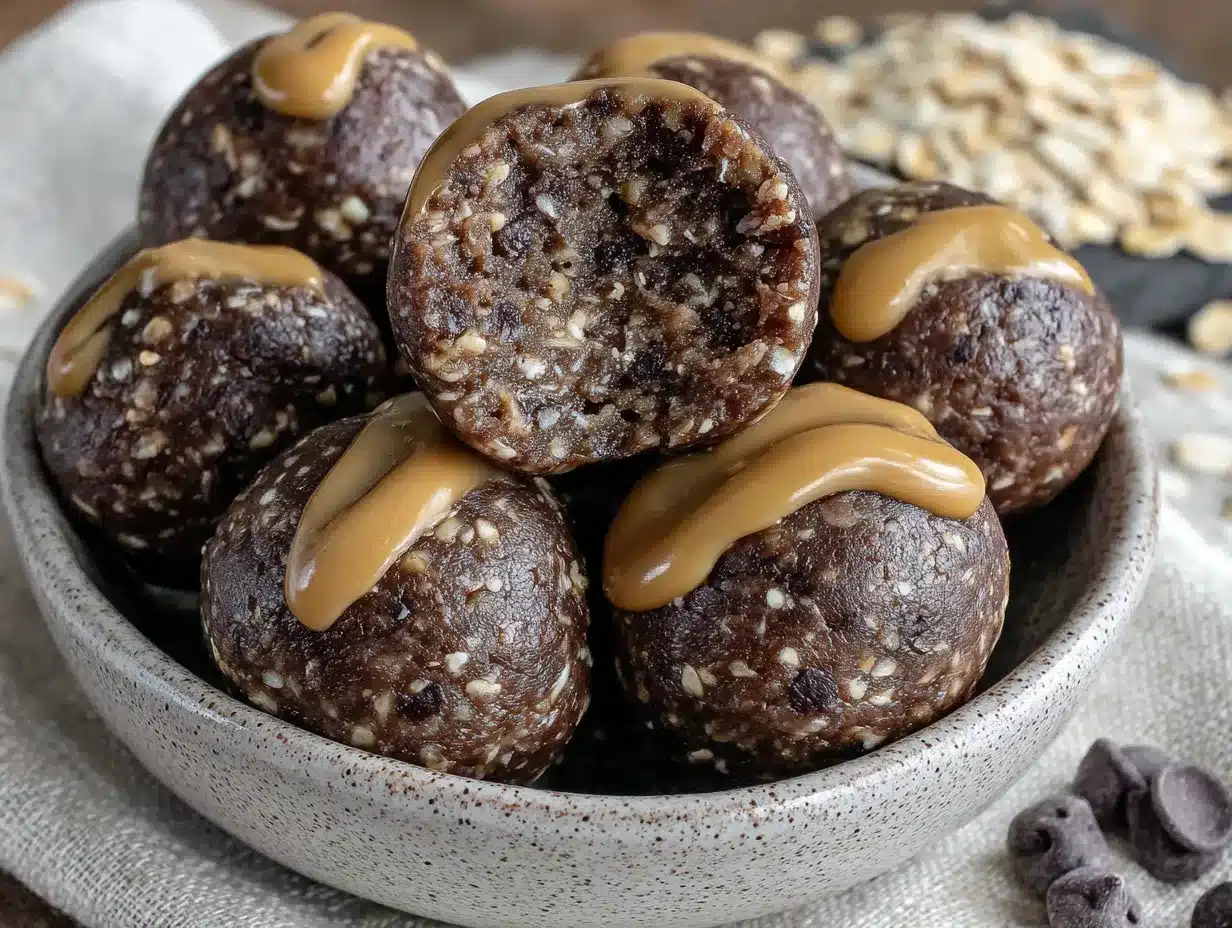
This comes together fast, so read through all the steps first. Trust me, it’s easier that way.
- Combine the dry ingredients. In a large mixing bowl, whisk together 1 cup old-fashioned rolled oats, 1/4 cup ground flaxseed, 1/4 cup unsweetened cocoa powder, and 1/4 teaspoon sea salt. Make sure there are no clumps in the cocoa powder—nobody wants a bitter surprise.
- Add the wet ingredients. To the same bowl, add 1/2 cup creamy peanut butter, 1/3 cup honey, and 1/2 teaspoon vanilla extract. Stir everything together with a rubber spatula until it forms a thick, uniform mixture. It should look like a dark, crumbly dough that holds together when pressed. If it’s too dry, add a teaspoon of honey or water. If it’s too wet, add a tablespoon of oats.
- Fold in the chocolate chips. Gently stir in 1/2 cup mini chocolate chips until they’re evenly distributed. Reserve a few to press onto the tops of the balls for a prettier presentation—this is optional but looks nice on a serving platter.
- Chill the mixture. Cover the bowl with plastic wrap and refrigerate for 15-20 minutes. This step is crucial. It firms up the peanut butter and honey so the balls hold their shape. I’ve skipped this before out of impatience, and I ended up with flattened, sad little discs instead of round balls. Learn from my mistake.
- Roll into balls. Line a baking sheet or large plate with parchment paper. Using a cookie scoop or a tablespoon, portion out the mixture and roll it between your palms into smooth balls. You should get about 18-20 balls, depending on size. If the mixture sticks to your hands, lightly wet your palms with water.
- Optional: Top with extra chocolate chips. Press a few mini chocolate chips onto the top of each ball. This makes them look more polished for guests—I do this when I’m bringing them to a dinner party.
- Chill again. Place the baking sheet in the refrigerator for at least 30 minutes. This sets them completely. If you can wait an hour, even better. The texture gets perfectly firm but still soft enough to bite into easily.
- Serve or store. Transfer the energy balls to an airtight container and keep them refrigerated. They’ll last up to two weeks—if they last that long in your house.
Cooking Tips & Techniques
I’ve made these energy balls more times than I can count, and I’ve definitely learned a few things the hard way. Here’s what I wish someone had told me when I started:
Don’t skip the chill time. I know it’s tempting to just roll them right away and call it a day. But the mixture needs that 15-minute rest in the fridge so the oats can absorb some moisture and the peanut butter can firm up. Without it, your balls will be sticky and misshapen. I’ve done it. It’s not pretty.
Use a cookie scoop for consistency. When I first started making these, I just grabbed handfuls and hoped for the best. Some balls were tiny, some were huge, and they never looked as nice as the ones in the photos. A small cookie scoop changed everything. Now they’re all the same size, which means they chill evenly and look professional on a platter.
Wet hands are your friend. Rolling energy balls can get messy, especially if your kitchen is warm. Keep a small bowl of water nearby and dip your fingers in it before rolling each ball. The water helps the mixture glide off your palms instead of sticking to them. It’s a small trick that makes the whole process much more pleasant.
Toast the oats for extra flavor. This is completely optional, but if you have an extra five minutes, spread the oats on a baking sheet and toast them at 350°F for 5-7 minutes until they’re golden and fragrant. Let them cool completely before using. The nutty flavor adds a whole new dimension to the energy balls. I do this when I’m making them for a special occasion.
Watch your peanut butter. Not all peanut butters are created equal. Natural ones that separate can be too oily, while processed ones can be too thick. I’ve found that creamy, no-stir peanut butter (like Skippy Natural or Jif Natural) gives the best texture. If yours is too runny, add an extra tablespoon of oats to compensate.
Variations & Adaptations
One of the best things about this recipe is how easy it is to change up. I’ve experimented with all sorts of variations, and here are my favorites:
Vegan version: Swap the honey for maple syrup or agave nectar. Use dairy-free chocolate chips (Enjoy Life brand works well). Everything else stays the same. The texture will be slightly softer, so you might need to chill them a little longer.
Nut-free option: Replace the peanut butter with sunflower seed butter. The color will turn a little greenish (that’s a natural reaction between sunflower seeds and baking soda, even though there’s no baking soda here), but the taste is still great. Add an extra tablespoon of honey to balance the slight bitterness of sunflower seed butter.
Protein boost: Add 2 tablespoons of your favorite protein powder (vanilla or chocolate works best). Reduce the oats by 2 tablespoons to keep the texture balanced. I’ve done this after workouts, and it’s a solid post-gym snack.
Spiced version: Add 1/2 teaspoon of cinnamon and a pinch of cayenne pepper to the dry ingredients. The warmth of the cinnamon pairs beautifully with the chocolate, and the cayenne adds a subtle kick that surprises people. I brought this version to a holiday party once, and it was the first thing to disappear.
Cookie dough-inspired: Omit the cocoa powder and increase the oats to 1 1/4 cups. Add 1/4 cup of mini chocolate chips and 1/4 cup of white chocolate chips. It tastes just like edible cookie dough, but with way less sugar. My kids beg for this version constantly.
Serving & Storage Suggestions
These energy balls are incredibly versatile when it comes to serving. Here’s how I handle them:
Serving temperature: Serve them straight from the fridge for the best texture. They’re firm but not hard, with a satisfying chew. If you leave them out at room temperature for more than an hour, they’ll soften up quite a bit. That’s fine for a party, but I recommend keeping the bowl on ice if it’s a warm day.
Presentation tips for guests: Arrange them on a nice platter or cake stand, and sprinkle a little extra sea salt on top. It looks fancy and takes two seconds. For a dinner party, I sometimes stack them in a small mason jar with a ribbon around it—it’s rustic and charming.
What to serve alongside: These pair beautifully with fresh fruit like apple slices or strawberries. They’re also great with a cup of coffee or a glass of cold milk. If you’re making a dessert spread, put them next to my no-bake chocolate oatmeal cookies for a complete no-bake theme.
Storage instructions: Keep them in an airtight container in the refrigerator for up to two weeks. They also freeze beautifully—just place them in a single layer on a baking sheet, freeze for an hour, then transfer to a freezer bag. They’ll keep for up to three months. Thaw in the fridge overnight before serving.
Flavor development: Honestly, these taste even better the next day. The flavors meld together overnight, and the texture becomes perfectly uniform. I always make them a day ahead when I’m hosting. It’s one less thing to worry about on party day.
Nutritional Information & Benefits
I’m not a nutritionist, but I’ve done the math on these, and they’re pretty solid for a snack. Here’s the breakdown per ball (based on 20 balls):
| Nutrient | Amount per ball |
|---|---|
| Calories | ~120 |
| Protein | 4g |
| Carbohydrates | 15g |
| Fiber | 3g |
| Sugar | 8g |
| Fat | 6g |
| Saturated Fat | 2g |
Health highlights: The oats provide slow-release energy, the peanut butter adds protein and healthy fats, and the flaxseed is packed with omega-3s and fiber. The cocoa powder gives you a little antioxidant boost. They’re also naturally dairy-free if you use dairy-free chocolate chips, and they’re easy to make gluten-free by using certified gluten-free oats.
Potential allergens: This recipe contains peanuts and oats (which may contain gluten depending on processing). If you’re serving a crowd, I recommend labeling them clearly. I always put a small card next to the platter at parties.
I personally love that I can grab one of these on my way out the door and feel satisfied until lunch. They’re not a meal replacement, but they’re a much better choice than the vending machine options at work.
Conclusion
These no-bake chocolate peanut butter energy balls have become my go-to for every gathering, every road trip, and every moment when I need something quick and satisfying. They’re the recipe I bring when I want to impress without stress, and they never let me down. The best part? They’re forgiving. If you accidentally add too much honey or forget the vanilla, they still turn out delicious. That’s the kind of recipe worth keeping in your back pocket.
I’d love to hear how yours turn out. Did you try any variations? Did your family love them as much as mine does? Drop a comment below and let me know. And if you’re looking for another easy snack to add to your rotation, try my 5-minute homemade granola bars—they’re just as simple and just as crowd-pleasing.
Happy rolling, friends. Your kitchen is about to smell amazing.
Frequently Asked Questions
Can I use quick oats instead of old-fashioned oats?
You can, but the texture will be different. Quick oats are finer and more processed, so they absorb moisture faster and can make the energy balls mushy. Old-fashioned oats give a better chew. If you only have quick oats, reduce the honey slightly and expect a softer ball.
How long do these energy balls last at room temperature?
They’re best kept refrigerated, but they’ll hold up at room temperature for about 4-6 hours. If you’re bringing them to a picnic or party, keep them in a cooler or on ice. After that, the peanut butter can soften and the balls might lose their shape.
Can I freeze these energy balls?
Absolutely. Freeze them in a single layer on a baking sheet for an hour, then transfer to a freezer-safe bag or container. They’ll keep for up to three months. Thaw in the fridge overnight or at room temperature for about 20 minutes before eating.
My mixture is too dry. What did I do wrong?
This usually happens if your peanut butter is too thick or if you measured the oats generously. Fix it by adding a tablespoon of honey or a splash of water. Mix well and let it sit for a minute before checking the consistency again.
Can I make these without chocolate chips?
Sure. The chocolate chips add sweetness and texture, but you can leave them out or replace them with dried fruit like raisins, chopped dates, or dried cranberries. Just keep in mind that dried fruit is sweeter, so you might want to reduce the honey slightly.
Pin This Recipe!
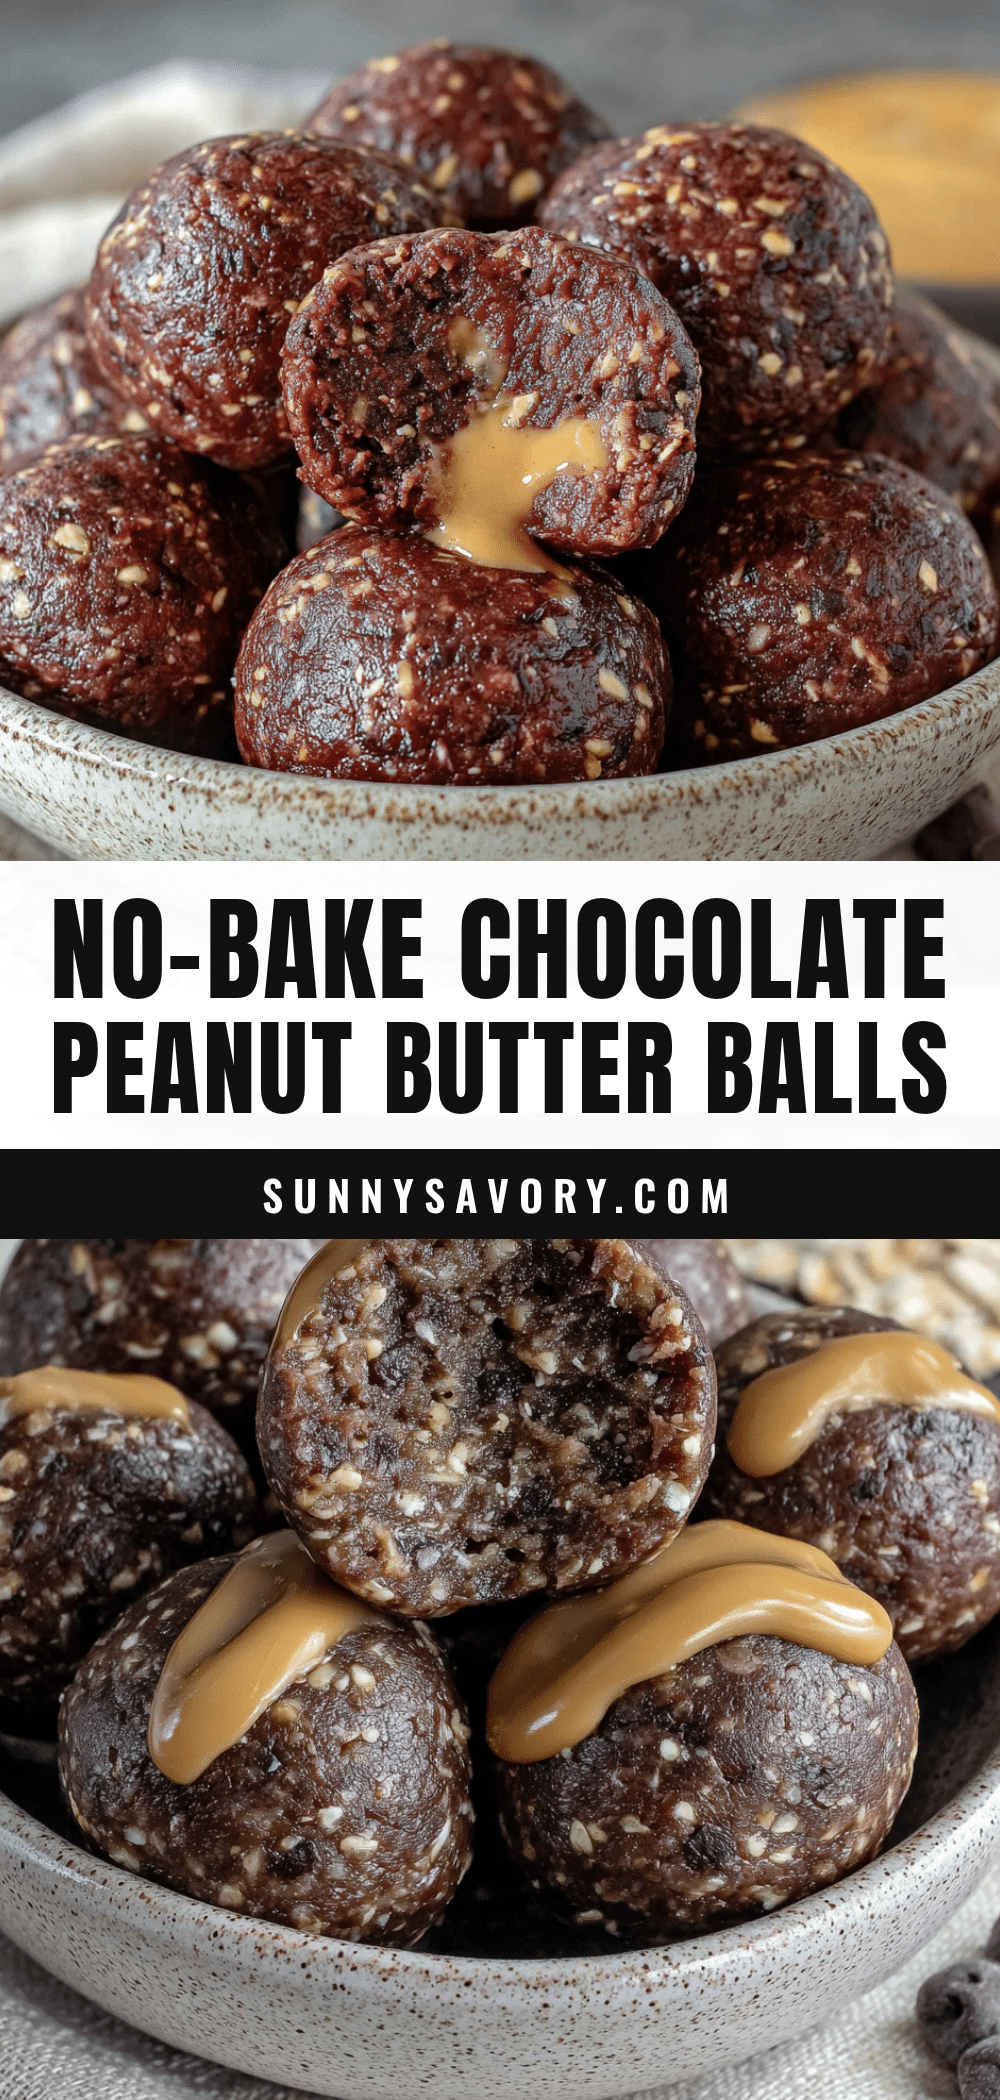
Best No-Bake Chocolate Peanut Butter Energy Balls
These no-bake chocolate peanut butter energy balls are quick, easy, and made with simple pantry ingredients. They’re perfect for snacking, parties, and road trips, and they always disappear first.
- Prep Time: 15 minutes
- Cook Time: 0 minutes
- Total Time: 1 hour 5 minutes
- Yield: 20 servings 1x
- Category: Snack
- Cuisine: American
Ingredients
- 1 cup old-fashioned rolled oats
- 1/2 cup creamy peanut butter
- 1/3 cup honey
- 1/2 cup mini chocolate chips
- 1/4 cup ground flaxseed
- 1/2 teaspoon vanilla extract
- 1/4 teaspoon sea salt
- 2 tablespoons unsweetened cocoa powder
Instructions
- Combine the dry ingredients. In a large mixing bowl, whisk together 1 cup old-fashioned rolled oats, 1/4 cup ground flaxseed, 1/4 cup unsweetened cocoa powder, and 1/4 teaspoon sea salt.
- Add the wet ingredients. To the same bowl, add 1/2 cup creamy peanut butter, 1/3 cup honey, and 1/2 teaspoon vanilla extract. Stir everything together with a rubber spatula until it forms a thick, uniform mixture.
- Fold in the chocolate chips. Gently stir in 1/2 cup mini chocolate chips until they’re evenly distributed. Reserve a few to press onto the tops of the balls for a prettier presentation.
- Chill the mixture. Cover the bowl with plastic wrap and refrigerate for 15-20 minutes.
- Roll into balls. Line a baking sheet or large plate with parchment paper. Using a cookie scoop or a tablespoon, portion out the mixture and roll it between your palms into smooth balls. You should get about 18-20 balls.
- Optional: Top with extra chocolate chips. Press a few mini chocolate chips onto the top of each ball.
- Chill again. Place the baking sheet in the refrigerator for at least 30 minutes.
- Serve or store. Transfer the energy balls to an airtight container and keep them refrigerated.
Notes
Don’t skip the chill time—it helps the balls hold their shape. Use a cookie scoop for uniform balls. Wet your hands slightly before rolling to prevent sticking. For extra flavor, toast the oats before using. The energy balls taste even better the next day.
Nutrition
- Serving Size: 1 ball
- Calories: 120
- Sugar: 8
- Sodium: 75
- Fat: 6
- Saturated Fat: 2
- Carbohydrates: 15
- Fiber: 3
- Protein: 4
Keywords: no-bake, energy balls, chocolate, peanut butter, healthy snack, easy, gluten-free option, vegan option



