Love this? Save it for later!
Share the inspiration with your friends
Jen wasn’t trying to impress anyone. I’d stopped by to borrow a steam cleaner—of all things—and the smell hit me before I even got past her screen door. It was buttery, garlicky, and so deeply savory that I actually forgot why I was there for a second. She was standing at the stove in sweatpants, stirring something in a single pan, looking like she’d just rolled out of bed. “Oh, this?” she said when I asked. “It’s just chicken and rice. I make it when I don’t feel like doing dishes.”
Just chicken and rice. She said it like it was nothing. But let me tell you, that first bite I snuck from the pan—while she was digging through the hall closet for the steam cleaner—stopped me cold. The chicken was golden and tender, the rice was fluffy and soaked in all that garlic butter goodness, and there was this perfect little crust on the bottom that she hadn’t even mentioned. I stood there with a fork in my hand, trying to act casual, while my brain was already planning to make this myself. Maybe you’ve been there—you taste something at a friend’s house and suddenly you can’t stop thinking about it.
I asked for the recipe, obviously. She shrugged and rattled off ingredients from memory, half-distracted. That’s when I knew this was one of those keepers—the kind of dish someone makes so often they don’t even think about it anymore. I’ve tweaked it a bit since that day, lightening it up without losing any of the comfort-food soul. This one-pan garlic butter chicken and rice is now a regular in my kitchen, and every time I make it, I think of Jen and her steam cleaner. Honestly, it’s the best thing I borrowed from her house that day.
Why You’ll Love This Recipe
This isn’t just another chicken and rice recipe. I’ve tested this one more times than I can count, tweaking the ratios, playing with the heat, and figuring out exactly what makes it work every single time. Here’s why it’s earned a permanent spot in my weekly rotation:
- Quick & Easy: From start to finish, this comes together in about 45 minutes. One pan, minimal prep, and you’ve got dinner on the table without a mountain of dishes.
- Simple Ingredients: You probably have most of this in your kitchen right now. No weird specialty items, no trips to three different stores.
- Perfect for Busy Weeknights: This is the kind of meal you make on a Tuesday when you’re tired but still want something that feels like a real dinner.
- Crowd-Pleaser: I’ve served this to picky kids, health-conscious friends, and my dad who thinks everything needs more butter. Everyone loves it.
- Lighter, But Still Indulgent: Here’s the thing—I lightened this up by using less butter than the original and swapping in some smarter choices, but you’d never know it. It still tastes rich and satisfying.
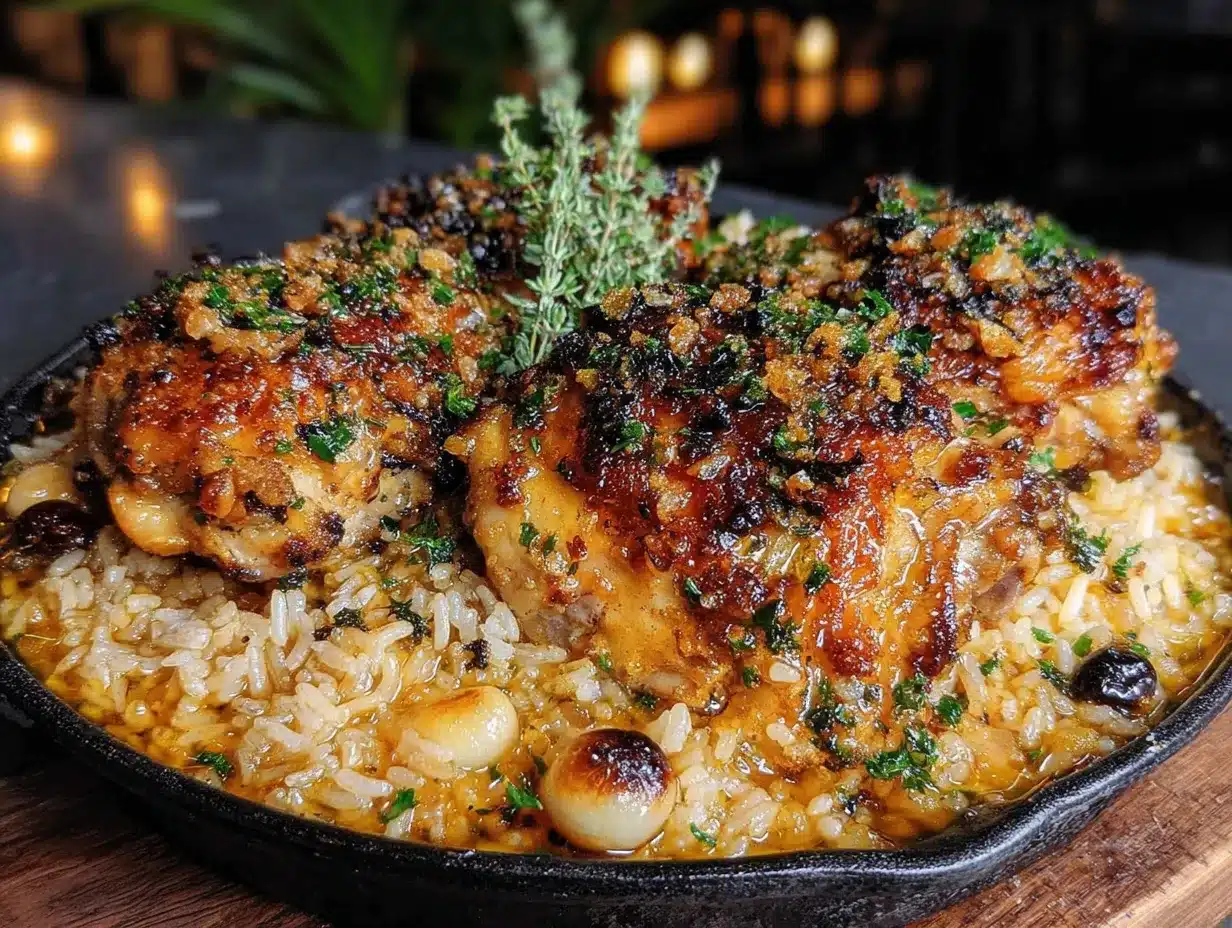
What makes this one different from all the other garlic butter chicken recipes out there? It’s the technique. Instead of just dumping everything in a pan, you get that beautiful golden sear on the chicken first, then build the rice right in the same pan with all those browned bits. The rice absorbs every drop of that garlic butter flavor, and you end up with a dish that tastes like you spent way more effort than you actually did. It’s comfort food that works with your lifestyle, not against it.
What Ingredients You Will Need
This recipe uses simple, wholesome ingredients that come together to create something genuinely special. Most of these are pantry staples, which makes this dish perfect for those nights when you need dinner to just happen without a lot of planning.
For the Chicken
- 1 ½ pounds boneless, skinless chicken thighs (about 4-6 thighs) — I prefer thighs here because they stay juicy and tender. If you want to use chicken breast, go for it, just watch the cooking time closely so they don’t dry out.
- 1 teaspoon salt
- ½ teaspoon black pepper
- ½ teaspoon garlic powder
- 1 tablespoon olive oil — for searing the chicken. This helps get that beautiful golden crust.
For the Rice
- 1 tablespoon unsalted butter — I know, it’s garlic butter chicken, but we’re keeping it lighter here. One tablespoon is plenty to get that rich flavor.
- 4 cloves garlic, minced — fresh garlic is non-negotiable here. The jarred stuff just won’t give you the same punch.
- 1 cup long-grain white rice — basmati or jasmine work beautifully. I’ve tested this with brown rice too, but you’ll need to adjust the liquid and cooking time.
- 2 cups low-sodium chicken broth — using low-sodium lets you control the salt level. I like Swanson or Kitchen Basics for consistent results.
- ½ cup water
- ½ teaspoon dried thyme — optional, but it adds a lovely earthiness that plays well with the garlic.
- ¼ teaspoon red pepper flakes — just a tiny pinch for warmth, not heat. Leave it out if you’re sensitive to spice.
For the Finish
- 2 tablespoons fresh parsley, chopped — for color and freshness. Don’t skip this, it really brightens the whole dish.
- Juice of half a lemon — this is my little trick. A squeeze of lemon right at the end cuts through the richness and makes everything taste lighter.
- Optional: ¼ cup grated Parmesan cheese — if you’re not watching calories, this takes it over the top. I sometimes add it, sometimes don’t.
For the best texture, look for chicken thighs that are similar in size so they cook evenly. And please, use real butter—not margarine. The flavor difference is huge, and since we’re only using one tablespoon, it’s worth it.
Equipment Needed
The beauty of this recipe is that you really don’t need much. Here’s what you’ll want to have on hand:
- A large, deep skillet or Dutch oven — I use a 12-inch skillet with a tight-fitting lid. A Lodge cast iron skillet works great, or any heavy-bottomed pan that holds heat well. If you don’t have a lid, foil works in a pinch.
- Wooden spoon or spatula — for stirring and scraping up those flavorful browned bits from the bottom of the pan.
- Tongs — for flipping the chicken without piercing it and losing those precious juices.
- Sharp knife and cutting board — for mincing garlic and chopping parsley.
- Measuring cups and spoons — rice is forgiving, but measuring helps you get consistent results.
If you don’t have a Dutch oven, any deep skillet with a lid will work. I’ve even made this in a large nonstick pan when my cast iron was in the oven doing something else. It still turned out great. The key is just making sure the pan is deep enough to hold the rice and liquid without spilling over.
Preparation Method
Alright, let’s get cooking. This one-pan garlic butter chicken and rice comes together in a few simple steps, and I’ll walk you through each one so you get perfect results every time.
- Prep the chicken. Pat the chicken thighs dry with paper towels. This is important—wet chicken won’t sear properly. Season both sides generously with salt, pepper, and garlic powder. Let them sit at room temperature for about 10 minutes while you get everything else ready.
- Heat the oil. Place your skillet over medium-high heat and add the olive oil. Let it get hot—you should see it shimmer, but not smoke. This usually takes about 2 minutes.
- Sear the chicken. Carefully place the chicken thighs in the pan, skin-side down if they have skin, or just one side down if they’re boneless. Don’t crowd them—work in batches if needed. Let them cook without moving for 5-6 minutes until the bottom is deep golden brown. Flip and cook another 4-5 minutes. The chicken won’t be fully cooked through yet, and that’s fine. Transfer the chicken to a plate and set aside. Don’t wipe out the pan—those browned bits are flavor gold.
- Start the garlic butter base. Reduce the heat to medium. Add the tablespoon of butter to the pan. Once it melts, add the minced garlic. Stir constantly for about 30-45 seconds until it’s fragrant. Watch it carefully—burnt garlic turns bitter in a heartbeat.
- Toast the rice. Add the rice to the pan and stir it around in the garlic butter for about 2 minutes. You’ll notice it starts to smell nutty and some grains might turn slightly translucent. This step is crucial—toasting the rice helps it stay fluffy instead of turning mushy.
- Add the liquid. Pour in the chicken broth, water, dried thyme, and red pepper flakes. Stir everything together, scraping up any browned bits from the bottom of the pan. Bring this to a gentle boil.
- Return the chicken. Nestle the chicken thighs back into the pan, pushing them down into the rice a bit. Any juices that collected on the plate go in too—don’t waste that flavor.
- Cover and simmer. Put the lid on and reduce the heat to low. Let it cook undisturbed for 20 minutes. I know it’s tempting to peek, but resist! Every time you lift that lid, steam escapes and your rice won’t cook properly.
- Rest off the heat. After 20 minutes, turn off the heat but keep the lid on. Let it sit for another 5-10 minutes. This resting time lets the rice absorb any remaining liquid and steam to perfection.
- Finish and serve. Remove the lid. Fluff the rice gently with a fork. Squeeze the lemon juice over everything, sprinkle with fresh parsley, and add Parmesan if you’re using it. Give it one gentle stir and serve hot.
One thing I learned the hard way—don’t stir the rice while it’s cooking. I did that once and ended up with gummy, sticky rice. Just let it do its thing under the lid. Trust the process.
Cooking Tips & Techniques
Over the many times I’ve made this one-pan garlic butter chicken and rice, I’ve picked up a few tricks that make a real difference. Here are the ones I think matter most:
Get the sear right. That golden crust on the chicken isn’t just for looks—it’s layers of flavor. Make sure your pan is hot enough before you add the chicken. If it doesn’t sizzle immediately when it hits the pan, the pan isn’t ready. I once rushed this step and ended up with pale, steamed chicken. It still tasted fine, but it wasn’t the same.
Don’t skip the rice toasting. I know it seems like an extra step that doesn’t matter, but it really does. Toasting the rice in the garlic butter for those two minutes changes the texture completely. It helps each grain stay separate and gives the rice a subtle nuttiness that you can’t get any other way.
Watch your heat. This is probably the most common mistake I see. After you add the liquid and bring it to a boil, you need to reduce the heat to low—like, really low. If the rice simmers too vigorously, it’ll cook unevenly and the liquid will evaporate too fast. On my stove, I turn it down to the lowest setting. Your stove might be different, so just keep an eye on it. A gentle simmer with tiny bubbles is what you’re after.
Let it rest. That 5-10 minute rest off the heat is not optional. I learned this one the hard way when I was impatient and served it right away. The rice was still a little crunchy in places. Giving it that resting time lets the steam finish the job perfectly.
Batch cooking tip: If you’re making this for meal prep, undercook the rice by just a minute or two. When you reheat it later, it’ll finish cooking and won’t turn mushy. I do this all the time and it works like a charm.
Variations & Adaptations
One of the best things about this recipe is how flexible it is. Here are some ways I’ve adapted it depending on what I have on hand or who I’m cooking for:
Make it dairy-free: Swap the butter for a good quality dairy-free butter or just use an extra tablespoon of olive oil. I’ve tried both, and honestly, the olive oil version is still delicious—just a little different in flavor. For the Parmesan on top, skip it or use a dairy-free alternative.
Add vegetables: This is my favorite way to bulk it up. Throw in a cup of frozen peas and carrots right when you add the liquid. Or add some sautéed mushrooms and spinach after the rice is cooked. I’ve also added chopped asparagus during the last 5 minutes of cooking, and it comes out perfectly tender-crisp.
Try different proteins: Chicken breast works, just pound it to even thickness first so it cooks evenly. You can also use boneless pork chops or even firm tofu. If using tofu, press it well and sear it the same way you would the chicken. The cooking time might vary slightly, so use a meat thermometer to check for doneness.
Spice it up: If you want more heat, add another pinch of red pepper flakes or a chopped jalapeño along with the garlic. I’ve also added a teaspoon of smoked paprika for a deeper, smokier flavor that’s really nice in the fall.
Make it a complete meal: Sometimes I stir in a can of drained and rinsed chickpeas along with the broth. It adds protein and fiber, making this an even heartier one-pan dinner. My husband didn’t even notice the first time I did it—he just said it was “extra good.”
Serving & Storage Suggestions
This one-pan garlic butter chicken and rice is best served hot, right from the pan. The lemon juice and fresh parsley really wake everything up, so don’t skip that final step. I like to serve it with a simple side salad dressed with lemon vinaigrette—the acidity cuts through the richness of the garlic butter beautifully.
If you’re serving this for company, transfer it to a warm platter and sprinkle a little extra parsley on top for presentation. A few lemon wedges on the side look pretty and let guests add more brightness if they want.
Storage: Leftovers keep beautifully in an airtight container in the refrigerator for up to 4 days. The flavors actually meld together overnight, so it might taste even better the next day. I’ve eaten this cold straight from the fridge and loved it, but it’s also great reheated.
Reheating: The best way to reheat is in a skillet over medium-low heat with a splash of chicken broth or water. Cover it and let it steam for about 5 minutes, stirring once or twice. The microwave works in a pinch—just cover it with a damp paper towel to add moisture back in.
Freezing: This freezes well for up to 3 months. Let it cool completely, then transfer to a freezer-safe container. To thaw, move it to the refrigerator overnight. Reheat using the stovetop method above. I’ve done this several times for busy weeks, and it’s always a lifesaver.
One thing I’ve noticed—the rice does absorb more liquid as it sits, so leftovers will be a bit firmer than the fresh version. That’s normal. Just add a little extra broth when reheating and it’ll be fine.
Nutritional Information & Benefits
Here’s the thing about this lighter one-pan garlic butter chicken and rice—it feels indulgent, but it’s actually pretty balanced. Using chicken thighs instead of breast gives you more iron and zinc, and the small amount of butter keeps the saturated fat in check while still delivering that rich flavor we all crave.
Estimated nutrition per serving (based on 4 servings):
- Calories: 485
- Protein: 32g
- Fat: 18g
- Saturated Fat: 6g
- Carbohydrates: 45g
- Fiber: 1g
- Sugar: 1g
- Sodium: 680mg
This recipe is naturally gluten-free—just make sure your chicken broth is certified gluten-free if that’s a concern. It’s also nut-free and egg-free, so it works for a lot of common dietary restrictions.
The garlic in this recipe isn’t just for flavor—it’s known for its anti-inflammatory properties and can support immune health. And the lemon juice adds a nice dose of vitamin C. It’s comfort food that actually supports your health goals rather than working against them. That’s a win in my book.
Conclusion
This one-pan garlic butter chicken and rice has become one of those recipes I turn to again and again. It’s the kind of meal that feels like a warm hug on a busy weeknight, but it’s light enough that you don’t feel weighed down afterward. Every time I make it, I think about that day at Jen’s house, standing in her kitchen with a fork, completely undone by something she made without a second thought.
I hope you give this recipe a try and make it your own. Maybe you’ll add extra vegetables, or swap in a different protein, or just follow it exactly as written. Either way, I’d love to hear how it turns out. Drop a comment below and let me know—did your family love it? Did you discover a new favorite variation? I read every single comment and I’m always looking for new ideas to try in my own kitchen.
Until next time, happy cooking. And remember—sometimes the best recipes come from the most ordinary moments.
Frequently Asked Questions
Can I use brown rice instead of white rice?
Yes, but you’ll need to adjust the cooking time and liquid. Brown rice typically needs about 45-50 minutes to cook and requires about 2 ½ cups of liquid per cup of rice. I’d recommend par-cooking the brown rice first or using a quick-cooking variety to keep this a one-pan meal.
Why is my rice mushy?
Mushy rice usually happens from too much liquid or stirring while it cooks. Make sure you’re using the exact measurements listed and resist the urge to stir after you add the liquid. Also, make sure your heat is low enough during the simmer—a vigorous boil will break down the rice grains.
Can I make this in a slow cooker or Instant Pot?
I haven’t tested this exact recipe in a slow cooker, but for the Instant Pot, you can sear the chicken using the sauté function, then add the rice and liquid and pressure cook on high for 5 minutes with a natural release. The texture will be slightly different, but it works in a pinch.
How do I know when the chicken is fully cooked?
The easiest way is to use an instant-read thermometer. Chicken thighs should reach an internal temperature of 165°F (74°C). If you don’t have a thermometer, cut into the thickest part of a thigh—the juices should run clear and there should be no pinkness.
Can I double this recipe?
You can, but you’ll need a very large pan—at least a 14-inch skillet or a large Dutch oven. The rice needs enough surface area to cook evenly, so if your pan is too crowded, the texture won’t be as good. I recommend making it in batches if you need more than 6 servings.
Pin This Recipe!
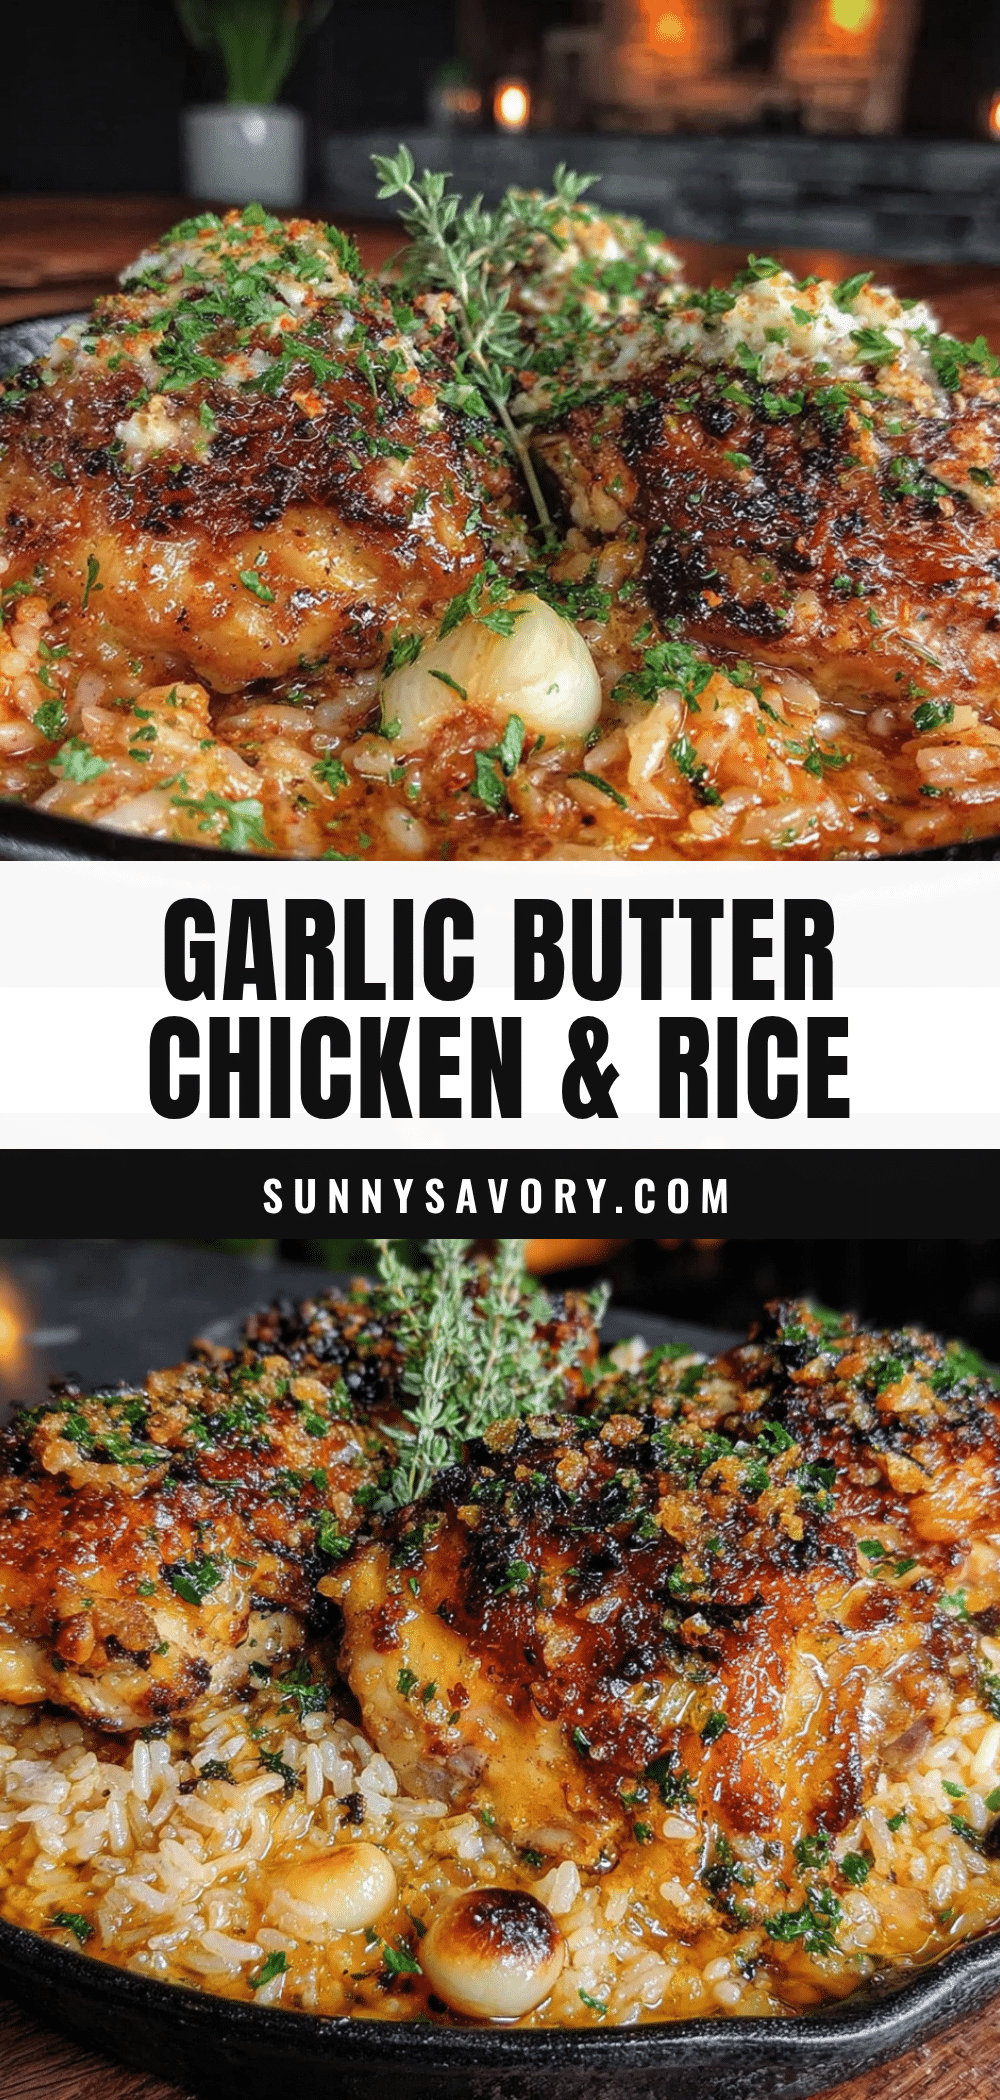
Best One-Pan Garlic Butter Chicken and Rice

A lighter, one-pan version of garlic butter chicken and rice that’s quick, easy, and perfect for busy weeknights. Golden seared chicken thighs and fluffy rice are cooked together in a single pan with garlic, butter, and a squeeze of lemon for a comforting yet balanced meal.
- Prep Time: 10 minutes
- Cook Time: 35 minutes
- Total Time: 45 minutes
- Yield: 4 servings 1x
- Category: Main Course
- Cuisine: American
Ingredients
- 1 ½ pounds boneless, skinless chicken thighs (about 4–6 thighs)
- 1 teaspoon salt
- ½ teaspoon black pepper
- ½ teaspoon garlic powder
- 1 tablespoon olive oil
- 1 tablespoon unsalted butter
- 4 cloves garlic, minced
- 1 cup long-grain white rice (basmati or jasmine)
- 2 cups low-sodium chicken broth
- ½ cup water
- ½ teaspoon dried thyme (optional)
- ¼ teaspoon red pepper flakes
- 2 tablespoons fresh parsley, chopped
- Juice of half a lemon
- ¼ cup grated Parmesan cheese (optional)
Instructions
- Pat the chicken thighs dry with paper towels. Season both sides generously with salt, pepper, and garlic powder. Let them sit at room temperature for about 10 minutes.
- Place a large, deep skillet or Dutch oven over medium-high heat and add the olive oil. Heat until shimmering, about 2 minutes.
- Carefully place the chicken thighs in the pan, skin-side down if they have skin, or one side down if boneless. Cook without moving for 5-6 minutes until deep golden brown. Flip and cook another 4-5 minutes. Transfer chicken to a plate (it won’t be fully cooked through). Do not wipe out the pan.
- Reduce heat to medium. Add the butter to the pan. Once melted, add the minced garlic and stir constantly for 30-45 seconds until fragrant.
- Add the rice to the pan and stir in the garlic butter for about 2 minutes until the rice smells nutty and some grains turn slightly translucent.
- Pour in the chicken broth, water, dried thyme, and red pepper flakes. Stir, scraping up any browned bits from the bottom. Bring to a gentle boil.
- Nestle the chicken thighs back into the pan, pushing them down into the rice. Add any juices from the plate.
- Cover with a lid, reduce heat to low, and cook undisturbed for 20 minutes.
- Turn off the heat but keep the lid on. Let it rest for 5-10 minutes.
- Remove the lid. Fluff the rice gently with a fork. Squeeze lemon juice over everything, sprinkle with fresh parsley, and add Parmesan if using. Give one gentle stir and serve hot.
Notes
Don’t stir the rice while it’s cooking to avoid gummy texture. Let the chicken rest at room temperature before searing for better browning. For meal prep, undercook the rice by a minute or two so it finishes when reheated. Leftovers keep in the fridge for up to 4 days and freeze for up to 3 months.
Nutrition
- Serving Size: 1 serving (about 1/4
- Calories: 485
- Sugar: 1
- Sodium: 680
- Fat: 18
- Saturated Fat: 6
- Carbohydrates: 45
- Fiber: 1
- Protein: 32
Keywords: one-pan chicken and rice, garlic butter chicken, easy weeknight dinner, one skillet meal, chicken thighs and rice



