Love this? Save it for later!
Share the inspiration with your friends
There used to be a diner off Highway 78 in Snellville, Georgia, that made a chocolate-peanut butter cake that absolutely ruined me for all other desserts. When they closed in 2018—just a handwritten sign taped to the door one Tuesday—I actually pulled over and sat in my car for a minute, genuinely mourning that cake. After twelve tries—twelve, let me tell you, some of them were borderline disasters—I finally got it. This Ultimate Reese’s Peanut Butter Poke Cake is the one. It’s the one that tastes like that diner counter, like a Saturday afternoon, like the best kind of sweet nostalgia you can eat with a fork.
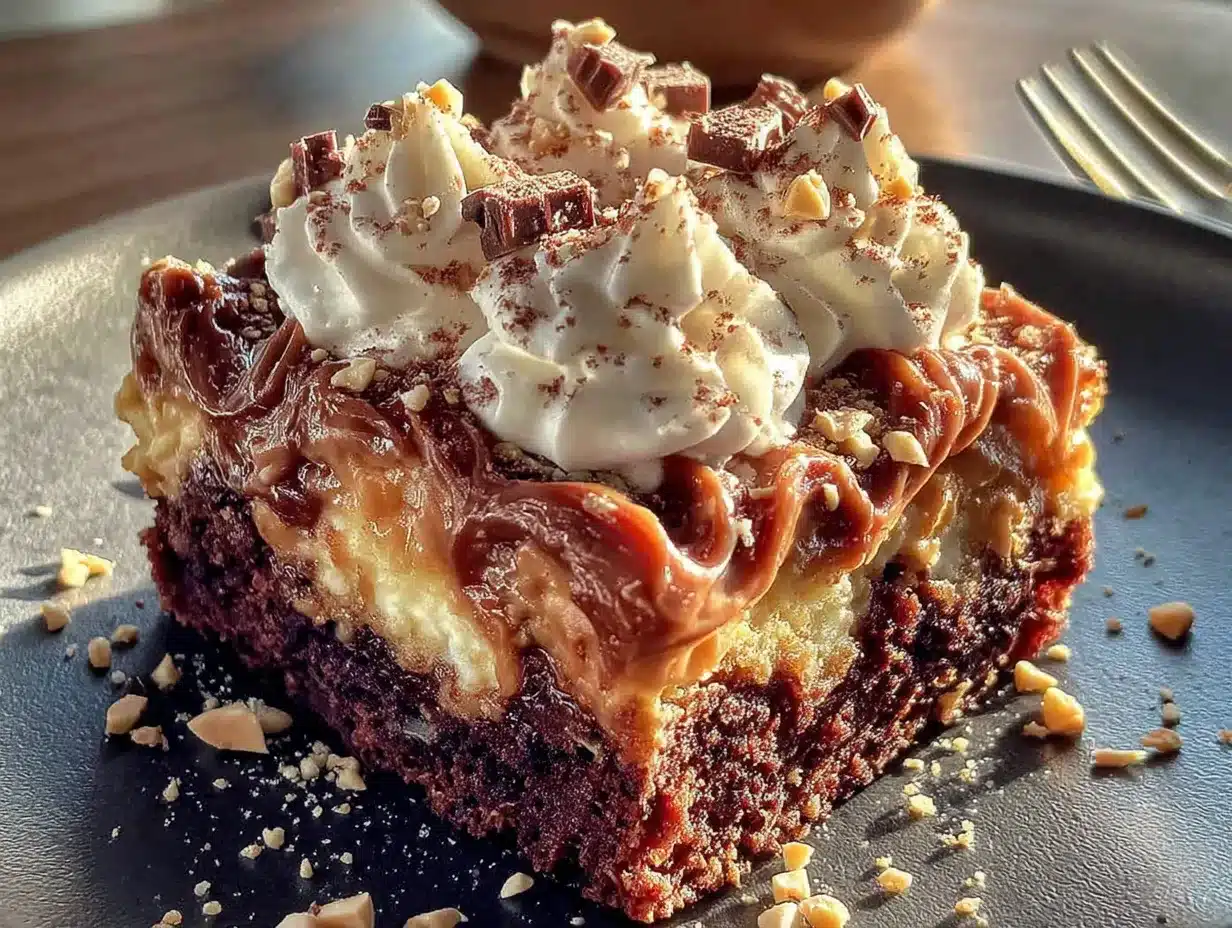
Honestly, the first few attempts were rough. One cake came out so dry it crumbled into what I can only describe as chocolate-flavored sand. Another one had so much peanut butter that it felt like eating a spoonful of Skippy straight from the jar—which, don’t get me wrong, has its moments, but not in cake form. But this version? This is the Goldilocks of poke cakes. It’s moist, it’s rich, it’s got that perfect peanut butter swirl running through every single bite. The chocolate ganache on top sets just enough to crack when you press your fork in, and those mini Reese’s cups scattered on top? Pure magic.
You know that feeling when you take a bite of something and you just close your eyes for a second? That’s this cake. It’s the kind of dessert that makes people at potlucks ask for the recipe before they’ve even finished their slice. I’ve made it for birthdays, for no reason Tuesdays, and for when I need a little pick-me-up that only chocolate and peanut butter can provide. Maybe you’ve been there too—chasing a flavor memory that feels just out of reach. Well, this is it. This is the one that finally measured up.
Why You’ll Love This Recipe
Let me tell you why this particular Reese’s Peanut Butter Poke Cake has earned its spot in my permanent recipe collection. I’ve tested this thing six ways from Sunday, and every single time it delivers. It’s not just good—it’s the kind of good that makes people fight over the last piece.
- Quick & Easy : This cake comes together in about 30 minutes of active prep time. The oven does the heavy lifting, and the poke step is almost too fun. Perfect for those last-minute dessert emergencies.
- Simple Ingredients : You probably have most of this stuff in your pantry right now. No weird specialty items, no trips to three different stores. Just good, honest ingredients that work together beautifully.
- Perfect for Celebrations : Birthday parties, game day gatherings, potlucks, or just a Tuesday that needs a little extra sweetness. This cake shows up and shows out every single time.
- Crowd-Pleaser : I’ve served this to kids, adults, picky eaters, and self-proclaimed dessert snobs. The response is always the same—wide eyes and requests for the recipe.
- Unbelievably Delicious : The texture is what gets me. The cake stays incredibly moist thanks to the sweetened condensed milk soak, and the peanut butter layer adds this creamy, salty richness that balances the chocolate perfectly.
What makes this recipe different from all the other poke cakes out there? It’s the ratio. I spent a lot of time figuring out the exact amount of sweetened condensed milk to soak into the cake without making it soggy. And the peanut butter mixture? It’s not too thick, not too runny—it’s just right to seep into those holes and create little pockets of peanut butter goodness throughout the entire cake. This isn’t just another version of a poke cake. It’s the best version.
This recipe is comfort food reimagined—it’s got that nostalgic diner feel but made right in your own kitchen. It’s the kind of dessert that makes you feel like a rockstar without the stress. Perfect for impressing guests or just treating yourself on a quiet evening.
What Ingredients You Will Need
This Ultimate Reese’s Peanut Butter Poke Cake uses simple, honest ingredients to create something truly special. Every component plays a role, and trust me, each one matters. Here’s what you’ll need to gather:
For the Cake
- 1 box (15.25 oz) chocolate cake mix (I prefer Duncan Hines Devil’s Food for the richest flavor)
- 3 large eggs (room temperature helps everything mix better)
- 1/2 cup vegetable oil
- 1 cup water
- 1 cup sour cream (this is my secret for an extra moist crumb)
For the Poke Filling
- 1 can (14 oz) sweetened condensed milk
- 1/2 cup creamy peanut butter (Jif or Skippy work great—avoid natural peanut butter here as it separates)
- 1 teaspoon vanilla extract
For the Peanut Butter Layer
- 1/2 cup creamy peanut butter
- 1/4 cup unsalted butter, softened
- 1 cup powdered sugar
- 2-3 tablespoons milk (adjust for spreading consistency)
For the Chocolate Ganache
- 1 cup semi-sweet chocolate chips (I like Ghirardelli for that smooth melt)
- 1/2 cup heavy cream
For the Topping
- 1 cup mini Reese’s peanut butter cups, roughly chopped
- 1/4 cup chopped salted peanuts (optional, but adds a lovely crunch)
A quick note on ingredient selection: When it comes to the peanut butter, stick with the processed stuff for this recipe. I know, I know—natural peanut butter is healthier, but it tends to separate and make the filling grainy. The stabilizers in Jif or Skippy keep everything smooth and creamy, which is exactly what you want here. Also, make sure your butter is truly softened—not melted, not rock hard. You want it to be spreadable but still hold its shape. This makes a huge difference in the peanut butter layer.
For the chocolate cake mix, I’ve tested this with several brands and Duncan Hines consistently gives the best texture. That said, Betty Crocker works fine too. Just don’t use a mix that has pudding in it already—it changes the crumb structure and makes the cake too dense for poking.
Equipment Needed
You don’t need a professional bakery setup for this one, but having the right tools makes the process smoother. Here’s what I use every time I make this cake:
- 9×13 inch baking pan (metal works best for even baking)
- Electric hand mixer or stand mixer
- Large mixing bowls (at least two)
- Wooden spoon or spatula for poking holes (the handle end works perfectly)
- Small saucepan for the ganache
- Measuring cups and spoons
- Offset spatula or butter knife for spreading
- Cooling rack
- Parchment paper (optional but makes cleanup a breeze)
If you don’t have a 9×13 pan, you can use a 9×9 square pan, but the cake will be thicker and may need a few extra minutes of baking time. Just keep an eye on it. And honestly, if you don’t have an offset spatula, a regular butter knife works just fine—I’ve done it plenty of times. The key is just getting that peanut butter layer spread evenly.
A quick tip on the poking tool: I’ve used everything from the handle of a wooden spoon to a chopstick to a skewer. The wooden spoon handle is my favorite because it makes holes that are big enough for the filling to seep in but not so big that the cake falls apart. Whatever you use, make sure it’s clean and dry before you start poking.
Preparation Method
- Preheat and Prep : Preheat your oven to 350°F (175°C). Grease your 9×13 inch baking pan thoroughly. If you’re using parchment paper, line the bottom and let the edges hang over the sides—this makes lifting the cake out so much easier later.
- Make the Cake Batter : In a large bowl, combine the chocolate cake mix, eggs, vegetable oil, water, and sour cream. Beat on medium speed for about 2 minutes until everything is smooth and well combined. The batter will be thick and luscious—that’s the sour cream doing its job. Scrape down the sides of the bowl halfway through to make sure everything incorporates evenly.
- Bake the Cake : Pour the batter into your prepared pan and spread it evenly. Bake for 28-32 minutes, or until a toothpick inserted in the center comes out with just a few moist crumbs attached. Don’t overbake—this is crucial. An overbaked cake won’t absorb the filling as well. Let the cake cool in the pan on a wire rack for about 10 minutes.
- Poke Those Holes : While the cake is still warm, take the handle of your wooden spoon and poke holes all over the cake. Space them about 1 inch apart. Don’t be shy—you want to poke all the way to the bottom of the pan. This is where the magic happens. I usually poke about 30-40 holes across the entire cake surface.
- Make the Poke Filling : In a small bowl, whisk together the sweetened condensed milk, 1/2 cup creamy peanut butter, and vanilla extract until smooth. It might look a little thick at first, but keep whisking—it will come together. Pour this mixture evenly over the warm cake, making sure it gets into all those holes. Use a spatula to spread it if needed. Let this sit for about 10 minutes so the filling can really soak in.
- Prepare the Peanut Butter Layer : In a medium bowl, beat together 1/2 cup peanut butter and the softened butter until smooth and creamy. Gradually add the powdered sugar, beating on low speed at first to avoid a sugar cloud, then increase to medium. Add the milk one tablespoon at a time until the mixture reaches a spreadable consistency. You want it thick but not stiff.
- Spread the Peanut Butter Layer : Carefully spread the peanut butter mixture over the cooled cake. This can be a little tricky because the cake is soft from the filling, so go gently. An offset spatula works wonders here. Spread it all the way to the edges for full coverage.
- Make the Ganache : Place the chocolate chips in a heatproof bowl. Heat the heavy cream in a small saucepan over medium heat until it just begins to simmer—don’t let it boil. Pour the hot cream over the chocolate chips and let it sit for 2-3 minutes. Then whisk gently until smooth and glossy. Let it cool for about 5 minutes so it thickens slightly but is still pourable.
- Top with Ganache and Candy : Pour the ganache over the peanut butter layer and spread it evenly. Immediately sprinkle the chopped mini Reese’s cups and chopped peanuts (if using) over the top. The ganache will help them stick. Refrigerate the cake for at least 2 hours before serving—this allows everything to set properly.
A few notes from my kitchen to yours: When you’re poking the holes, try to make them about the same depth. Uneven holes mean uneven filling distribution. Also, don’t skip the refrigeration step—I know it’s tempting to dig in right away, but that chill time is what makes the layers set and the flavors meld together. Trust me on this one.
Cooking Tips & Techniques
After making this cake more times than I care to count, I’ve picked up a few tricks that make a real difference. Let me share them so you can skip the trial and error phase.
Temperature Matters : The cake needs to be warm when you pour on the sweetened condensed milk mixture. If it’s too cool, the filling won’t soak in properly. If it’s too hot, the cake might fall apart. That 10-minute cooling window is your sweet spot. I set a timer as soon as the cake comes out of the oven—no guessing.
Don’t Overmix the Batter : I learned this one the hard way. Overmixing develops too much gluten and makes the cake tough. You want to mix just until everything comes together, then stop. A few small lumps are totally fine—they’ll bake out.
Room Temperature Ingredients : This is one of those tips that actually matters. Cold eggs and cold sour cream can make the batter seize up and create a denser cake. Take them out of the fridge about 30 minutes before you start baking. Your cake will thank you.
The Poke Technique : I used to poke straight down and twist, but that actually creates too big of a hole and can tear the cake. Now I poke straight down and pull straight up—no twisting. It makes cleaner holes that hold the filling better. Also, wipe the handle of your spoon clean between pokes if it gets cakey on there.
Ganache Consistency : If your ganache is too thin, let it cool a few more minutes before pouring. If it’s too thick, add a tiny splash of warm cream and whisk. The perfect consistency is like thick honey—pourable but not runny. I messed this up more times than I’d like to admit before I got the hang of it.
Timing Strategy : Here’s how I time it out: Start the cake first, then make the poke filling while it bakes. While the filling soaks in, make the peanut butter layer. While the cake chills after that, make the ganache. This way, everything flows smoothly and you’re not running around like a chicken with your head cut off.
Variations & Adaptations
One of the best things about this Ultimate Reese’s Peanut Butter Poke Cake is how adaptable it is. I’ve experimented with quite a few variations, and here are some of my favorites:
Gluten-Free Version : Swap the regular chocolate cake mix for a gluten-free chocolate cake mix. King Arthur Flour makes an excellent one. Everything else in the recipe is naturally gluten-free, so you’re good to go. Just make sure your chocolate chips and peanut butter are certified gluten-free if that’s a concern.
Extra Peanut Butter Punch : For the true peanut butter fanatics out there, add 1/2 cup of peanut butter chips to the cake batter before baking. They melt into little pockets of peanut butter goodness throughout the cake. I did this for a friend’s birthday and she literally hugged me after the first bite.
Chocolate Overload : If you’re more of a chocolate person (no judgment here), use a dark chocolate cake mix and add chocolate chips to the batter. You can also drizzle some melted chocolate over the top along with the ganache. It’s decadent, but sometimes that’s exactly what you need.
Nut-Free Option : Use sunflower seed butter instead of peanut butter for the filling and layer. SunButter works really well and doesn’t turn green when baked like some other nut-free alternatives. Skip the chopped peanuts on top and use extra mini Reese’s Pieces instead.
Seasonal Twist : In the fall, I sometimes add a teaspoon of cinnamon to the cake batter and use Reese’s Pieces instead of mini cups for a fun color pop. In the summer, a scoop of vanilla ice cream on top takes this to a whole new level.
Less Sweet Version : If you’re watching your sugar intake, use a sugar-free chocolate cake mix and sugar-free sweetened condensed milk. The peanut butter layer can be made with powdered erythritol instead of powdered sugar. It’s not quite as indulgent, but it still hits the spot when a craving strikes.
Serving & Storage Suggestions
This cake is incredibly versatile when it comes to serving. Here’s how I handle it from the kitchen to the table:
Serving Temperature : I prefer this cake cold, straight from the fridge. The layers are firm, the ganache has that satisfying snap, and the peanut butter filling is perfectly set. That said, if you like a softer texture, let it sit at room temperature for about 15 minutes before serving. Both ways are delicious—it just depends on your mood.
Presentation Ideas : For a casual gathering, just cut squares and serve them on a platter. For something a little fancier, use a biscuit cutter to create perfect circles, then drizzle a little extra chocolate sauce on the plate. A dollop of whipped cream and a whole mini Reese’s cup on top makes it look like it came from a bakery.
What to Serve With It : A cold glass of milk is the classic pairing, and for good reason. Vanilla ice cream is also amazing—the cold creaminess balances the rich chocolate and peanut butter. If you’re feeling fancy, a scoop of coffee ice cream adds a lovely bitter note that cuts through the sweetness.
Storage Instructions : This cake keeps beautifully in the refrigerator for up to 5 days. Cover it tightly with plastic wrap or aluminum foil to keep it from drying out. I’ve found that the flavors actually get better on day two—the filling has more time to soak into the cake and everything melds together beautifully.
Freezer Tips : You can freeze this cake for up to 3 months. Wrap individual slices tightly in plastic wrap, then place them in a freezer-safe bag or container. To thaw, just transfer a slice to the refrigerator overnight. The texture stays surprisingly good—I’ve done this many times for last-minute dessert emergencies.
Reheating : I don’t recommend microwaving this cake—it makes the ganache melt and the peanut butter layer get weirdly greasy. If you want it warm, let it sit at room temperature for 30 minutes, then pop it in a 300°F oven for about 5 minutes. It’ll be warm without being a mess.
Nutritional Information & Benefits
Let’s be real—this is a treat, not a health food. But that doesn’t mean it can’t fit into a balanced lifestyle. Here’s what you need to know:
Estimated Nutritional Values (per slice, based on 12 servings) :
- Calories: 480-520
- Total Fat: 28g
- Saturated Fat: 12g
- Cholesterol: 55mg
- Sodium: 420mg
- Total Carbohydrates: 58g
- Dietary Fiber: 3g
- Sugars: 42g
- Protein: 9g
Health Highlights : Peanut butter actually brings some good stuff to the table—protein, healthy fats, and a little bit of fiber. The sour cream in the cake adds calcium and a bit of protein too. And dark chocolate (if you use semi-sweet chips) contains antioxidants. So while this isn’t a salad, it’s not completely empty calories either.
Dietary Considerations : This recipe contains dairy, gluten, eggs, and peanuts. For a gluten-free version, use a gluten-free cake mix. For a dairy-free version, use dairy-free chocolate chips, a plant-based milk alternative, and vegan butter. The peanut butter can be swapped for sunflower seed butter for a nut-free option.
Allergen Notes : Beyond the obvious peanut and dairy, this recipe doesn’t contain common allergens like soy or tree nuts (unless you add the optional peanuts). Always check your ingredient labels if you’re cooking for someone with allergies.
My Personal Perspective : I believe in enjoying dessert without guilt. This cake is a celebration, a treat, a little moment of joy. I make it for special occasions and sometimes for no reason at all. Life is short—eat the cake. Just maybe not the whole pan in one sitting, you know?
Conclusion
This Ultimate Reese’s Peanut Butter Poke Cake is everything I wanted it to be and more. It’s the cake I chased for years after that diner closed, and now it’s the cake I make when I want to feel like I’ve created something truly special. The moist chocolate crumb, the creamy peanut butter pockets, the rich ganache, and those little bursts of candy on top—it all comes together in a way that feels both nostalgic and brand new.
I really hope you give this one a try. Don’t be intimidated by the steps—once you get the hang of it, it’s actually pretty straightforward. And honestly, even if it’s not perfect the first time, it’s still going to be delicious. That’s the beauty of a poke cake. It’s forgiving, it’s flexible, and it always delivers.
If you make this cake, I’d love to hear about it. Leave a comment below and tell me how it turned out, or share your own twist on the recipe. Did you add something extra? Did you serve it at a party? Did your family fight over the last piece? I want to know all about it. And if you take a photo, tag me on Pinterest—I love seeing your creations in the wild.
Until next time, happy baking, and remember: there’s always room for one more slice of cake. Trust me on that one.
Frequently Asked Questions
Can I make this cake ahead of time?
Absolutely! In fact, I recommend it. This cake tastes even better the next day after the flavors have had time to meld together. You can make it up to 2 days in advance and keep it covered in the refrigerator.
Why did my cake turn out dry?
The most common reason is overbaking. Keep a close eye on your cake and test it at the 28-minute mark. Every oven runs a little differently, so start checking early. The sour cream in the batter helps keep it moist, but nothing can save an overbaked cake.
Can I use natural peanut butter?
I don’t recommend it for this recipe. Natural peanut butter tends to separate and can make the filling grainy. The stabilizers in processed peanut butter like Jif or Skippy keep everything smooth and creamy, which is exactly what you want here.
How do I know when the ganache is the right consistency?
The perfect ganache should be thick enough to coat the back of a spoon but still pourable. If it’s too thin, let it cool for a few more minutes. If it’s too thick, add a tiny splash of warm cream and whisk gently. It should flow slowly off the spoon.
Can I freeze the leftovers?
Yes! Wrap individual slices tightly in plastic wrap, then place them in a freezer-safe bag or container. They’ll keep for up to 3 months. Thaw in the refrigerator overnight for the best texture. I’ve done this many times for those moments when only this cake will do.
Pin This Recipe!
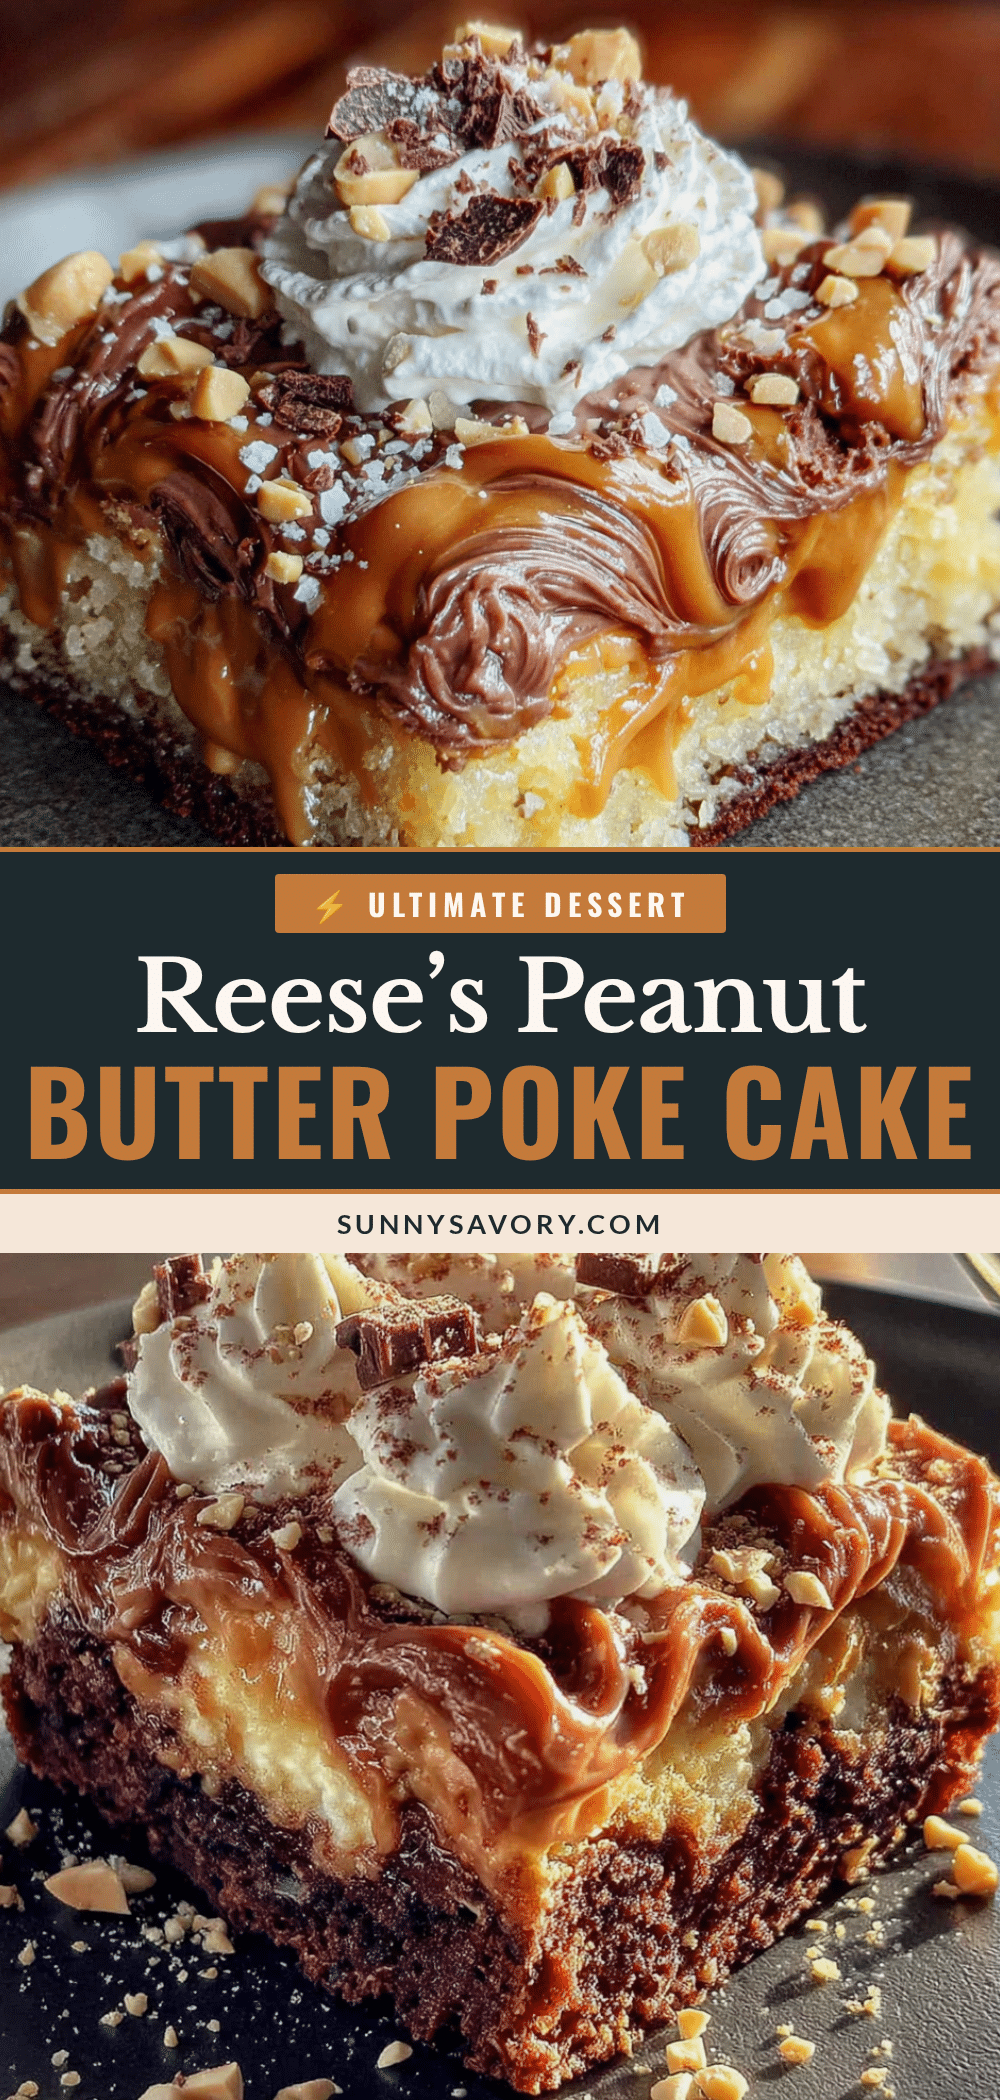
Best Reese’s Peanut Butter Poke Cake Recipe

This Ultimate Reese’s Peanut Butter Poke Cake is a moist chocolate cake soaked with sweetened condensed milk and peanut butter, topped with a creamy peanut butter layer, rich chocolate ganache, and mini Reese’s cups. It’s the perfect nostalgic dessert for any occasion.
- Prep Time: 30 minutes
- Cook Time: 30 minutes
- Total Time: 3 hours (includes chilling)
- Yield: 12 servings 1x
- Category: Dessert
- Cuisine: American
Ingredients
- 1 box (15.25 oz) chocolate cake mix (preferably Duncan Hines Devil’s Food)
- 3 large eggs (room temperature)
- 1/2 cup vegetable oil
- 1 cup water
- 1 cup sour cream
- 1 can (14 oz) sweetened condensed milk
- 1/2 cup creamy peanut butter (for poke filling)
- 1 teaspoon vanilla extract
- 1/2 cup creamy peanut butter (for peanut butter layer)
- 1/4 cup unsalted butter, softened
- 1 cup powdered sugar
- 2–3 tablespoons milk
- 1 cup semi-sweet chocolate chips
- 1/2 cup heavy cream
- 1 cup mini Reese’s peanut butter cups, roughly chopped
- 1/4 cup chopped salted peanuts (optional)
Instructions
- Preheat oven to 350°F (175°C). Grease a 9×13 inch baking pan thoroughly.
- In a large bowl, combine chocolate cake mix, eggs, vegetable oil, water, and sour cream. Beat on medium speed for about 2 minutes until smooth and well combined.
- Pour batter into prepared pan and spread evenly. Bake for 28-32 minutes, or until a toothpick inserted in the center comes out with a few moist crumbs. Let cool in pan on a wire rack for 10 minutes.
- While cake is still warm, poke holes all over the cake using the handle of a wooden spoon, spacing them about 1 inch apart and poking all the way to the bottom.
- In a small bowl, whisk together sweetened condensed milk, 1/2 cup creamy peanut butter, and vanilla extract until smooth. Pour evenly over the warm cake, ensuring it fills the holes. Let sit for 10 minutes.
- In a medium bowl, beat together 1/2 cup peanut butter and softened butter until smooth. Gradually add powdered sugar, beating on low then medium speed. Add milk one tablespoon at a time until spreadable consistency is reached.
- Carefully spread the peanut butter mixture over the cooled cake, going gently to avoid tearing.
- Place chocolate chips in a heatproof bowl. Heat heavy cream in a small saucepan over medium heat until it just simmers. Pour hot cream over chocolate chips, let sit 2-3 minutes, then whisk until smooth and glossy. Let cool for 5 minutes.
- Pour ganache over the peanut butter layer and spread evenly. Immediately sprinkle chopped mini Reese’s cups and chopped peanuts (if using) on top. Refrigerate for at least 2 hours before serving.
Notes
Use processed peanut butter like Jif or Skippy for best results. Do not overbake the cake. Refrigeration is essential for proper setting. The cake tastes even better the next day.
Nutrition
- Serving Size: 1 slice
- Calories: 500
- Sugar: 42
- Sodium: 420
- Fat: 28
- Saturated Fat: 12
- Carbohydrates: 58
- Fiber: 3
- Protein: 9
Keywords: Reese's, peanut butter, poke cake, chocolate, dessert, easy, potluck