Love this? Save it for later!
Share the inspiration with your friends
I wasn’t expecting cooking advice from my accountant, but there I was, sorting through a pile of receipts in his cluttered office, listening to him describe exactly how to make these enchiladas. Frank—a man who wears suspenders and types with two fingers—started talking about roasting Hatch chiles while I was trying to explain a deduction for a stand mixer. “You’re overcomplicating it,” he said, not about my taxes, but about my dinner plans. He pulled a stained index card from his desk drawer, the edges soft and curled like old parchment.
The thing is, I’d been chasing the perfect enchilada for years. I’d tried recipes from famous chefs, followed intricate layering techniques, and even flown back from New Mexico with a suitcase full of frozen chiles. But Frank’s version? It was different. He didn’t talk about technique or tradition—he just talked about what tasted good. “The secret,” he said, tapping the card, “is not being afraid of the heat.” I laughed, thinking he meant spice, but he meant the roasting process itself. Let the chiles blister, he insisted. Let them get ugly. That’s where the magic happens.
Honestly, I almost forgot about that index card. It sat in my glove compartment for three months until Hatch season rolled around again. When I finally made these Best Roasted Hatch Green Chili Chicken Enchiladas, I kicked myself for waiting so long. The filling was creamy but not heavy, the sauce had this smoky depth I’d never achieved before, and the whole thing came together without any fancy equipment or complicated steps. Frank was right—I’d been overcomplicating it. Maybe you’ve been there too, chasing a recipe that feels just out of reach, only to find it in the most unlikely place. These enchiladas are that recipe. I’ve made them every year since, and they never disappoint.
Why You’ll Love This Recipe
These enchiladas have become my go-to for everything from casual weeknight dinners to holiday gatherings. I’ve tested them at least a dozen times, tweaking the ratios and roasting times until everything clicked. Here’s what makes them stand out from every other enchilada recipe you’ll find online.
- Quick & Easy: From start to table in about 45 minutes. The active prep time is only 20 minutes, making it perfect for those evenings when you want something impressive without spending hours in the kitchen.
- Simple Ingredients: No hard-to-find specialty items here. The grocery list is short and straightforward—chicken, cheese, tortillas, and those glorious Hatch chiles that show up at regular supermarkets during the season.
- Perfect for Entertaining: These hold up beautifully in a warm oven while you visit with guests. They’re the kind of dish that makes you look like you’ve been cooking all day when really, you had time to shower and pour wine.
- Crowd-Pleaser: I’ve served these to spice-averse relatives and heat-seeking friends, and everyone goes back for seconds. The creaminess balances the chiles perfectly.
- Unbelievably Delicious: The combination of roasted chiles, tender chicken, and melty cheese creates this thing I can only describe as comfort food nirvana. It’s the kind of meal that makes you close your eyes after the first bite.
What sets this recipe apart is the double-roasting technique. Most recipes just mix canned chiles with cream of mushroom soup and call it a day. Here, we roast the chiles until they’re deeply charred, then we roast the assembled enchiladas just long enough to get those crispy edges on the tortillas. The result is layers of flavor that taste like you spent all day cooking, when really, you just worked smarter.
These aren’t just good enchiladas—they’re the ones you’ll request for your birthday dinner. They’re the recipe your friends will ask for, the one that becomes a family tradition without anyone officially voting on it. There’s something about that combination of smoky chiles and creamy sauce that just hits different.
What Ingredients You Will Need
This recipe uses simple, wholesome ingredients that work together to create something truly special. Most of these are pantry staples or easy to find at any grocery store, especially during Hatch chile season.
- Hatch green chiles – 6-8 medium chiles (about 1 pound). Look for ones with smooth, firm skin and no soft spots. If you can’t find fresh, frozen Hatch chiles work beautifully—just thaw and pat them dry before using.
- Boneless, skinless chicken breasts – 1.5 pounds (about 3 medium breasts). I prefer using breasts for shredding, but thighs work too if you want extra moisture.
- Monterey Jack cheese – 3 cups shredded (about 12 ounces). This melts like a dream and doesn’t overpower the chiles. I’ve tried cheddar, and it’s good, but Monterey Jack is the right move here.
- Corn tortillas – 12-14 tortillas (6-inch size). Corn holds up better than flour and adds that authentic texture. Look for ones that are pliable—if they crack, warm them briefly in the microwave wrapped in a damp paper towel.
- Heavy cream – 1 cup. This creates that luscious, non-canned-soup sauce. Don’t substitute half-and-half; it won’t thicken properly.
- Chicken broth – 1/2 cup, low-sodium. Use this to deglaze the pan and thin the sauce to the perfect consistency.
- Onion – 1 medium yellow onion, diced. White onion works too, but yellow gives a sweeter base flavor.
- Garlic – 4 cloves, minced. Fresh garlic is non-negotiable here—powder won’t give you that aromatic punch.
- Ground cumin – 1 teaspoon. This adds warmth without being spicy. I recommend toasting your own cumin seeds and grinding them fresh if you have the time.
- Dried oregano – 1 teaspoon. Mexican oregano if you can find it, but regular works fine too.
- Salt – 1 teaspoon, plus more to taste. I use kosher salt for better control.
- Black pepper – 1/2 teaspoon, freshly ground.
- Olive oil – 2 tablespoons, for sautéing.
- Sour cream – 1/2 cup, for serving (optional but highly recommended).
- Fresh cilantro – 1/4 cup chopped, for garnish.
- Lime wedges – For squeezing over the top before serving.
For the chiles, I look for the medium-heat variety—hot enough to notice, but not so fiery that you can’t taste the other flavors. If you’re nervous about heat, remove the seeds and membranes after roasting. That’s where most of the capsaicin lives.
Equipment Needed
You don’t need a professional kitchen to make these enchiladas shine. Here’s what you’ll actually use:
- Large baking sheet – For roasting the chiles. A rimmed sheet prevents juice from spilling everywhere.
- 9×13-inch baking dish – Glass or ceramic works best. I’ve used metal pans, and they sometimes react with the chiles and create a metallic taste. My grandmother’s old Pyrex dish is my go-to.
- Large skillet – For cooking the chicken and sautéing the aromatics. A 12-inch skillet gives you enough room to work.
- Mixing bowls – One large for the filling, one medium for the sauce.
- Tongs – For handling hot chiles and flipping the chicken.
- Chef’s knife and cutting board – A sharp knife makes all the difference when dicing onions and mincing garlic.
- Box grater or food processor – For shredding cheese. Pre-shredded cheese has anti-caking agents that prevent smooth melting, so grate your own if you can.
- Plastic or latex gloves – Trust me on this one. Handling roasted chiles without gloves is a lesson you only learn once.
If you don’t have a gas stove for roasting chiles, you can use your oven’s broiler or even an outdoor grill. The goal is the same: char the skin until it’s blackened and blistered.
Preparation Method
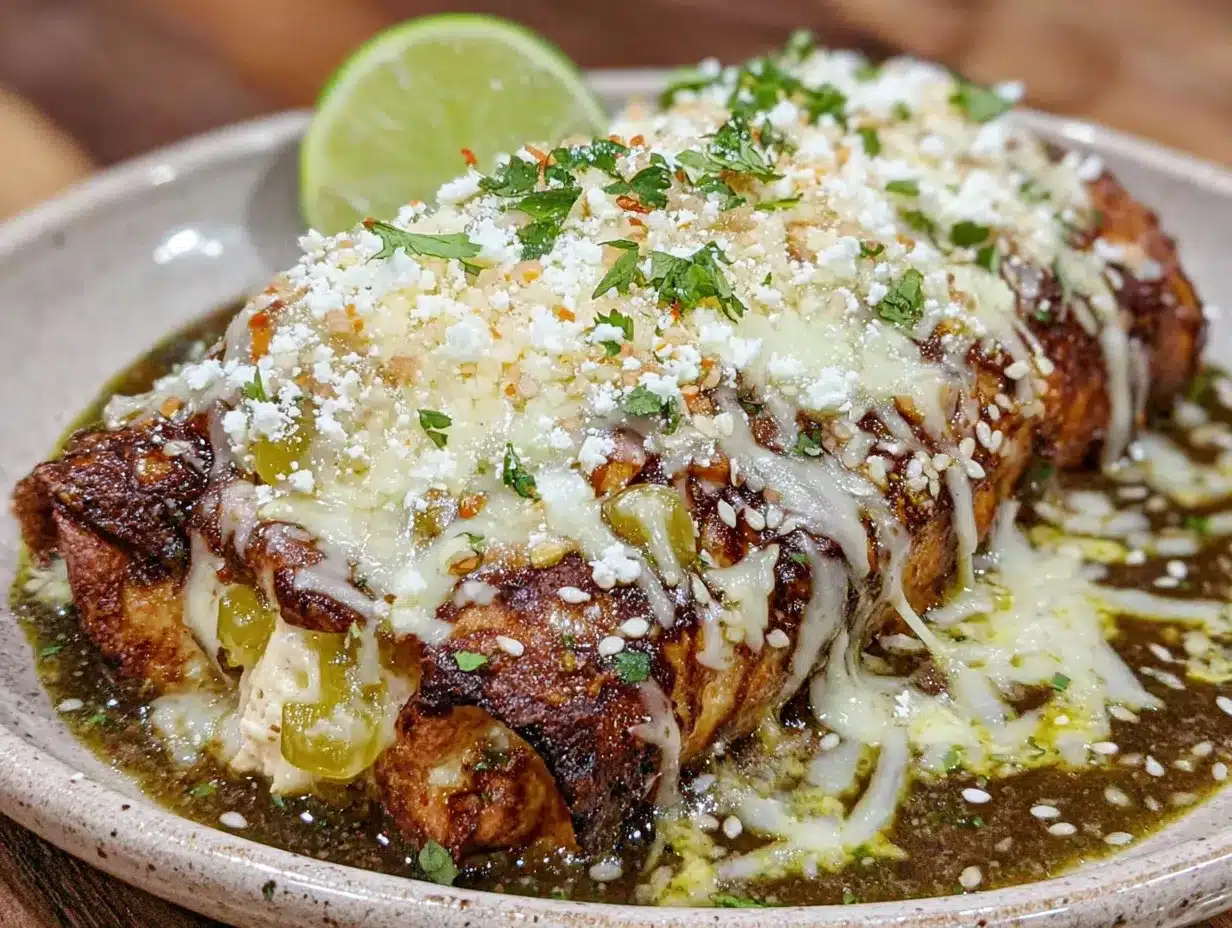
Let me walk you through this step by step. I’ve included all the little details I wish someone had told me the first time I made these.
- Roast the chiles. Preheat your broiler to high. Place the Hatch chiles on a baking sheet lined with foil. Broil them for 4-5 minutes per side, turning with tongs, until the skin is blackened and blistered all over. Don’t skip this—the char is where the smoky flavor comes from. You’ll hear them sizzle and pop, which is totally normal. Once they’re done, transfer them to a bowl and cover with plastic wrap. Let them steam for 10 minutes. This loosens the skin so it peels off easily.
- Cook the chicken. While the chiles steam, season your chicken breasts with salt and pepper. Heat 1 tablespoon of olive oil in a large skillet over medium-high heat. Add the chicken and cook for 6-7 minutes per side, until golden brown and cooked through (internal temperature should reach 165°F). Let the chicken rest on a cutting board for 5 minutes before shredding. I use two forks to pull it apart, but you can also use a stand mixer with the paddle attachment on low speed—it works surprisingly well.
- Peel and chop the chiles. Once the chiles are cool enough to handle, put on those gloves. Peel off the blackened skin—it should come off in large strips. Remove the stems and seeds if you want less heat. Chop the chiles into small pieces, about 1/4-inch dice. You should have about 1 cup of chopped chiles.
- Sauté the aromatics. Wipe out the skillet you used for the chicken (don’t wash it—the browned bits add flavor). Add the remaining 1 tablespoon of olive oil over medium heat. Cook the diced onion for 4-5 minutes until translucent and starting to brown at the edges. Add the minced garlic and cook for 30 seconds until fragrant. Stir in the cumin and oregano, cooking for another 30 seconds until the spices smell toasty.
- Make the sauce. Pour in the chicken broth and scrape up any browned bits from the bottom of the pan. Let it simmer for 2 minutes until reduced by half. Reduce the heat to low and stir in the heavy cream. Add the chopped roasted chiles and stir to combine. Season with salt and pepper to taste. The sauce should be thick enough to coat the back of a spoon but still pourable. Let it simmer gently for 5 minutes while you assemble everything else.
- Prepare the filling. In a large bowl, combine the shredded chicken with about 1 cup of the sauce and 1 cup of the shredded Monterey Jack cheese. Mix well. The filling should be moist but not soupy. Taste it and adjust seasoning if needed.
- Assemble the enchiladas. Preheat your oven to 375°F. Spread about 1/2 cup of the remaining sauce on the bottom of your baking dish. This prevents the tortillas from sticking and adds flavor to the bottom layer. Take a corn tortilla, place about 2-3 tablespoons of filling down the center, and roll it up tightly. Place it seam-side down in the dish. Repeat with the remaining tortillas and filling, packing them snugly together. You should fit about 12 enchiladas in a standard 9×13 dish.
- Top and bake. Pour the remaining sauce over the rolled enchiladas, spreading it evenly. Sprinkle the remaining 2 cups of cheese over the top. Bake for 20-25 minutes until bubbly and golden brown on top. The edges of the tortillas should be slightly crispy—that’s the good stuff. Let the dish rest for 5-10 minutes before serving. This helps the enchiladas set so they don’t fall apart when you serve them.
A few things I’ve learned the hard way: Don’t overfill the tortillas, or they’ll burst open during baking. And don’t skip the resting time at the end—I know it’s tempting to dig in right away, but those enchiladas need a minute to pull themselves together.
Cooking Tips & Techniques
After making these enchiladas more times than I can count, I’ve collected some tricks that make a real difference. I wish I’d known these from the start—would have saved me a few mediocre batches.
Double-roast for deeper flavor. Most recipes stop after roasting the chiles, but I’ve found that roasting the assembled enchiladas under the broiler for the last 2-3 minutes gives you those irresistible crispy cheese edges. Just watch them closely—they go from golden to burnt in seconds.
Don’t skip the sauce reduction. I made the mistake of using the sauce straight from the pan once, and the enchiladas turned out watery and bland. Simmering that cream and broth mixture until it thickens concentrates all the flavors. You want it thick enough that it clings to the tortillas, not runs off them.
Warm your tortillas. Cold corn tortillas crack when you try to roll them. I wrap a stack in a damp paper towel and microwave them for 30 seconds. They become pliable and easy to work with. You can also dip them briefly in warm sauce before filling—that’s the traditional method and it works beautifully.
Use a hot pan for the chicken. Getting a good sear on the chicken adds so much flavor. If your pan isn’t hot enough, the chicken will steam instead of brown, and you’ll miss out on those delicious browned bits that make the sauce better. Wait until the oil shimmers before adding the chicken.
Let the chiles steam properly. That 10-minute steam after roasting is crucial. I once got impatient and tried to peel the chiles after only 5 minutes, and the skin clung to the flesh like it was glued on. The steam creates condensation that lifts the skin away from the pepper. It’s worth the wait.
Layer your cheese strategically. I mix some cheese into the filling for creaminess, some on top for that melty blanket, and sometimes I sprinkle a little between the layers of enchiladas for extra gooeyness. It’s not traditional, but it’s delicious.
One time I forgot to buy cream and tried using milk instead. The sauce never thickened properly, and I ended up with enchilada soup. Not my finest moment, but now I triple-check my ingredients before starting.
Variations & Adaptations
These enchiladas are forgiving enough to adapt to different diets and preferences. Here are some variations I’ve tried and loved.
Vegetarian version. Swap the chicken for 2 cups of roasted sweet potatoes and black beans. Cube the sweet potatoes, toss them with olive oil and cumin, and roast at 400°F for 25 minutes. Mix them with a can of drained black beans and proceed with the recipe. The sweetness of the potatoes plays beautifully against the smoky chiles.
Lower-carb option. Use low-carb tortillas or make enchilada stacks instead of rolls. Layer tortillas, filling, and sauce like a lasagna, then bake. You get all the flavor with fewer carbs per serving. I’ve also tried using large collard green leaves as wrappers—blanch them first, then fill and roll like regular tortillas.
Extra spicy version. For heat lovers, add 1-2 minced jalapeños to the onion mixture, and use hot Hatch chiles instead of mild. You can also drizzle some hot sauce over the finished enchiladas. My brother-in-law adds a chopped serrano pepper to his filling, and honestly, I can’t feel my tongue after eating his version.
Green chicken version. Add 1 cup of fresh spinach to the filling, wilted and squeezed dry. The spinach adds color and nutrients without changing the flavor much. I’ve also added a handful of chopped tomatillos to the sauce for extra tanginess.
Dairy-free adaptation. Use dairy-free cream cheese and shredded vegan cheese. The texture changes slightly, but it’s still satisfying. I’ve found that cashew cream makes an excellent substitute for the heavy cream—soak 1/2 cup cashews in hot water for 30 minutes, then blend with 1/2 cup water until smooth.
My personal favorite variation is adding a layer of refried beans between the tortillas and filling. It makes the enchiladas extra hearty and adds a creamy texture that complements the chiles. I spread about 2 tablespoons of beans on each tortilla before adding the chicken filling.
Serving & Storage Suggestions
These enchiladas are at their best served hot from the oven, but they’re pretty great the next day too. Here’s how to make the most of them.
Serving temperature and presentation. Let the enchiladas rest for 5-10 minutes after baking. This allows the cheese to set slightly so it doesn’t slide off when you serve. Top with a dollop of sour cream, a sprinkle of fresh cilantro, and a squeeze of lime juice. The bright acidity cuts through the richness perfectly. I like to serve them with a simple side salad dressed with lime vinaigrette.
Complementary dishes. These enchiladas pair beautifully with Mexican rice, refried beans, or a simple black bean soup. For drinks, a cold Mexican lager or a margarita (on the rocks, not frozen) is the obvious choice. My non-alcoholic go-to is an agua fresca made with cucumber and lime.
Storage instructions. Leftover enchiladas keep well in the refrigerator for up to 4 days. Store them in an airtight container, or cover the baking dish tightly with foil. The flavors actually meld together overnight, making leftovers even better. I’ve been known to make a double batch just for the next-day lunch situation.
Freezing instructions. These enchiladas freeze beautifully. Assemble the dish completely but don’t bake it. Cover tightly with plastic wrap, then foil, and freeze for up to 3 months. To bake from frozen, remove the plastic wrap, cover with foil, and bake at 350°F for 45 minutes. Remove the foil for the last 10 minutes to brown the cheese. No need to thaw first—it actually works better straight from the freezer.
Reheating methods. For single servings, the microwave works in a pinch (about 2 minutes on high). But for the best texture, reheat in a 350°F oven for 15-20 minutes. The oven revives those crispy edges that the microwave kills. If the enchiladas seem dry, add a splash of chicken broth or cream before reheating.
How flavors develop over time. Day-old enchiladas have a depth of flavor that fresh ones just don’t have. The chiles continue to infuse the sauce, and the cheese sets into this wonderful creamy-solid texture. I actually prefer them the next day, if I’m being honest.
Nutritional Information & Benefits
These enchiladas are comfort food, but they’re not nutritionally empty. Here’s what you’re getting in each serving (based on 6 servings, with 2 enchiladas per serving).
Estimated nutritional values per serving:
- Calories: 485
- Protein: 38g
- Fat: 28g
- Carbohydrates: 22g
- Fiber: 4g
- Sugar: 4g
- Sodium: 680mg
Health benefits of key ingredients: Hatch green chiles are rich in vitamin C and capsaicin, which has anti-inflammatory properties. Chicken provides lean protein for muscle repair and satiety. The calcium from cheese supports bone health. And the garlic and onions contain compounds that support immune function.
Dietary considerations: This recipe is naturally gluten-free when using corn tortillas. For a lower-calorie version, use reduced-fat cheese and swap the heavy cream for half-and-half (though the sauce won’t be as rich). If you’re watching sodium, use low-sodium broth and go easy on the added salt—the cheese provides plenty.
Potential allergens: This recipe contains dairy (cheese, cream) and corn (tortillas). It’s free of nuts, eggs, and soy, though always check your specific ingredient labels.
Personal wellness perspective: I don’t believe in labeling foods as “good” or “bad.” These enchiladas are a celebration—a meal that brings people together and makes them happy. Balance comes from eating them alongside vegetables and not making them an everyday thing. But honestly? They’re worth every calorie.
Frequently Asked Questions
Can I use canned Hatch chiles instead of fresh?
Yes, you can use canned or jarred Hatch chiles in a pinch. Drain them well and pat them dry before using. You’ll miss out on the smoky flavor from roasting, but the recipe will still be delicious. Use about 1 cup of canned chiles, which is roughly equivalent to 6-8 fresh ones.
Why did my enchiladas turn out soggy?
Soggy enchiladas usually happen when the sauce is too thin or the tortillas are over-sauced. Make sure you reduce the cream sauce until it’s thick enough to coat a spoon. Also, don’t drown the tortillas—just a light coating of sauce on the bottom of the dish and a moderate amount on top is enough.
Can I make these enchiladas ahead of time?
Absolutely! Assemble the enchiladas up to 24 hours in advance, but don’t bake them. Cover and refrigerate. When you’re ready to bake, add about 10 minutes to the baking time since you’re starting from cold. You can also freeze them unbaked for up to 3 months.
What’s the best cheese to use besides Monterey Jack?
Pepper Jack adds a nice kick, and Oaxaca cheese melts beautifully with a stringy texture. A blend of Monterey Jack and sharp cheddar works too—just don’t use all cheddar, as it can become greasy. For a more authentic flavor, try queso Chihuahua or asadero, which are available at many Latin grocery stores.
How do I handle the heat from the chiles?
If you’re sensitive to spice, remove all the seeds and membranes after roasting—that’s where most of the heat lives. You can also mix mild and hot chiles to find your perfect balance. Drinking milk or eating yogurt with the enchiladas helps tame the heat if you accidentally go too spicy.
Conclusion
These Best Roasted Hatch Green Chili Chicken Enchiladas are the kind of recipe that becomes part of your life. They’re the dish you make when you want to impress someone without stressing yourself out, the meal that turns a regular Tuesday into something special. I’ve made them for potlucks where they disappeared in minutes, for quiet dinners where we ate every last bite in comfortable silence, and for holidays where they sat alongside more traditional dishes and somehow stole the show.
The beauty of this recipe is how adaptable it is. Maybe you’ll make it exactly as written, or maybe you’ll add your own twist—some extra spice, a different cheese, a layer of beans. That’s the point. Cooking should feel like your own, and this recipe gives you a solid foundation to build on.
I’d love to hear how these turn out for you. Did you make any changes? Did your family love them as much as mine does? Drop a comment below and let me know. And if you’re looking for more ways to use those Hatch chiles, check out our collection of Hatch chile recipes for more inspiration. Until next time, happy cooking—and don’t forget to save that index card.
Pin This Recipe!
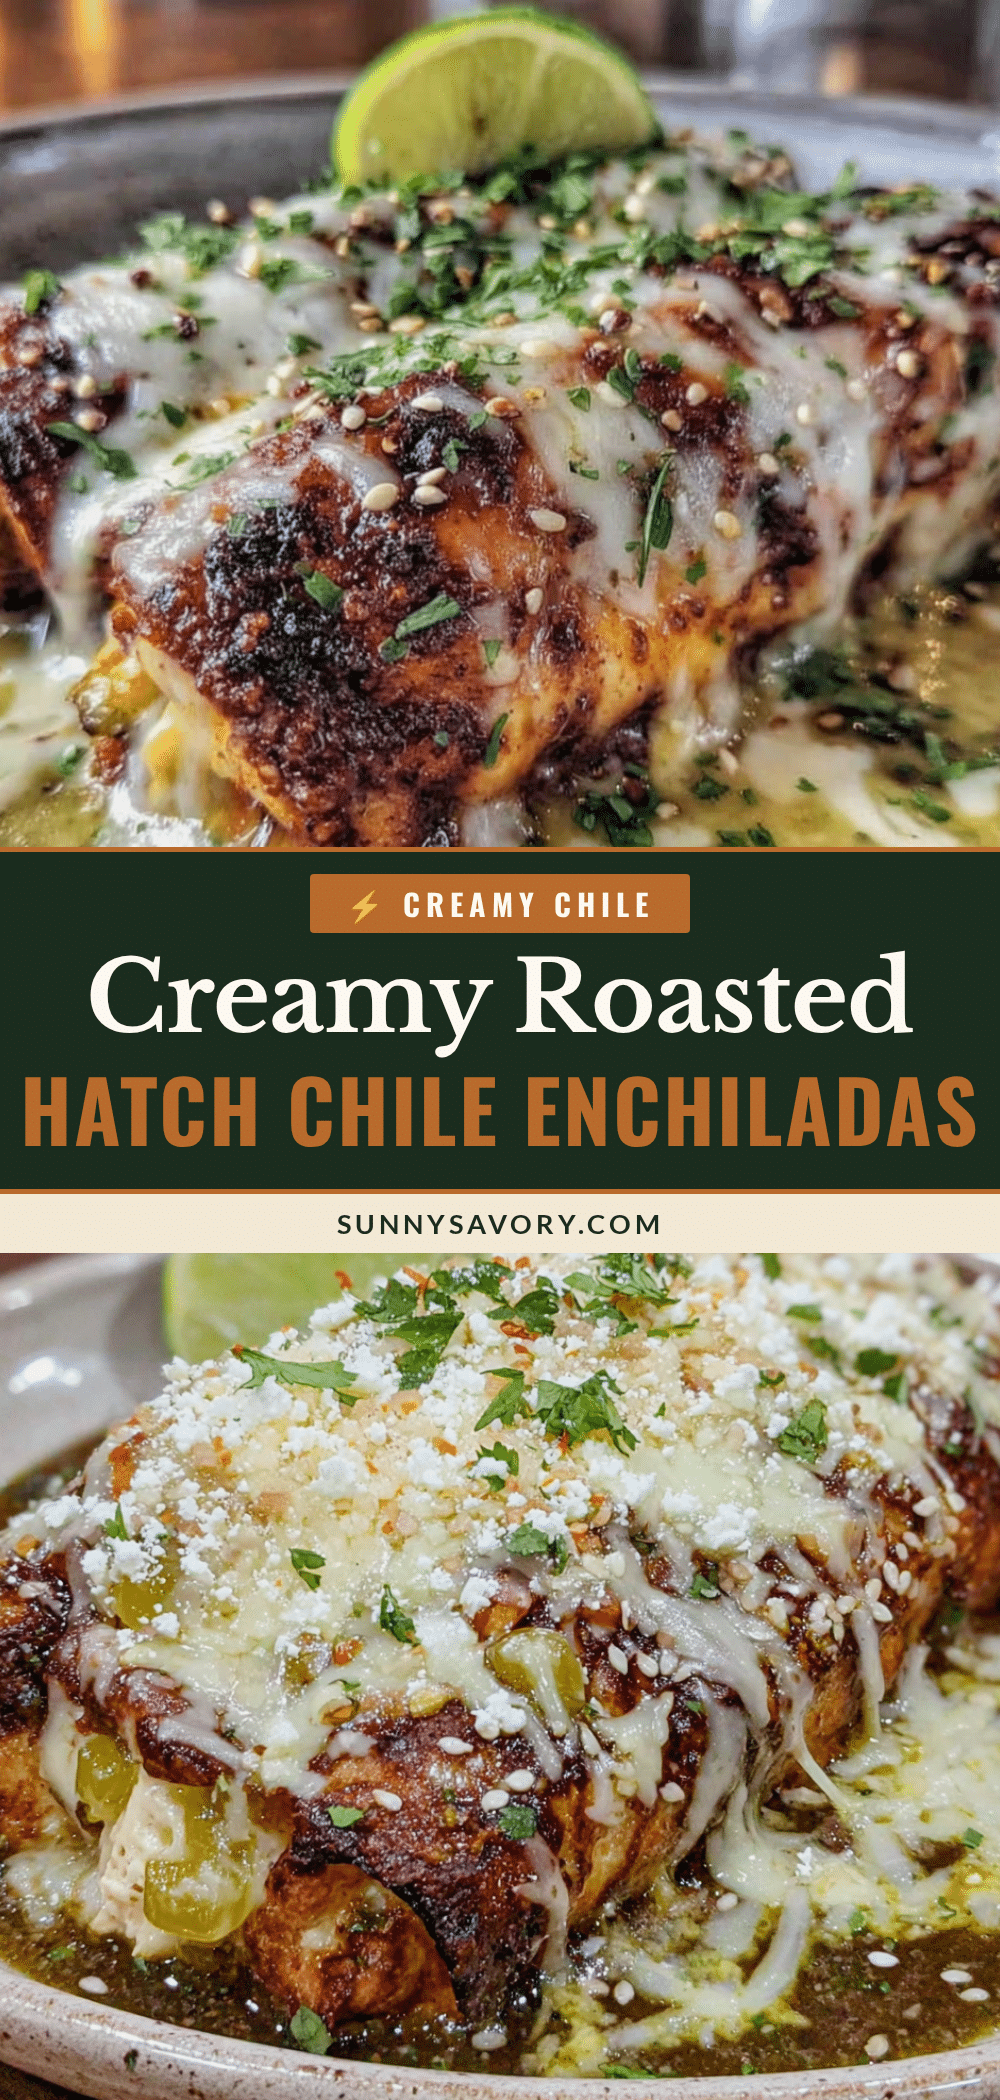
Best Roasted Hatch Green Chili Chicken Enchiladas

These enchiladas feature a double-roasting technique for deep, smoky flavor, with a creamy sauce and tender chicken. Quick to assemble and perfect for entertaining, they’re a crowd-pleaser that tastes like you spent all day cooking.
- Prep Time: 20 minutes
- Cook Time: 25 minutes
- Total Time: 45 minutes
- Yield: 6 servings 1x
- Category: Main Course
- Cuisine: Mexican
Ingredients
- 6–8 medium Hatch green chiles (about 1 pound)
- 1.5 pounds boneless, skinless chicken breasts (about 3 medium)
- 3 cups shredded Monterey Jack cheese (about 12 ounces)
- 12–14 corn tortillas (6-inch size)
- 1 cup heavy cream
- 1/2 cup low-sodium chicken broth
- 1 medium yellow onion, diced
- 4 cloves garlic, minced
- 1 teaspoon ground cumin
- 1 teaspoon dried oregano (preferably Mexican)
- 1 teaspoon kosher salt, plus more to taste
- 1/2 teaspoon freshly ground black pepper
- 2 tablespoons olive oil
- 1/2 cup sour cream (for serving, optional)
- 1/4 cup fresh cilantro, chopped (for garnish)
- Lime wedges (for serving)
Instructions
- Roast the chiles: Preheat broiler to high. Place chiles on a foil-lined baking sheet. Broil 4-5 minutes per side, turning with tongs, until skin is blackened and blistered. Transfer to a bowl, cover with plastic wrap, and let steam for 10 minutes.
- Cook the chicken: Season chicken breasts with salt and pepper. Heat 1 tablespoon olive oil in a large skillet over medium-high heat. Cook chicken 6-7 minutes per side until golden and cooked through (internal temperature 165°F). Let rest 5 minutes, then shred with two forks.
- Peel and chop chiles: Wearing gloves, peel off blackened skin. Remove stems and seeds if desired. Chop chiles into 1/4-inch dice (about 1 cup).
- Sauté aromatics: Wipe out skillet. Add remaining 1 tablespoon olive oil over medium heat. Cook onion 4-5 minutes until translucent. Add garlic and cook 30 seconds. Stir in cumin and oregano, cook 30 seconds until fragrant.
- Make the sauce: Pour in chicken broth, scraping up browned bits. Simmer 2 minutes until reduced by half. Reduce heat to low, stir in heavy cream and chopped chiles. Season with salt and pepper. Simmer 5 minutes until thickened.
- Prepare filling: In a large bowl, combine shredded chicken with 1 cup of the sauce and 1 cup shredded Monterey Jack cheese. Mix well.
- Assemble enchiladas: Preheat oven to 375°F. Spread 1/2 cup of remaining sauce on bottom of a 9×13-inch baking dish. Place 2-3 tablespoons filling down center of each tortilla, roll tightly, and place seam-side down in dish. Repeat with remaining tortillas and filling.
- Top and bake: Pour remaining sauce over enchiladas, spreading evenly. Sprinkle remaining 2 cups cheese on top. Bake 20-25 minutes until bubbly and golden. Let rest 5-10 minutes before serving. Garnish with sour cream, cilantro, and lime wedges.
Notes
Double-roast for deeper flavor: broil assembled enchiladas for last 2-3 minutes for crispy cheese edges. Don’t skip sauce reduction to avoid watery enchiladas. Warm tortillas in damp paper towel for 30 seconds to prevent cracking. Let chiles steam fully for easy peeling. Layer cheese strategically: mix some into filling, some on top, and some between layers for extra gooeyness.
Nutrition
- Serving Size: 2 enchiladas
- Calories: 485
- Sugar: 4
- Sodium: 680
- Fat: 28
- Saturated Fat: 16
- Carbohydrates: 22
- Fiber: 4
- Protein: 38
Keywords: Hatch green chile, chicken enchiladas, roasted chiles, New Mexican, comfort food, easy dinner



