Love this? Save it for later!
Share the inspiration with your friends
My neighbor Mrs. Gable watched me hauling groceries up the porch steps one freezing Tuesday evening, a bag of chocolate bars poking out the top. She didn’t say anything at first. Then she just smiled and said, “You look like you need my lava cake recipe. It’s for two, so you don’t have to share.” I laughed, snow melting in my hair, and that was it—the beginning of a beautiful, chocolatey friendship. She didn’t hand me a printed card or a link. She just told me the ratios while I stood there shivering, and I scribbled them on a crumpled receipt.
Honestly, I was skeptical at first. A perfect lava cake from a neighbor’s memory? I mean, I’d tried restaurant versions that were either overbaked or underbaked, never that perfect molten middle. But that night, standing in my tiny kitchen with the snow piling up outside, I gave it a shot. The batter came together in one bowl—no fancy equipment, no melting chocolate over a double boiler. And when I flipped that little ramekin onto a plate? Let me tell you, the way the center spilled out like a slow chocolate river was nothing short of magic.
That first bite had this unexpected warmth that spread through me, the kind you feel in your chest after a long day. Maybe you’ve been there—that moment when food just *fixes* something. I’ve tweaked Mrs. Gable’s original over the years, swapping in a touch of espresso powder to deepen the flavor, but the soul of it is still hers. This recipe stayed with me because it’s not just dessert; it’s a quiet ritual. It’s the thing I make when I need to remind myself that simple, honest cooking can feel like a hug. It’s for the nights when you want something indulgent but don’t want to face a sink full of dishes.
Why You’ll Love This Recipe
This isn’t just another chocolate lava cake recipe. I’ve tested this one more times than I care to admit—burned a few, underbaked a few, even dropped one on the floor (don’t worry, I made another). What I landed on is a foolproof version that delivers every single time. Here’s why it’s become my go-to:
- Quick & Easy: From start to plate in under 15 minutes. No complicated steps, no waiting for butter to soften. You can have this on the table before your takeout delivery would even arrive.
- Simple Ingredients: You probably have everything in your pantry right now. Butter, eggs, sugar, flour, and chocolate—that’s it. No fancy extracts or hard-to-find items.
- Perfect for a Cozy Night In: This recipe is designed for two people, making it ideal for date night, a catch-up session with a friend, or honestly, just treating yourself without leftovers tempting you for days.
- Crowd-Pleaser: Every single person I’ve made this for has closed their eyes after the first bite. It’s that good. The contrast between the tender cake and the gooey center is pure comfort food magic.
- Unbelievably Delicious: The texture is next-level—a perfectly set outer cake that gives way to a warm, molten heart. It feels fancy, but it’s secretly the easiest dessert you’ll ever make.
What makes this version different? It’s the tiny tweaks I’ve learned through trial and error. I use a specific ratio of egg yolk to whole egg that creates the ideal structure without being too cakey. And I’ve found that a quick rest in the freezer before baking—just 5 minutes—gives you that perfect lava consistency without any guesswork. This isn’t just another version; it’s the best version I’ve ever made, and I’ve made a lot.
What Ingredients You Will Need
This recipe uses simple, honest ingredients to create something truly special. No complicated shopping list, just pantry staples that transform into pure magic. The beauty of this lava cake is that each ingredient plays a specific role, and together they create that perfect molten center.
For the Lava Cakes
- Unsalted butter, 4 tablespoons (57g), plus extra for greasing the ramekins (I prefer using a high-quality European butter like Kerrygold for richer flavor)
- Dark chocolate, 4 ounces (113g), chopped (I recommend 60-70% cacao—too sweet and the lava effect doesn’t work as well; I usually grab Ghirardelli or Lindt bars)
- Granulated sugar, 1/4 cup (50g)
- Large eggs, 2 whole eggs plus 1 egg yolk, at room temperature (the extra yolk is the secret to that perfect fudgy texture)
- All-purpose flour, 2 tablespoons (16g)
- Vanilla extract, 1 teaspoon
- Instant espresso powder, 1/4 teaspoon (optional, but trust me on this—it doesn’t make it taste like coffee, it just deepens the chocolate flavor)
- Pinch of salt, about 1/8 teaspoon (flaky sea salt like Maldon is lovely here)
For Serving (Optional but Recommended)
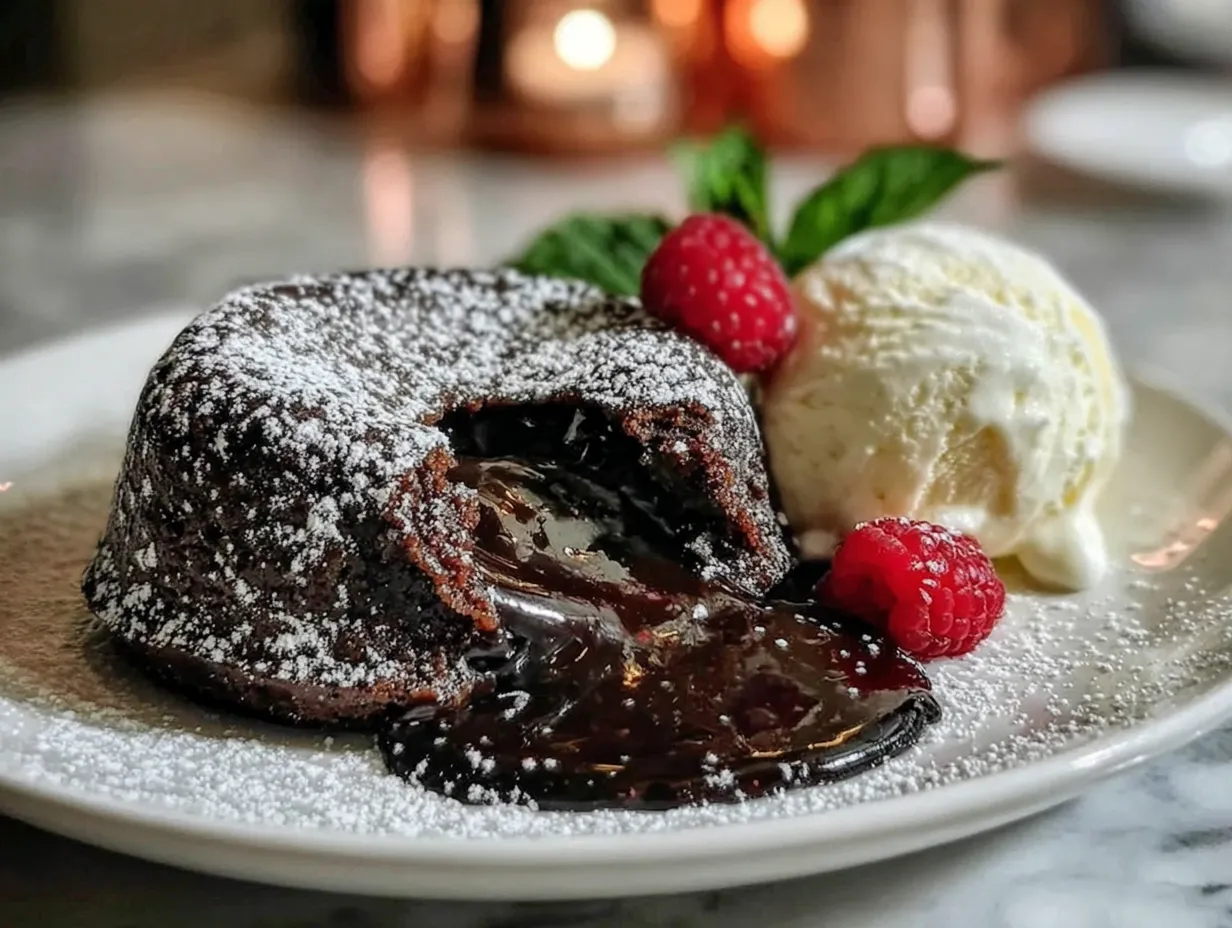
- Powdered sugar, for dusting
- Vanilla ice cream or lightly whipped cream (the cold creaminess against the warm cake is a match made in heaven)
- Fresh raspberries or strawberries (adds a bright, tart contrast)
Let me share a quick tip about the chocolate—don’t use chocolate chips here. They often contain stabilizers that prevent them from melting smoothly. A good quality chocolate bar, chopped into small pieces, will give you that silky, luxurious texture you’re after. And if you’re dairy-free? I’ve used a high-quality vegan dark chocolate and coconut oil instead of butter with great results. The key is keeping that fat content similar.
Equipment Needed
You don’t need a professional pastry kitchen for this recipe, and that’s the beauty of it. Here’s what you’ll need:
- Two 6-ounce ramekins (the standard size for individual desserts; if you only have larger ones, adjust the baking time slightly)
- Small mixing bowl for melting the chocolate and butter
- Medium mixing bowl for the egg mixture
- Whisk (a hand whisk works perfectly—no electric mixer needed)
- Rubber spatula for folding
- Baking sheet (to place the ramekins on for easy handling)
- Small saucepan or a microwave-safe bowl for melting
- Pastry brush or paper towel for greasing the ramekins
If you don’t have ramekins, you can use a standard muffin tin—just grease it well and reduce the baking time by a minute or two. I’ve even made these in small oven-safe ceramic bowls in a pinch. The key is using a vessel that holds about 3/4 cup of batter. And honestly, I bought my ramekins at a thrift store for a dollar each, so don’t feel like you need fancy equipment.
Preparation Method
Let me walk you through this step by step. I’ve made these cakes more times than I can count, so I’ll share every little trick I’ve picked up along the way.
- Preheat your oven to 425°F (218°C) and position the rack in the center. You want the oven nice and hot—this is what creates that dramatic lava effect.
- Grease your ramekins generously with softened butter. Don’t skimp here! Use a pastry brush or your fingers to coat every surface, including the rim. Then dust each ramekin with a teaspoon of cocoa powder or flour, tapping out the excess. This extra step ensures the cakes release perfectly. I learned this the hard way after my first attempt stuck to the dish like glue.
- Melt the butter and chocolate together. You can do this in a double boiler on the stove or in the microwave. For the microwave method, combine the chopped chocolate and butter in a microwave-safe bowl, heat in 30-second bursts, stirring between each, until smooth. It usually takes about 60-90 seconds total. Let it cool slightly while you prep the eggs.
- Whisk the eggs, egg yolk, and sugar together in a medium bowl until thick and pale, about 2 minutes. You’re looking for a ribbon-like consistency—when you lift the whisk, the batter should fall in a slow, thick stream. This is crucial because it incorporates air into the batter, giving the cake structure while keeping the center molten.
- Add the vanilla and espresso powder (if using) to the egg mixture and whisk to combine. The espresso powder dissolves easily at this stage.
- Pour the melted chocolate mixture into the egg mixture and fold gently with a rubber spatula. Don’t overmix—you want to keep as much air in the batter as possible. Fold just until you don’t see any streaks of chocolate.
- Sprinkle the flour and salt over the batter and fold again. Again, gentle is the keyword here. A few streaks of flour are okay; they’ll disappear as you fold.
- Divide the batter evenly between the two prepared ramekins. The batter will be thick and glossy—this is normal. Place the ramekins on a baking sheet for stability.
- Refrigerate or freeze for 5 minutes. This is my secret step! Chilling the batter briefly helps the outside set faster in the oven while the center stays liquid. Trust me, this makes the lava effect much more reliable.
- Bake for exactly 12-14 minutes. The edges should be set and pulling away slightly from the sides of the ramekin, but the center should still jiggle when you gently shake the ramekin. Every oven is different, so start checking at 12 minutes. The top should look set but not cracked.
- Let the cakes rest for 30 seconds after removing from the oven. Run a thin knife around the edges to loosen them. Place a plate upside down over the ramekin, then quickly invert it. Give it a gentle shake, and the cake should slide right out. If it sticks, give the ramekin a firm tap on the counter.
- Serve immediately while the center is still warm and flowing. Dust with powdered sugar and add a scoop of ice cream if you’re feeling fancy.
One thing I’ve learned—don’t be tempted to overbake these. The difference between a perfect lava cake and a chocolate muffin is literally 60 seconds. When in doubt, err on the side of underbaking. You can always pop it back in for another minute, but you can’t undo a fully set center.
Cooking Tips & Techniques
I’ve had my fair share of lava cake failures, and I’m happy to share what I’ve learned so you can skip the frustration. Here are the tips that make this recipe foolproof:
The egg temperature matters. Cold eggs won’t whip up as well, and they can seize the chocolate mixture. Let your eggs sit on the counter for 15 minutes before starting. If you’re in a hurry, place them in a bowl of warm water for 5 minutes.
Don’t skip the salt. A pinch of salt isn’t just for seasoning—it balances the sweetness and makes the chocolate taste more chocolatey. I’ve forgotten it before, and the cake was noticeably flat in flavor.
The freezer trick is your best friend. I mentioned this in the method, but it bears repeating. That 5-minute chill in the freezer creates a temperature gradient in the oven. The outside starts cooking immediately while the center stays cool and liquid. This is the single best tip for consistent lava cakes.
Watch for visual cues, not just the timer. Every oven runs differently. Look for the edges to be set and slightly puffed, with the center still having a slight wobble. The surface should look matte, not shiny. If the top is cracking, it’s probably overbaked.
Room temperature is key for serving. These cakes cool down fast, so have your plates, toppings, and spoons ready before you pull them from the oven. I learned this the hard way when I was scrambling to find a clean plate while my cake sat cooling.
One mistake I made early on? Using a metal bowl for the microwave melting. Metal and microwaves don’t mix! Use glass or ceramic. And always, always stir between bursts—chocolate can burn quickly and seize into a grainy mess.
Variations & Adaptations
This recipe is wonderfully adaptable. Here are some of my favorite variations I’ve tried over the years:
Gluten-Free Version: Swap the all-purpose flour with an equal amount of almond flour or a gluten-free 1:1 baking blend. I’ve tested this with almond flour, and it adds a lovely nutty richness that complements the chocolate beautifully. Just be aware that the texture will be slightly denser.
Vegan Adaptation: Use a high-quality vegan dark chocolate and replace the butter with coconut oil or a vegan butter stick. For the eggs, I’ve used a flax egg (1 tablespoon ground flaxseed mixed with 3 tablespoons water per egg) with decent results. The texture won’t be exactly the same—slightly less airy—but the lava effect still works wonderfully.
Flavor Twists: Add a teaspoon of orange zest to the batter for a chocolate-orange combo that feels fancy. Or stir in a tablespoon of peanut butter right before baking—drop it in the center of the batter for a peanut butter lava surprise. My personal favorite is adding a pinch of cinnamon and cayenne pepper for a Mexican hot chocolate vibe.
Make It a Sundae: Instead of serving the cakes on their own, crumble one over a bowl of vanilla ice cream, drizzle with warm chocolate sauce, and add a sprinkle of sea salt. It’s messy and glorious.
Single Serving: This recipe halves perfectly if you just want one cake. Use one egg and skip the extra yolk. The baking time stays about the same, maybe a minute less.
Serving & Storage Suggestions
These lava cakes are best enjoyed immediately—like, within 60 seconds of coming out of the oven. That’s when the center is perfectly molten and the contrast between warm cake and cold ice cream is at its peak. Serve them on small plates or shallow bowls to catch any chocolate that spills out.
For toppings, I’m partial to a scoop of vanilla bean ice cream and a dusting of powdered sugar. The cold creaminess against the warm, rich chocolate is pure comfort. Fresh raspberries add a bright, tart pop that cuts through the richness beautifully. A drizzle of salted caramel sauce? Absolutely decadent.
If you somehow have leftovers (it’s rare in my house), you can store the baked cakes in the refrigerator for up to 2 days. To reheat, microwave them for about 15-20 seconds, but be warned—the lava effect won’t be as dramatic. The center will still be soft and fudgy, just not as liquid. Alternatively, you can prepare the batter in the ramekins, cover them with plastic wrap, and refrigerate for up to 24 hours before baking. Just add an extra minute or two to the baking time if baking straight from the fridge.
I don’t recommend freezing the baked cakes—the texture suffers too much. But the unbaked batter freezes well in the ramekins for up to a month. Thaw in the refrigerator overnight before baking.
One thing I love about this recipe is how the flavors deepen as the batter rests. If you have time, making the batter an hour ahead and letting it sit at room temperature before baking actually improves the chocolate flavor. It’s a small thing, but it makes a difference.
Nutritional Information & Benefits
Let’s be real—this is an indulgent dessert, and I’m not here to pretend otherwise. But knowing what’s in your food is part of enjoying it mindfully. Here’s the estimated nutritional breakdown for one lava cake (without ice cream or toppings):
| Nutrient | Amount per Serving |
|---|---|
| Calories | 410 |
| Total Fat | 28g |
| Saturated Fat | 16g |
| Cholesterol | 195mg |
| Sodium | 180mg |
| Total Carbohydrates | 38g |
| Dietary Fiber | 3g |
| Sugars | 30g |
| Protein | 7g |
Dark chocolate is actually packed with antioxidants and can be part of a balanced diet when enjoyed in moderation. The eggs provide high-quality protein and essential vitamins like B12 and D. And honestly? There’s something to be said for the mental health benefits of taking 15 minutes to make yourself something special. This cake is comfort food, and comfort has its own nutritional value.
If you’re watching your sugar intake, you can reduce the sugar to 3 tablespoons without affecting the texture too much. And using a 70% dark chocolate will lower the sugar content while boosting the antioxidant benefits.
Conclusion
This cozy chocolate lava cake for two is more than just a dessert—it’s a little ritual of warmth and indulgence that I genuinely believe everyone deserves. It’s the recipe I turn to when the world feels a bit too loud, when I need a quiet moment with someone I love, or when I just want to remind myself that simple things can be extraordinary.
Mrs. Gable’s recipe, passed on in the snow that evening, has become one of my most treasured kitchen companions. It’s proof that the best recipes aren’t always the most complicated—they’re the ones that feel like a hug. I hope you’ll make this your own, tweak it to suit your tastes, and share it with someone who needs a little warmth.
Have you tried this recipe? I’d love to hear how it turned out! Drop a comment below and let me know if you added any fun twists or if the lava effect worked perfectly. And if you’re looking for more cozy dessert inspiration, don’t miss my easy chocolate mousse recipe or these fudgy classic brownies. Happy baking, friends!
Frequently Asked Questions
Can I make these lava cakes ahead of time?
Absolutely! You can prepare the batter in the ramekins, cover them with plastic wrap, and refrigerate for up to 24 hours. When you’re ready to bake, just add an extra minute or two to the baking time. The batter also freezes well in the ramekins for up to a month—thaw overnight in the fridge before baking.
Why did my lava cake turn out like a regular cake?
This usually happens when the cake is overbaked. The key is pulling it out when the edges are set but the center still jiggles slightly. Every oven is different, so start checking at 12 minutes. Also, make sure you’re using the right size ramekins—6-ounce ones are ideal for that perfect molten center.
Can I use milk chocolate instead of dark chocolate?
You can, but I don’t recommend it. Milk chocolate has more sugar and less cocoa butter, which can make the lava cake too sweet and affect the texture. If you prefer milk chocolate, try using a mix—half milk chocolate and half dark chocolate—for a balanced result.
What if I don’t have ramekins?
No problem! You can use a standard muffin tin—just grease it well and reduce the baking time by a minute or two. Small oven-safe ceramic bowls or even large custard cups work too. The key is using a vessel that holds about 3/4 cup of batter.
Can I double this recipe?
Yes, this recipe scales beautifully. Just double all the ingredients and use four ramekins. The baking time stays about the same, but keep an eye on them—you might need an extra minute if your oven is crowded. And honestly, having extra lava cakes in the freezer is never a bad thing.
Pin This Recipe!
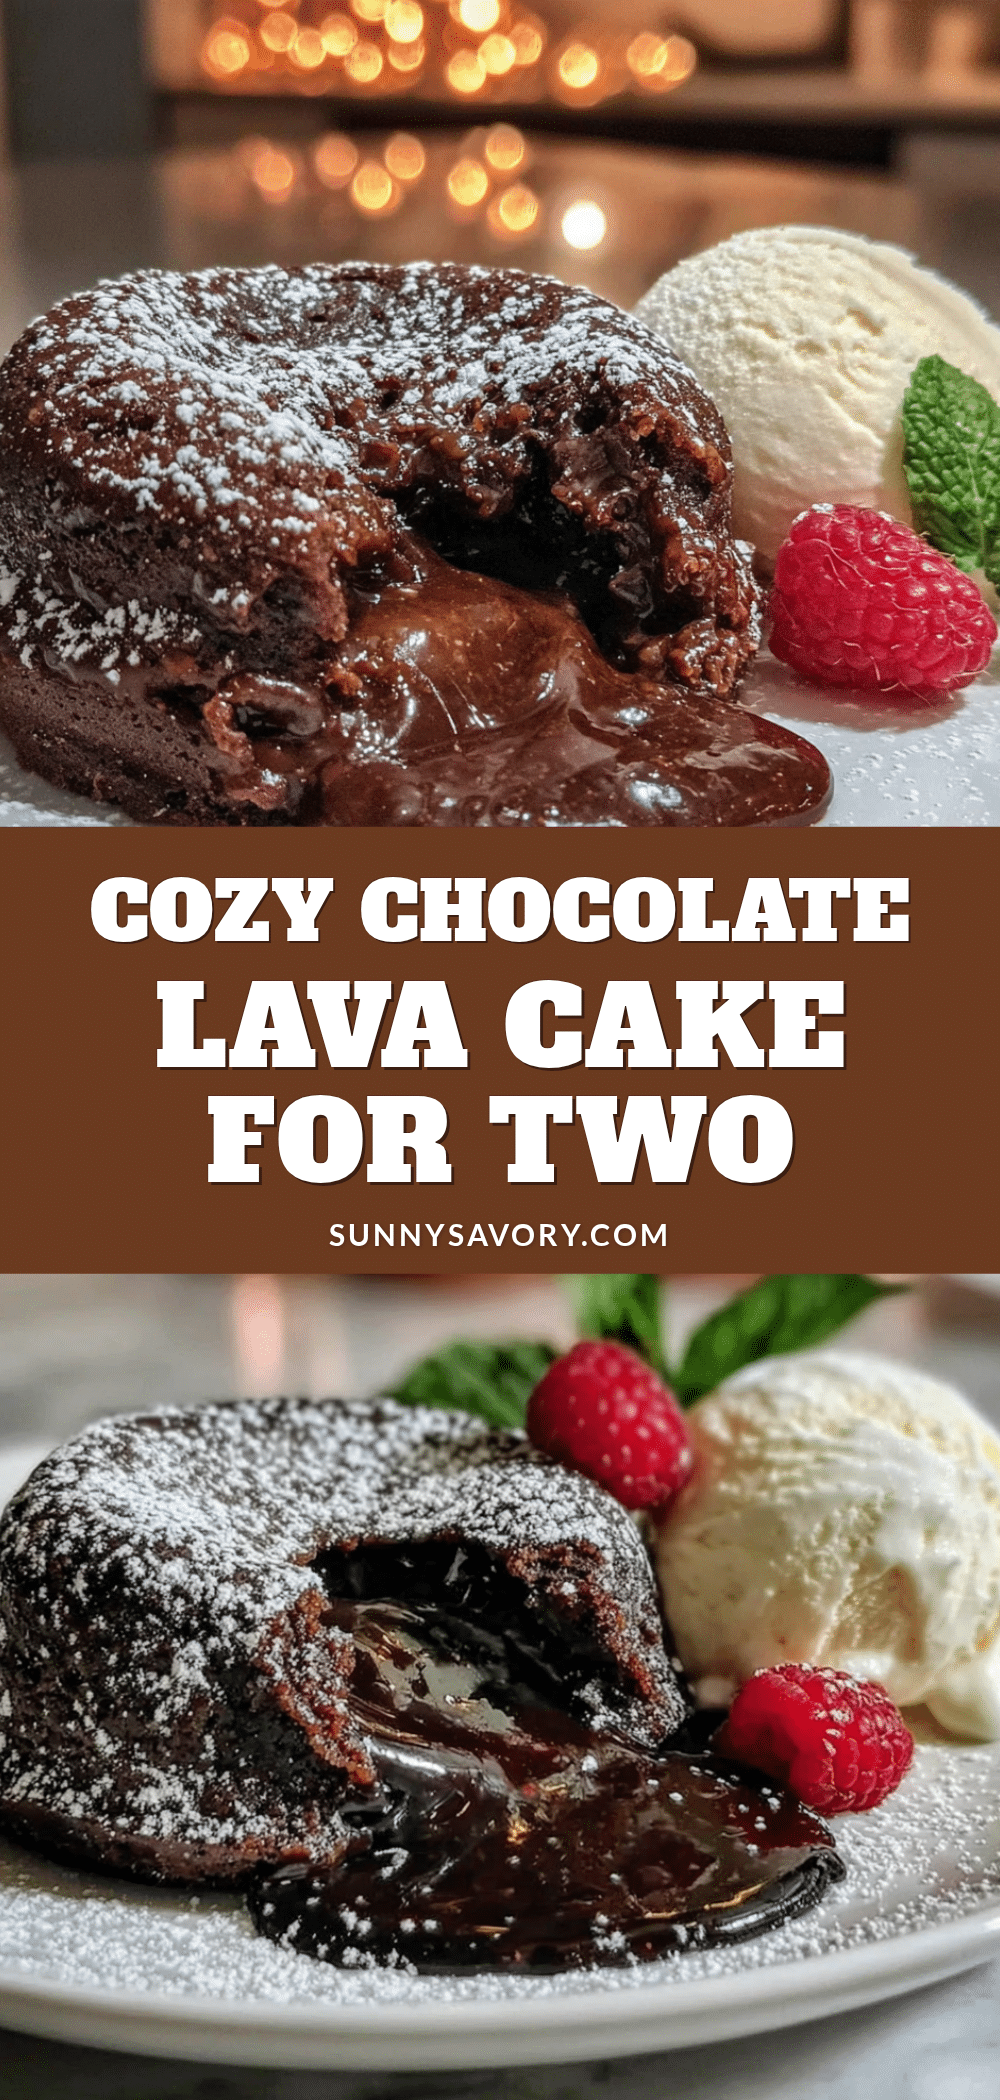
Cozy Chocolate Lava Cake for Two – Easy 15-Minute Recipe
A foolproof chocolate lava cake for two that comes together in under 15 minutes with simple pantry ingredients. Perfect for a cozy night in, this recipe delivers a tender cake with a gooey molten center every time.
- Prep Time: 10 minutes
- Cook Time: 12-14 minutes
- Total Time: 15 minutes
- Yield: 2 servings 1x
- Category: Dessert
- Cuisine: American
Ingredients
- 4 tablespoons (57g) unsalted butter, plus extra for greasing ramekins
- 4 ounces (113g) dark chocolate (60-70% cacao), chopped
- 1/4 cup (50g) granulated sugar
- 2 large eggs plus 1 egg yolk, at room temperature
- 2 tablespoons (16g) all-purpose flour
- 1 teaspoon vanilla extract
- 1/4 teaspoon instant espresso powder (optional)
- 1/8 teaspoon salt
- Powdered sugar, for dusting (optional)
- Vanilla ice cream or lightly whipped cream, for serving (optional)
- Fresh raspberries or strawberries, for serving (optional)
Instructions
- Preheat oven to 425°F (218°C) and position rack in the center.
- Generously grease two 6-ounce ramekins with softened butter, then dust with cocoa powder or flour, tapping out excess.
- Melt butter and chocolate together in a microwave-safe bowl in 30-second bursts, stirring between each, until smooth (about 60-90 seconds total). Let cool slightly.
- In a medium bowl, whisk eggs, egg yolk, and sugar until thick and pale, about 2 minutes, until ribbon-like consistency.
- Add vanilla and espresso powder (if using) to egg mixture and whisk to combine.
- Pour melted chocolate mixture into egg mixture and fold gently with a rubber spatula until just combined.
- Sprinkle flour and salt over batter and fold gently until just incorporated.
- Divide batter evenly between prepared ramekins. Place ramekins on a baking sheet.
- Refrigerate or freeze for 5 minutes.
- Bake for exactly 12-14 minutes, until edges are set and center still jiggles slightly.
- Let cakes rest for 30 seconds. Run a thin knife around edges, invert onto plates, and serve immediately.
- Dust with powdered sugar and add ice cream or berries if desired.
Notes
For best results, use high-quality dark chocolate (60-70% cacao) and avoid chocolate chips. The 5-minute freezer rest is key for a reliable lava effect. Do not overbake; err on the side of underbaking. Serve immediately for the best molten center.
Nutrition
- Serving Size: 1 lava cake
- Calories: 410
- Sugar: 30
- Sodium: 180
- Fat: 28
- Saturated Fat: 16
- Carbohydrates: 38
- Fiber: 3
- Protein: 7
Keywords: chocolate lava cake, molten chocolate cake, easy dessert, quick dessert, dessert for two, chocolate cake, lava cake recipe



