Love this? Save it for later!
Share the inspiration with your friends
I wasn’t expecting to find my new favorite fall cookie recipe from a plumber, but there I was, standing in the hardware aisle at the local home improvement store, listening to a man named Gary explain the exact ratio of pumpkin to butter for the perfect snickerdoodle. He was wearing a stained work shirt and holding a pipe wrench, and I was just trying to find the right size washer for a leaky faucet. But Gary, apparently, had strong opinions about cookies. “The problem with most pumpkin snickerdoodles,” he said, wiping his hands on a rag, “is they’re too cakey. You want them chewy, like a real snickerdoodle, but with that fall flavor.” I was skeptical, honestly. I mean, this was a plumber. But something about his confidence made me grab a notebook from my purse right there in aisle seven.
Gary’s recipe, as it turned out, was scribbled on the back of a receipt from 2019. He’d gotten it from his grandmother, who apparently was known in her small town for her baking. The original version didn’t even have pumpkin in it—that was Gary’s addition after his wife requested something “more autumnal.” He told me he’d tested it seven times before getting it right. Seven times. That’s dedication, you know? And let me tell you, this recipe is the kind that makes you wonder why you ever bothered with full-sized batches in the first place. It’s just two of us in my house, and I got tired of having thirty cookies staring at me from the counter, begging to be eaten. These cozy small-batch pumpkin snickerdoodle cookies make exactly eight perfect cookies, which is somehow both enough and not nearly enough at the same time.
The first time I made them, I used a can of pumpkin that had been sitting in my pantry since last October—you know, that one can you always forget about. The cookies came out soft, spiced, and rolled in that glorious cinnamon-sugar coating that snickerdoodles are famous for. My husband walked in while they were still warm and ate three before I could even get a photo. That’s when I knew this was a keeper. Maybe you’ve been there, standing in an unexpected place, getting cooking advice from someone you never expected to give it. That’s the thing about recipes—they come from the most unlikely sources. And this one, from a plumber named Gary in the hardware aisle, is honestly one of the best fall cookie recipes I’ve ever made.
Why You’ll Love This Recipe
I’ve tested this recipe more times than I care to admit, and I can tell you with absolute confidence that these are not your average pumpkin cookies. They’re chewy, they’re perfectly spiced, and they have that signature snickerdoodle tang from the cream of tartar that just works so well with the pumpkin. Here’s why this recipe stands out:
- Small-Batch Perfection: Makes exactly 8 cookies—no more, no less. Perfect for when you want a treat without committing to a dozen or more.
- Quick & Easy: From start to finish, you’re looking at about 25 minutes. The dough comes together in one bowl, and there’s no chilling required.
- Simple Ingredients: You probably have most of these in your pantry right now. The only “special” ingredient is pumpkin puree, and that’s a fall staple.
- Perfect for Fall Cravings: That warm, spiced flavor with the cinnamon-sugar coating is pure autumn comfort in cookie form.
- Crowd-Pleaser: I’ve brought these to two different gatherings, and both times they disappeared before any other dessert on the table.
- No Leftover Pumpkin Waste: The recipe uses just ¼ cup of pumpkin puree, so you can use the rest for smoothies or pancakes without feeling wasteful.
What makes these different from every other pumpkin cookie recipe out there? It’s the texture, honestly. Most pumpkin cookies are puffy and cake-like, which is fine, but these are dense and chewy with slightly crisp edges. The secret is in the butter-to-pumpkin ratio and a little trick with how you mix the ingredients. I spent three batches getting this right—the first was too flat, the second was too cakey, and the third, well, that was the one where I closed my eyes after the first bite. That’s the feeling I want you to have. That moment where you’re standing in your kitchen, cookie in hand, and everything just feels right with the world.
What Ingredients You Will Need
This recipe uses simple, wholesome ingredients to deliver that perfect chewy texture and warm fall flavor without any fuss. Most of these are pantry staples, and the ones that aren’t are easy to find at any grocery store during the fall season.
- Unsalted butter, softened (4 tablespoons, or 57g) — Make sure it’s at room temperature for proper creaming. I use Kerrygold for its rich flavor, but any good-quality butter works.
- Granulated sugar (⅓ cup, or 67g) — Regular white sugar gives these cookies the perfect sweetness and helps with that slightly crisp edge.
- Light brown sugar, packed (2 tablespoons, or 25g) — This adds moisture and a hint of molasses flavor that complements the pumpkin beautifully.
- Pumpkin puree (¼ cup, or 61g) — Not pumpkin pie filling! Make sure you grab 100% pure pumpkin puree. I prefer Libby’s for its consistent texture.
- Large egg yolk (1) — Just the yolk, not the whole egg. This gives richness without adding too much liquid, which would make the cookies cakey.
- Vanilla extract (½ teaspoon) — Pure vanilla extract makes a difference here. Skip the imitation stuff for these cookies.
- All-purpose flour (¾ cup plus 2 tablespoons, or 112g) — Spoon and level your flour for the most accurate measurement. Scooping directly from the bag can pack in too much.
- Cream of tartar (½ teaspoon) — This is the secret ingredient that gives snickerdoodles their signature tangy flavor and chewy texture.
- Baking soda (¼ teaspoon) — Helps the cookies spread just enough without becoming flat.
- Salt (¼ teaspoon) — Balances the sweetness and enhances all the warm spices.
- Ground cinnamon (½ teaspoon for the dough, plus more for rolling) — Use a good-quality cinnamon like Saigon or Ceylon for the best flavor.
- Ground nutmeg (¼ teaspoon) — Freshly grated if you have it, but pre-ground works perfectly fine.
- Ground ginger (⅛ teaspoon) — Adds that subtle warmth that makes pumpkin recipes taste like fall.
- Ground cloves (⅛ teaspoon) — Just a pinch for depth. A little goes a long way.
- For the cinnamon-sugar coating: 2 tablespoons granulated sugar mixed with 1 teaspoon ground cinnamon
One thing I want to mention about the pumpkin puree—if you open a can and only use ¼ cup, store the rest in an airtight container in the fridge for up to a week. You can use it in smoothies, oatmeal, or even mix it into pancake batter. I’ve also frozen leftover pumpkin puree in ice cube trays for later use. Each cube is about 2 tablespoons, which makes it super convenient for small-batch baking.
Equipment Needed
You don’t need anything fancy for these cookies, which is part of what makes them so great. Here’s what you’ll need:
- Mixing bowls: One medium bowl for the wet ingredients and one small bowl for the cinnamon-sugar coating. I use glass bowls because they’re easy to clean and don’t retain odors.
- Electric hand mixer or stand mixer: You can cream the butter and sugar by hand if you’re feeling strong, but a hand mixer makes it much easier and faster. I’ve used my trusty KitchenAid hand mixer for years, and it’s never let me down.
- Rubber spatula: For scraping down the sides of the bowl and folding in the flour mixture. A silicone spatula is my go-to because it doesn’t scratch my bowls.
- Cookie scoop or tablespoon: For portioning the dough evenly. I use a 1.5-tablespoon cookie scoop, which gives me perfectly uniform cookies every time. If you don’t have one, a regular tablespoon works fine.
- Baking sheet: A standard half-sheet pan works perfectly. I recommend lining it with parchment paper for easy cleanup and even baking.
- Cooling rack: Letting the cookies cool on a rack prevents them from getting soggy on the bottom. If you don’t have one, you can transfer them to a plate after a few minutes.
- Measuring cups and spoons: Accurate measurements matter in baking, so use proper measuring tools. I prefer metal measuring cups for dry ingredients and glass for liquids.
If you don’t have a hand mixer, you can absolutely cream the butter and sugar with a wooden spoon—it just takes a bit more elbow grease. And if you don’t have a cookie scoop, use two spoons to portion the dough, or just roll the dough into balls with your hands. The cookies might not be perfectly uniform, but they’ll taste just as good. Honestly, the slightly imperfect ones are my favorite because they feel more homemade.
Preparation Method
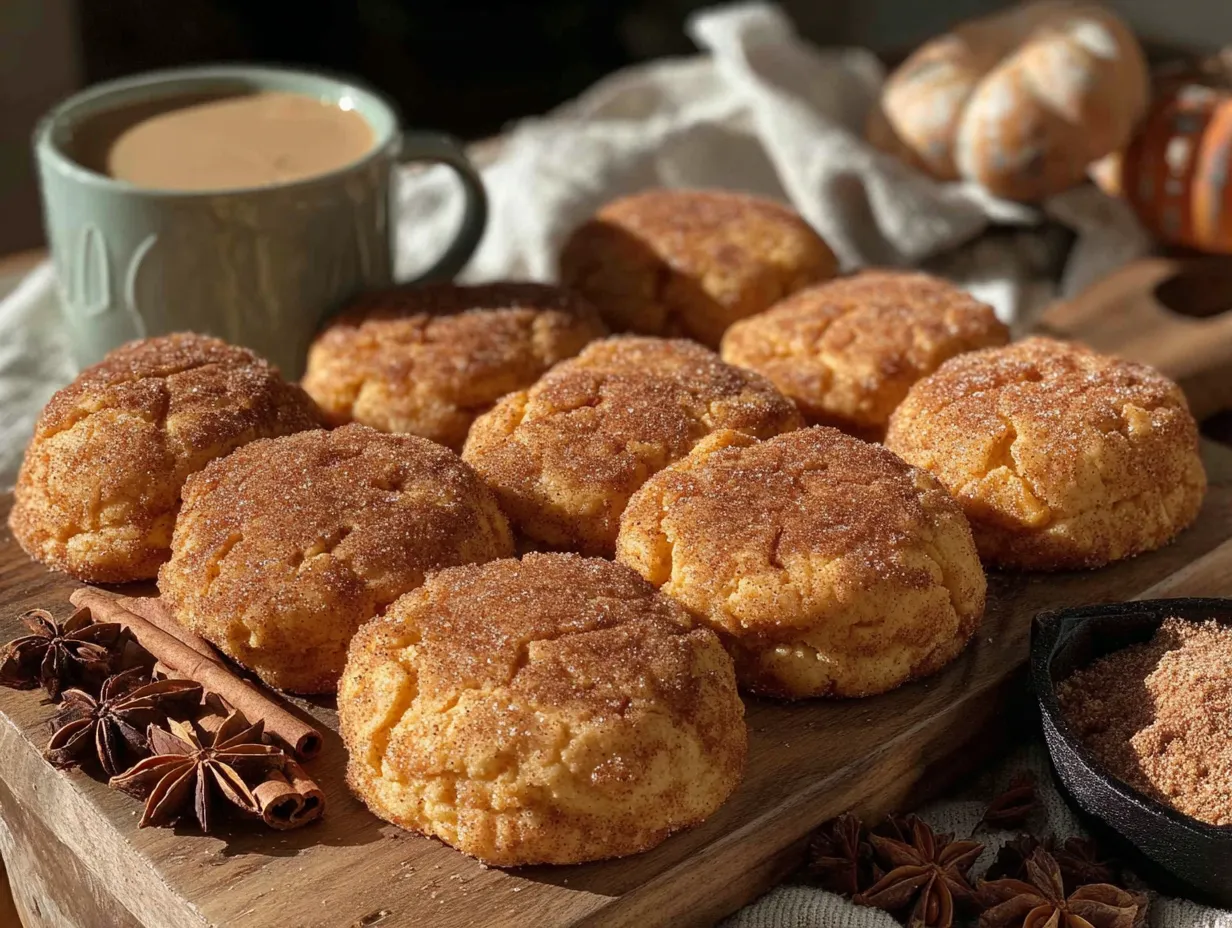
Let me walk you through this step by step. I’ve made these cookies more times than I can count, and I’ve learned a few things along the way that will help you get perfect results on your first try.
- Preheat your oven to 350°F (175°C) and line a baking sheet with parchment paper. I like to do this first so the oven is fully heated by the time the dough is ready. Trust me on this—putting cookies into an oven that hasn’t fully preheated can mess with their spread and texture.
- In a medium mixing bowl, cream together the softened butter, granulated sugar, and brown sugar. Beat on medium speed for about 2 minutes until the mixture is light, fluffy, and pale in color. You’re looking for a texture that’s almost like a thick paste. Scrape down the sides and bottom of the bowl with your spatula halfway through to make sure everything is incorporated evenly.
- Add the pumpkin puree, egg yolk, and vanilla extract. Beat on low speed until just combined—about 30 seconds. The mixture might look a little separated at this point, and that’s totally normal. Don’t overmix it, or the cookies could end up tough. I made that mistake on my first batch, and they were definitely less tender than they should have been.
- In a separate small bowl, whisk together the flour, cream of tartar, baking soda, salt, cinnamon, nutmeg, ginger, and cloves. Whisking ensures the leavening agents and spices are evenly distributed throughout the flour. If you skip this step, you might end up with one cookie that’s super spicy and another that’s bland.
- Gradually add the dry ingredients to the wet ingredients, mixing on low speed. Add the flour mixture in two additions, mixing just until the flour disappears after each addition. You should see a soft, slightly sticky dough form. Don’t keep mixing once the flour is incorporated—overmixing develops gluten, which can make the cookies tough and less tender.
- In a small bowl, mix together the 2 tablespoons of sugar and 1 teaspoon of cinnamon for the coating. Use a fork to combine them thoroughly. I sometimes add an extra pinch of cinnamon because I love that warm flavor, but the standard ratio is perfect for most people.
- Using a cookie scoop or tablespoon, portion the dough into 8 equal balls, each about 1.5 tablespoons in size. Roll each ball between your palms until smooth. The dough will be slightly sticky, so lightly dampening your hands can help. Don’t worry if they’re not perfectly round—the rolling in cinnamon sugar will smooth them out.
- Roll each dough ball in the cinnamon-sugar mixture, coating it completely. I like to press the dough gently into the sugar mixture to make sure it sticks well. Place the coated dough balls on the prepared baking sheet, spacing them about 2 inches apart. These cookies spread a bit, so give them room to breathe.
- Bake for 10 to 12 minutes, or until the edges are set and the centers look slightly puffy and cracked. The cookies will look underdone in the middle when you take them out—that’s exactly what you want. They continue to bake on the hot baking sheet as they cool. I usually pull mine out at exactly 11 minutes for that perfect chewy texture. If you like crisper cookies, go for 12 minutes.
- Let the cookies cool on the baking sheet for 5 minutes. This is crucial—if you try to move them right away, they’ll fall apart because they’re still soft. After 5 minutes, transfer them to a wire cooling rack to cool completely. Or, you know, eat one warm. I won’t tell anyone.
One thing I’ve learned from making these cookies is that the dough is quite forgiving. If you accidentally add a little too much flour, the cookies will be slightly thicker and more cake-like—still delicious, just different. If you add too little flour, they’ll spread more and have thinner, crispier edges. Both versions are good, honestly, so don’t stress about perfection. The first time I made these, I forgot the cream of tartar entirely, and they were still tasty—just not as snickerdoodle-y. You learn as you go, right?
Cooking Tips & Techniques
After making these cookies more times than I care to count, I’ve picked up some tricks that make a real difference. Let me share what I’ve learned so you can skip the trial-and-error phase.
Room temperature ingredients matter. I know, I know, everyone says this, but it’s true for a reason. Cold butter won’t cream properly with the sugar, which means your cookies won’t have that light, tender texture. If you forget to take the butter out ahead of time, cut it into small cubes and let it sit on the counter for 15 minutes. For the egg yolk, place it in a bowl of warm water for 5 minutes to bring it to room temperature quickly.
Don’t skip the cream of tartar. This is what gives snickerdoodles their signature tangy flavor and helps create that chewy texture. If you don’t have cream of tartar, you can substitute it with 1 teaspoon of lemon juice or white vinegar, but honestly, the flavor won’t be quite the same. I once tried making these without it because I thought I could get away with it, and they just tasted like regular pumpkin cookies. Good, but not snickerdoodles.
Measure your flour correctly. This is the most common mistake I see in baking. Spoon the flour into your measuring cup and level it off with a knife. Scooping directly from the bag packs the flour down, and you can end up with up to 25% more flour than the recipe calls for. That extra flour will make your cookies dry and cakey instead of soft and chewy.
Watch the bake time closely. Ovens vary, so start checking your cookies at the 10-minute mark. You’re looking for edges that are set and lightly golden, with centers that still look slightly underdone and puffy. The cookies will continue to bake on the hot sheet after you pull them out. If you wait until the centers look fully baked, they’ll be overdone and dry by the time they cool.
Let them cool properly. I know it’s tempting to grab one right out of the oven, but those 5 minutes on the baking sheet are non-negotiable. The cookies are too fragile to move when they’re hot, and they need that time to set up properly. If you try to transfer them too early, you’ll end up with a crumbly mess. Ask me how I know.
For consistently sized cookies, use a cookie scoop. This ensures all your cookies bake evenly because they’re the same size. If you’re using a tablespoon, try to make each scoop as uniform as possible. Uneven cookies mean some will be overdone while others are underdone, and nobody wants that.
Variations & Adaptations
One of the best things about this recipe is how adaptable it is. I’ve tried several variations over the past few months, and here are my favorites:
Gluten-Free Version: Substitute the all-purpose flour with a 1:1 gluten-free baking flour blend. I’ve used Bob’s Red Mill 1-to-1 Baking Flour with great results. The texture is slightly more delicate, but the flavor is spot-on. Add an extra tablespoon of flour if the dough seems too sticky.
Vegan Adaptation: Use vegan butter (I like Miyoko’s) and replace the egg yolk with 1 tablespoon of aquafaba (the liquid from a can of chickpeas) mixed with 1 teaspoon of cornstarch. The cookies won’t be quite as rich, but they’re still delicious. I tested this version for a friend who’s vegan, and she said they were the best pumpkin cookies she’d had in years.
Extra Spiced Version: If you’re like me and can’t get enough of those warm fall flavors, increase the cinnamon to 1 teaspoon and add an extra ¼ teaspoon of ginger and a pinch of cardamom. The cardamom adds this lovely floral note that pairs beautifully with the pumpkin. I made this version for a fall gathering, and everyone asked for the recipe.
Chocolate Chip Pumpkin Snickerdoodles: Fold in ¼ cup of mini chocolate chips after the flour is incorporated. The chocolate adds a nice contrast to the spiced cookie, and mini chips distribute more evenly than regular-sized ones. This is my husband’s favorite variation—he says it’s like a pumpkin snickerdoodle and a chocolate chip cookie had a delicious baby.
Maple Glaze Topping: For an extra special treat, whisk together ½ cup of powdered sugar, 1 tablespoon of maple syrup, and 1 teaspoon of milk. Drizzle this over the cooled cookies. The maple flavor complements the pumpkin and spices beautifully. I made these for a Friendsgiving dinner, and they were the first thing to disappear from the dessert table.
Nutty Addition: Toast ¼ cup of pecans or walnuts, chop them finely, and fold them into the dough. The nuts add a lovely crunch and earthy flavor that pairs perfectly with the pumpkin and spices. Just make sure they’re cooled completely before adding them to the dough, or they’ll melt the butter.
Serving & Storage Suggestions
These cookies are best served slightly warm, when the edges are still a little soft and the cinnamon-sugar coating is at its most fragrant. I like to pop them in the microwave for about 10 seconds if they’ve been sitting for a while—it brings back that fresh-from-the-oven texture. Serve them with a glass of cold milk, a warm cup of chai tea, or a pumpkin spice latte for the ultimate fall experience.
For a more elaborate presentation, arrange the cookies on a rustic wooden board with some apple slices, a few cinnamon sticks, and maybe a small bowl of whipped cream for dipping. They’re also wonderful crumbled over vanilla ice cream for an impromptu dessert sundae. I did this last week when I had two leftover cookies, and honestly, it might be my new favorite way to enjoy them.
Storage: Store the cookies in an airtight container at room temperature for up to 4 days. Place a piece of bread in the container to help keep them soft—the cookies will absorb moisture from the bread, staying tender longer. I learned this trick from my grandmother, and it works like magic.
Freezing: You can freeze either the baked cookies or the unbaked dough. For baked cookies, let them cool completely, then place them in a single layer in a freezer-safe container with parchment paper between layers. They’ll keep for up to 3 months. Thaw at room temperature for about 30 minutes, then warm in the microwave for 10 seconds.
For the dough, portion it into balls, roll them in the cinnamon-sugar mixture, and place them on a parchment-lined baking sheet. Freeze until solid, then transfer to a freezer bag. When you’re ready to bake, place the frozen dough balls on a baking sheet and bake for 12 to 14 minutes—no need to thaw. This is my favorite method because I can have fresh cookies in under 15 minutes whenever the craving strikes.
One thing I’ve noticed is that these cookies actually get better on the second day. The flavors meld together, and the texture becomes even more chewy and tender. So don’t worry if you can’t eat them all on day one—they’ll still be delicious tomorrow.
Nutritional Information & Benefits
Per cookie (based on 8 cookies):
| Nutrient | Amount |
|---|---|
| Calories | 185 |
| Total Fat | 9g |
| Saturated Fat | 5g |
| Cholesterol | 45mg |
| Sodium | 115mg |
| Total Carbohydrates | 25g |
| Dietary Fiber | 1g |
| Sugars | 15g |
| Protein | 2g |
| Vitamin A | 15% DV |
| Iron | 4% DV |
These cookies offer some surprising nutritional benefits thanks to the pumpkin puree. Pumpkin is rich in vitamin A, which supports eye health and immune function. It’s also a good source of fiber, which helps with digestion and keeps you feeling satisfied. The cinnamon in the coating has anti-inflammatory properties and can help regulate blood sugar levels. Of course, these are still cookies, so enjoy them in moderation—but it’s nice to know they’re not completely devoid of nutritional value.
For those with dietary concerns, this recipe contains gluten, dairy, and eggs. The gluten-free and vegan variations I mentioned earlier work well for most people with those restrictions. If you’re watching your sugar intake, you can reduce the sugar in the dough by 2 tablespoons without significantly affecting the texture, though the cookies will be slightly less sweet.
FAQs
Can I make these cookies without cream of tartar?
Yes, but they won’t have that classic snickerdoodle tang. You can substitute ½ teaspoon of lemon juice or white vinegar, but the flavor will be slightly different. The cream of tartar also helps with the chewy texture, so without it, the cookies might be a bit more cake-like.
Why did my cookies turn out cakey instead of chewy?
This usually happens for one of three reasons: too much flour (make sure you’re spooning and leveling), overmixing the dough (mix just until combined), or overbaking (pull them out when the centers still look slightly underdone). Also, make sure you’re using pumpkin puree and not pumpkin pie filling, which has added sugar and thickeners.
Can I use pumpkin pie spice instead of individual spices?
Absolutely! Substitute 1 teaspoon of pumpkin pie spice for the cinnamon, nutmeg, ginger, and cloves. The flavor will be slightly different—pumpkin pie spice usually has a bit more nutmeg and allspice—but it works beautifully. I’ve done this when I was out of one of the individual spices, and the cookies were still delicious.
How do I make these cookies dairy-free?
Use a high-quality vegan butter stick (not the spreadable kind from a tub, as it has too much water). I recommend Miyoko’s or Country Crock Plant Butter. The texture will be slightly different, but the cookies will still be chewy and delicious. Make sure your vegan butter is at room temperature before creaming.
Can I double this recipe?
Yes, this recipe doubles beautifully. Just double all the ingredients and bake in batches. You might need to add an extra minute or two to the bake time if you’re baking two sheets at once, and rotate the pans halfway through for even baking. I’ve made a double batch for holiday parties, and they’re always a hit.
Conclusion
These cozy small-batch pumpkin snickerdoodle cookies are everything I want in a fall dessert—warm, spiced, chewy, and perfectly portioned for when you don’t need a mountain of cookies staring at you from the counter. They came from an unlikely source (thanks again, Gary the plumber), but they’ve become a staple in my kitchen every autumn. The combination of pumpkin and classic snickerdoodle flavors is just magical, and the texture is exactly what I look for in a cookie: soft, tender, with slightly crisp edges and that glorious cinnamon-sugar coating.
I hope you give these cookies a try. Feel free to customize them based on what you have on hand or what sounds good to you—that’s the beauty of a simple recipe like this. Add chocolate chips, throw in some nuts, or drizzle them with maple glaze. Make them your own. And when you do, I’d love to hear about it. Drop a comment below and let me know how they turned out, what variations you tried, or if you have any questions. Your feedback helps me create better recipes, and I genuinely love hearing from you.
Happy baking, my friend. May your kitchen smell like cinnamon and your cookies be perfectly chewy. And remember—sometimes the best recipes come from the most unexpected places. Keep your ears open and your oven preheated. You never know when a plumber might change your cookie game forever.
Pin This Recipe!
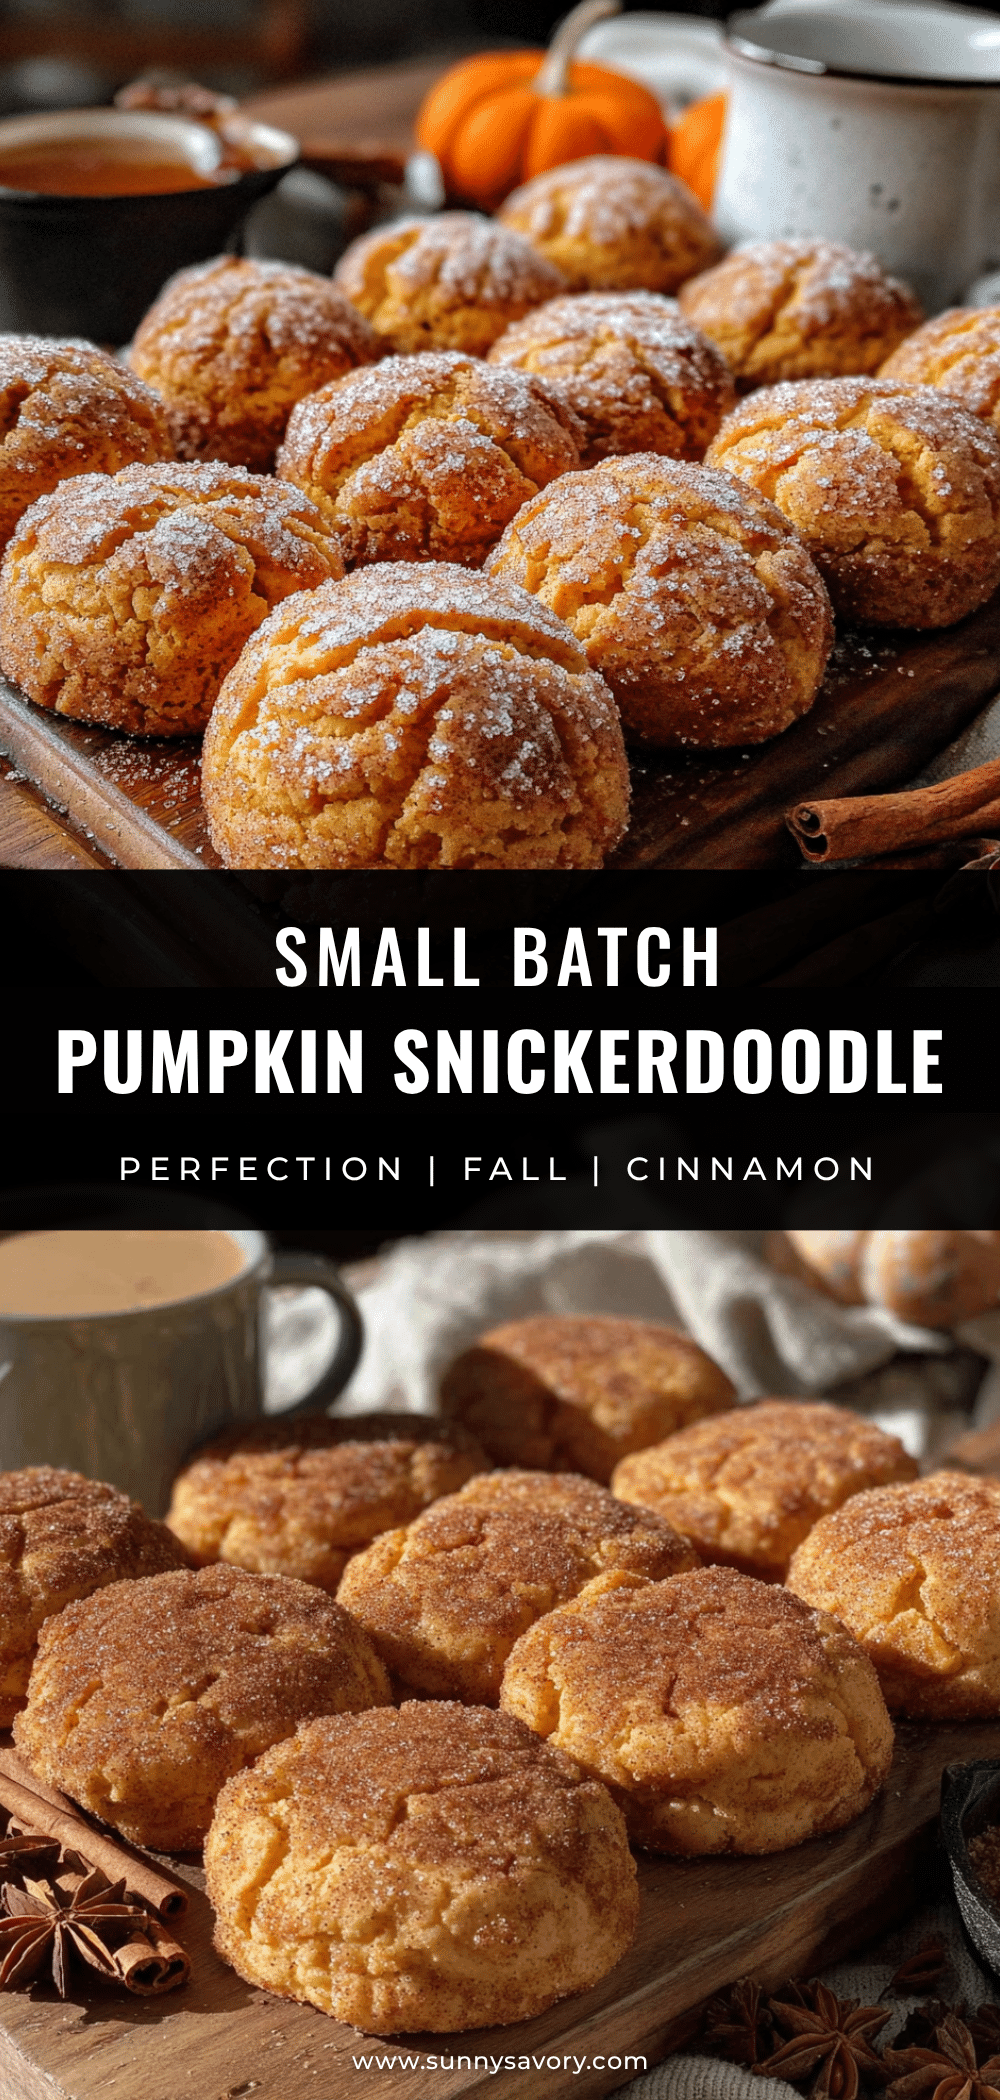
Cozy Small-Batch Pumpkin Snickerdoodle Cookies: Easy Fall Recipe

These chewy, perfectly spiced pumpkin snickerdoodle cookies are made in a small batch of eight, with no chilling required and a simple one-bowl dough. They’re the ideal fall treat with a classic cinnamon-sugar coating and a tender, not cakey, texture.
- Prep Time: 15 minutes
- Cook Time: 11 minutes
- Total Time: 26 minutes
- Yield: 8 cookies 1x
- Category: Dessert
- Cuisine: American
Ingredients
- 4 tablespoons (57g) unsalted butter, softened
- 1/3 cup (67g) granulated sugar
- 2 tablespoons (25g) light brown sugar, packed
- 1/4 cup (61g) pumpkin puree (not pumpkin pie filling)
- 1 large egg yolk
- 1/2 teaspoon vanilla extract
- 3/4 cup plus 2 tablespoons (112g) all-purpose flour
- 1/2 teaspoon cream of tartar
- 1/4 teaspoon baking soda
- 1/4 teaspoon salt
- 1/2 teaspoon ground cinnamon (for dough)
- 1/4 teaspoon ground nutmeg
- 1/8 teaspoon ground ginger
- 1/8 teaspoon ground cloves
- For the cinnamon-sugar coating: 2 tablespoons granulated sugar mixed with 1 teaspoon ground cinnamon
Instructions
- Preheat your oven to 350°F (175°C) and line a baking sheet with parchment paper.
- In a medium mixing bowl, cream together the softened butter, granulated sugar, and brown sugar on medium speed for about 2 minutes until light, fluffy, and pale. Scrape down the sides halfway through.
- Add the pumpkin puree, egg yolk, and vanilla extract. Beat on low speed until just combined, about 30 seconds. The mixture may look slightly separated; do not overmix.
- In a separate small bowl, whisk together the flour, cream of tartar, baking soda, salt, cinnamon, nutmeg, ginger, and cloves.
- Gradually add the dry ingredients to the wet ingredients in two additions, mixing on low speed just until the flour disappears after each addition. The dough should be soft and slightly sticky.
- In a small bowl, mix together the 2 tablespoons of sugar and 1 teaspoon of cinnamon for the coating.
- Using a cookie scoop or tablespoon, portion the dough into 8 equal balls, each about 1.5 tablespoons. Roll each ball between your palms until smooth.
- Roll each dough ball in the cinnamon-sugar mixture, coating completely. Place on the prepared baking sheet, spacing them about 2 inches apart.
- Bake for 10 to 12 minutes, or until the edges are set and the centers look slightly puffy and cracked. The centers will appear underdone; that’s desired.
- Let the cookies cool on the baking sheet for 5 minutes, then transfer to a wire cooling rack to cool completely.
Notes
For best results, use room temperature butter and egg yolk. Do not overmix the dough. The cookies continue to bake on the hot sheet after removal; pull them out when centers are still slightly underdone. Store in an airtight container at room temperature for up to 4 days. Freeze baked cookies or unbaked dough balls for up to 3 months.
Nutrition
- Serving Size: 1 cookie
- Calories: 185
- Sugar: 15
- Sodium: 115
- Fat: 9
- Saturated Fat: 5
- Carbohydrates: 25
- Fiber: 1
- Protein: 2
Keywords: pumpkin snickerdoodle cookies, small batch cookies, fall cookies, chewy pumpkin cookies, easy pumpkin recipe