Love this? Save it for later!
Share the inspiration with your friends
My neighbor Karen wasn’t trying to impress anyone. I’d stopped by to borrow an egg for a cake I was messing up, and this smell—this buttery, garlicky, herby smell—hit me before I even got through the screen door. She was just standing there in her faded gardening jeans, barefoot, casually flipping these little golden potatoes in a cast iron skillet like it was nothing. “Oh, those?” she said when I asked, pointing her spatula at the pan. “Just some smashed potatoes. I had some tiny ones from the farmer’s market.” She didn’t even look up. She was more concerned about the mud her dog had tracked across the kitchen floor. And honestly? That’s the whole magic of this recipe. It’s not fussy. It’s not complicated. It’s the kind of side dish that makes you look like you know what you’re doing without you actually having to try that hard. I stood there, leaning against her counter, watching her work while my cake batter sat abandoned at home. She boiled them, smashed them, drenched them in garlic and herbs, and popped them under the broiler. Twenty minutes later, I was eating one straight off the pan, burned my tongue, and didn’t care. I mean, maybe you’ve been there—that moment when you realize the best food comes from people who aren’t even thinking about it. That’s this recipe. It’s for spring dinners when you want something crispy and golden on the table without a lot of drama. It’s for those evenings when the light is still hanging around at 6 p.m. and you can eat outside. And it’s for when you want a side dish that steals the whole show.
Why You’ll Love This Recipe
Let me tell you why this recipe has become my go-to spring side dish. I’ve tested it about a dozen times—burned my fair share of garlic, over-smashed a few potatoes into oblivion—but I’ve landed on a version that just works. It hits that sweet spot between crispy and tender, buttery and bright. Here’s what makes it stand out from every other potato recipe you’ve tried.
- Quick & Easy: These come together in about 45 minutes, start to finish. Most of that is hands-off boiling and roasting time, so you can prep the rest of your dinner while the oven does the work.
- Simple Ingredients: You probably already have baby potatoes, butter, garlic, and a few fresh herbs in your kitchen. No fancy grocery store trips required.
- Perfect for Spring: This dish is made for those transitional weeks when you’re craving something hearty but still light enough for a patio dinner. It goes with grilled chicken, roasted fish, or a simple spring salad.
- Crowd-Pleaser: I’ve brought these to three different potlucks this spring, and every single time, someone asks for the recipe. Kids love the crispy edges. Adults love the garlic butter. It’s a universal win.
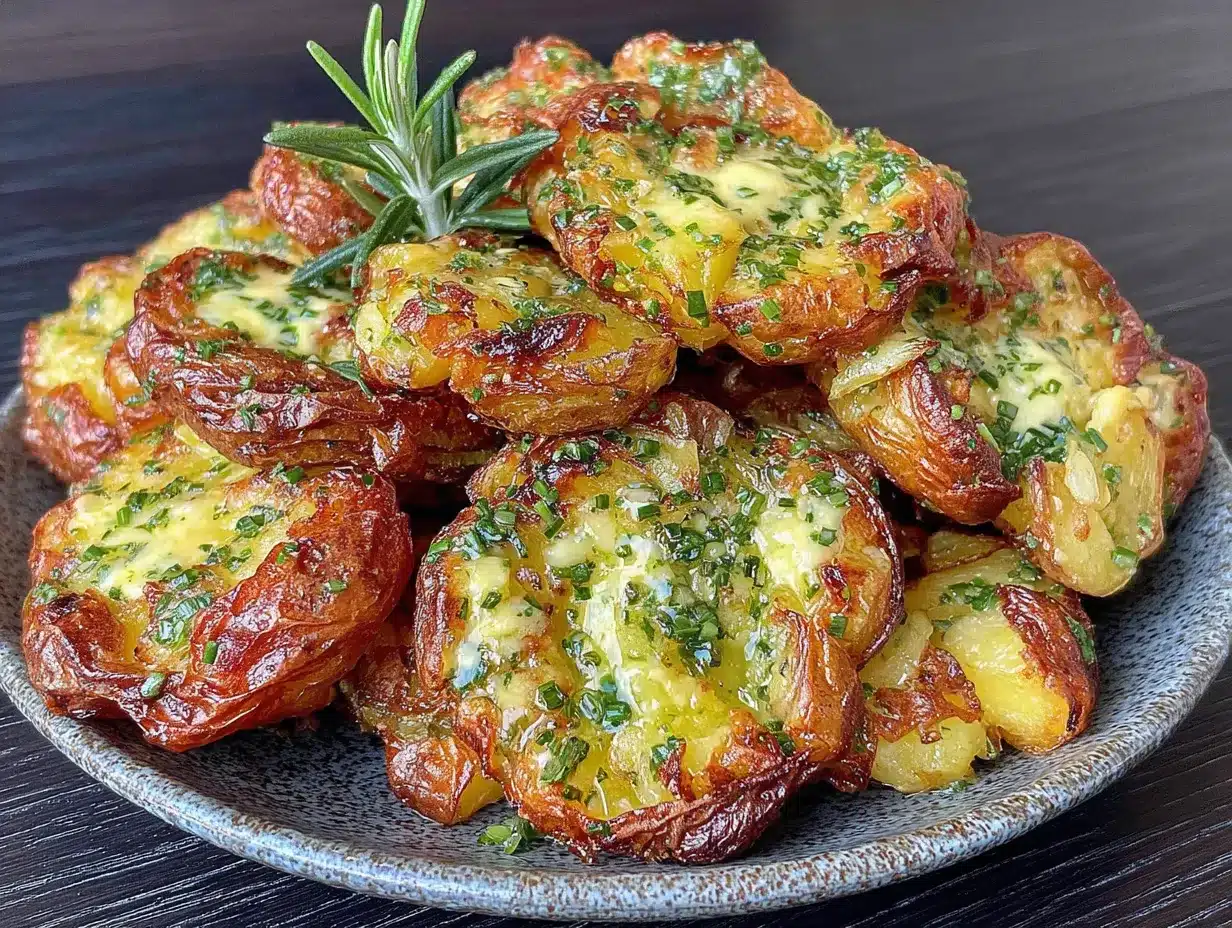
- Unbelievably Delicious: The texture is what gets me every time. That contrast between the crunchy, golden-brown exterior and the fluffy, almost mashed interior is next-level comfort food. And the garlic herb butter? It seeps into every crack and crevice. Honestly, it’s the kind of dish that makes you close your eyes after the first bite.
What makes this version different is the technique. Most recipes just boil and smash, but I’ve added a step where you let the potatoes steam dry before smashing. It sounds small, but it makes a huge difference in how crispy they get. Plus, the garlic herb butter is infused, not just melted on top. That little extra step means every single bite is packed with flavor, not just the top layer.
What Ingredients You Will Need
This recipe uses simple, wholesome ingredients to deliver bold flavor and satisfying texture without the fuss. Most of these are pantry staples or easy to find at any grocery store, especially in spring when fresh herbs are at their peak.
For the Potatoes
- 1 ½ pounds baby potatoes or small Yukon Gold potatoes (look for ones that are about 1-2 inches in diameter; uniform size helps them cook evenly)
- 2 tablespoons kosher salt (for the boiling water; don’t skip this—it seasons the potatoes from the inside out)
- 2 tablespoons olive oil (for drizzling before roasting; helps get that golden crust)
- Freshly ground black pepper (to taste)
For the Garlic Herb Butter
- 4 tablespoons unsalted butter (I prefer Kerrygold for its richness, but any good-quality butter works)
- 4 cloves garlic, minced (fresh is non-negotiable here—don’t use the jarred stuff)
- 2 tablespoons fresh parsley, finely chopped (flat-leaf or curly both work)
- 1 tablespoon fresh chives, finely chopped (adds a mild oniony brightness)
- 1 teaspoon fresh thyme leaves (or ½ teaspoon dried, but fresh is better for spring)
- ¼ teaspoon red pepper flakes (optional, but I love the little kick)
- Flaky sea salt (for finishing; Maldon is my go-to)
A few ingredient notes I’ve learned the hard way. First, the potato size matters more than you think. If you use potatoes that are too big, they take forever to boil and don’t smash evenly. If they’re too small, they fall apart. Aim for that golf ball to ping-pong ball size range. Second, fresh herbs really do make a difference here. In spring, when chives and parsley are popping up everywhere, it feels wrong to use dried. But if you’re making this in the dead of winter, dried thyme and freeze-dried chives will still give you a decent result. Third, I’ve tested this with both salted and unsalted butter. If you use salted, cut back on the finishing salt a little. The garlic should be minced fine—not crushed into a paste, but small enough that it melts into the butter without burning.
Equipment Needed
You don’t need a lot of fancy equipment for this recipe, which is part of why I love it. Here’s what you’ll need:
- Large pot (4-5 quart, for boiling the potatoes)
- Colander (for draining)
- Baking sheet (a rimmed half-sheet pan works best; the rim catches any butter drips)
- Parchment paper or silicone baking mat (parchment is easier for cleanup)
- Potato masher or flat-bottomed glass (for smashing; I actually prefer a sturdy glass for more control)
- Small saucepan (for melting the butter and infusing the garlic)
- Chef’s knife and cutting board
- Measuring spoons
If you don’t have a potato masher, don’t worry. I’ve used the bottom of a coffee mug, a meat tenderizer, and even a clean wine bottle in a pinch. Just make sure whatever you use is flat and sturdy. Also, if you have a convection oven, use it. The circulating air makes the potatoes even crispier. Just reduce the temperature by 25 degrees and check them a few minutes early.
Preparation Method
Alright, let’s get cooking. I’ll walk you through every step, including the little tricks I’ve picked up along the way.
- Preheat your oven to 425°F (220°C). Line a rimmed baking sheet with parchment paper. This gives the potatoes a non-stick surface and makes cleanup a breeze.
- Boil the potatoes. Place the baby potatoes in a large pot and cover them with cold water by about 2 inches. Add 2 tablespoons of kosher salt to the water. Bring to a boil over high heat, then reduce to a simmer. Cook for 15-20 minutes, until the potatoes are fork-tender. You should be able to pierce one easily with a paring knife, but it shouldn’t fall apart. Pro tip: Start checking at 12 minutes if your potatoes are on the smaller side.
- Drain and steam dry. Drain the potatoes in a colander and let them sit for 5 minutes. This is the step most people skip, but it’s crucial. The steam evaporates the excess moisture, which means the potatoes will crisp up instead of steam in the oven. I once skipped this step in a hurry, and my potatoes came out soggy. Never again.
- Smash the potatoes. Transfer the potatoes to the prepared baking sheet, leaving space between each one. Using a potato masher or the bottom of a glass, gently press down on each potato until it flattens to about ½-inch thick. The edges should crack and split—that’s where the crispy bits come from. Don’t press too hard or they’ll fall apart. You want them smashed, not obliterated.
- First roast. Drizzle the smashed potatoes with olive oil and season with black pepper. Roast for 15 minutes. This gives them a head start on crisping before we add the butter.
- Make the garlic herb butter. While the potatoes roast, melt the butter in a small saucepan over medium-low heat. Add the minced garlic and cook for 1-2 minutes, until fragrant but not browned. Remove from heat and stir in the parsley, chives, thyme, and red pepper flakes. Watch the garlic carefully—burnt garlic is bitter and will ruin the whole dish.
- Finish roasting. Remove the baking sheet from the oven. Spoon the garlic herb butter evenly over each smashed potato, making sure some gets into the cracks. Return to the oven and roast for another 10-15 minutes, until the edges are deep golden brown and crispy.
- Broil for extra crunch (optional but recommended). Switch the oven to broil and cook for 1-2 minutes, watching closely. The tops should bubble and brown even more. I burned a batch here once by walking away. Don’t do that. Stay by the oven.
- Finish and serve. Remove from the oven and sprinkle immediately with flaky sea salt. Let them rest for 2 minutes before serving—the potatoes need a moment to set, and you need a moment to not burn your mouth. Trust me on this.
Cooking Tips & Techniques
I’ve made this recipe more times than I can count, and I’ve learned a few things the hard way. Here’s what I wish someone had told me.
Don’t overcrowd the pan. This is the number one mistake I see. If the potatoes are too close together, they steam instead of roast. Leave at least an inch of space between each smashed potato. If you need to, use two baking sheets. It’s worth the extra dish.
Dry those potatoes thoroughly. I mentioned the steam-drying step above, but let me emphasize it again. Wet potatoes = soggy potatoes. After draining, you can even pat them gently with a clean kitchen towel if you’re in a hurry. The drier they are, the crispier they’ll get.
Smash with confidence but not aggression. There’s a sweet spot. You want the potato to flatten and crack, but you don’t want it to disintegrate into a pile of mush. If you’re using a glass, press straight down without twisting. Twisting can tear the potato apart.
Timing is everything with the garlic. Garlic burns fast. When you’re making the butter, keep the heat low and stir constantly. The moment it turns golden, pull it off the heat. I’ve had to start over more than once because I got distracted and let it go too far. It happens to everyone.
Use a rimmed baking sheet. The butter will bubble up and spread as it roasts. A rimless sheet will let it drip into your oven, which means smoke and a mess. Learn from my mistake.
Let them rest before serving. I know it’s hard to wait, but those two minutes of resting allow the butter to soak into the potato and the exterior to stay crispy. If you serve them straight from the oven, the butter runs off and the crunch softens.
Variations & Adaptations
One of the best things about this recipe is how flexible it is. Here are some variations I’ve tried and loved.
Herb Swap: Not a fan of parsley? Use basil, dill, or tarragon instead. In late spring, I love using fresh mint and a squeeze of lemon. It’s bright and unexpected. Rosemary also works beautifully, but use it sparingly—it can overpower the dish.
Cheesy Version: After spooning on the garlic butter, sprinkle the potatoes with ¼ cup of grated Parmesan or pecorino. Roast as directed. The cheese melts into the cracks and gets incredibly crispy. My neighbor Karen actually tried this version after I shared the recipe with her, and she said it was “dangerously good.”
Vegan Adaptation: Swap the butter for a high-quality vegan butter or use olive oil mixed with a little nutritional yeast for that savory depth. The garlic and herbs still shine through beautifully. I’ve made this for a vegan friend’s birthday brunch, and no one missed the butter.
Spicy Kick: Add an extra ½ teaspoon of red pepper flakes to the butter, or drizzle the finished potatoes with a little sriracha or chili crisp. The heat pairs perfectly with the creamy potato interior.
Lemon-Herb Version: Add the zest of one lemon to the butter along with the herbs, and finish with a squeeze of fresh lemon juice. It’s incredibly fresh and perfect for spring. I made this version for Easter brunch last year, and it was the first thing to disappear from the table.
Air Fryer Option: If you don’t want to heat up your oven, you can finish these in an air fryer. After boiling and smashing, brush the potatoes with the garlic herb butter and air fry at 400°F for 10-12 minutes, flipping halfway through. They come out just as crispy, if not more.
Serving & Storage Suggestions
These potatoes are best served hot, straight from the oven, when the edges are at their crispiest and the butter is still bubbling. I like to transfer them to a warm platter and sprinkle with a little extra flaky salt and fresh herbs right before serving. They’re great as a side for grilled salmon, roasted chicken, a simple steak, or even a big spring salad with vinaigrette.
If you’re serving them at a party or potluck, keep them warm in a 200°F oven for up to 30 minutes. Just spread them out on the baking sheet so they don’t steam each other. They’ll stay crispy surprisingly well.
Storage: Leftovers (if you have any) can be stored in an airtight container in the refrigerator for up to 3 days. The texture will soften, but the flavor is still fantastic.
Reheating: The best way to revive them is in the oven or air fryer. Spread them on a baking sheet and reheat at 400°F for 5-7 minutes. The microwave will make them soggy, so avoid it if you can. I’ve also reheated them in a cast iron skillet with a little extra butter, and they came out almost as good as fresh.
One thing I love about this recipe is that the flavors actually deepen overnight. The garlic and herbs meld together, and the potatoes absorb all that buttery goodness. So even if they’re not as crispy the next day, they’re still delicious in a different way. I’ve been known to eat them cold straight from the fridge, honestly.
Nutritional Information & Benefits
Here’s a rough estimate of the nutritional information per serving (based on 4 servings):
| Nutrient | Amount per Serving |
|---|---|
| Calories | 285 |
| Total Fat | 18g |
| Saturated Fat | 8g |
| Cholesterol | 30mg |
| Sodium | 480mg |
| Total Carbohydrates | 28g |
| Dietary Fiber | 3g |
| Sugars | 2g |
| Protein | 4g |
Potatoes often get a bad reputation, but when prepared this way, they’re actually a great source of fiber, vitamin C, and potassium. The skin is where most of the nutrients are, so keeping it on is a win. The butter and olive oil add healthy fats that help your body absorb the fat-soluble vitamins. If you’re watching your sodium, you can reduce the salt in the boiling water and skip the finishing salt. And if you’re dairy-free, the vegan adaptation works beautifully without sacrificing flavor.
I’m not a nutritionist, but I’ve learned that balance is key. This dish has butter and salt, yes, but it also has fresh herbs and whole ingredients. It’s comfort food that makes you feel good, not heavy.
Conclusion
So there you have it—crispy smashed potatoes with garlic herb butter, the spring side dish that keeps showing up on my table. It’s simple enough for a random Tuesday night but impressive enough for Easter brunch or a spring dinner party. The contrast between the crunchy edges and the fluffy center, the way the garlic butter seeps into every crack, the brightness of the fresh herbs—it all comes together in a way that feels both effortless and special.
I hope you make these and love them as much as I do. And if you do, I’d love to hear about it. Leave a comment below and tell me how they turned out. Did you try a variation? Add cheese? Swap the herbs? I’m always looking for new ideas. Tag me in your photos on Pinterest or Instagram—I love seeing your creations. Honestly, the best recipes are the ones we share and adapt, so make these your own. Happy spring cooking!
Frequently Asked Questions
Can I use regular-sized potatoes instead of baby potatoes?
Yes, but you’ll need to cut them into smaller pieces. Aim for 1-2 inch chunks, and adjust the boiling time accordingly. They may not smash as evenly, but they’ll still taste great.
How do I get the potatoes extra crispy?
Make sure they’re thoroughly dried after boiling, don’t overcrowd the pan, and use the broiler for the last 1-2 minutes. Also, a convection oven helps if you have one.
Can I make these ahead of time?
You can boil and smash the potatoes up to a day ahead. Store them in the fridge on the baking sheet, then add the butter and roast when you’re ready. Add a few extra minutes to the roasting time since they’ll be cold.
What if I don’t have fresh herbs?
Dried herbs work in a pinch, but use about half the amount. Dried thyme and dried chives are your best bets. The flavor won’t be as bright, but it’ll still be delicious.
Can I freeze these potatoes?
I don’t recommend freezing them after roasting—the texture changes too much. But you can freeze the boiled and smashed potatoes before roasting. Thaw in the fridge, then proceed with the recipe.
Pin This Recipe!
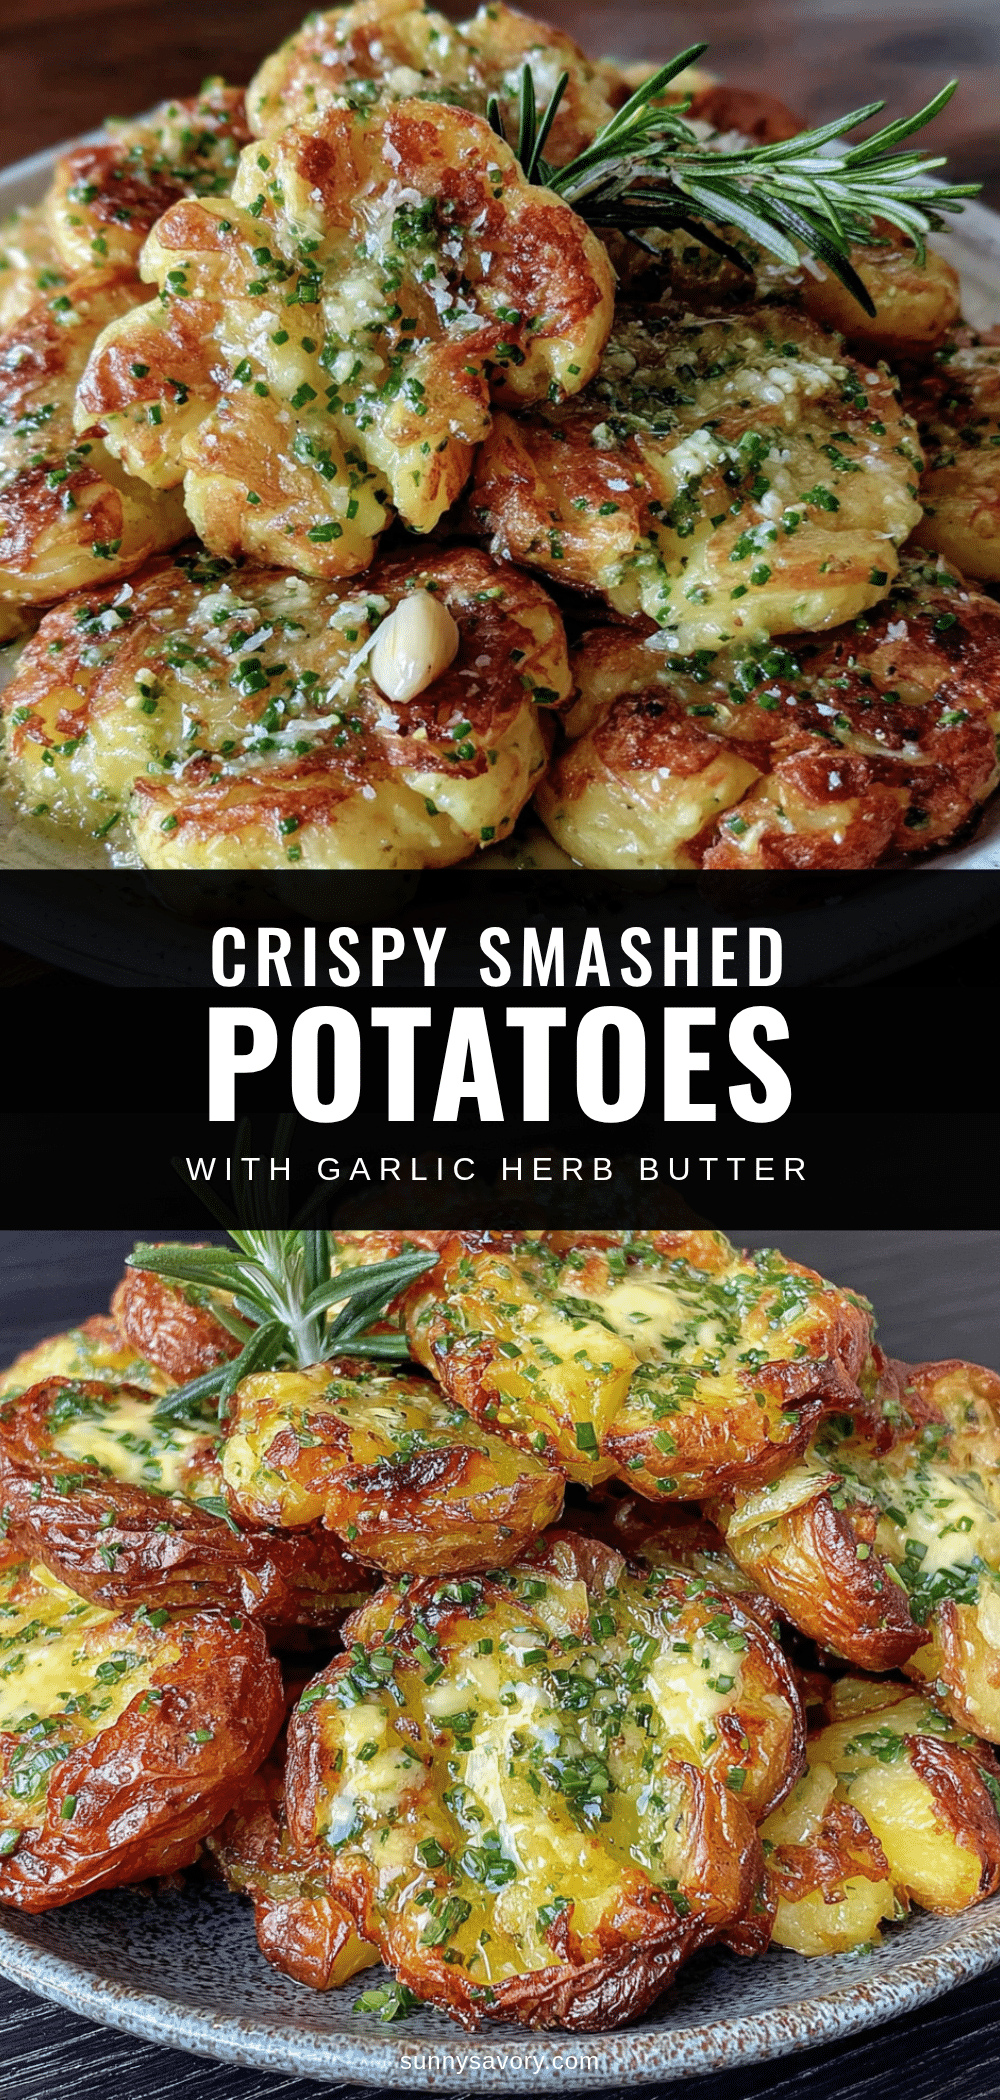
Crispy Smashed Potatoes with Garlic Herb Butter – Best Spring Side

These crispy smashed potatoes are boiled, smashed, and roasted with a garlic herb butter that seeps into every crack. They’re the perfect spring side dish—crispy on the outside, fluffy on the inside, and packed with flavor.
- Prep Time: 10 minutes
- Cook Time: 35 minutes
- Total Time: 45 minutes
- Yield: 4 servings 1x
- Category: Side Dish
- Cuisine: American
Ingredients
- 1 ½ pounds baby potatoes or small Yukon Gold potatoes (1–2 inches in diameter)
- 2 tablespoons kosher salt (for boiling water)
- 2 tablespoons olive oil
- Freshly ground black pepper (to taste)
- 4 tablespoons unsalted butter
- 4 cloves garlic, minced
- 2 tablespoons fresh parsley, finely chopped
- 1 tablespoon fresh chives, finely chopped
- 1 teaspoon fresh thyme leaves
- ¼ teaspoon red pepper flakes (optional)
- Flaky sea salt (for finishing)
Instructions
- Preheat your oven to 425°F (220°C). Line a rimmed baking sheet with parchment paper.
- Place the baby potatoes in a large pot and cover with cold water by about 2 inches. Add 2 tablespoons of kosher salt. Bring to a boil over high heat, then reduce to a simmer. Cook for 15-20 minutes, until fork-tender.
- Drain the potatoes in a colander and let them sit for 5 minutes to steam dry.
- Transfer the potatoes to the prepared baking sheet, leaving space between each one. Using a potato masher or the bottom of a glass, gently press down on each potato until it flattens to about ½-inch thick.
- Drizzle the smashed potatoes with olive oil and season with black pepper. Roast for 15 minutes.
- While the potatoes roast, melt the butter in a small saucepan over medium-low heat. Add the minced garlic and cook for 1-2 minutes, until fragrant but not browned. Remove from heat and stir in the parsley, chives, thyme, and red pepper flakes.
- Remove the baking sheet from the oven. Spoon the garlic herb butter evenly over each smashed potato. Return to the oven and roast for another 10-15 minutes, until the edges are deep golden brown and crispy.
- Optional: Switch the oven to broil and cook for 1-2 minutes, watching closely, until the tops bubble and brown.
- Remove from the oven and sprinkle immediately with flaky sea salt. Let them rest for 2 minutes before serving.
Notes
Don’t overcrowd the pan; leave at least an inch of space between potatoes. Dry potatoes thoroughly after boiling for maximum crispiness. Watch garlic carefully to avoid burning. Let potatoes rest for 2 minutes before serving to allow butter to soak in and exterior to stay crispy.
Nutrition
- Serving Size: 1 serving
- Calories: 285
- Sugar: 2
- Sodium: 480
- Fat: 18
- Saturated Fat: 8
- Carbohydrates: 28
- Fiber: 3
- Protein: 4
Keywords: crispy smashed potatoes, garlic herb butter, spring side dish, baby potatoes, easy side dish



