Love this? Save it for later!
Share the inspiration with your friends
My neighbor Mark wasn’t trying to impress me. I’d stopped by to borrow a wrench for a wobbly bookshelf, and this sharp, tangy, almost yeasty smell hit me before I even got past his screen door. It was a Thursday afternoon, totally unremarkable, and there he was, stirring a cloudy, bubbling jar on his kitchen counter like it was the most normal thing in the world. He shrugged when I asked about it. “Oh, that’s just my sourdough starter. I feed it every day.” Just. Just a sourdough starter. As if he hadn’t created a living, breathing thing that smelled like a professional bakery.
I stood there for a solid five minutes, watching him casually pour off half of it and stir in new flour and water. He didn’t have a fancy setup—just a mason jar, a kitchen scale, and a rubber band. He wasn’t following a complicated chart or using a special thermometer. He was just… doing it. And the confidence he had, the way he treated this bubbling jar like an old friend, made me realize something important. Maybe I had been overthinking this whole sourdough thing. Maybe you have been, too.
Honestly, I’d tried making a starter years ago and ended up with a sad, moldy mess that smelled like feet. I thought it required some kind of secret knowledge or a special flour. But watching Mark that day, I realized the secret was just patience and a simple routine. That’s it. So I went home, grabbed a clean jar, and started my own. And let me tell you, that first day I saw bubbles and smelled that sweet, tangy flour, I felt like I’d won the lottery. This recipe is exactly what I did—the simple, no-stress, 7-day path to a bubbly, healthy sourdough starter that anyone can pull off.
Why You’ll Love This Recipe
This isn’t just another sourdough starter guide. I’ve tested this method over and over, tweaking it until it was foolproof for even the most distracted home baker. It’s the kind of routine that fits into your life, not the other way around. Here’s why this one is different:
- Simple & Foolproof: No complicated ratios, no special tools, no fancy thermometers. Just flour, water, and a little patience. It’s the easiest way to get started.
- Minimal Daily Effort: You’ll only spend about 5 minutes a day feeding your starter. It’s a small, satisfying ritual that fits into a morning coffee routine or an evening wind-down.
- Cheap to Make: You probably already have the ingredients in your pantry. All-purpose flour and water are all you need. No expensive “starter kits” required.
- Incredibly Rewarding: There’s something deeply satisfying about watching a dormant jar of flour and water come to life. The first time you see those bubbles, you’ll feel like a mad scientist.
- Perfect for Beginners: If you’ve ever been intimidated by sourdough, this is your starting point. It breaks down the process into simple, daily steps that build confidence.
This recipe is built on trust and experience. I’ve made the mistakes so you don’t have to. I’ve dealt with the hooch (that weird liquid on top), the sluggish bubbles, and the days where nothing seemed to happen. This guide walks you through all of it with clear, honest advice. It’s the starter I wish I had when I first started—a reliable, no-nonsense path to a bubbly, active starter that will make the most amazing bread.
What Ingredients You Will Need
This recipe uses the simplest ingredients possible. The magic isn’t in fancy flours; it’s in the process. Here’s exactly what you need to get started on your 7-day journey.
- All-Purpose Flour: This is your workhorse. I recommend unbleached all-purpose flour for the best results. It has a good protein content and the natural yeast and bacteria on the flour are what get the fermentation going. I personally use King Arthur Flour for consistency, but any good brand will work. Avoid bleached flour if you can, as the chemicals can slow down the fermentation process.
- Water: Use filtered or bottled water. Tap water often contains chlorine or chloramines, which can kill the delicate yeast and bacteria you’re trying to cultivate. If you only have tap water, let it sit out on the counter for 24 hours to let the chlorine evaporate. The water should be at room temperature—not cold, not hot. Lukewarm (about 70-75°F) is perfect.
- A Clean Jar: A wide-mouth mason jar (like a 16-ounce or 32-ounce size) is ideal. It’s easy to stir in and easy to see the bubbles. Make sure it’s clean and dry before you start. I like to use a new jar each day for the first few days to avoid any mold issues.
- A Rubber Band or Marker: This is for tracking. You’ll put the rubber band around the jar at the level of your starter after feeding. This lets you see how much it has risen over the next 12-24 hours. It’s a simple visual cue that tells you your starter is active and healthy.
- A Kitchen Scale (Optional but Highly Recommended): While you can do this with measuring cups, a scale makes it much more consistent and accurate. We’re going to use a 1:1:1 ratio (equal parts starter, flour, and water by weight). A scale eliminates the guesswork and leads to a more reliable starter. I use a simple digital scale that cost me $15.
That’s it. Seriously. No special “sourdough starter flour,” no fancy “starter food.” Just flour, water, a jar, and a little bit of time. The simplicity is the whole point. You are creating a tiny ecosystem, and it only needs these two ingredients to thrive.
Equipment Needed
You don’t need a lot of fancy gear for this. Here’s the short list of what you’ll need to get your starter going.
- Mason Jar (16-32 oz): A wide-mouth jar is best for easy stirring and cleaning. A standard pint or quart jar works perfectly.
- Kitchen Scale (Digital): This is your best friend for consistency. It makes measuring the 1:1:1 ratio a breeze. You can find affordable ones online or at any kitchen store.
- Spatula or Spoon: A small silicone spatula is perfect for scraping down the sides of the jar and mixing the starter. A regular spoon works fine, too.
- Rubber Band or Marker: As mentioned, this is essential for tracking the rise. It gives you a clear visual of your starter’s activity.
- Clean Kitchen Towel or Coffee Filter: You’ll use this to cover the jar loosely. It lets air flow in while keeping dust and bugs out. A paper towel works in a pinch.
I’ve made starters with just a plastic container and a fork. The equipment isn’t the secret—the process is. But having the right tools, especially the scale, makes the whole thing smoother and more predictable. If you don’t have a scale, you can use measuring cups, but just know that consistency might be a little harder to achieve.
Preparation Method
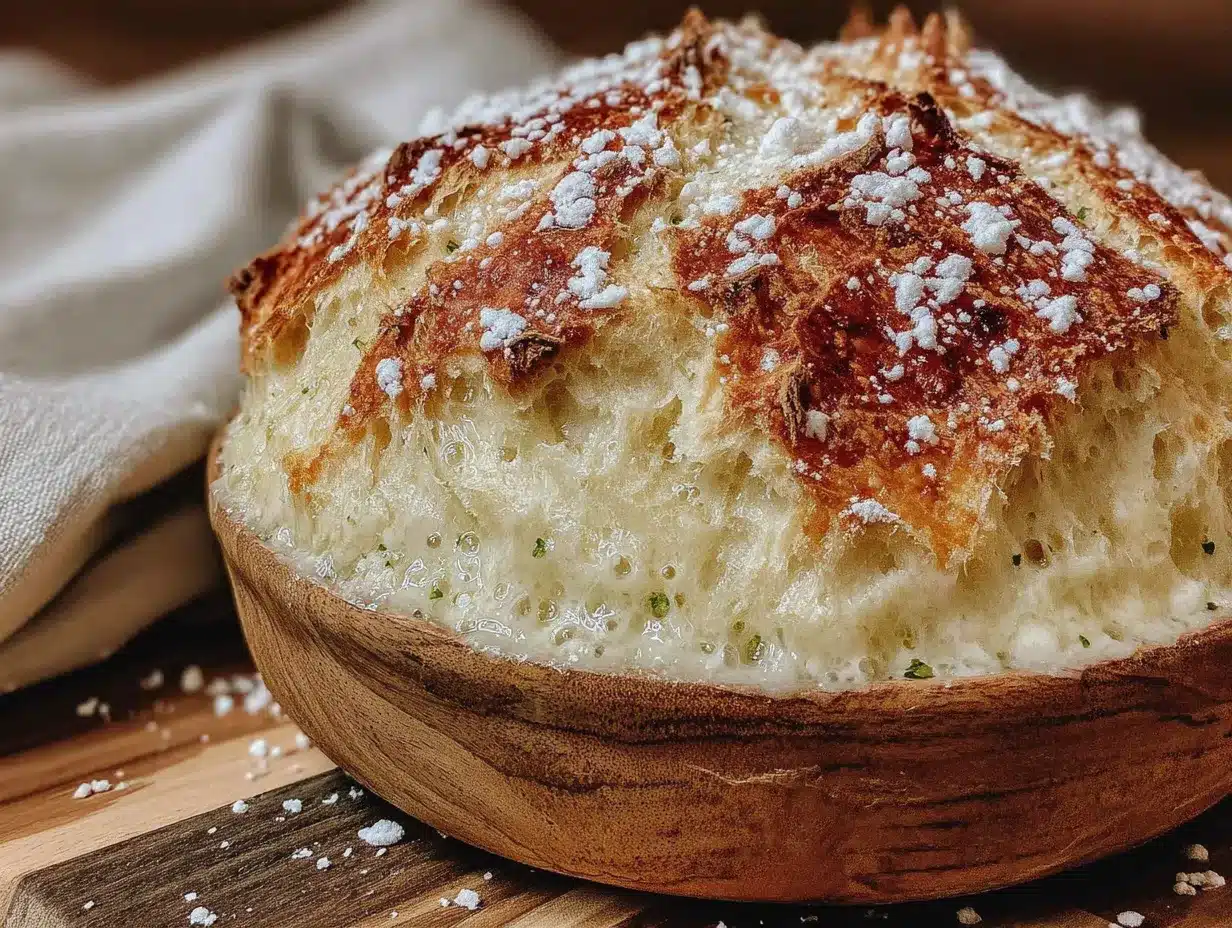
This is the step-by-step, day-by-day guide to creating your very own sourdough starter. Take it one day at a time, and don’t stress if things look a little different than you expected. That’s totally normal.
Day 1: The Beginning
- In your clean jar, combine 50 grams of all-purpose flour and 50 grams of room-temperature water. Stir vigorously until no dry bits remain. It should look like a thick paste.
- Scrape down the sides of the jar with your spatula. Place the rubber band around the jar at the level of the mixture.
- Cover the jar loosely with a clean towel or coffee filter. Place it in a warm spot in your kitchen (around 70-75°F is ideal). A spot on top of the fridge or near the stove works well.
- Let it sit for 24 hours. You might not see much activity on Day 1, and that’s perfectly fine. Don’t worry if nothing seems to be happening.
Day 2: First Signs of Life
- After 24 hours, check your starter. You might see a few tiny bubbles or a thin layer of liquid (called “hooch”) on top. This is a good sign! It means fermentation is starting.
- Discard half of the starter (about 50 grams) into the trash. Don’t throw it down the sink—it can clog your pipes.
- Add 50 grams of fresh all-purpose flour and 50 grams of fresh water to the remaining starter. Stir well until combined. It should be thick and pasty again.
- Scrape down the sides, mark the level with your rubber band, and cover loosely. Let it sit for another 24 hours.
Day 3: The Bubble Show Begins
- By Day 3, you should see more bubbles and maybe a bit of a rise. Your starter might smell a little sour or even like nail polish remover (acetone). This is all normal as the different bacteria and yeast populations are competing.
- Discard half of the starter (about 50 grams).
- Feed it again with 50 grams of flour and 50 grams of water. Stir until smooth.
- Mark the level and cover. You might notice it rises a bit more quickly now. Check on it after 12 hours to see if it’s doubled in size.
Day 4: Patience is Key
- Your starter might be very bubbly and active today, or it might seem a little sluggish. This is the “slump” period where things can seem to slow down. Don’t give up! It’s still working.
- Discard half (50 grams).
- Feed with 50 grams of flour and 50 grams of water. Stir well.
- Your starter might not double in size today, and that’s okay. Just keep feeding it on schedule. The smell might become more pleasant, like yogurt or ripe fruit.
Day 5: The Comeback
- Things usually start to pick up again around Day 5. You should see more consistent bubbles and a noticeable rise after feeding. The starter should smell pleasantly tangy.
- Discard half (50 grams).
- Feed with 50 grams of flour and 50 grams of water. Stir until smooth.
- Now you can start feeding twice a day (every 12 hours) if your starter is rising and falling predictably. This helps it become stronger and more active.
Day 6: Double Your Fun
- Your starter should be doubling in size within 6-8 hours of feeding. It should be full of bubbles, both large and small. The smell should be pleasantly sour and yeasty, like fresh bread.
- Continue feeding twice a day (morning and evening). Discard half before each feeding and add 50 grams of flour and 50 grams of water.
- If it’s not doubling yet, don’t worry. Stick with the twice-a-day feedings and be patient. Some starters take a little longer.
Day 7: Ready to Bake!
- By Day 7, your starter should be predictable and strong. It should double in size within 4-8 hours of feeding, have a dome on top, and smell amazing—tangy, yeasty, and complex.
- To test if it’s ready, do the “float test.” Drop a small spoonful of your starter into a glass of room-temperature water. If it floats, it’s full of gas and ready to use. If it sinks, it needs a few more feedings.
- Congratulations! You now have a healthy, active sourdough starter. You can use it immediately to bake bread, or you can store it in the refrigerator and feed it once a week.
Cooking Tips & Techniques
I’ve made a lot of mistakes with sourdough starters over the years. Here are the lessons I learned the hard way, so you don’t have to.
- Temperature is Everything: Your starter is a living thing, and it likes warmth. If your kitchen is cold (below 65°F), your starter will be sluggish. I’ve placed my jar on top of my refrigerator or near my computer’s exhaust fan to give it a little extra warmth. A consistent temperature is key.
- Don’t Overthink the Discard: The discard is just a byproduct of the process. You don’t have to save it. Tossing it feels wasteful at first, but it’s essential for keeping your starter healthy. You can collect discard in a separate jar in the fridge and use it for discard recipes like pancakes or crackers later.
- The “Hooch” is Your Friend: If you see a layer of dark liquid on top of your starter, that’s hooch. It’s a sign your starter is hungry. Just stir it back in before you discard and feed. It adds a nice tangy flavor.
- Consistency Matters: Your starter should look like a thick, scoopable paste after feeding. If it’s too runny, it might be over-fermented. If it’s too stiff, it might not rise well. Adjust the water slightly if needed.
- Trust Your Senses: Don’t just rely on a timer. Look at the bubbles, smell the tanginess, and feel the texture. Your senses are the best tools you have. A healthy starter smells good—like yogurt, fruit, and yeast. A bad starter smells like rotten eggs or vomit. If it smells bad, discard it and start over.
Variations & Adaptations
Once you have a healthy starter, the possibilities are endless. Here are a few ways to adapt it to your needs.
- Whole Wheat Starter: For a more robust, nutty flavor, you can use whole wheat flour instead of all-purpose. Whole wheat has more nutrients, so your starter might be more active. Just be aware it will have a slightly different flavor profile.
- Rye Flour Starter: Rye flour is a powerhouse for sourdough starters. It ferments very quickly and creates a wonderfully complex, earthy flavor. Many professional bakers use a rye starter for its reliability. You can start with rye and then transition to all-purpose.
- Gluten-Free Starter: Yes, you can make a gluten-free starter! Use a blend of gluten-free flours like brown rice flour, sorghum flour, and buckwheat flour. The process is the same, but it might take a little longer to get going. It will have a different texture and flavor, but it works.
- Cold-Weather Starter: If your kitchen is cold, your starter will be slower. You can use slightly warmer water (80-85°F) when feeding to give it a boost. You can also place the jar in a slightly warmer spot, like a turned-off oven with the light on.
- Dried Starter: Once your starter is strong, you can dry some of it to save for later or share with friends. Just spread a thin layer of starter on a piece of parchment paper and let it dry completely. Break it into flakes and store in a sealed bag. To rehydrate, just add water and flour and feed it back to life.
Serving & Storage Suggestions
Once your starter is mature, you need to know how to keep it happy and healthy.
- Room Temperature Storage: If you bake bread every day or two, you can keep your starter on the counter. Feed it once a day (or twice a day in warm weather). This keeps it very active and ready to use at a moment’s notice.
- Refrigerator Storage: For most home bakers, the fridge is the way to go. After a feeding, let the starter sit at room temperature for 1-2 hours to start fermenting, then cover it tightly and place it in the fridge. It will go dormant and only needs to be fed once a week.
- Reviving from the Fridge: When you want to bake, take your starter out of the fridge the night before. Discard half and feed it. Let it sit on the counter for 8-12 hours. It should become bubbly and active. If it’s sluggish, give it another feeding before using.
- Freezing Starter: You can also freeze your starter for long-term storage. Feed it, let it sit for an hour, then pour it into a freezer-safe bag. It will keep for several months. To revive, thaw it in the fridge and then feed it for a few days until it’s active again.
- Flavor Development: As your starter ages, its flavor will become more complex and sour. The longer you keep it, the more character it develops. Some bakers have starters that are decades old, passed down through generations.
Nutritional Information & Benefits
Sourdough bread, made from a natural starter, is often easier to digest than bread made with commercial yeast. Here’s a quick look at the benefits.
- Estimated Nutritional Values (per 1/2 cup of active starter): Calories: 180, Fat: 1g, Carbs: 38g, Protein: 5g, Fiber: 1g. (These are estimates and will vary based on the flour used.)
- Improved Digestibility: The long fermentation process breaks down phytic acid, a compound that can interfere with nutrient absorption. This makes the minerals in the flour more bioavailable.
- Lower Glycemic Index: The natural acids produced during fermentation can slow down the absorption of carbohydrates, leading to a lower glycemic index compared to regular bread. This means more stable blood sugar levels.
- Gut Health: While most of the bacteria are killed during baking, the fermentation process creates prebiotic compounds that can feed the good bacteria in your gut.
- Dietary Considerations: Sourdough is naturally low in fat and contains no added sugars. It is not gluten-free, but some people with mild gluten sensitivities find it easier to digest than conventional bread.
Conclusion
Creating your own sourdough starter from scratch is one of the most rewarding things you can do in the kitchen. It’s a small act of creation that connects you to a tradition that’s thousands of years old. It’s not about perfection—it’s about patience, observation, and a little bit of faith. Trust the process, trust your senses, and don’t be afraid of a few bubbles.
I love this starter because it’s forgiving. It’s okay if you forget to feed it one day. It’s okay if it looks a little weird. It’s alive, and it wants to survive. All you have to do is show up each day with a little flour and water. That’s the whole secret. So grab a jar, some flour, and give it a try. You might just surprise yourself with what you can create.
I’d love to hear about your sourdough journey! Did your starter take off on Day 5 or Day 8? What kind of bread did you bake first? Drop a comment below and share your story. And if you found this guide helpful, please share it with a friend who’s been thinking about starting their own starter. Happy baking!
Frequently Asked Questions
Why isn’t my starter bubbling after 3 days?
This is very common. It could be that your kitchen is too cold, or the natural yeast in your flour is just taking its time. Make sure you are using unbleached flour and room-temperature water. Give it a few more days and try placing it in a slightly warmer spot. Patience is the most important ingredient here.
My starter smells like nail polish remover. Is it ruined?
Not at all! That acetone smell is totally normal, especially in the first few days. It’s a sign that the bacteria are producing acids. This smell will mellow out as your starter matures and becomes more balanced. Just keep feeding it on schedule, and the smell will transform into a pleasant, tangy yogurt-like aroma.
Can I use tap water for my starter?
It’s best to avoid tap water if you can. Most municipal water contains chlorine or chloramines that can inhibit the growth of the yeast and bacteria you are trying to cultivate. If tap water is all you have, let it sit out in an open container for 24 hours to allow the chlorine to evaporate. Filtered or bottled water is a safer bet.
What should I do with the discard?
You can toss it, or you can save it! Many bakers keep a separate container in the fridge to collect their discard over a week. You can use it to make delicious sourdough discard recipes like crackers, pancakes, waffles, or even pizza dough. Just remember that discard is “unfed” starter, so it won’t leaven bread on its own.
How do I know when my starter is ready to use?
The best test is the “float test.” Drop a small spoonful of your starter into a glass of room-temperature water. If it floats, it’s full of gas and ready to bake. It should also be doubling in size within 4-8 hours of feeding, have a domed top, and smell pleasantly sour and yeasty. Trust these signs more than a specific day on the calendar.
Pin This Recipe!

Easy 7-Day Beginner Sourdough Starter from Scratch

A simple, foolproof 7-day guide to creating a bubbly, healthy sourdough starter from scratch using just flour and water. Perfect for beginners, this method requires minimal daily effort and yields a reliable starter for baking amazing bread.
- Prep Time: 5 minutes per day
- Cook Time: 0 minutes
- Total Time: 7 days
- Yield: 1 active sourdough starter (about 200-250 grams after feeding)
- Category: Starter / Baking
- Cuisine: American
Ingredients
- All-purpose flour (unbleached preferred, e.g., King Arthur Flour)
- Filtered or bottled water (room temperature, about 70-75°F)
- A clean jar (wide-mouth mason jar, 16-32 oz)
- A rubber band or marker (for tracking rise)
- A kitchen scale (digital, optional but highly recommended)
Instructions
- Day 1: In a clean jar, combine 50 grams of all-purpose flour and 50 grams of room-temperature water. Stir vigorously until no dry bits remain. Scrape down the sides, mark the level with a rubber band, cover loosely with a towel or coffee filter, and place in a warm spot (70-75°F). Let sit for 24 hours.
- Day 2: Check for tiny bubbles or a thin layer of liquid (hooch). Discard half (about 50 grams). Add 50 grams of fresh flour and 50 grams of fresh water. Stir well, scrape sides, mark level, cover, and let sit for 24 hours.
- Day 3: Expect more bubbles and a slight rise. The smell may be sour or like nail polish remover. Discard half (50 grams). Feed with 50 grams flour and 50 grams water. Stir, mark level, cover. Check after 12 hours for doubling in size.
- Day 4: Starter may be bubbly or sluggish (the ‘slump’ period). Discard half (50 grams). Feed with 50 grams flour and 50 grams water. Stir well. It may not double today; keep feeding on schedule.
- Day 5: More consistent bubbles and noticeable rise. Smell should be pleasantly tangy. Discard half (50 grams). Feed with 50 grams flour and 50 grams water. Start feeding twice a day (every 12 hours) if rising and falling predictably.
- Day 6: Starter should double in size within 6-8 hours of feeding, full of bubbles. Smell should be sour and yeasty. Continue feeding twice a day (morning and evening), discarding half before each feeding and adding 50 grams flour and 50 grams water.
- Day 7: Starter should double in 4-8 hours, have a dome on top, and smell tangy and yeasty. Perform the ‘float test’: drop a spoonful into room-temperature water; if it floats, it’s ready. Use immediately or store in the refrigerator, feeding once a week.
Notes
Temperature is crucial: keep starter in a warm spot (70-75°F). If kitchen is cold, place on top of fridge or near a warm appliance. The ‘hooch’ (dark liquid on top) is normal and indicates hunger; stir it back in before feeding. Discard is essential for health; save it for discard recipes like pancakes or crackers. Use unbleached all-purpose flour for best results; avoid bleached flour. If using tap water, let it sit out for 24 hours to remove chlorine. The float test is the best indicator of readiness. Be patient: some starters take longer than 7 days.
Nutrition
- Serving Size: 1/2 cup of active st
- Calories: 180
- Fat: 1
- Carbohydrates: 38
- Fiber: 1
- Protein: 5
Keywords: sourdough starter, beginner sourdough, easy sourdough starter, 7-day sourdough starter, homemade sourdough starter, sourdough from scratch



