Love this? Save it for later!
Share the inspiration with your friends
This was supposed to be a simple chocolate sugar cookie. I had the butter softening on the counter, the flour measured, and my mind already set on a neat little batch of round, unassuming cookies. But then my phone rang, the cat knocked over the vanilla extract, and by the time I turned back to the bowl, I’d dumped in twice the cocoa powder and grabbed the black food coloring instead of the red. Honestly, I stared at the pitch-black dough for a solid minute, ready to toss it in the trash. What came out of the oven was nothing like the plan — and better.
I pulled the first tray out and saw these perfectly dark, slightly cracked rounds that looked like little shadows. My kid walked in and said, “Mom, that looks like a cat’s face.” And just like that, the Black Cat Halloween Cookie Cake was born. I mean, I didn’t plan it. I was just trying to salvage a distracted baker’s mess. But that first accidental batch had this soft, fudgy center and a slightly crisp edge that I couldn’t stop eating. Maybe you’ve been there — you mess up a recipe and end up with something way more fun than you intended.
That night, I piped on some orange icing whiskers and used candy corn for ears. It was silly and imperfect, and my family devoured it before I could even get a photo. Now, every October, this cookie cake makes an appearance. It’s the kind of happy accident that feels like a tradition now. You don’t need to be a pastry pro to pull this off — you just need a little patience and a willingness to laugh at your own kitchen chaos.
Why You’ll Love This Recipe
Let me tell you why this Black Cat Halloween Cookie Cake has become my go-to spooky season dessert. It’s not just cute — it actually delivers on flavor and ease.
- Quick & Easy: From start to finish, you’re looking at about 45 minutes. That includes chilling the dough, which is non-negotiable for that perfect texture.
- Simple Ingredients: You likely have everything in your pantry right now. No weird extracts or specialty flours — just butter, sugar, cocoa, and a few pantry staples.
- Perfect for Halloween Parties: This isn’t just a cookie — it’s a centerpiece. Kids love it, adults sneak slices, and it photographs beautifully for your Instagram stories.
- Crowd-Pleaser: I’ve brought this to three Halloween potlucks now, and every single time, someone asks for the recipe. It’s that good.
- Unbelievably Delicious: The texture is what gets you. It’s chewy in the middle, slightly crisp on the edges, and deeply chocolatey without being overly sweet.
What makes this different from every other chocolate cookie cake out there? It’s the chilling step and the specific cocoa-to-butter ratio I landed on after that first accident. Most recipes rush you through, but taking the time to chill the dough for 20 minutes gives you that bakery-style thickness. And the black cat decoration? It’s forgiving. You don’t need a steady hand — just some candy corn, icing, and a little creativity.
This recipe isn’t just good — it is the kind that makes you close your eyes after the first bite. It’s comfort food reimagined for a spooky night in. Perfect for impressing guests without stress, or turning a simple Tuesday into a mini celebration.
What Ingredients You Will Need
This recipe uses simple, wholesome ingredients to deliver bold chocolate flavor and that perfect chewy texture. Most of these are pantry staples, which makes it a great last-minute Halloween treat.
- Unsalted butter, softened (1 cup / 2 sticks) — I prefer Land O’Lakes for consistent results. Make sure it’s at room temperature so it creams properly with the sugar.
- Granulated sugar (1 cup / 200g) — Regular white sugar gives the cookies that slight crispness on the outside.
- Light brown sugar (½ cup / 100g), packed — This adds moisture and a subtle molasses undertone that deepens the chocolate flavor.
- Large eggs (2), room temperature — Cold eggs can seize the butter mixture. Leave them out for 15 minutes before starting.
- Vanilla extract (2 teaspoons) — Pure vanilla makes a difference here. Imitation works in a pinch, but the real stuff adds warmth.
- All-purpose flour (2 cups / 240g) — Spoon and level your flour. Scooping directly from the bag packs in too much and makes the cookie cake dense.
- Unsweetened cocoa powder (¾ cup / 75g) — I recommend Hershey’s Special Dark or Ghirardelli for that deep, almost black color. Regular cocoa works too, but the color won’t be as intense.
- Baking soda (1 teaspoon) — Make sure it’s fresh. Expired baking soda leads to flat cookies.
- Salt (½ teaspoon) — Don’t skip this. It balances the sweetness and enhances the chocolate.
- Black gel food coloring (1-2 teaspoons) — Americolor Super Black is my go-to. Liquid food coloring won’t give you the same dark shade without thinning the dough.
- Orange icing (for decorating) — Store-bought piping gel works fine, or make your own with powdered sugar and orange extract.
- Candy corn (for ears) — About 12 pieces for a standard 9-inch cookie cake. You’ll place them in a V-shape at the top.
- Candy eyes (2 per cat) — These are optional but adorable. Wilton makes edible eyes you can find at craft stores.
Equipment Needed
You don’t need a fancy bakery setup for this one. Here’s what I use every time I make this Black Cat Halloween Cookie Cake.
- 9-inch round cake pan or a cast-iron skillet — I prefer a light-colored metal pan for even browning. Dark pans can over-brown the bottom.
- Electric hand mixer or stand mixer — A hand mixer works perfectly here. I’ve made this with a whisk and some elbow grease, but the mixer saves time.
- Parchment paper — Line the pan for easy removal. Trust me, trying to lift a cookie cake out of an unlined pan is a nightmare.
- Mixing bowls — One large, one medium.
- Rubber spatula — For scraping down the bowl and spreading the dough evenly.
- Piping bag or zip-top bag with a small corner snipped off — For the orange icing details.
- Cooling rack — Essential for letting the cookie cake cool completely before decorating.
If you don’t have a cake pan, you can use a 9-inch pie plate or even a baking sheet shaped into a free-form circle. Just keep an eye on the baking time — thinner cookies bake faster.
Preparation Method
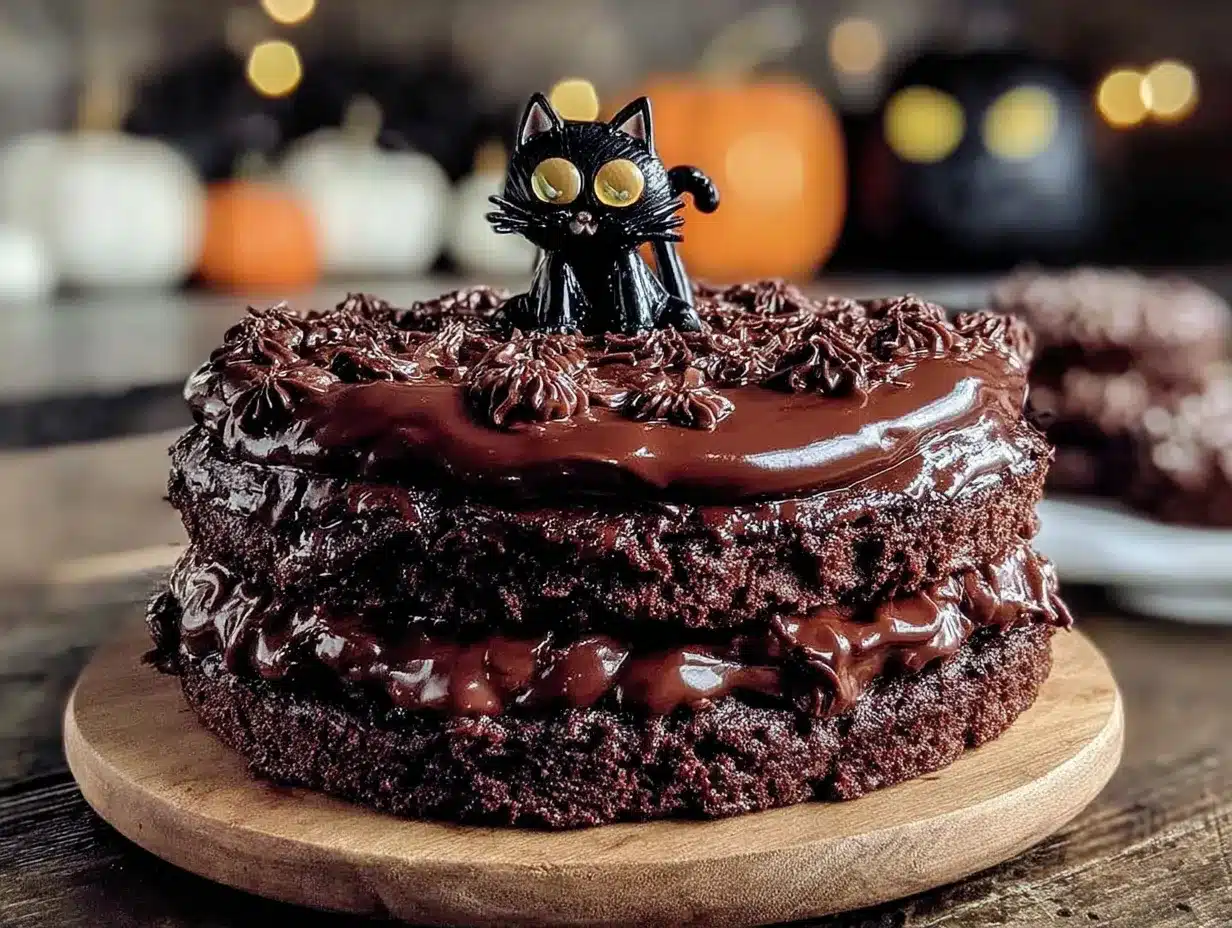
Here’s how to make this Black Cat Halloween Cookie Cake from start to finish. Follow these steps closely, and you’ll have a spooky showstopper.
- Cream the butter and sugars — In a large mixing bowl, beat the softened butter, granulated sugar, and brown sugar together on medium speed for 2-3 minutes until light and fluffy. Scrape down the sides of the bowl once. You want the mixture to look pale and airy.
- Add the wet ingredients — Beat in the eggs one at a time, mixing well after each addition. Add the vanilla extract and mix until combined. The mixture might look slightly curdled at this point — that’s okay.
- Mix the dry ingredients — In a separate bowl, whisk together the flour, cocoa powder, baking soda, and salt. Make sure there are no lumps in the cocoa powder. Sifting is optional but helpful if your cocoa is clumpy.
- Combine wet and dry — Gradually add the dry ingredients to the wet mixture, mixing on low speed. Stop as soon as the flour disappears. Overmixing will make the cookie cake tough.
- Add the black food coloring — Stir in the black gel food coloring with a rubber spatula. Start with 1 teaspoon and add more until you reach your desired darkness. The dough will look almost black — that’s the goal.
- Chill the dough — Cover the bowl with plastic wrap and refrigerate for 20 minutes. This step is crucial. Chilled dough spreads less and gives you a thicker, chewier cookie cake.
- Preheat the oven — Set your oven to 350°F (175°C). Line your 9-inch cake pan with parchment paper and lightly grease the sides.
- Press the dough into the pan — Scrape the chilled dough into the prepared pan. Use your hands or a spatula to press it into an even layer. It should be about ½-inch thick.
- Bake — Bake for 18-22 minutes. At 18 minutes, check for doneness. The edges should be set and slightly cracked, but the center will look soft and puffy. A toothpick inserted in the center should come out with a few moist crumbs.
- Cool completely — Let the cookie cake cool in the pan for 10 minutes, then transfer it to a wire rack. Do not decorate while warm — the icing will melt and the candy corn will slide off.
- Decorate the black cat — Once fully cool, use the orange icing to pipe two small triangles at the top for ears. Place a candy corn piece in each triangle. Pipe two small dots for eyes and attach candy eyes if using. Draw a small orange nose and a curved mouth. Add three whiskers on each side.
- Let the icing set — Allow the decorated cookie cake to sit for 15 minutes before slicing. This keeps the design intact.
Cooking Tips & Techniques
I’ve made this Black Cat Halloween Cookie Cake about a dozen times now, and I’ve learned a few things the hard way. Here are my best tips.
First, don’t skip the chilling step. I know it’s tempting to rush, but warm dough spreads into a thin, crispy mess. That first time I skipped it, my black cat looked more like a black puddle. Chilling solidifies the butter, which means the cookie cake bakes up thick and soft.
Second, use gel food coloring, not liquid. Liquid coloring will throw off your dough’s moisture balance, and you’ll need half the bottle to get a true black. Gel is concentrated — a little goes a long way. I’ve stained my fingers more times than I care to admit, so wear gloves if you’re sensitive.
Third, watch your oven like a hawk. Every oven runs differently. My old oven would brown the bottom by 15 minutes, so I started placing the pan on the middle rack and rotating it halfway through. If your cookie cake is browning too fast on the edges but still raw in the center, tent it loosely with foil for the last 5 minutes.
One mistake I made early on was overmixing the dough after adding the flour. The cookie cake came out tough and almost bread-like. Mix just until the flour disappears — a few streaks are fine. The dough will come together as you press it into the pan.
Finally, let the cookie cake cool completely before decorating. I was impatient once and piped icing onto a warm surface. It melted into a sad orange puddle, and my cat looked like it had been crying. Patience pays off here.
Variations & Adaptations
This Black Cat Halloween Cookie Cake is flexible. Here are a few ways I’ve changed it up depending on the occasion or dietary needs.
Gluten-Free Version: Swap the all-purpose flour with a 1:1 gluten-free baking blend. I’ve used Bob’s Red Mill with great results. Add an extra tablespoon of milk to the dough since gluten-free flours tend to be thirstier.
Dairy-Free Adaptation: Use vegan butter sticks (like Earth Balance) and a plant-based milk in place of the eggs? Actually, eggs are harder to replace here. For a dairy-free version, use vegan butter and ensure your candy corn is dairy-free. Most brands are, but check the label.
Spooky Spider Variation: Instead of a black cat, pipe eight legs onto the cookie cake using black icing and place a large candy spider ring in the center. My nephew requested this last year, and it was a hit.
Mini Cookie Cakes: Press the dough into a muffin tin (lined with parchment rounds) for individual-sized black cat cookies. Bake for 12-14 minutes. These are perfect for classroom parties or goodie bags.
Flavor Twist: Add ½ teaspoon of peppermint extract to the dough for a chocolate-mint version. It pairs surprisingly well with the orange icing. I tried this on a whim after Halloween, and it tasted like a Christmas cookie in disguise.
White Chocolate Drizzle: Melt ¼ cup of white chocolate chips and drizzle it over the cooled cookie cake before decorating. It adds a nice contrast against the black dough and makes it look extra fancy.
Serving & Storage Suggestions
This Black Cat Halloween Cookie Cake is best served at room temperature. The texture is at its peak — chewy, soft, and perfectly sliceable. I like to cut it into wedges like a pizza and serve it on a festive plate. A dusting of powdered sugar (even though it’s black) can look cool if you do it lightly.
For a full Halloween spread, pair it with a glass of cold milk, a hot apple cider, or a pumpkin spice latte. It also goes great with a scoop of vanilla ice cream — the contrast of warm cookie and cold cream is unbeatable.
Leftovers? Store the cookie cake in an airtight container at room temperature for up to 3 days. Do not refrigerate — the fridge dries out baked goods and makes them stale faster. If you need to keep it longer, wrap it tightly in plastic wrap and freeze for up to 2 months. Thaw at room temperature for about an hour before serving.
To reheat a slice, pop it in the microwave for 10-15 seconds. It’ll taste fresh out of the oven. One thing I’ve noticed — the flavors actually deepen after a day. The chocolate becomes more pronounced, and the cookie softens slightly. So if you can resist eating it all on day one, day two is even better.
Nutritional Information & Benefits
Here’s an estimated nutritional breakdown per serving (based on 12 slices).
| Nutrient | Amount Per Serving |
|---|---|
| Calories | 320 |
| Total Fat | 16g |
| Saturated Fat | 10g |
| Cholesterol | 55mg |
| Sodium | 210mg |
| Total Carbohydrates | 44g |
| Dietary Fiber | 2g |
| Sugars | 28g |
| Protein | 4g |
Cocoa powder is rich in antioxidants called flavonoids, which can support heart health and reduce inflammation. The butter provides vitamin A, and the eggs add a small amount of protein. This is a treat, not a health food, but using quality ingredients means you’re getting some nutritional value alongside the indulgence.
If you’re watching your sugar intake, you can reduce the granulated sugar to ¾ cup without sacrificing texture too much. The brown sugar is harder to cut because it provides moisture. This recipe contains gluten and dairy, so it’s not suitable for those with celiac disease or lactose intolerance unless you use the substitutions mentioned above.
Conclusion
This Black Cat Halloween Cookie Cake started as a kitchen disaster and turned into a tradition I look forward to every October. It’s proof that sometimes the best recipes come from mistakes — and a little bit of black food coloring. The texture is spot-on, the decorations are forgiving, and the joy on people’s faces when they see that little cat face is worth every messy piping bag.
I encourage you to make this your own. Add different decorations, try a different flavor, or just keep it simple with candy corn and a smile. The beauty of this recipe is that it’s hard to mess up — trust me, I’ve tried. So go ahead, preheat your oven, and let your inner spooky baker shine. And if you make it, drop a comment below. I’d love to hear how your black cat turned out, what variations you tried, or if your cat knocked anything over while you baked. Happy Halloween, friends!
Frequently Asked Questions
Can I make this cookie cake ahead of time?
Yes! You can bake the cookie cake up to 2 days in advance. Store it undecorated in an airtight container at room temperature, then decorate on the day you plan to serve it.
Why did my cookie cake spread too much?
This usually happens if the dough wasn’t chilled long enough or if the butter was too soft. Make sure to chill for the full 20 minutes, and don’t skip it.
Can I use regular food coloring instead of gel?
You can, but you’ll need a lot more to achieve a true black color, which can thin out the dough. Gel is highly recommended for the best results.
How do I get clean slices?
Use a sharp knife and wipe it clean between cuts. For the neatest slices, chill the cookie cake for 10 minutes before cutting.
Can I freeze the decorated cookie cake?
It’s best to freeze the undecorated cookie cake. The icing and candy corn can become sticky or discolored in the freezer. Freeze the plain cookie cake, then decorate after thawing.
Pin This Recipe!
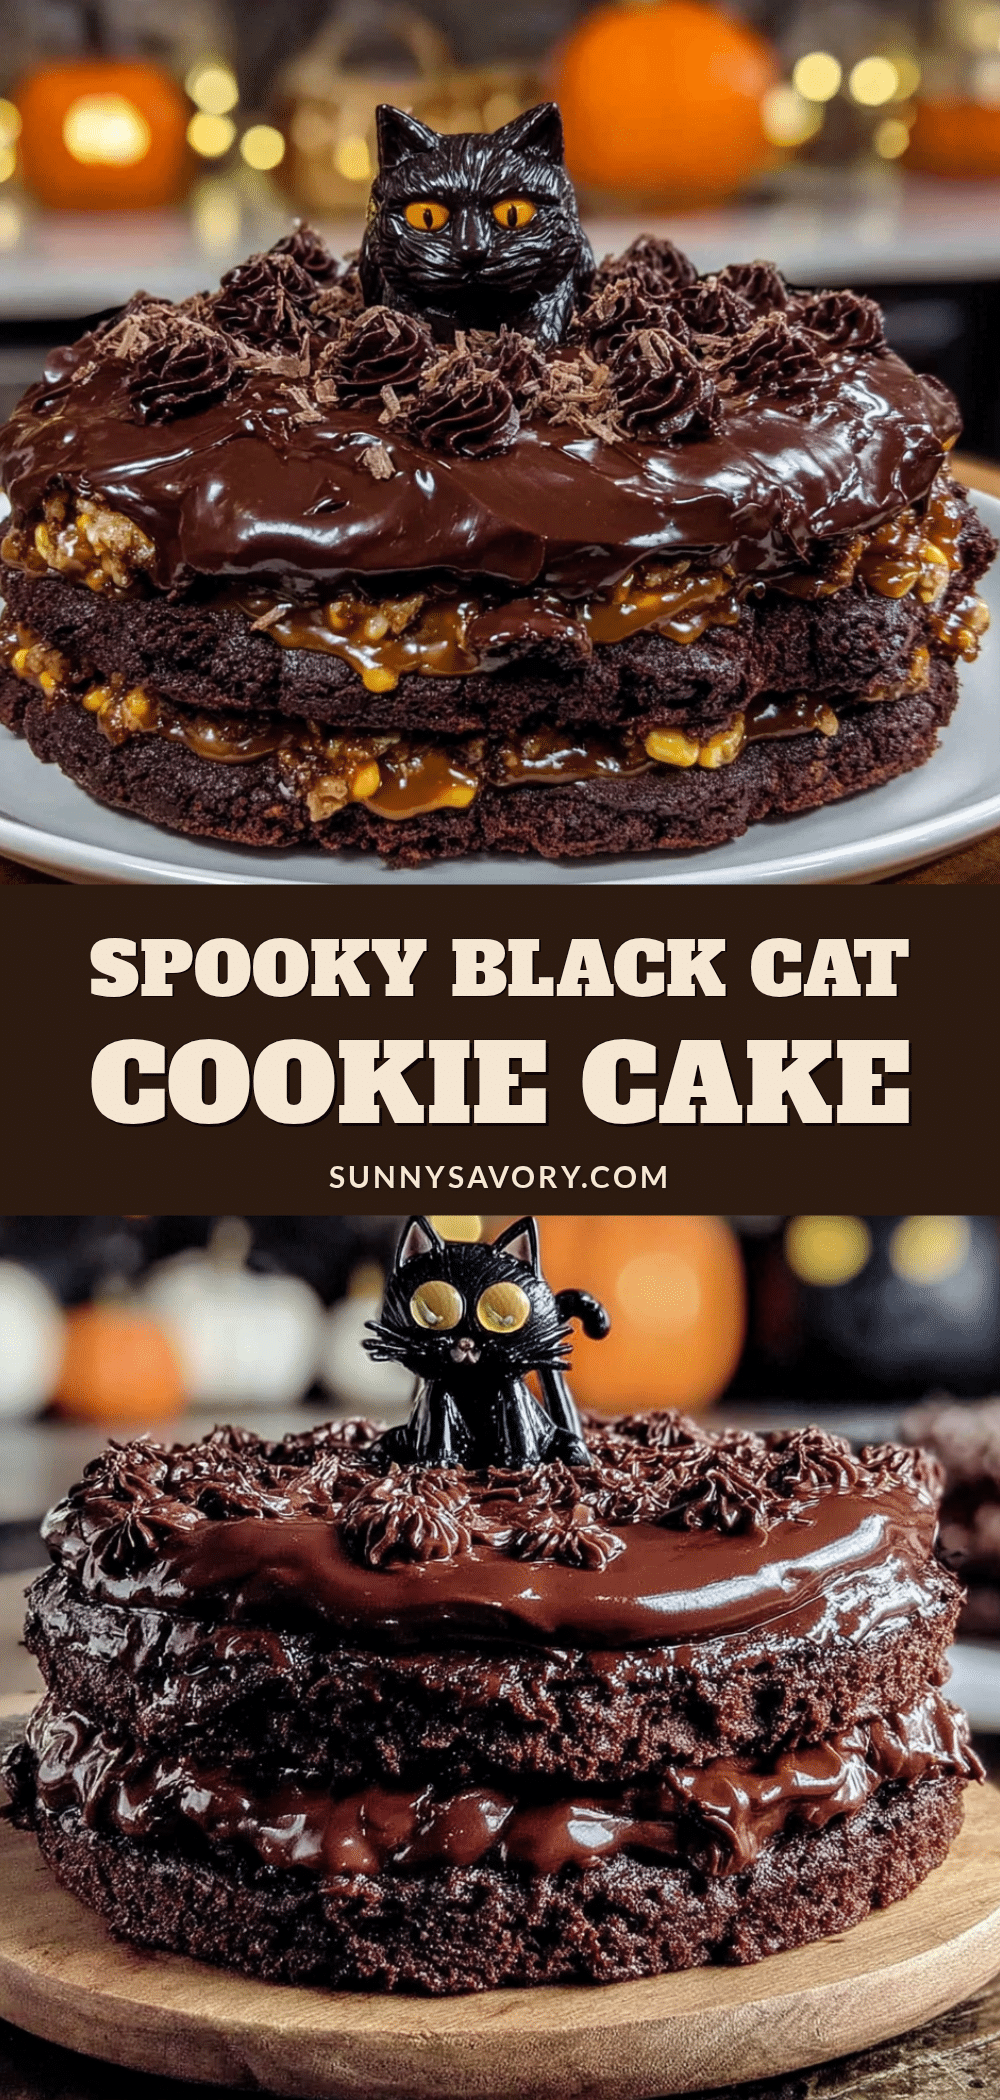
Easy Black Cat Halloween Cookie Cake Recipe
This Black Cat Halloween Cookie Cake is a soft, fudgy chocolate cookie cake decorated to look like a cute black cat. It’s quick, easy, and perfect for Halloween parties or a spooky night in.
- Prep Time: 15 minutes
- Cook Time: 20 minutes
- Total Time: 45 minutes
- Yield: 12 servings 1x
- Category: Dessert
- Cuisine: American
Ingredients
- 1 cup (2 sticks) unsalted butter, softened
- 1 cup (200g) granulated sugar
- ½ cup (100g) light brown sugar, packed
- 2 large eggs, room temperature
- 2 teaspoons vanilla extract
- 2 cups (240g) all-purpose flour
- ¾ cup (75g) unsweetened cocoa powder
- 1 teaspoon baking soda
- ½ teaspoon salt
- 1–2 teaspoons black gel food coloring
- Orange icing (for decorating)
- 12 pieces candy corn (for ears)
- 2 candy eyes (optional)
Instructions
- Cream the butter and sugars: In a large mixing bowl, beat the softened butter, granulated sugar, and brown sugar together on medium speed for 2-3 minutes until light and fluffy. Scrape down the sides of the bowl once.
- Add the wet ingredients: Beat in the eggs one at a time, mixing well after each addition. Add the vanilla extract and mix until combined.
- Mix the dry ingredients: In a separate bowl, whisk together the flour, cocoa powder, baking soda, and salt.
- Combine wet and dry: Gradually add the dry ingredients to the wet mixture, mixing on low speed. Stop as soon as the flour disappears.
- Add the black food coloring: Stir in the black gel food coloring with a rubber spatula. Start with 1 teaspoon and add more until you reach your desired darkness.
- Chill the dough: Cover the bowl with plastic wrap and refrigerate for 20 minutes.
- Preheat the oven: Set your oven to 350°F (175°C). Line your 9-inch cake pan with parchment paper and lightly grease the sides.
- Press the dough into the pan: Scrape the chilled dough into the prepared pan. Use your hands or a spatula to press it into an even layer, about ½-inch thick.
- Bake: Bake for 18-22 minutes. The edges should be set and slightly cracked, but the center will look soft and puffy. A toothpick inserted in the center should come out with a few moist crumbs.
- Cool completely: Let the cookie cake cool in the pan for 10 minutes, then transfer it to a wire rack. Do not decorate while warm.
- Decorate the black cat: Once fully cool, use the orange icing to pipe two small triangles at the top for ears. Place a candy corn piece in each triangle. Pipe two small dots for eyes and attach candy eyes if using. Draw a small orange nose and a curved mouth. Add three whiskers on each side.
- Let the icing set: Allow the decorated cookie cake to sit for 15 minutes before slicing.
Notes
Don’t skip the chilling step—it prevents spreading. Use gel food coloring for the best black color. Let the cookie cake cool completely before decorating to prevent icing from melting.
Nutrition
- Serving Size: 1 slice
- Calories: 320
- Sugar: 28
- Sodium: 210
- Fat: 16
- Saturated Fat: 10
- Carbohydrates: 44
- Fiber: 2
- Protein: 4
Keywords: Halloween cookie cake, black cat cookie, chocolate cookie cake, easy Halloween dessert, spooky cookie



