Love this? Save it for later!
Share the inspiration with your friends
My friend Jen asked why I couldn’t just brown the butter in the same pan I was going to mix the batter in. I started to explain why that wouldn’t work — something about temperature control and burnt bits sticking to the sides. Then I stopped. Honestly, I had no good reason except that I’d never done it that way before. She was standing in my kitchen, hands on her hips, waiting for an answer that didn’t come.
So I tried it. I melted the butter in my big mixing bowl right on the stove, watched it foam and turn that nutty amber color, then slid the bowl off the heat. The residual warmth helped the sugar dissolve when I stirred it in a minute later. I mean, it was one of those moments where you realize you’ve been making things harder than they need to be for years. The bowl was already there. The butter was already brown. Why dirty another pan?
That was three falls ago, and I haven’t made this brown butter pumpkin chocolate chip bread any other way since. It’s become the thing I bring to every gathering — the loaf that disappears before the store-bought stuff even gets opened. There’s something about that browned butter, you know? It adds this almost caramel-like depth that regular butter just can’t touch. Maybe you’ve been there too — standing over a pan, watching butter turn golden, wondering why you don’t do this more often.
This bread stayed with me because it taught me something I keep forgetting: sometimes the best cooking advice comes from people who don’t overthink it. Jen didn’t know anything about proper technique. She just saw a pan and a bowl and wondered why they couldn’t be the same thing. And she was right.
Why You’ll Love This Recipe
This isn’t just another pumpkin bread recipe. After testing this version more times than I care to count — including one memorable batch where I forgot the sugar entirely (don’t ask) — I can tell you this one is different. It’s the kind of bread that makes people close their eyes after the first bite. Here’s why you’ll keep coming back to it:
- Brown Butter Magic : The nutty, toasty flavor from browned butter transforms ordinary pumpkin bread into something that tastes like you spent hours on it. You didn’t. It just tastes that way.
- Simple Ingredients : No weird extracts or hard-to-find spices. Everything is probably in your pantry right now, minus maybe the pumpkin puree.
- Perfect for Hosting : This bread is made for gatherings. It slices beautifully, travels well, and somehow tastes even better the next day — which means you can make it ahead and actually enjoy your guests.
- Crowd-Pleaser : I’ve brought this to potlucks, dinner parties, and casual get-togethers. It gets devoured every single time. Kids love the chocolate chips. Adults love the sophisticated brown butter flavor.
- Unbelievably Moist : The pumpkin and brown butter work together to create a texture that’s tender without being gummy. It stays moist for days — if it lasts that long.
What makes this version different from the dozens of pumpkin breads out there? It’s the technique. Browning the butter adds a layer of complexity that pumpkin alone just doesn’t have. And using melted brown butter instead of creaming room-temperature butter means the batter comes together in one bowl with zero fuss. No mixer required. No waiting for butter to soften. It’s comfort food reimagined — richer, deeper, but with the same soul-soothing satisfaction you expect from a slice of pumpkin bread with your afternoon coffee.
This is the recipe you turn to when you want to impress without stress. When you want guests to ask for the recipe before they’ve finished their first slice. When you want something that feels special but takes almost no real effort.
What Ingredients You Will Need
This recipe uses simple, wholesome ingredients to deliver that bold brown butter flavor and tender pumpkin texture without any fuss. Most of these are pantry staples, which makes this perfect for those moments when you decide at 8 PM that you want fresh bread tomorrow morning.
- Unsalted butter, 1 cup (2 sticks) — You’ll brown this yourself, so start with good butter. I prefer Kerrygold for its higher fat content, which browns beautifully. Salted butter works in a pinch, just reduce the added salt slightly.
- Pumpkin puree, 1 can (15 ounces) — Not pumpkin pie filling. Look for 100% pure pumpkin. Libby’s is my go-to because it’s consistently thick and not watery. If you’re feeling ambitious, homemade roasted pumpkin puree works too — just drain it well.
- Granulated sugar, 1 cup — Regular white sugar. The brown butter will add enough caramel notes that you don’t need brown sugar here, though you could swap half for a deeper flavor.
- Light brown sugar, 1/2 cup, packed — This adds moisture and a hint of molasses that plays nicely with the pumpkin and browned butter. Dark brown sugar works too if that’s what you have.
- Large eggs, 2, at room temperature — Cold eggs can seize the browned butter. If you forgot to take them out, place them in a bowl of warm water for 5 minutes.
- Vanilla extract, 2 teaspoons — Pure vanilla makes a difference here. The brown butter and vanilla together are a flavor combination worth splurging on.
- All-purpose flour, 2 cups — Spoon and level it. Scooping directly from the bag packs in too much flour and makes the bread dense. I learned this the hard way with a loaf that could have doubled as a doorstop.
- Baking soda, 1 teaspoon — Make sure it’s fresh. Old baking soda won’t give you that nice domed top.
- Baking powder, 1/2 teaspoon — For a little extra lift.
- Salt, 1/2 teaspoon — Don’t skip it. Salt makes the brown butter flavor pop and balances the sweetness.
- Pumpkin pie spice, 2 teaspoons — Store-bought is fine, or make your own with cinnamon, nutmeg, ginger, and cloves. I sometimes add an extra 1/2 teaspoon of cinnamon because I can’t help myself.
- Semi-sweet chocolate chips, 1 cup — Use good quality chips. Ghirardelli or Guittard hold their shape better and taste richer. You can also chop a dark chocolate bar for those melty puddles of chocolate.
- Optional: Turbinado sugar, for sprinkling on top — This gives the crust a lovely sparkly crunch. Totally optional but highly recommended if you’re serving this to guests.
Equipment Needed
You don’t need a fancy kitchen for this bread. Here’s what you’ll actually use:
- A 9×5-inch loaf pan — Standard size. If you use an 8×4, the bread will take longer to bake and might dome too much. If you use a 10×5, the loaf will be shorter and bake faster. Adjust your timing accordingly.
- A medium saucepan or large mixing bowl — Remember Jen’s trick? Use a heat-safe mixing bowl so you can brown the butter and mix the batter in the same vessel. Stainless steel or glass works great.
- Parchment paper — Line your loaf pan with a sling. It makes lifting the bread out so much easier. Plus, less cleanup.
- A whisk — For mixing the wet ingredients. A wooden spoon or spatula works too.
- A rubber spatula — For folding in the chocolate chips and scraping every last bit of batter into the pan.
- Cooling rack — Essential for even cooling. If you let the bread cool in the pan, the bottom gets soggy.
Budget-friendly tip: If you don’t have a loaf pan, you can bake this in an 8×8 square pan. Just reduce the baking time by about 10 minutes and check early. The bread will be thinner but just as delicious.
Preparation Method
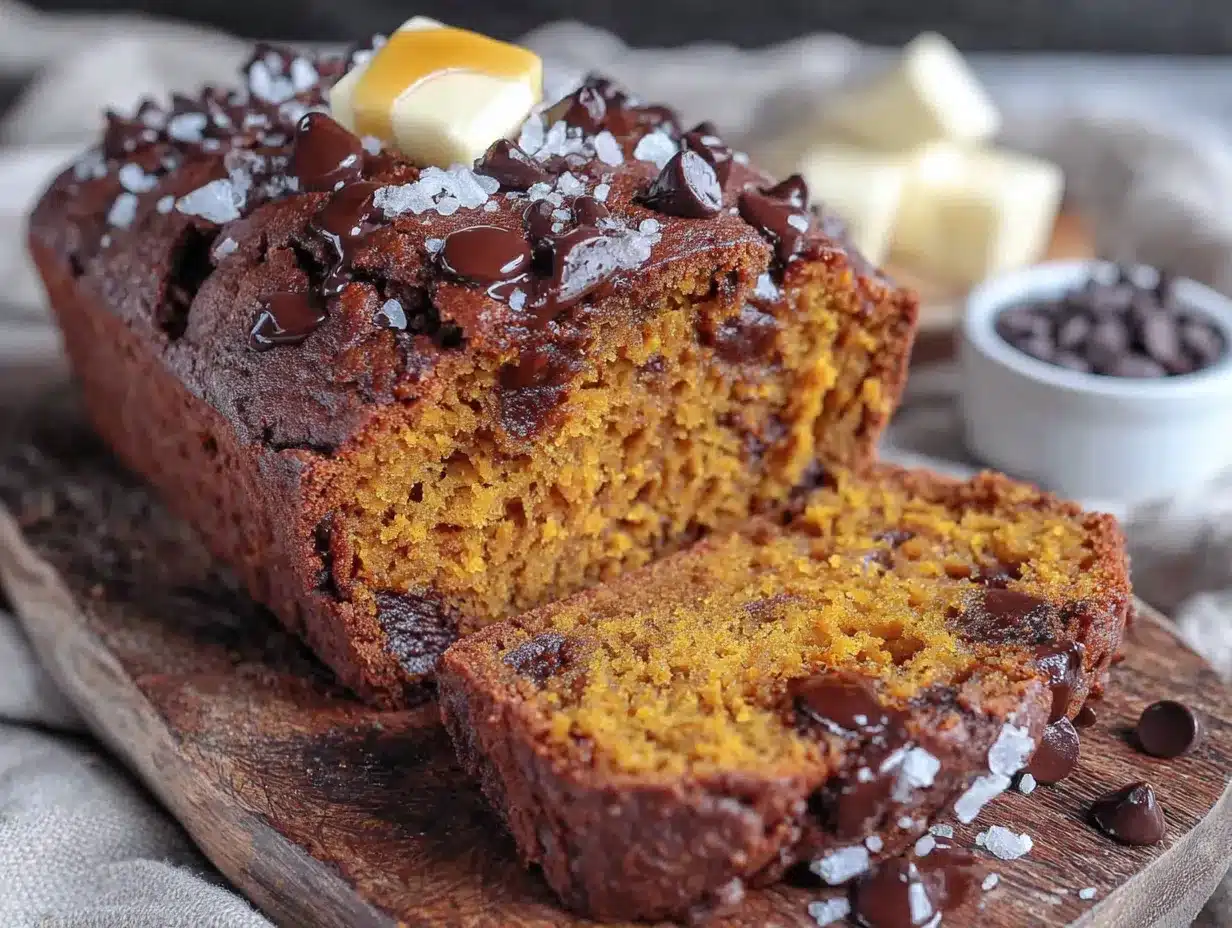
This comes together in about 15 minutes of active work. The hardest part is waiting for it to bake — and then waiting for it to cool enough to slice.
- Preheat your oven to 350°F (175°C). Position the rack in the center. Line your 9×5 loaf pan with parchment paper, leaving some overhang on the long sides. This creates handles for lifting the bread out later.
- Brown the butter. Place 1 cup of butter in a medium saucepan or heat-safe mixing bowl over medium heat. Let it melt completely, then swirl the pan occasionally. The butter will foam up, then settle down. Watch for golden brown specks forming at the bottom and a nutty aroma — this takes about 5-7 minutes. The moment it turns amber and smells like toasted hazelnuts, remove it from the heat. Pour it into a large mixing bowl if you didn’t brown it in one. Let it cool for 10 minutes. Don’t rush this — hot butter can cook the eggs.
- Mix the wet ingredients. To the cooled brown butter, add 1 cup granulated sugar and 1/2 cup packed light brown sugar. Whisk until combined — it’ll look like wet sand. Add 2 large eggs and 2 teaspoons vanilla extract. Whisk vigorously for about 30 seconds until the mixture is smooth and slightly thickened. Add the entire can of pumpkin puree (15 ounces) and whisk until fully incorporated. The batter will look smooth and glossy at this point.
- Combine the dry ingredients. In a separate medium bowl, whisk together 2 cups all-purpose flour, 1 teaspoon baking soda, 1/2 teaspoon baking powder, 1/2 teaspoon salt, and 2 teaspoons pumpkin pie spice. Whisking aerates the flour and distributes the leavening agents evenly — don’t skip this step.
- Fold the dry into the wet. Add the flour mixture to the pumpkin mixture in three additions, folding gently with a rubber spatula after each. Stop as soon as you see the last streak of flour disappear. Overmixing develops gluten and makes the bread tough. A few lumps are totally fine — they’ll disappear during baking.
- Add the chocolate chips. Reserve about 2 tablespoons of chocolate chips for the top. Fold the remaining chocolate chips into the batter with a few gentle strokes. The batter will be thick and smell incredible at this point — like pumpkin pie crossed with a bakery.
- Fill the pan. Scrape the batter into your prepared loaf pan and spread it evenly. Sprinkle the reserved chocolate chips on top, pressing them in slightly so they don’t slide off. If using turbinado sugar, sprinkle a generous tablespoon over the top now.
- Bake. Place the pan in the preheated oven and bake for 55-65 minutes. At 50 minutes, start checking. The bread is done when a toothpick inserted into the center comes out clean or with just a few moist crumbs. If the top is browning too quickly (after about 40 minutes), tent loosely with aluminum foil.
- Cool properly. Let the bread cool in the pan on a wire rack for 15 minutes. Then use the parchment sling to lift it out and transfer it to the rack to cool completely. This step is crucial — slicing warm bread will result in crumbly, messy slices. I know it’s tempting. I’ve burned my tongue more than once. Wait at least 1 hour before slicing.
Cooking Tips & Techniques
After making this brown butter pumpkin chocolate chip bread probably two dozen times (including that sugarless disaster I mentioned), here’s what I’ve learned the hard way so you don’t have to.
The brown butter will try to trick you. It goes from perfect to burnt in about 15 seconds. Keep your eyes on it. The moment you see those brown specks and smell that nutty aroma, pull it off the heat immediately. I ruined my first batch because I thought “a little darker would be better.” It wasn’t. Burnt butter tastes bitter and acrid, and there’s no saving it.
Temperature matters more than you think. If your eggs are cold and your brown butter is still warm, you’ll end up with scrambled egg bits in your batter. Let the butter cool for the full 10 minutes. If you’re in a hurry, set the bowl in a shallow pan of cool water and stir for a minute.
The toothpick test can lie. Sometimes a toothpick comes out clean but the center is still underdone. I’ve started using an instant-read thermometer — 200°F to 205°F in the center means it’s done. This was a game-changer for me after one too many gummy-centered loaves.
Don’t skip the parchment sling. I know, it’s an extra step. But I promise you’ll thank me when you lift that perfect loaf out of the pan without it crumbling. Plus, it makes cleanup basically nonexistent.
Let it rest overnight if you can. This bread is good the day you make it. But the next day? It’s incredible. The flavors meld together, the moisture distributes evenly, and the brown butter flavor deepens. If you’re serving guests, make this a day ahead and thank yourself later.
Variations & Adaptations
This recipe is forgiving. I’ve played around with it more than I’d like to admit, and most variations turn out great.
Gluten-Free Version: Swap the all-purpose flour for a 1:1 gluten-free baking flour blend. I’ve had good results with King Arthur’s Measure for Measure. Add 1 teaspoon of xanthan gum if your blend doesn’t include it. The texture will be slightly more delicate, so handle gently and let it cool completely before slicing.
Dairy-Free Adaptation: Use vegan butter for browning. I’ve used Miyoko’s and it browns surprisingly well. The flavor won’t be quite as rich, but it’s still delicious. Coconut oil works in a pinch, though it won’t brown the same way.
Nutty Crunch Variation: Add 1/2 cup toasted pecans or walnuts along with the chocolate chips. Toast them first in a dry pan for 3-4 minutes until fragrant — it makes a huge difference. I did this for a Thanksgiving gathering and it was the first thing to disappear.
Spice It Up: Add 1/4 teaspoon of cardamom or allspice for a more complex flavor profile. I sometimes add a pinch of black pepper — it sounds weird but it brings out the pumpkin and brown butter in a way that’s hard to describe.
Muffin Version: Divide the batter into a 12-cup muffin tin lined with paper cups. Bake at 350°F for 18-22 minutes. Perfect for brunch or freezing for later. I’ve done this for weekend guests and it’s a nice change from the loaf format.
Serving & Storage Suggestions
This bread is at its best served slightly warm or at room temperature. If you’re hosting, slice it just before serving and arrange on a wooden board. A smear of salted butter takes it over the top — yes, even with all that brown butter already in there. Trust me.
For a dinner party, I like to serve thick slices with a dollop of whipped cream or a drizzle of caramel sauce. It’s also fantastic with a cup of strong coffee or a chai latte. If you’re feeling extra, toast a slice in a buttered skillet until golden — the edges get crispy and the chocolate chips melt. This is my secret indulgence when no one’s watching.
Storage: Wrap the cooled bread tightly in plastic wrap or aluminum foil. It keeps at room temperature for up to 4 days. Do not refrigerate — the cold dries it out and makes the texture dense. If your kitchen is warm, store it in a cool spot away from direct sunlight.
Freezing: This bread freezes beautifully. Wrap the whole loaf or individual slices in plastic wrap, then foil, and freeze for up to 3 months. Thaw at room temperature for a few hours or pop a frozen slice in the toaster. I always keep a loaf in the freezer for unexpected guests — it’s saved me more than once.
Flavor Development: Honestly, this bread gets better on day two. The pumpkin and brown butter flavors meld overnight, and the texture becomes more tender. If you can resist it on day one, you’ll be rewarded.
Nutritional Information & Benefits
Per slice (based on 10 slices): approximately 380 calories, 18g fat, 52g carbohydrates, 5g protein, 3g fiber. This is a treat, not a health food, and that’s okay.
That said, pumpkin brings some real benefits: it’s loaded with vitamin A (great for eye health and immunity), fiber (helps with fullness), and antioxidants. The brown butter adds healthy fats that help your body absorb the fat-soluble vitamins in the pumpkin. And dark chocolate? It’s rich in flavonoids and magnesium — so there’s that.
For dietary considerations: this recipe contains gluten, dairy, and eggs. For a gluten-free version, see the variations section above. For dairy-free, use vegan butter. It’s not low-carb or keto-friendly, but it’s worth every single bite for special occasions.
My personal perspective? This is comfort food. It’s meant to be shared with people you love, enjoyed with a hot drink, and not overthought. One slice won’t derail anything. Two slices might make your afternoon better.
Conclusion
This brown butter pumpkin chocolate chip bread has become my signature host gift, my go-to for fall gatherings, and the recipe my friends request most often. It’s the one that makes people say “you need to give me this recipe” before they’ve finished their first slice. And the best part? It comes from a place of simplicity — one bowl, one pan, and a friend who asked a question I couldn’t answer.
I hope you make this your own. Add more chocolate chips if that’s your thing. Double the spice. Swap in white chocolate or butterscotch chips. The recipe is a starting point, not a rulebook. And if you try browning the butter in your mixing bowl like Jen taught me, you’ll understand why I still smile every time I make it.
I’d love to hear how it turns out for you. Drop a comment below, share your variations, or tag me in your photos. There’s something special about knowing this bread is being baked in kitchens I’ll never see — and that makes me happier than you’d think. Happy baking, friends.
Frequently Asked Questions
Can I use homemade pumpkin puree instead of canned?
Absolutely. Just make sure to drain it well. Homemade pumpkin puree tends to be more watery than canned, which can make the bread too wet. Place it in a fine-mesh strainer lined with cheesecloth for about 30 minutes to remove excess liquid.
Why did my bread sink in the middle?
This usually happens when the bread is underbaked or the oven temperature is too low. Make sure your oven is properly preheated to 350°F. Also, don’t open the oven door during the first 40 minutes of baking — the temperature drop can cause the center to collapse.
Can I reduce the sugar?
You can reduce the granulated sugar to 3/4 cup, but don’t go lower than that. The sugar does more than sweeten — it adds moisture and helps with browning. If you reduce it too much, the bread will be dense and dry.
How do I know when the butter is properly browned?
Watch for three signs: the butter will foam up and then subside, you’ll see golden brown specks forming at the bottom of the pan, and it will smell nutty and toasty. Swirl the pan as it cooks — the color should be even throughout. When in doubt, pull it off a little early. Burnt butter can’t be fixed.
Can I make this without chocolate chips?
Yes! The bread is still delicious without them. You can replace the chocolate chips with chopped nuts, dried cranberries, or leave it plain. If omitting the chocolate, consider adding an extra 1/4 cup of sugar to balance the sweetness.
Pin This Recipe!
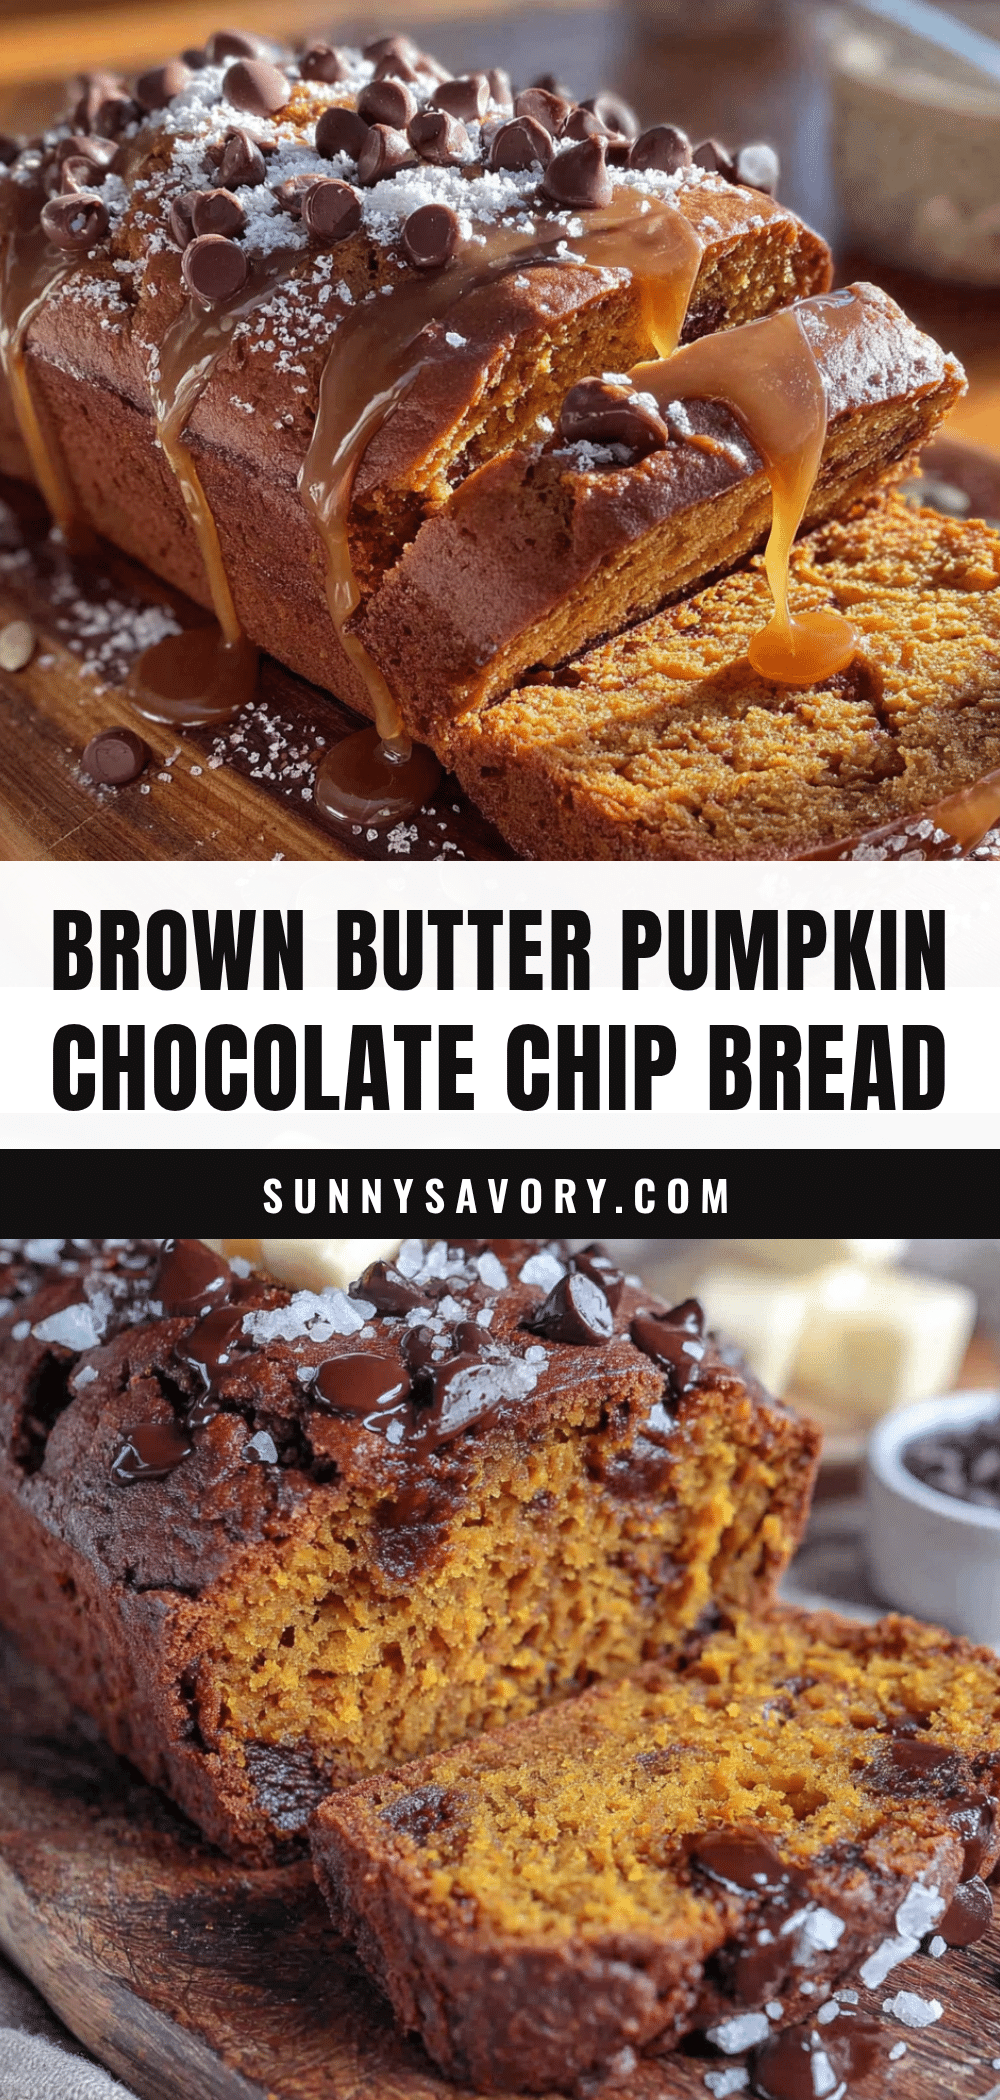
Easy Brown Butter Pumpkin Chocolate Chip Bread
This brown butter pumpkin chocolate chip bread is incredibly moist and flavorful, made with simple ingredients in one bowl. The nutty brown butter adds a caramel-like depth that makes this loaf a guaranteed crowd-pleaser.
- Prep Time: 15 minutes
- Cook Time: 55-65 minutes
- Total Time: 1 hour 15 minutes
- Yield: 10 servings 1x
- Category: Dessert
- Cuisine: American
Ingredients
- 1 cup (2 sticks) unsalted butter
- 1 can (15 ounces) pumpkin puree (not pumpkin pie filling)
- 1 cup granulated sugar
- 1/2 cup packed light brown sugar
- 2 large eggs, at room temperature
- 2 teaspoons vanilla extract
- 2 cups all-purpose flour
- 1 teaspoon baking soda
- 1/2 teaspoon baking powder
- 1/2 teaspoon salt
- 2 teaspoons pumpkin pie spice
- 1 cup semi-sweet chocolate chips
- Optional: Turbinado sugar for sprinkling
Instructions
- Preheat your oven to 350°F (175°C). Position the rack in the center. Line a 9×5-inch loaf pan with parchment paper, leaving overhang on the long sides.
- Brown the butter: Place 1 cup of butter in a medium saucepan or heat-safe mixing bowl over medium heat. Melt completely, then swirl occasionally. The butter will foam, then settle. Watch for golden brown specks and a nutty aroma (about 5-7 minutes). Remove from heat immediately. Pour into a large mixing bowl if not already in one. Let cool for 10 minutes.
- Mix the wet ingredients: To the cooled brown butter, add 1 cup granulated sugar and 1/2 cup packed light brown sugar. Whisk until combined. Add 2 large eggs and 2 teaspoons vanilla extract. Whisk vigorously for about 30 seconds until smooth and slightly thickened. Add the entire can of pumpkin puree and whisk until fully incorporated.
- Combine the dry ingredients: In a separate medium bowl, whisk together 2 cups all-purpose flour, 1 teaspoon baking soda, 1/2 teaspoon baking powder, 1/2 teaspoon salt, and 2 teaspoons pumpkin pie spice.
- Fold the dry into the wet: Add the flour mixture to the pumpkin mixture in three additions, folding gently with a rubber spatula after each. Stop as soon as the last streak of flour disappears. A few lumps are fine.
- Add the chocolate chips: Reserve about 2 tablespoons of chocolate chips for the top. Fold the remaining chocolate chips into the batter with a few gentle strokes.
- Fill the pan: Scrape the batter into the prepared loaf pan and spread evenly. Sprinkle reserved chocolate chips on top, pressing them in slightly. If using turbinado sugar, sprinkle a generous tablespoon over the top.
- Bake: Place the pan in the preheated oven and bake for 55-65 minutes. At 50 minutes, start checking. The bread is done when a toothpick inserted into the center comes out clean or with a few moist crumbs. If the top browns too quickly (after about 40 minutes), tent loosely with aluminum foil.
- Cool properly: Let the bread cool in the pan on a wire rack for 15 minutes. Then use the parchment sling to lift it out and transfer to the rack to cool completely. Wait at least 1 hour before slicing.
Notes
Let the brown butter cool for a full 10 minutes to avoid cooking the eggs. For best flavor, make the bread a day ahead and let it rest overnight. Use an instant-read thermometer for accuracy: 200°F to 205°F in the center means it’s done. Do not refrigerate; store at room temperature for up to 4 days. Freezes well for up to 3 months.
Nutrition
- Serving Size: 1 slice
- Calories: 380
- Sugar: 32
- Sodium: 280
- Fat: 18
- Saturated Fat: 10
- Carbohydrates: 52
- Fiber: 3
- Protein: 5
Keywords: brown butter, pumpkin bread, chocolate chip, fall recipe, easy pumpkin bread, one bowl pumpkin bread



