Love this? Save it for later!
Share the inspiration with your friends
My neighbor Marco asked why I couldn’t just toss the chicken thighs in the air fryer without all the extra steps. I started to explain why that wouldn’t work — then stopped. Actually, I had no good reason. I’d been doing it the “proper” way for years, dredging in flour, setting up a three-step breading station, making a mess of my kitchen. And here was this guy, a guy who once burned water, suggesting I skip half the process. I almost laughed. But I didn’t.
I went home that night, stared at my air fryer, and thought about what he said. The next evening, I tried it his way. Just seasoned the chicken, gave it a quick spray of oil, and let the machine do the work. I honestly expected dry, sad chicken. What came out was the crispiest, juiciest chicken thigh I’d ever made at home. The skin was shatteringly golden, the meat so tender it practically fell off the bone. I felt a little silly, honestly. Here I was, the “cooking teacher” in our building, and I’d been overcomplicating things for years.
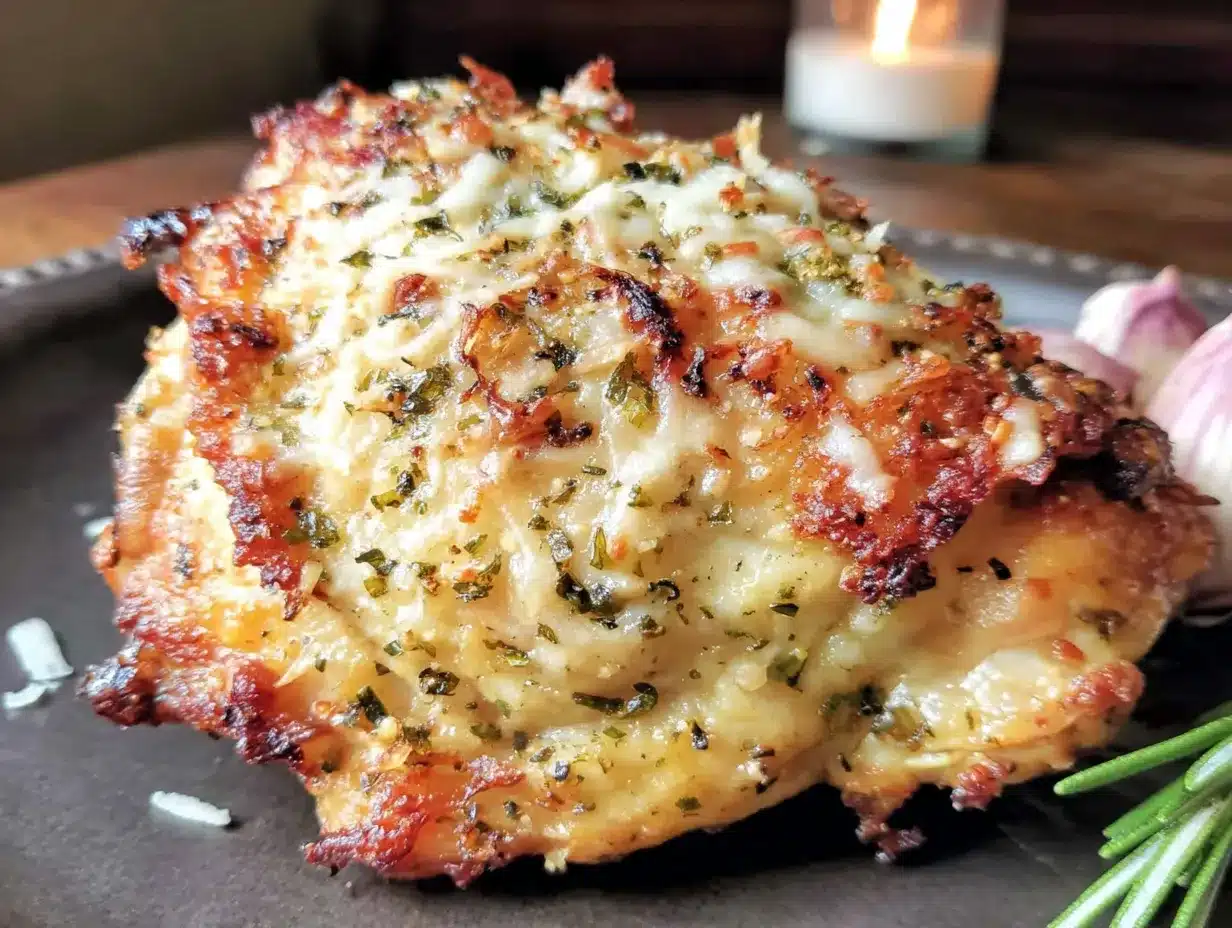
That’s the thing about Easy Crispy Air Fryer Chicken Thighs with Garlic Parmesan. They taught me that sometimes the simplest approach is the best one. The garlic and parmesan melt into the crispy skin, creating this savory, nutty crust that you just can’t get from a pan. Maybe you’ve been there too — stuck in your ways, convinced you need all the gadgets and steps. Let me tell you, letting go of that made dinner so much better. I keep making these because they prove that a perfect weeknight meal doesn’t need a complicated story. Sometimes it just needs a good idea from a neighbor who doesn’t know any better.
Why You’ll Love This Recipe
After testing this recipe about seven times in two weeks (my family wasn’t complaining), I can tell you exactly why these chicken thighs work so well. They solve the biggest problem with weeknight cooking: getting crispy chicken without the mess and time of deep frying.
- Quick & Easy: From fridge to table in under 30 minutes. No marinating, no complicated breading station. Just season, cook, and eat.
- Simple Ingredients: You need chicken thighs, garlic powder, parmesan, and a few pantry staples. No weird specialty items that you’ll use once and forget about.
- Perfect for Busy Weeknights: This is the dinner you make when you’re tired, hungry, and need something that actually works without babysitting.
- Crowd-Pleaser: Even my picky eater, who “doesn’t like chicken,” asked for seconds. The crispy parmesan crust wins everyone over.
- Unbelievably Delicious: The texture is what gets me every time. The skin gets this paper-thin crunch while the meat stays juicy. It’s the kind of chicken that makes you close your eyes after the first bite — I’m not kidding.
What makes this version different from all the others? It’s the technique. Most recipes tell you to coat the chicken in oil, then add the parmesan. That makes the cheese burn. Instead, I season the chicken first, cook it until the skin starts crisping, then add the parmesan in the last few minutes. The cheese melts into the skin without burning, creating this savory crust that tastes like you spent an hour on it. It’s comfort food reimagined — faster, simpler, but with the same soul-soothing satisfaction.
What Ingredients You Will Need
This recipe uses simple, wholesome ingredients that come together to create something genuinely special. Most of these are probably already in your kitchen, which is exactly how weeknight cooking should work.
- Bone-in, skin-on chicken thighs (4-6 thighs, about 2 pounds): The skin is crucial here — it renders and crisps up beautifully in the air fryer. I prefer thighs from Bell & Evans or Mary’s for consistent quality. If you can only find skinless, this recipe won’t work the same way. The fat in the skin is what creates that crackling crust.
- Garlic powder (1 tablespoon): Not garlic salt, please. Garlic powder distributes evenly and won’t make the chicken too salty. I use McCormick — it’s reliable and doesn’t clump.
- Onion powder (1 teaspoon): Adds a subtle sweetness that balances the savory notes. You could skip it, but you’d miss that little something extra.
- Smoked paprika (1 teaspoon): This gives the chicken a gorgeous color and a hint of smokiness. Regular paprika works too, but smoked adds more depth.
- Dried oregano (1/2 teaspoon): Just a touch for an herby background note. Italian seasoning would work as a substitute.
- Salt (1 teaspoon): I use fine sea salt. If using kosher salt, increase to 1 1/2 teaspoons.
- Black pepper (1/2 teaspoon): Freshly ground is best, but pre-ground works fine.
- Grated Parmesan cheese (1/3 cup, plus more for serving): Buy the good stuff in a wedge and grate it yourself. The pre-shredded stuff has anti-caking agents that prevent melting. Parmigiano-Reggiano is worth the splurge here — its nutty, salty flavor is what makes this dish sing.
- Olive oil spray (or avocado oil spray): A light coating helps the seasoning stick and promotes browning. Don’t use cooking spray with propellants — get a pump spray bottle or an oil mister.
- Fresh parsley (2 tablespoons, chopped, optional): For garnish. It adds a fresh pop of color and brightness.
- Lemon wedges (for serving): A squeeze of lemon right before eating cuts through the richness perfectly. Don’t skip this — it’s not just decoration.
For the best results, let your chicken thighs sit at room temperature for about 15 minutes before seasoning. This helps them cook more evenly. Also, pat them dry with paper towels — wet skin won’t crisp up, no matter how hot your air fryer gets.
Equipment Needed
You don’t need much for this recipe, which is part of the beauty. Here’s what you’ll need:
- Air fryer (6-quart or larger): I use a Cosori Pro II and love it. If yours is smaller, cook in batches — overcrowding is the enemy of crispiness.
- Paper towels: For drying the chicken. This step matters more than you think.
- Medium bowl: For mixing the seasoning blend. Any bowl works, but I like a wide one for easy tossing.
- Tongs: For flipping the chicken without tearing the skin. Silicone-tipped ones won’t scratch your air fryer basket.
- Instant-read thermometer: This is non-negotiable for me. Chicken thighs need to reach 175°F internally for the best texture. A $15 ThermoPro works perfectly.
- Cheese grater: For grating fresh parmesan. The microplane style gives you that fluffy, meltable texture.
- Oil sprayer: A simple pump mister filled with olive oil. Much better than aerosol cans.
If you don’t have an air fryer, you can use a convection oven set to 400°F. Place the thighs on a wire rack over a baking sheet and cook for about 30-35 minutes, adding the parmesan in the last 5 minutes. It won’t be quite as crispy, but it’ll still be delicious.
Preparation Method
- Preheat your air fryer to 400°F (200°C). Let it run empty for 3-5 minutes. A hot start is key for crispy skin. I usually do this while I’m seasoning the chicken.
- Pat the chicken thighs dry with paper towels. This is the most important step, honestly. Wet skin steams instead of crisping. Press firmly and get every bit of moisture off. I usually go through three or four paper towels for 6 thighs.
- Mix the seasoning. In a small bowl, combine the garlic powder, onion powder, smoked paprika, dried oregano, salt, and black pepper. Stir with a fork to break up any clumps.
- Season the chicken. Place the dried thighs in a medium bowl. Sprinkle the seasoning mixture over them, then toss with your hands until each thigh is evenly coated. Don’t be shy — get the seasoning under the skin too if you can. Just lift the skin gently and rub some in.
- Spray the air fryer basket. A quick spritz of oil prevents sticking. You can use a paper towel with a drop of oil if you don’t have spray.
- Arrange the thighs in the basket. Place them skin-side down in a single layer. Leave about 1/2 inch between each piece. If they’re touching, they won’t crisp evenly. I can fit 4-5 thighs in my 6-quart air fryer. Cook in batches if needed.
- Cook for 12 minutes at 400°F. Don’t open the basket during this time. Let the air fryer do its thing. The skin will start rendering and turning golden.
- Flip the chicken. Using tongs, carefully turn each thigh over. The skin side should be golden and starting to crisp. Spray the tops lightly with oil — this helps the parmesan stick.
- Sprinkle on the parmesan. Evenly divide the grated parmesan over the skin side of each thigh. Don’t pile it on — a light, even layer melts better. About 1 tablespoon per thigh is perfect.
- Cook for another 5-7 minutes. The parmesan will melt into the skin and turn golden brown. Watch it closely — cheese can go from perfect to burnt in seconds. I set a timer for 5 minutes and check.
- Check the temperature. Insert an instant-read thermometer into the thickest part of a thigh, avoiding the bone. You’re looking for 175-180°F. If it’s not there yet, cook in 2-minute increments.
- Rest for 5 minutes. This is crucial. The juices need time to redistribute. If you cut into them right away, all that goodness runs out onto the plate.
- Garnish and serve. Sprinkle with fresh parsley and squeeze a lemon wedge over the top. The brightness cuts through the richness perfectly.
Cooking Tips & Techniques
I’ve made this recipe at least fifteen times now, and I’ve learned a few things the hard way. Here’s what I wish someone had told me:
Don’t overcrowd the basket. I know it’s tempting to cram in as many thighs as possible to save time. But steam needs room to escape. If your thighs are touching, you’ll get soggy spots. Cook in batches — it takes 25 minutes total per batch, and the extra 5 minutes is worth it.
Patience with the parmesan. My first attempt, I added the cheese at the beginning. Big mistake. It burned into a bitter, black crust. Adding it in the last 5-7 minutes lets it melt without burning. Also, grate your own cheese. The pre-shredded stuff has cellulose that prevents melting, and you’ll end up with dry, powdery bits instead of a golden crust.
Temperature matters more than time. Every air fryer runs a little differently. My friend’s Ninja cooks faster than my Cosori. Trust your thermometer, not the timer. Chicken thighs are forgiving — they stay juicy even if you go a few degrees over. But undercooked chicken is no joke.
Let the chicken rest. I know you’re hungry. I am too. But cutting into these right away releases all the juices. Resting for 5 minutes lets the meat reabsorb those juices, so every bite is moist. I use that time to make a quick salad or set the table.
One mistake I made early on: I used too much oil. I thought more oil would mean crispier skin. Wrong. Too much oil makes the skin greasy and soft. A light spray is all you need. The chicken’s own fat renders and does most of the work.
Variations & Adaptations
One of the best things about this recipe is how flexible it is. Here are some variations I’ve tried and loved:
Spicy Buffalo Version: After the first cook, toss the thighs in 2 tablespoons of melted butter mixed with 3 tablespoons of hot sauce (I use Frank’s RedHot). Then add the parmesan for the last 5 minutes. The tangy heat with the nutty cheese is incredible.
Herb and Lemon: Skip the parmesan and add 1 tablespoon of fresh rosemary and 1 tablespoon of lemon zest to the seasoning mix. Finish with a squeeze of lemon juice. This version is lighter and perfect for summer.
Keto-Friendly: This recipe is naturally low-carb — just skip the parmesan if you’re watching dairy, or use nutritional yeast instead. The chicken itself has zero carbs, and the seasoning adds negligible amounts.
Dairy-Free: Replace the parmesan with 2 tablespoons of nutritional yeast mixed with 1 tablespoon of almond flour. It won’t get quite as crispy, but the umami flavor is surprisingly close.
Extra Crispy: After the first 12 minutes, remove the thighs and toss them with 1 tablespoon of cornstarch before adding the parmesan. This creates an even crunchier crust. I tried this on a whim and it worked way better than I expected.
Different Cuts: This method works for chicken drumsticks too. Increase cooking time to 20 minutes for the first side, then 10 minutes with the cheese. Chicken breasts work but need less time — about 10 minutes per side, then 3-4 minutes with the parmesan.
Serving & Storage Suggestions
These chicken thighs are best served immediately, while the skin is still crackling. But they’re pretty forgiving, so here’s how to handle leftovers:
Serving: Arrange the thighs on a warm platter and garnish with fresh parsley and lemon wedges. I like to serve them with a simple arugula salad dressed with lemon and olive oil — the peppery greens balance the richness. Roasted broccoli or asparagus work beautifully too. For a heartier meal, serve over mashed potatoes or with crusty bread to soak up the juices.
Storage: Let the chicken cool completely, then store in an airtight container in the refrigerator for up to 4 days. The skin will soften, but the flavor stays great. I usually make extra on purpose — cold chicken thighs are amazing chopped up over salads or in sandwiches the next day.
Reheating: The air fryer is your best friend here. Reheat at 350°F for 3-4 minutes. The skin crisps back up beautifully. You can also reheat in a 375°F oven for 8-10 minutes. Skip the microwave — it makes the skin rubbery and the meat dry.
Freezing: Cooked thighs freeze well for up to 3 months. Wrap each one individually in plastic wrap, then place in a freezer bag. Thaw overnight in the refrigerator and reheat in the air fryer. The texture won’t be quite as perfect as fresh, but it’s still better than takeout.
Flavor development: Honestly, these taste even better the next day. The garlic and parmesan flavors meld together overnight, creating a deeper, more complex taste. I sometimes make them a day ahead on purpose for this reason.
Nutritional Information & Benefits
Here’s the approximate nutritional breakdown per serving (2 thighs with skin):
- Calories: 420
- Protein: 38g
- Fat: 28g (9g saturated)
- Carbohydrates: 2g
- Fiber: 0g
- Sugar: 0g
- Sodium: 680mg
Chicken thighs are often overlooked in favor of breasts, but they’re actually more nutritious in some ways. They’re higher in iron and zinc, which support immune function and energy levels. The skin contains healthy fats that help your body absorb fat-soluble vitamins.
The parmesan adds calcium and protein, plus a satisfying umami flavor that makes this feel indulgent. If you’re watching sodium, reduce the added salt to 1/2 teaspoon — the parmesan adds plenty of saltiness on its own.
This recipe is naturally gluten-free, low-carb, and keto-friendly. It’s also high in protein, which keeps you full and satisfied. I personally love that I can serve this to my family without anyone feeling like they’re eating “diet food.” It’s just good chicken.
Conclusion
These Easy Crispy Air Fryer Chicken Thighs with Garlic Parmesan have become my go-to weeknight dinner for a reason. They’re fast, they’re forgiving, and they deliver that deep satisfaction of a meal that feels special without requiring a special occasion. The crispy skin, the savory parmesan crust, the juicy meat — it all comes together in under 30 minutes with minimal cleanup.
What I love most is how this recipe taught me to trust simplicity. I spent years overcomplicating chicken, convinced that more steps meant better results. Marco’s suggestion — just toss it in the air fryer — felt too easy to work. But it did work, and it works every single time. Sometimes the best cooking advice comes from the most unexpected places.
I’d love to hear how these turn out for you. Did you try a variation? Did your family fight over the last piece? Drop a comment below and let me know. And if you’re looking for another quick weeknight win, try my crispy garlic chicken — it uses a similar technique with a different flavor profile. Happy cooking, friends.
Frequently Asked Questions
Can I use boneless, skinless chicken thighs?
You can, but the results won’t be the same. Boneless thighs cook faster (about 10-12 minutes total) and won’t get that crispy skin. If you use them, reduce the cooking time and skip the parmesan step — it won’t stick well to skinless meat.
How do I keep the parmesan from burning?
Add it in the last 5-7 minutes of cooking, not at the beginning. Also, use finely grated fresh parmesan — the powdery kind melts quickly without burning. Watch it closely after 5 minutes; every air fryer runs a little differently.
Can I make this recipe in a regular oven?
Yes! Preheat your oven to 425°F. Place the seasoned thighs on a wire rack over a baking sheet. Bake for 25 minutes, then flip and add the parmesan. Bake another 10-15 minutes until the internal temperature reaches 175°F. The skin won’t be quite as crispy as the air fryer version, but it’s still delicious.
Why are my chicken thighs not getting crispy?
Most likely, they weren’t dried properly before seasoning. Pat them thoroughly with paper towels — any moisture creates steam that prevents crisping. Also, make sure your air fryer is fully preheated and you’re not overcrowding the basket. If all else fails, try adding 1 teaspoon of baking powder to your seasoning mix; it helps dry out the skin.
How long do leftovers last, and how should I reheat them?
Leftovers keep in the refrigerator for up to 4 days. Reheat in the air fryer at 350°F for 3-4 minutes to restore crispiness. The microwave will make the skin rubbery, so avoid it if possible. These also taste great cold, chopped up over salads or in wraps.
Pin This Recipe!

Easy Crispy Air Fryer Chicken Thighs with Garlic Parmesan

Crispy, juicy air fryer chicken thighs with a savory garlic parmesan crust. Ready in under 30 minutes with minimal cleanup, this simple weeknight dinner proves that sometimes the best approach is the simplest one.
- Prep Time: 10 minutes
- Cook Time: 17-19 minutes
- Total Time: 27-29 minutes
- Yield: 4 servings 1x
- Category: Main Course
- Cuisine: American
Ingredients
- 4–6 bone-in, skin-on chicken thighs (about 2 pounds)
- 1 tablespoon garlic powder
- 1 teaspoon onion powder
- 1 teaspoon smoked paprika
- 1/2 teaspoon dried oregano
- 1 teaspoon fine sea salt
- 1/2 teaspoon black pepper
- 1/3 cup grated Parmesan cheese (plus more for serving)
- Olive oil spray (or avocado oil spray)
- 2 tablespoons fresh parsley, chopped (optional, for garnish)
- Lemon wedges (for serving)
Instructions
- Preheat your air fryer to 400°F (200°C) for 3-5 minutes.
- Pat the chicken thighs dry with paper towels, pressing firmly to remove all moisture.
- In a small bowl, combine garlic powder, onion powder, smoked paprika, dried oregano, salt, and black pepper. Stir to break up clumps.
- Place dried thighs in a medium bowl. Sprinkle seasoning mixture over them and toss with your hands until evenly coated. Optionally, lift the skin gently and rub some seasoning underneath.
- Spray the air fryer basket lightly with oil to prevent sticking.
- Arrange thighs skin-side down in a single layer in the basket, leaving about 1/2 inch between each piece. Cook in batches if needed.
- Cook for 12 minutes at 400°F without opening the basket.
- Flip the chicken using tongs. Spray the tops lightly with oil.
- Sprinkle grated Parmesan evenly over the skin side of each thigh (about 1 tablespoon per thigh).
- Cook for another 5-7 minutes, watching closely to prevent burning, until the Parmesan is melted and golden brown.
- Check internal temperature with an instant-read thermometer in the thickest part of a thigh (avoiding bone). Target 175-180°F. If not done, cook in 2-minute increments.
- Let the chicken rest for 5 minutes before serving.
- Garnish with fresh parsley and squeeze lemon wedges over the top. Serve immediately.
Notes
Pat chicken thighs very dry for crispiest skin. Add Parmesan in the last 5-7 minutes to prevent burning. Let chicken rest 5 minutes before serving. For best results, use freshly grated Parmigiano-Reggiano. If air fryer is smaller, cook in batches to avoid overcrowding.
Nutrition
- Serving Size: 2 thighs with skin
- Calories: 420
- Sodium: 680
- Fat: 28
- Saturated Fat: 9
- Carbohydrates: 2
- Protein: 38
Keywords: air fryer chicken thighs, crispy chicken thighs, garlic parmesan chicken, easy weeknight dinner, keto chicken, gluten-free chicken



