Love this? Save it for later!
Share the inspiration with your friends
My sister asked why I couldn’t just skip the candy thermometer and use marshmallow creme instead. I started to explain why that wouldn’t work—then stopped. Honestly, I had no good reason. I’d just always done it the old-fashioned way, stirring sugar and butter to a precise softball stage, praying the humidity didn’t ruin everything. But she was standing there in my kitchen, holding a jar of marshmallow creme like it was the most obvious solution in the world. I wanted to tell her that real fudge requires real technique. That you can’t shortcut something this classic. But I was tired from a long week, and the stove was already hot, so I shrugged and said, “Fine. Let’s try it your way.”
The first batch came out so smooth and glossy I actually laughed out loud. I mean, I had spent years perfecting my stovetop method, and here she was, on her first try, making fudge that set perfectly in half the time. No grainy texture. No crystallized sugar. Just that perfect, melt-in-your-mouth fudge that makes you close your eyes after the first bite. Maybe you’ve been there—stubbornly sticking to a complicated method when a simpler one was sitting right under your nose.
That’s how this Easy Fantasy Fudge with Marshmallow Creme and Walnuts became my new go-to. It’s the recipe that taught me to listen more and lecture less. And honestly? It’s the best fudge I’ve ever made.
Why You’ll Love This Recipe
This isn’t just another fudge recipe—it’s the one that will make you forget every other version you’ve tried. After testing this method dozens of times (and yes, messing up a few batches along the way), I can confidently say this is the most reliable, foolproof fudge out there.
- Quick & Easy: From start to finish, this fudge comes together in about 15 minutes of active time. No candy thermometers, no guessing games, no stress.
- Simple Ingredients: You likely have everything in your pantry right now. Sugar, butter, marshmallow creme, chocolate chips, walnuts, and vanilla. That’s it.
- Perfect for Holidays & Gifting: This fudge travels beautifully, stays fresh for weeks, and makes the most thoughtful homemade gift for neighbors, teachers, and coworkers.
- Crowd-Pleaser: I’ve brought this to potlucks, family gatherings, and office parties. It disappears every single time. Kids and adults fight over the last piece.
- Unbelievably Foolproof: The marshmallow creme stabilizes the sugar mixture, preventing that dreaded grainy texture. Even if you’re a beginner, this recipe will make you look like a pro.
What makes this recipe different from the rest? It’s the texture. The marshmallow creme creates a fudge that’s creamy, not crumbly. Rich, not greasy. And the walnuts add that perfect crunch that balances the sweetness. This isn’t just another version of fantasy fudge—it’s the best version. The one you’ll come back to year after year.
What Ingredients You Will Need
This recipe uses simple, pantry-friendly ingredients to deliver that classic fudge flavor and texture. Each ingredient plays a specific role, so here’s what to look for and why it matters.
For the Fudge Base
- Sugar (3 cups / 600g): Regular white granulated sugar works perfectly. Don’t substitute with brown sugar—it changes the texture and moisture content.
- Unsalted butter (¾ cup / 170g): I recommend using a good-quality butter like Kerrygold or Land O’Lakes. Unsalted gives you control over the salt level. Cut it into pieces so it melts evenly.
- Evaporated milk (⅔ cup / 160ml): This is not the same as sweetened condensed milk. Evaporated milk adds creaminess without extra sweetness. I’ve tried both, and evaporated milk gives the best texture.
- Marshmallow creme (1 jar / 7 oz / 198g): Marshmallow Fluff or Jet-Puffed both work great. This is the magic ingredient that prevents sugar crystals from forming, giving you that silky-smooth fudge every time.
- Semi-sweet chocolate chips (2 cups / 340g): I prefer Ghirardelli or Guittard for their smooth melting properties. You can also use a chopped chocolate bar if you have one handy.
- Vanilla extract (1 teaspoon): Pure vanilla extract makes a difference here. Imitation vanilla works in a pinch, but the flavor won’t be as rich.
- Salt (¼ teaspoon): A little salt balances the sweetness and enhances the chocolate flavor. I use fine sea salt.
For the Mix-Ins
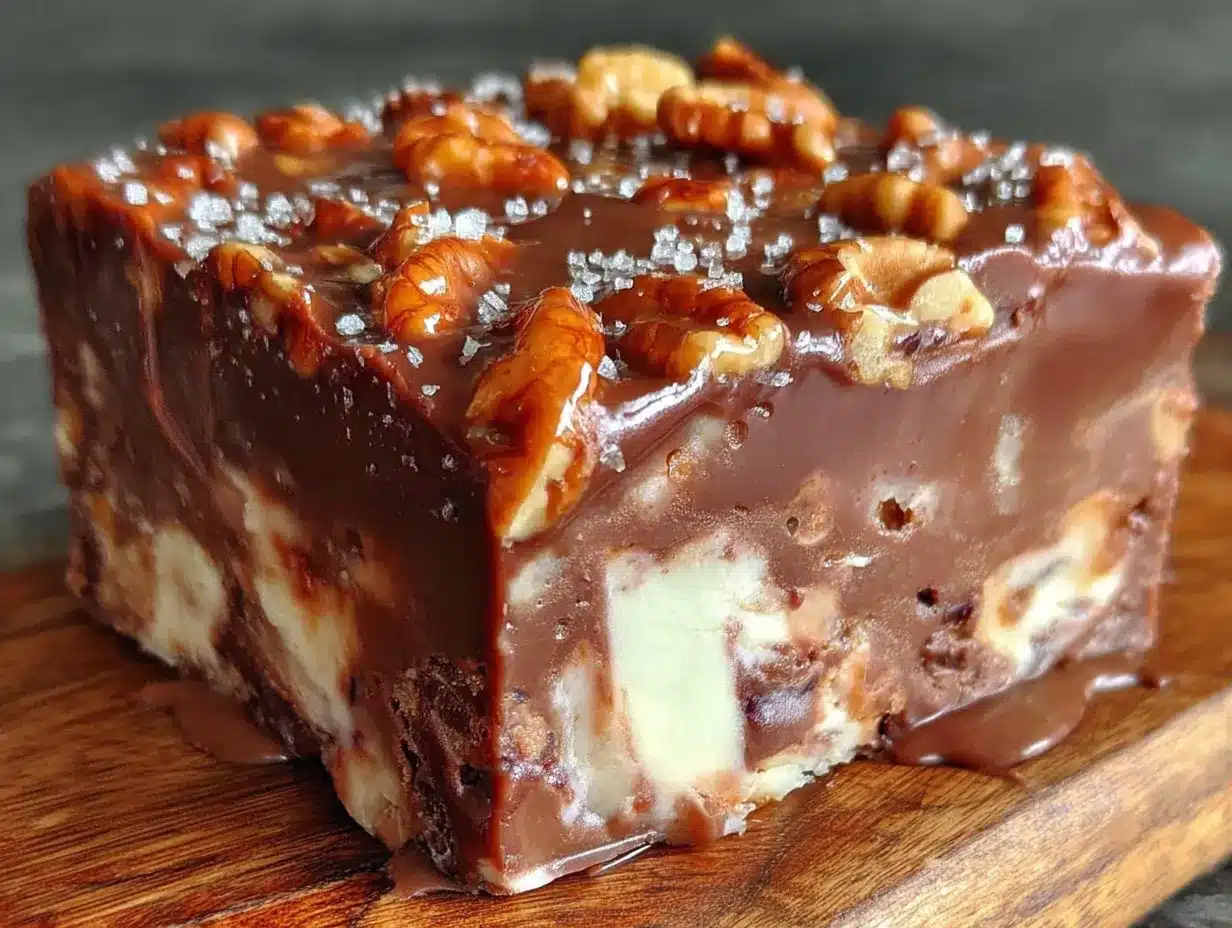
- Chopped walnuts (1 cup / 120g): Toast them lightly for extra flavor—just 5 minutes in a 350°F oven brings out their natural oils. You can substitute pecans or leave them out entirely for nut-free fudge.
Substitution Notes
- Dairy-free option: Use a high-quality vegan butter and dairy-free chocolate chips. The texture will be slightly different but still delicious.
- Nut-free option: Skip the walnuts entirely or replace them with dried cranberries or shredded coconut.
- Milk chocolate version: Swap semi-sweet chips for milk chocolate chips if you prefer a sweeter, creamier fudge.
Equipment Needed
You don’t need a fancy kitchen to make this fudge. Here’s what you’ll need:
- Medium saucepan (3-quart): Heavy-bottomed is best for even heat distribution. I use my trusty Calphalon saucepan—it’s never let me down.
- Wooden spoon or silicone spatula: Metal spoons can scratch your pan and don’t stir as effectively. A good silicone spatula is my go-to.
- 8×8-inch baking pan: Glass or metal both work. Line it with parchment paper for easy removal—trust me on this one.
- Measuring cups and spoons: Accurate measurements matter in candy-making. Use dry measuring cups for sugar and liquid measuring cups for evaporated milk.
- Sharp knife: For cutting the fudge into clean squares. A chef’s knife works better than a butter knife.
- Parchment paper: Makes lifting the fudge out of the pan effortless. Don’t skip this unless you enjoy scraping fudge out of corners.
If you don’t have an 8×8 pan, a 9×9 will work—your fudge will just be slightly thinner. I’ve also used a loaf pan for thicker fudge bars, but adjust the chilling time accordingly.
Preparation Method
Making this fudge is almost embarrassingly easy. Here’s the step-by-step method that’s never failed me.
- Prep your pan (5 minutes): Line an 8×8-inch baking pan with parchment paper, leaving a 2-inch overhang on two sides. This creates “handles” for lifting the fudge out later. Lightly grease the parchment with butter or non-stick spray.
- Combine the base ingredients (2 minutes): In a medium saucepan, combine 3 cups sugar, ¾ cup unsalted butter, and ⅔ cup evaporated milk. Stir gently to combine. Don’t turn on the heat yet—make sure everything is mixed first.
- Bring to a boil (5-7 minutes): Place the saucepan over medium heat and stir constantly until the mixture comes to a full rolling boil. You’ll see bubbles across the entire surface, not just around the edges. This is important—if it’s not boiling fully, the fudge won’t set properly.
- Boil for exactly 4 minutes (4 minutes): Once boiling, set a timer for 4 minutes. Keep stirring the entire time. I know it’s tempting to walk away, but don’t. The sugar can scorch quickly. The mixture will thicken slightly and turn a pale golden color.
- Remove from heat and add chocolate (1 minute): Take the pan off the burner. Immediately add 2 cups semi-sweet chocolate chips, 1 jar marshmallow creme, 1 teaspoon vanilla, and ¼ teaspoon salt. Stir vigorously until everything is smooth and fully combined. The residual heat will melt the chocolate and marshmallow creme—no need to turn the heat back on.
- Fold in walnuts (30 seconds): Once the mixture is smooth and glossy, fold in 1 cup chopped walnuts. Stir just until evenly distributed. Overmixing at this stage can make the fudge grainy.
- Pour into prepared pan (30 seconds): Immediately pour the fudge mixture into your lined pan. Use a spatula to spread it evenly into the corners. Don’t fuss with it too much—just get it level.
- Cool and set (2-3 hours): Let the fudge cool at room temperature for about 30 minutes, then transfer to the refrigerator. Let it set for at least 2 hours, or until firm to the touch. I usually leave it overnight for the cleanest slices.
- Cut and serve (5 minutes): Lift the fudge out of the pan using the parchment overhang. Place on a cutting board and use a sharp knife to cut into 1-inch squares. Clean the knife between cuts for the neatest edges.
Sensory cues to watch for: The mixture should look glossy and smooth when you pour it into the pan. If it looks dull or grainy, you may have cooked it too long. The finished fudge should feel firm but give slightly when pressed—like a firm chocolate bar at room temperature.
Cooking Tips & Techniques
After making this fudge more times than I can count, I’ve learned a few things the hard way. Here are my best tips for perfect results every time.
Don’t skip the constant stirring. I know it’s tedious, but sugar loves to crystallize, and stirring prevents that. The first time I made this, I got distracted by a phone call and only stirred occasionally. The fudge turned out grainy and crumbly. Lesson learned.
Use a timer, not your instincts. Four minutes of boiling might not seem like enough, but it is. I once let it boil for five minutes “just to be safe,” and the fudge turned out dry and brittle. Trust the recipe, not your impatience.
Room temperature ingredients matter. I know, I know—another recipe telling you to bring ingredients to room temperature. But here’s the thing: cold butter can seize the sugar mixture, and cold evaporated milk can cause the fudge to separate. Take the extra 10 minutes to let everything warm up.
Humidity is your enemy. Fudge-making on a rainy day is a gamble. Sugar absorbs moisture from the air, which can prevent proper setting. If you absolutely must make fudge in humid weather, increase the boiling time by 30 seconds to compensate.
Line your pan properly. The first time I made this, I thought I could just grease the pan and call it good. I spent 20 minutes chiseling fudge out of the corners. Parchment paper with overhang is non-negotiable.
Variations & Adaptations
This recipe is incredibly versatile. Here are some of my favorite variations:
Chocolate Peppermint Fudge: Add ½ teaspoon peppermint extract along with the vanilla, and top the fudge with crushed candy canes before it sets. This is my go-to for holiday cookie exchanges.
Rocky Road Fudge: Fold in ½ cup mini marshmallows and ¼ cup chopped almonds along with the walnuts. The marshmallows stay soft and create little pockets of sweetness.
White Chocolate Fantasy Fudge: Substitute white chocolate chips for semi-sweet and add ½ cup dried cranberries and ¼ cup pistachios. It’s sweeter, but oh-so-pretty for gift boxes.
Vegan Version: Use vegan butter, dairy-free chocolate chips (Enjoy Life works great), and a vegan marshmallow creme like Dandies. The texture is slightly softer but still delicious.
Spiced Fudge: Add ½ teaspoon cinnamon and ¼ teaspoon cayenne pepper along with the vanilla. The warmth of the spices pairs beautifully with the chocolate.
I tried the peppermint version last Christmas, and honestly, it was the first thing to disappear from my gift tins. Even my dad, who claims he doesn’t like mint, ate three pieces before admitting it was “pretty good.”
Serving & Storage Suggestions
This fudge is best served at room temperature. Cold fudge from the refrigerator will be too firm, and the flavors won’t be as pronounced. Let it sit out for about 15 minutes before serving.
For gifting: Cut into neat squares and layer between sheets of parchment paper in a decorative tin or box. Add a ribbon and a handwritten tag, and you’ve got a gift that feels personal and thoughtful.
Storage: Keep fudge in an airtight container at room temperature for up to 2 weeks. If your kitchen is warm, store it in the refrigerator—just let it come to room temperature before serving. For longer storage, freeze the fudge for up to 3 months. Wrap each piece individually in plastic wrap, then place in a freezer-safe bag. Thaw in the refrigerator overnight.
Flavor development: Here’s something interesting—fudge actually tastes better the next day. The flavors meld together, and the texture becomes even creamier. So don’t be disappointed if it’s not perfect right out of the pan. Give it 24 hours, and you’ll be amazed at the difference.
Nutritional Information & Benefits
Let’s be real—this is a treat, not a health food. But here’s the breakdown if you’re curious:
Per 1-inch square (approximate): 120 calories, 6g fat, 17g carbohydrates, 1g protein, 12g sugar. These numbers will vary based on your specific ingredients and how you cut the fudge.
Walnuts: The good news is that walnuts are packed with omega-3 fatty acids, which support heart health and brain function. So at least there’s that.
Dark chocolate: Semi-sweet chocolate contains antioxidants called flavonoids, which can help reduce inflammation. Again, not a health claim—just a nice bonus.
Dietary considerations: This recipe contains dairy, gluten (if your chocolate chips contain wheat), and nuts. For gluten-free fudge, check that your chocolate chips are certified gluten-free. For nut-free, simply omit the walnuts.
I’m not a nutritionist, and I’m not pretending this is a health food. But I do believe in balance. A piece of fudge after a long day? Absolutely. The whole pan? Maybe not.
Conclusion
This Easy Fantasy Fudge with Marshmallow Creme and Walnuts is the recipe that taught me to be humble in the kitchen. It’s proof that sometimes the simplest method really is the best. No candy thermometers, no complicated techniques—just honest, delicious fudge that comes together in minutes.
I love this recipe because it reminds me of that moment with my sister, standing in my kitchen, learning that I don’t always have to be the expert. Sometimes the best lessons come from letting go of control and trying something new.
I’d love to hear how your fudge turns out. Did you add your own twist? Did you make it for a holiday or just because? Drop a comment below and share your experience. And if you loved this recipe, share it with a friend who needs a little sweetness in their life. Happy cooking, friends!
Frequently Asked Questions
Can I use sweetened condensed milk instead of evaporated milk?
No, I wouldn’t recommend it. Sweetened condensed milk is much thicker and sweeter, which will throw off the sugar balance and texture. Stick with evaporated milk for the best results.
Why did my fudge turn out grainy?
Grainy fudge usually means the sugar crystallized. This can happen if you didn’t stir constantly during boiling, or if the mixture wasn’t fully dissolved before it came to a boil. Next time, make sure you’re stirring the entire time and that the sugar is completely dissolved before the mixture boils.
Can I freeze this fudge?
Absolutely! Wrap individual pieces in plastic wrap, place them in a freezer-safe bag, and freeze for up to 3 months. Thaw in the refrigerator overnight, then let them come to room temperature before serving.
How do I know when the fudge is done boiling?
You’re looking for a full rolling boil—bubbles across the entire surface, not just around the edges. Once you see that, start your 4-minute timer and keep stirring. The mixture will thicken slightly and turn a pale golden color.
Can I make this without walnuts?
Yes, absolutely. The fudge is just as delicious without them. You can also substitute pecans, almonds, or even dried cranberries for a different texture and flavor.
Pin This Recipe!
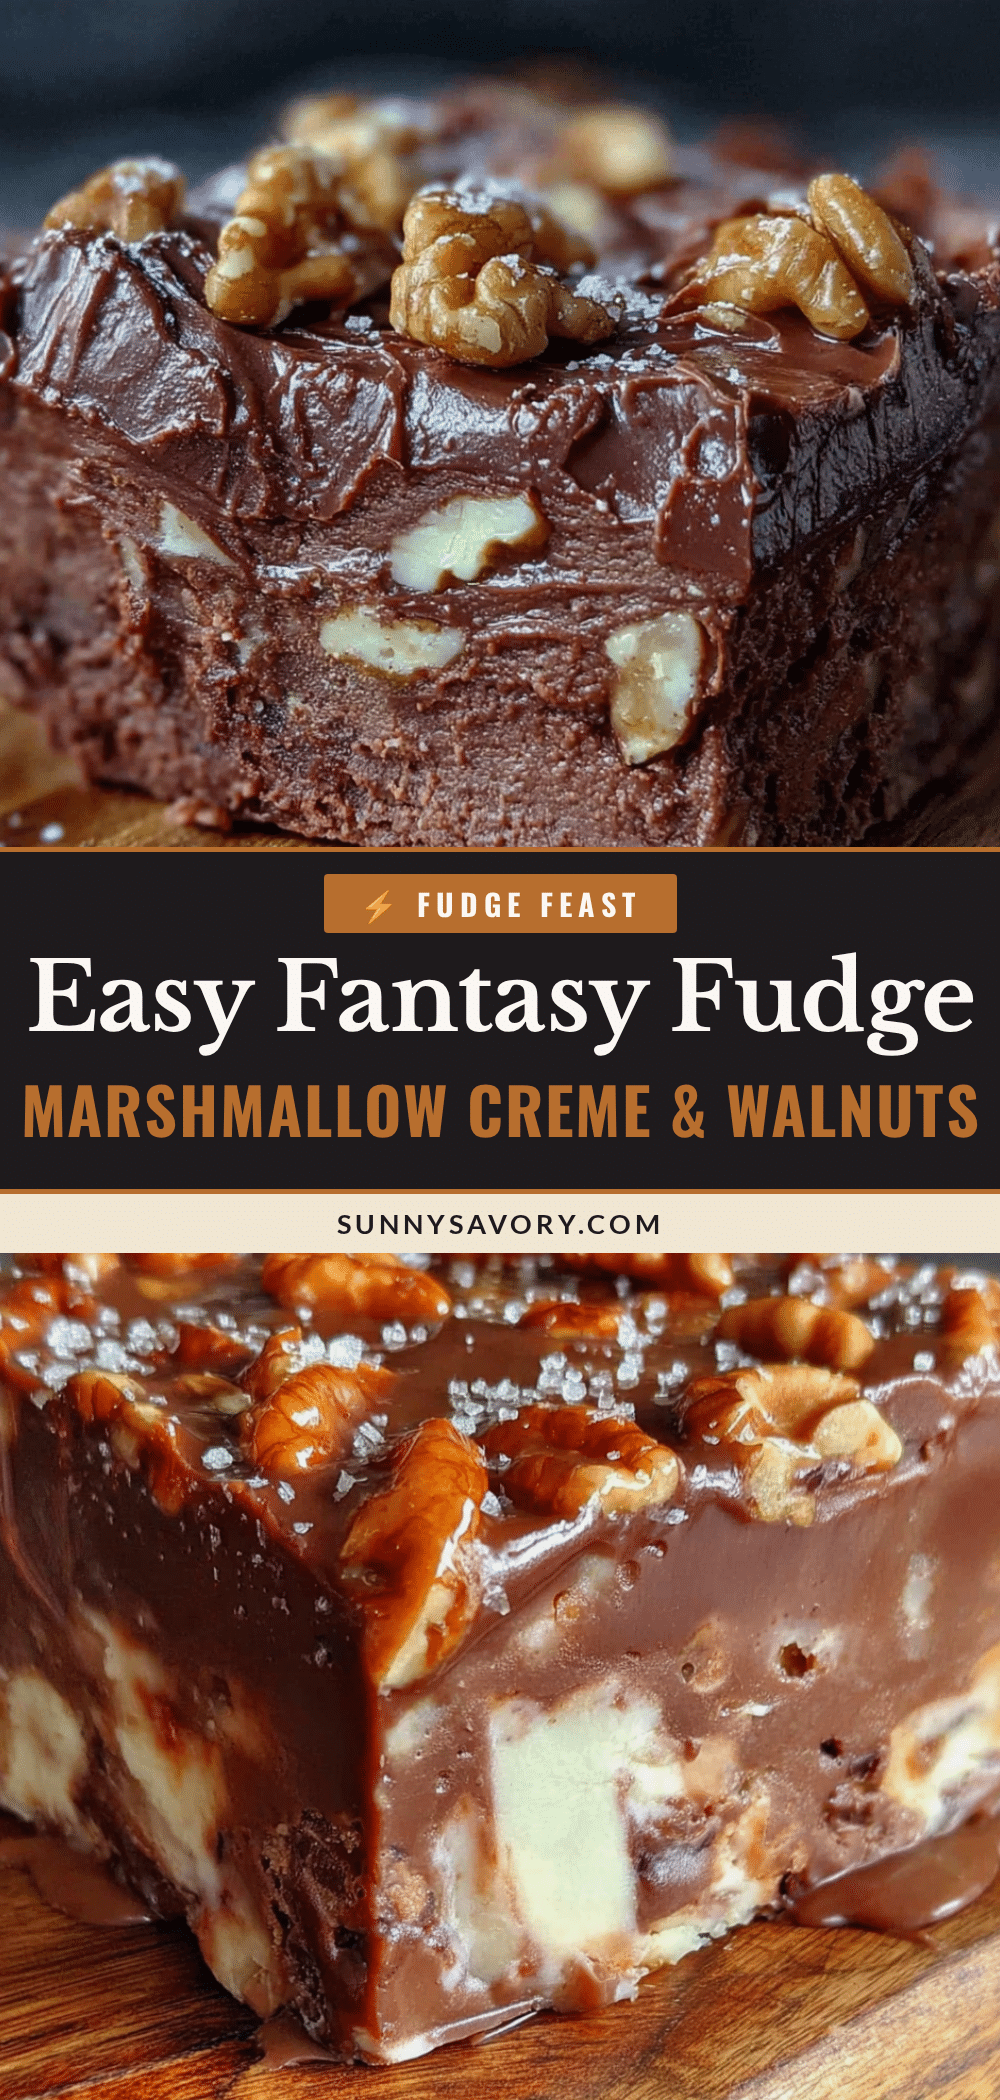
Easy Fantasy Fudge with Marshmallow Creme & Walnuts
This foolproof fudge uses marshmallow creme to prevent graininess, creating a silky-smooth, melt-in-your-mouth treat with crunchy walnuts. Ready in just 15 minutes of active time, it’s perfect for holidays, gifting, or any sweet craving.
- Prep Time: 15 minutes
- Cook Time: 4 minutes
- Total Time: 2 hours 19 minutes (includes cooling and setting)
- Yield: 64 servings (1-inch squares) 1x
- Category: Dessert
- Cuisine: American
Ingredients
- 3 cups (600g) white granulated sugar
- ¾ cup (170g) unsalted butter, cut into pieces
- ⅔ cup (160ml) evaporated milk
- 1 jar (7 oz / 198g) marshmallow creme (e.g., Marshmallow Fluff or Jet-Puffed)
- 2 cups (340g) semi-sweet chocolate chips (e.g., Ghirardelli or Guittard)
- 1 teaspoon pure vanilla extract
- ¼ teaspoon fine sea salt
- 1 cup (120g) chopped walnuts, lightly toasted (optional)
Instructions
- Line an 8×8-inch baking pan with parchment paper, leaving a 2-inch overhang on two sides. Lightly grease the parchment with butter or non-stick spray.
- In a medium saucepan, combine sugar, unsalted butter, and evaporated milk. Stir gently to combine before turning on the heat.
- Place the saucepan over medium heat and stir constantly until the mixture comes to a full rolling boil (bubbles across the entire surface).
- Once boiling, set a timer for exactly 4 minutes. Keep stirring the entire time. The mixture will thicken slightly and turn a pale golden color.
- Remove the pan from heat. Immediately add semi-sweet chocolate chips, marshmallow creme, vanilla extract, and salt. Stir vigorously until smooth and fully combined.
- Fold in chopped walnuts until evenly distributed. Do not overmix.
- Immediately pour the fudge mixture into the prepared pan. Use a spatula to spread it evenly into the corners.
- Let the fudge cool at room temperature for about 30 minutes, then transfer to the refrigerator. Let it set for at least 2 hours, or until firm to the touch (overnight is best for clean slices).
- Lift the fudge out of the pan using the parchment overhang. Place on a cutting board and cut into 1-inch squares with a sharp knife, cleaning the knife between cuts.
Notes
For best results, use room temperature ingredients. Avoid making fudge on humid days; if necessary, increase boiling time by 30 seconds. Fudge tastes even better the next day as flavors meld. Store in an airtight container at room temperature for up to 2 weeks, or freeze for up to 3 months.
Nutrition
- Serving Size: 1 square (1-inch)
- Calories: 120
- Sugar: 12
- Sodium: 30
- Fat: 6
- Saturated Fat: 3
- Carbohydrates: 17
- Fiber: 1
- Protein: 1
Keywords: fantasy fudge, marshmallow creme fudge, easy fudge, walnut fudge, holiday fudge, no thermometer fudge



