Love this? Save it for later!
Share the inspiration with your friends
My sister swore she hated pudding. For years. Like, would scrunch up her nose at the sight of a pudding cup in a lunchbox. Then, last October, I was tasked with bringing a dessert to our family Halloween party, and I was running late—like, embarrassingly late. I grabbed a box of instant chocolate pudding, a sleeve of Oreos, and some gummy worms, fully expecting to just throw something together. I didn’t even tell her what I was making. I just set the little cups on the dessert table and walked away to help my nephew with his costume zipper. When I turned back, there she was, spoon in hand, halfway through her second cup. “What is this?” she asked, trying to sound casual. I just smiled. That was the moment I learned that sometimes, the best recipes are the ones you don’t overthink. Honestly, this Easy Halloween Oreo Dirt Cup Pudding Cups recipe is proof that you don’t need hours in the kitchen or a long ingredient list to create something that feels special. It’s the kind of dessert that makes people stop, take a bite, and then look at you with that surprised expression. Maybe you’ve been there—needing a last-minute Halloween treat that doesn’t scream “store-bought” but also doesn’t require a culinary degree. These little cups of chocolatey, crunchy goodness are my go-to, and they’ve converted more than one pudding skeptic along the way.
Why You’ll Love This Recipe
Let me tell you, after testing about a dozen different versions of this classic dessert—some with homemade pudding, some with different cookie ratios—this one is the winner. It hits that sweet spot between ridiculously easy and genuinely delicious. You know that feeling when a recipe just works? This is it.
- Five Minutes to Prep: I’m not exaggerating. If you can stir and crumble, you can make these. It’s perfect for those days when Halloween snuck up on you (which, let’s face it, happens every year).
- Pantry-Friendly Ingredients: You probably have everything already. No special trips to the store for obscure ingredients. Just pudding mix, milk, Oreos, and some creepy-crawly candy.
- Perfect for Halloween Parties: Whether it’s a school party, a work potluck, or just a spooky movie night at home, these cups fit right in. They look festive without being fussy.
- Kid-Approved and Adult-Loved: I’ve seen grown-ups sneak these from the back of the fridge. The combination of creamy pudding and crunchy cookie crumbs is just universally appealing.
- Unbelievably Satisfying: There’s something about that first spoonful—the way the soft pudding meets the slightly crunchy “dirt” and the chewy gummy worm. It’s a textural party in your mouth.
What makes this version different from all the others? It’s the ratio. I spent a good amount of time figuring out the perfect Oreo-to-pudding balance. Too many crumbs and it’s dry; too few and it’s just pudding with a garnish. This recipe gives you that perfect layer of “dirt” that stays crunchy on top and melds into the pudding below. Plus, I’ll share my trick for getting the crumbs just right—not too fine, not too chunky. It’s comfort food reimagined for the spooky season, and it’s the kind of dessert that makes you close your eyes after the first bite.
What Ingredients You Will Need
This recipe uses simple, wholesome-ish ingredients to deliver big flavor without the fuss. Most of these are pantry staples, which is exactly what you want when Halloween chaos is in full swing.
For the Pudding Base
- 1 (3.9 oz) box instant chocolate pudding mix – I prefer Jell-O brand for its consistent texture, but store brands work fine too. Make sure it’s the instant kind, not cook-and-serve, or you’ll be waiting forever.
- 2 cups cold whole milk – Whole milk gives the richest, creamiest texture. (2% works in a pinch, but honestly, the full-fat version is worth it for a treat like this.)
For the “Dirt”
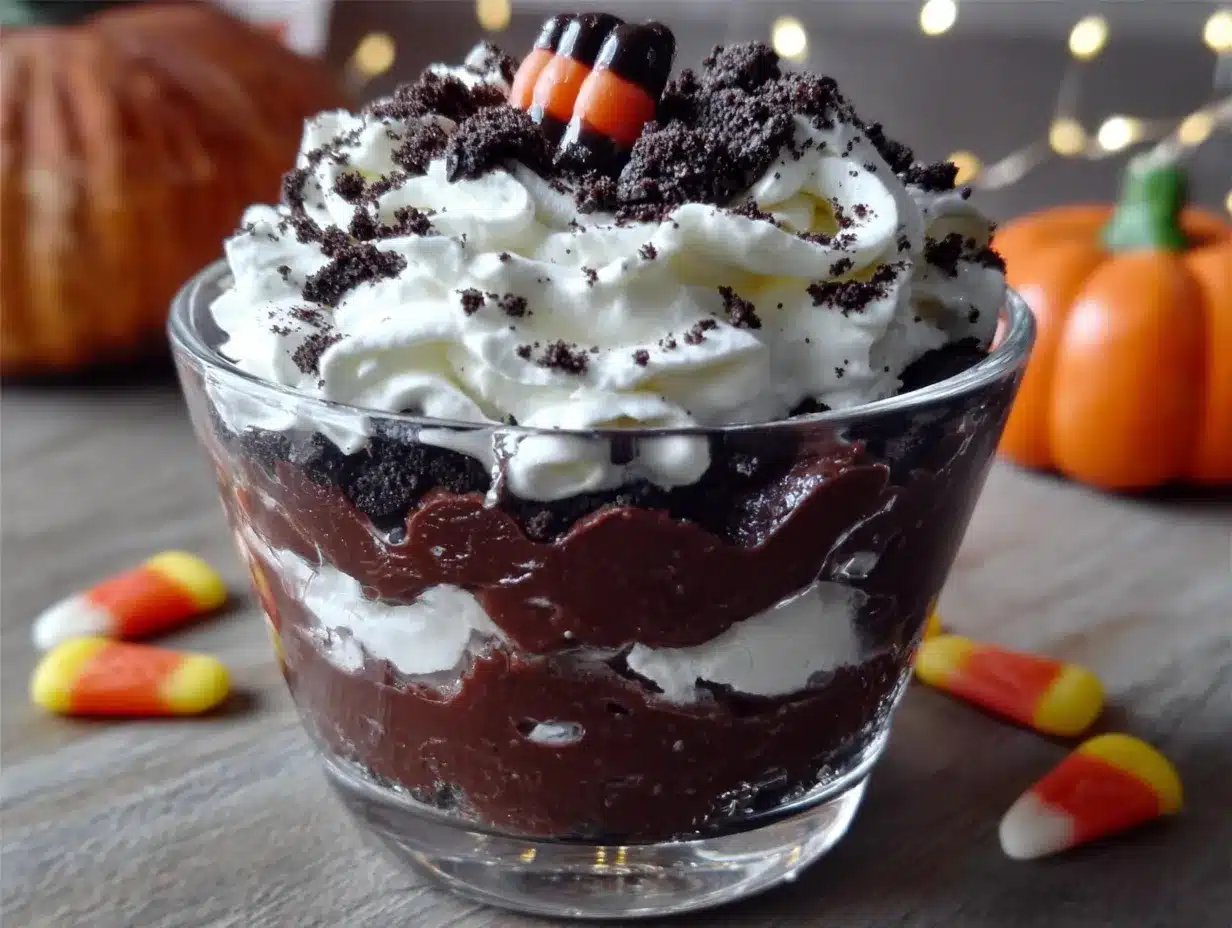
- 1 (14.3 oz) package Oreo cookies – Regular Oreos are best. Not the double-stuf or the thin ones—the classic version crumbles into that perfect dirt-like texture. I’ve tested this, trust me.
- Optional: 2 tablespoons melted butter – This is my secret for making the “dirt” slightly clumpy, like real garden soil. It adds a tiny bit of richness and helps the crumbs hold together better. Skip it if you want a looser crumb.
For Decoration
- Gummy worms – The classic choice. Look for the sour kind for a nice tangy contrast to the sweet pudding.
- Halloween sprinkles – Little ghosts, pumpkins, or just orange and black jimmies. Totally optional but very cute.
- Optional: Fresh mint leaves – Sounds weird, I know, but a tiny sprig on top makes it look like a little garden. I tried it once for a photo and it looked amazing.
Ingredient Selection Tip: When buying your Oreos, check the expiration date. Fresh cookies crumble better than stale ones. Also, if you’re using a dairy-free milk alternative (like oat or almond milk), make sure it’s unsweetened and cold. The pudding needs to set properly, and warm or sweetened milk can mess with the texture.
Substitution Guidance: For a gluten-free version, use gluten-free chocolate sandwich cookies (like Glutino or Goodie Girl brands) and double-check your pudding mix label. For a lower-sugar option, you can use sugar-free pudding mix and reduced-fat Oreos—the texture will be slightly different, but it still works. If you’re out of whole milk, mix 1 cup of 2% milk with 1 cup of half-and-half for a similar richness.
Equipment Needed
One of the best things about this recipe is how little equipment you need. I’ve made these in my sister’s poorly-stocked kitchen more times than I can count.
- Mixing bowls: One medium bowl for the pudding, one small bowl for the cookie crumbs. Any size works.
- Whisk: A good whisk helps get the pudding smooth. A fork works in a pinch, but you’ll be whisking for a while.
- Plastic zipper bag and rolling pin: This is my preferred method for crushing Oreos. Put the cookies in the bag, seal it, and go to town with the rolling pin. It’s oddly satisfying and keeps the mess contained. You can also use a food processor, but honestly, the bag method gives you more control over the texture.
- Small cups or glasses: I use 6-ounce clear plastic cups for parties, but any small glass or jar works. Mason jars are cute, and even small ramekins will do. You want something that shows off the layers.
- Spoon or small spatula: For layering the pudding and crumbs. A small offset spatula is nice but not necessary.
Budget-Friendly Tip: Don’t run out and buy special cups. Reuse empty yogurt containers, small jam jars, or even paper cups. The presentation is still cute, and nobody cares what it’s served in once they taste it.
Preparation Method
Alright, let’s get to it. This is where the magic happens. Follow these steps, and you’ll have a batch of spooky treats in no time.
- Crush the Oreos (2 minutes): Place the entire package of Oreos (cream filling and all) into a large zipper bag. Seal it, squeezing out as much air as possible. Use a rolling pin or even a heavy pan to crush the cookies into fine crumbs. You want a mix of fine powder and small pebbly bits—the “dirt” texture. Don’t pulverize it into dust; you want some texture. If you’re using the melted butter, transfer the crumbs to a bowl and stir it in with a fork until it’s evenly distributed. Set aside.
- Make the pudding (2 minutes): In a medium bowl, pour the cold milk and the instant pudding mix. Whisk vigorously for about 2 minutes, until the mixture starts to thicken. It will be thin at first, then suddenly it’ll get that pudding-like consistency. Scrape the bottom and sides of the bowl to make sure there are no dry pockets. Let it sit for 5 minutes to fully set. (Pro tip: If your pudding isn’t thickening, your milk might not be cold enough. Pop it in the fridge for 10 minutes before mixing.)
- Layer the cups (3 minutes): Grab your cups or glasses. Start with a spoonful of the crushed Oreos at the bottom—about 1 to 2 tablespoons, depending on your cup size. Then, spoon or pour the pudding on top, filling the cup about three-quarters full. Leave a little room at the top for more “dirt.” You should get about 6 to 8 servings, depending on cup size.
- Top with “dirt”: Sprinkle a generous layer of the remaining Oreo crumbs on top of the pudding. This is the “dirt” layer, so don’t be shy. Use about 1 to 2 tablespoons per cup. It should completely cover the pudding.
- Add the decorations (1 minute): This is the fun part. Gently poke a gummy worm or two into the top of each cup, so it looks like they’re crawling out of the dirt. Add a few Halloween sprinkles if you’re using them. For an extra touch, place a tiny mint leaf next to the worm to look like a plant.
- Chill (at least 30 minutes): This step is important. Place the cups in the fridge for at least 30 minutes before serving. This allows the pudding to fully set and the flavors to meld. The cookies will soften slightly against the pudding, creating that perfect spoonful. If you’re in a rush, 15 minutes will do, but the texture is better with a longer chill.
Personal Efficiency Tip: I usually crush the Oreos and make the pudding at the same time. Use one hand to whisk and the other to crush—it feels chaotic but it saves time. Also, if you’re making these for a party, assemble them a few hours ahead and keep them in the fridge. The flavors get even better as they sit.
Cooking Tips & Techniques
Over the years, I’ve made a few mistakes with this recipe so you don’t have to. Here’s what I’ve learned.
The Biggest Mistake: Using warm milk. I did this once when I was in a hurry, and the pudding never set properly. It was soupy and sad. Always use cold milk straight from the fridge. It’s non-negotiable.
Texture Troubles: If your “dirt” is too fine, it can turn into a paste when it touches the pudding. That’s why I recommend the bag-and-rolling-pin method over a food processor. You get more varied crumb sizes, which gives you that authentic dirt texture. If you do use a food processor, pulse it just a few times and check the texture frequently.
Multitasking Strategy: While the pudding is setting (that 5-minute rest), use that time to crush the Oreos and set out your cups. It keeps the workflow smooth. I also like to line up all my cups on a tray before I start layering—it makes the assembly line much faster.
Consistency Tip: For the best texture, let the assembled cups chill for at least an hour. The Oreo crumbs will soften just enough to meld with the pudding without becoming mushy. If you serve them immediately, the “dirt” will be too crunchy and separate from the pudding. Patience pays off here.
Personal Failure Story: I once tried to make these in a giant trifle bowl instead of individual cups. It looked amazing, but when I served it, the “dirt” layer sank into the pudding and it became a brown mess. Individual cups are the way to go—they keep the layers intact and make for better presentation.
Variations & Adaptations
This recipe is a great base for experimentation. Here are a few ways I’ve changed it up over the years.
- Peanut Butter Cup Version: Swap the gummy worms for mini peanut butter cups. Poke them into the “dirt” so they look like buried treasure. Use chocolate peanut butter pudding mix for an extra punch. My nephew requests this version for his birthday every year.
- Vegan Adaptation: Use a vegan chocolate pudding mix (like Simply Delish) and your favorite plant-based milk (oat milk works best for creaminess). Use vegan chocolate sandwich cookies (many brands are accidentally vegan) and skip the butter in the “dirt.” It’s just as good, honestly.
- Spooky Spider Cups: Instead of gummy worms, use chocolate spiders or place a couple of candy eyes on top of the “dirt.” Use black licorice strings to make spider legs. It’s a fun twist for kids who might be scared of worms.
- Pumpkin Spice Dirt Cups: Add 1 teaspoon of pumpkin pie spice to the pudding mix before whisking. Use crushed ginger snaps instead of Oreos for the “dirt.” Top with a small candy pumpkin. It’s a fall flavor bomb.
- Low-Sugar Option: Use sugar-free pudding mix and reduced-fat Oreos. The texture is slightly less creamy, but the taste is still there. I’ve served this to friends who are watching their sugar and they didn’t even notice the difference.
Personal Variation I Love: I once made a batch with crushed graham crackers mixed into the Oreo crumbs—about half and half. It added a slight toasty flavor that was surprisingly good. I called them “Campfire Dirt Cups” and served them with a tiny pretzel stick as a “log.” It was a hit.
Serving & Storage Suggestions
These little cups are best served cold, straight from the fridge. The contrast between the cool pudding and the slightly crunchy “dirt” is what makes them special.
Serving Temperature: Serve them chilled, not frozen. If they’ve been in the fridge for more than a few hours, let them sit at room temperature for 5 minutes before serving. It takes the chill off and lets the flavors open up.
Presentation Ideas: Arrange the cups on a tray lined with fake spiderwebs or orange and black napkins. Add a few plastic spiders around the base for a spooky touch. For a party, I like to set up a “dirt cup bar” with extra toppings—sprinkles, candy eyes, extra gummy worms—and let guests decorate their own. It’s interactive and fun.
Complementary Dishes: These pair well with other Halloween treats like spider web cupcakes or a bowl of caramel popcorn. For a drink, serve them with apple cider or a warm pumpkin spice latte.
Storage Instructions: Store any leftover cups in the refrigerator, covered with plastic wrap or a lid, for up to 3 days. The “dirt” will soften over time, but they’re still delicious. Do not freeze them—the pudding will become watery and the texture will be off.
Reheating (Not Recommended): These are meant to be eaten cold. Don’t microwave them. If you want a warm dessert, this isn’t the recipe for it.
Flavor Development: Honestly, these are best after about 2 to 4 hours in the fridge. The flavors meld together, and the “dirt” softens just enough to create that perfect spoonful. If you can make them in the morning for an evening party, you’ll be rewarded.
Nutritional Information & Benefits
I’m not going to pretend these are health food, but they’re a treat, and treats have their place in a balanced diet. Here’s the breakdown for one serving (based on 8 servings per recipe, using whole milk and regular Oreos).
| Nutrient | Per Serving |
|---|---|
| Calories | ~280 |
| Total Fat | 12g |
| Saturated Fat | 5g |
| Carbohydrates | 40g |
| Sugar | 28g |
| Protein | 5g |
| Calcium | 10% DV |
Health Benefits of Key Ingredients: The milk provides calcium and vitamin D for bone health. Dark cocoa in the Oreos contains antioxidants (a small amount, but it counts). If you use the vegan version with oat milk, you’ll get some fiber. It’s not a health food, but it’s not empty calories either.
Dietary Considerations: This recipe contains gluten, dairy, and soy (from the Oreos). For a gluten-free version, use certified gluten-free sandwich cookies. For a dairy-free version, use plant-based milk and a vegan pudding mix. Always check labels if you’re cooking for someone with allergies.
Personal Wellness Perspective: I believe in enjoying treats without guilt. These dirt cups are a once-in-a-while indulgence, perfect for a holiday celebration. They’re portion-controlled (in individual cups), which helps with mindful eating. Plus, making them with your kids is a fun activity that builds memories—and that’s good for the soul.
Conclusion
So there you have it—my tried-and-true Easy Halloween Oreo Dirt Cup Pudding Cups recipe. It’s the dessert that converted my pudding-hating sister, and it’s been a staple at every Halloween gathering I’ve hosted since. The best part? It takes five minutes to throw together, uses ingredients you probably already have, and looks like you spent way more effort than you actually did. That’s my kind of recipe.
I’d love to hear how yours turn out. Did you add any fun toppings? Did your kids get creative with the decorations? Drop a comment below and let me know. And if you’re looking for more quick and festive treats, check out our easy Halloween desserts collection for more last-minute inspiration. Happy Halloween, and happy eating!
Frequently Asked Questions
Can I make these dirt cups ahead of time?
Absolutely! In fact, they’re better when made a few hours in advance. Assemble them up to 24 hours ahead and keep them covered in the fridge. The texture will be slightly softer, but still delicious.
Can I use homemade pudding instead of instant?
You can, but it changes the texture. Homemade pudding is thinner and won’t set as firmly. If you want to go that route, use a recipe that includes cornstarch and let it chill for at least 4 hours before layering.
How do I keep the Oreo crumbs from getting soggy?
The key is to add the “dirt” layer right before serving, or at least within an hour of serving. If you’re making them ahead, keep the crumbs separate and add them just before you serve. The pudding will still be creamy, and the “dirt” will stay crunchy.
Can I use a different type of cookie?
Yes! Chocolate wafer cookies, crushed graham crackers, or even crushed pretzels work well. Each gives a different flavor and texture. Just make sure they’re finely crushed for that “dirt” look.
Are these safe for school parties?
Check your school’s policy on homemade treats. If allowed, they’re perfect for classroom parties because they’re individual servings and don’t require utensils. Just make sure to label them with any allergen information (dairy, gluten, soy).
Pin This Recipe!

Easy Halloween Oreo Dirt Cups: Best 5-Minute Dessert

These Easy Halloween Oreo Dirt Cup Pudding Cups are a quick, no-bake dessert that combines creamy chocolate pudding with crunchy Oreo ‘dirt’ and gummy worms. Perfect for last-minute Halloween parties, they take just 5 minutes to prep and are a hit with kids and adults alike.
- Prep Time: 5 minutes
- Cook Time: 0 minutes
- Total Time: 35 minutes
- Yield: 6-8 servings 1x
- Category: Dessert
- Cuisine: American
Ingredients
- 1 (3.9 oz) box instant chocolate pudding mix
- 2 cups cold whole milk
- 1 (14.3 oz) package Oreo cookies
- 2 tablespoons melted butter (optional)
- Gummy worms (for decoration)
- Halloween sprinkles (optional)
- Fresh mint leaves (optional)
Instructions
- Crush the Oreos: Place the entire package of Oreos into a large zipper bag. Seal it, squeezing out as much air as possible. Use a rolling pin or heavy pan to crush the cookies into fine crumbs with a mix of fine powder and small pebbly bits. If using melted butter, transfer crumbs to a bowl and stir it in with a fork until evenly distributed. Set aside.
- Make the pudding: In a medium bowl, pour the cold milk and instant pudding mix. Whisk vigorously for about 2 minutes until the mixture starts to thicken. Scrape the bottom and sides of the bowl to ensure no dry pockets. Let it sit for 5 minutes to fully set.
- Layer the cups: Grab your cups or glasses. Start with a spoonful of crushed Oreos at the bottom (about 1-2 tablespoons). Then spoon or pour the pudding on top, filling the cup about three-quarters full.
- Top with ‘dirt’: Sprinkle a generous layer of remaining Oreo crumbs on top of the pudding (about 1-2 tablespoons per cup), completely covering the pudding.
- Add decorations: Gently poke a gummy worm or two into the top of each cup so they look like they’re crawling out of the dirt. Add Halloween sprinkles or a mint leaf if desired.
- Chill: Place the cups in the fridge for at least 30 minutes before serving to allow the pudding to fully set and flavors to meld.
Notes
For best texture, let assembled cups chill for at least 1 hour. The Oreo crumbs will soften slightly, melding with the pudding without becoming mushy. If making ahead, keep the ‘dirt’ layer separate and add just before serving to maintain crunch. Use cold milk straight from the fridge for proper pudding setting. For a gluten-free version, use gluten-free chocolate sandwich cookies and check pudding mix label.
Nutrition
- Serving Size: 1 cup
- Calories: 280
- Sugar: 28
- Sodium: 320
- Fat: 12
- Saturated Fat: 5
- Carbohydrates: 40
- Fiber: 1
- Protein: 5
Keywords: Halloween dessert, Oreo dirt cups, pudding cups, no-bake dessert, easy Halloween treat, chocolate pudding, gummy worms, kid-friendly dessert



