Love this? Save it for later!
Share the inspiration with your friends
My sister-in-law, Jen, wasn’t trying to win any parenting awards that Tuesday. I’d stopped by to drop off a birthday present for my nephew and the smell of chocolate and peanut butter hit me before I even got through the screen door. It was three in the afternoon, the kitchen was a wreck, and she was scooping something into little bowls while her kids bounced around her legs like pinballs. “Oh, that’s just their snack,” she said, practically shrugging, like she hadn’t just created something that smelled better than any fancy ice cream parlor I’d ever been to.
Honestly, I was a little annoyed. Here I was, spending good money on fancy pints of ice cream with ingredients I couldn’t pronounce, and she was casually whipping up this incredible-looking treat with stuff from her pantry. The best part? She wasn’t even following a recipe. She was just throwing things together because her kids were hungry and she wanted them to eat something that wasn’t total junk. I stood there, holding my present, completely distracted by the magic happening in her blender. She handed me a spoon and said, “Here, taste test.” Let me tell you, that first bite stopped me in my tracks. It was creamy, rich, and had that perfect chocolate-peanut butter thing going on, but it didn’t feel heavy or guilt-inducing. It felt… sneaky. In the best way.
The whole thing took her maybe five minutes. Five minutes! She didn’t churn anything, she didn’t pull out a fancy machine, and she definitely wasn’t trying to impress me. She was just trying to get through the afternoon without a meltdown. “I make it all the time,” she said, wiping a smear of chocolate off her counter. “The kids think it’s a treat, and I feel good about it.” That’s when it clicked for me. This wasn’t just a recipe; it was a secret weapon for any parent trying to win the snack battle. I asked for the rough measurements, tweaked it a dozen times in my own kitchen, and now here we are. This is the kind of recipe that makes you feel like a genius, even on your most exhausted days. You know that feeling when you need something quick, healthy-ish, and guaranteed to make everyone happy? This is it.
Why You’ll Love This Recipe
Let’s be real for a second. Getting kids to eat something high in protein that isn’t a chicken nugget or a cheese stick can feel like a full-time job. This high-protein chocolate peanut butter ice cream solves that problem in the most delicious way possible. I’ve tested this recipe with my own picky eaters, my neighbor’s sugar-crazed toddlers, and a group of skeptical teenagers. Every single time, the bowls come back clean. No one believes it’s actually good for them, and that’s the whole point.
- Quick & Easy: From freezer to bowl in under 10 minutes. Seriously. No ice cream maker, no complicated steps, no waiting for hours. Perfect for those “I need a snack right now” emergencies.
- Simple Ingredients: You probably have everything in your kitchen right now. Frozen bananas, peanut butter, cocoa powder, and milk. That’s it. No weird protein powders or expensive superfoods required.
- Perfect for Family Snacking: Great for after-school treats, post-dinner desserts, or even a sneaky breakfast option. It’s versatile enough for any time of day.
- Crowd-Pleaser: Kids love the creamy, sweet taste. Adults love the protein boost and the fact that it’s not loaded with sugar. It’s a win-win situation for everyone.
- Unbelievably Delicious: The texture is so smooth and creamy, you’d never guess it’s made from frozen bananas. The chocolate and peanut butter combo is classic comfort food, but with a healthy twist that makes you feel good about eating it.
What makes this recipe different from the dozens of other “healthy ice cream” recipes out there? It’s the texture. Most banana-based ice creams turn icy or slimy if you don’t get the ratios right. I’ve spent months perfecting the balance of frozen banana to peanut butter to get that scoopable, creamy consistency that actually feels like real ice cream. Plus, the peanut butter adds a natural protein punch without any chalky aftertaste. This isn’t just another version of healthy ice cream—it’s the one you’ll actually want to make again and again.
This recipe connects to something deeper than just a sweet craving. It’s about giving your family something that feels like a treat but actually nourishes them. It’s comfort food reimagined—healthier, faster, but with the same soul-soothing satisfaction. Perfect for impressing your kids without any stress, or turning a simple afternoon into something memorable.
What Ingredients You Will Need
This recipe uses simple, wholesome ingredients to deliver bold flavor and satisfying texture without the fuss. Everything is a pantry staple, which means you can make this anytime the craving hits without a special trip to the store.
- Frozen ripe bananas (3 large bananas, sliced and frozen): This is the secret to the creamy texture. The riper the bananas, the sweeter your ice cream will be. I like to buy bananas when they’re on sale, let them get spotty brown, then peel, slice, and freeze them in a zip-top bag. This is a great way to use up bananas that are past their prime.
- Creamy peanut butter (1/4 cup, or 60g): Adds protein, healthy fats, and that irresistible flavor. I recommend using a natural peanut butter without added sugar or hydrogenated oils for the best texture. Brands like Smucker’s Natural or Justin’s work well. If your peanut butter is too thick, give it a quick stir before measuring.
- Unsweetened cocoa powder (2 tablespoons, or 10g): Provides that deep chocolate flavor without extra sugar. I prefer Hershey’s Special Dark for a richer taste, but regular unsweetened cocoa powder works perfectly too. For a more intense chocolate flavor, you can use Dutch-processed cocoa.
- Milk of choice (1/4 cup, or 60ml): Helps the blender get everything moving. Whole milk adds creaminess, but almond milk, oat milk, or even coconut milk work great. Start with less and add more if needed. I’ve used Oatly oat milk many times with excellent results.
- Pure vanilla extract (1 teaspoon): Enhances the sweetness and rounds out the flavors. It’s a small addition that makes a big difference. Skip the imitation vanilla if you can—the real stuff is worth it here.
- Pinch of salt (optional): Balances the sweetness and intensifies the chocolate and peanut butter flavors. A tiny pinch is all you need. Don’t skip it if you’re using unsalted peanut butter.
- Optional mix-ins: Mini chocolate chips, chopped peanuts, or a swirl of sugar-free chocolate syrup. These are great for adding texture, but the base recipe is already amazing on its own.
Substitution Guidance: If you’re avoiding nuts, swap the peanut butter for sunflower seed butter or WowButter. The flavor will be slightly different, but still delicious. For a dairy-free version, use any plant-based milk. If you want to boost the protein even more, add a scoop of your favorite chocolate or vanilla protein powder. Just be aware that some protein powders can make the texture a bit thicker, so you might need an extra splash of milk.
Equipment Needed
You don’t need a fancy ice cream maker for this recipe. In fact, the simpler your setup, the easier cleanup will be. Here’s what you’ll need:
- High-speed blender or food processor: This is the most important tool. A Vitamix or Ninja blender works beautifully, but a standard food processor also does the job. The key is having enough power to break down the frozen bananas without burning out the motor. If your blender is on the weaker side, let the bananas thaw for 5 minutes before blending.
- Rubber spatula: Essential for scraping down the sides of the blender or food processor. You’ll use this multiple times during the blending process to ensure everything gets evenly mixed.
- Measuring cups and spoons: For accurate ingredient measurements. I prefer using a liquid measuring cup for the milk and dry measuring cups for the peanut butter and cocoa powder.
- Freezer-safe container: If you’re not eating the ice cream immediately, you’ll need a container for storage. A glass loaf pan or a Pyrex dish with a tight-fitting lid works great.
- Ice cream scoop: For serving. A scoop with a nonstick coating makes portioning much easier, especially if the ice cream has been in the freezer for a while.
If you don’t have a high-speed blender, don’t worry. I’ve made this recipe countless times with a $30 food processor from a discount store. It takes a little more patience and a few extra scrapes down the sides, but the results are just as good. The trick is to not overload the machine—work in batches if you’re doubling the recipe.
Preparation Method
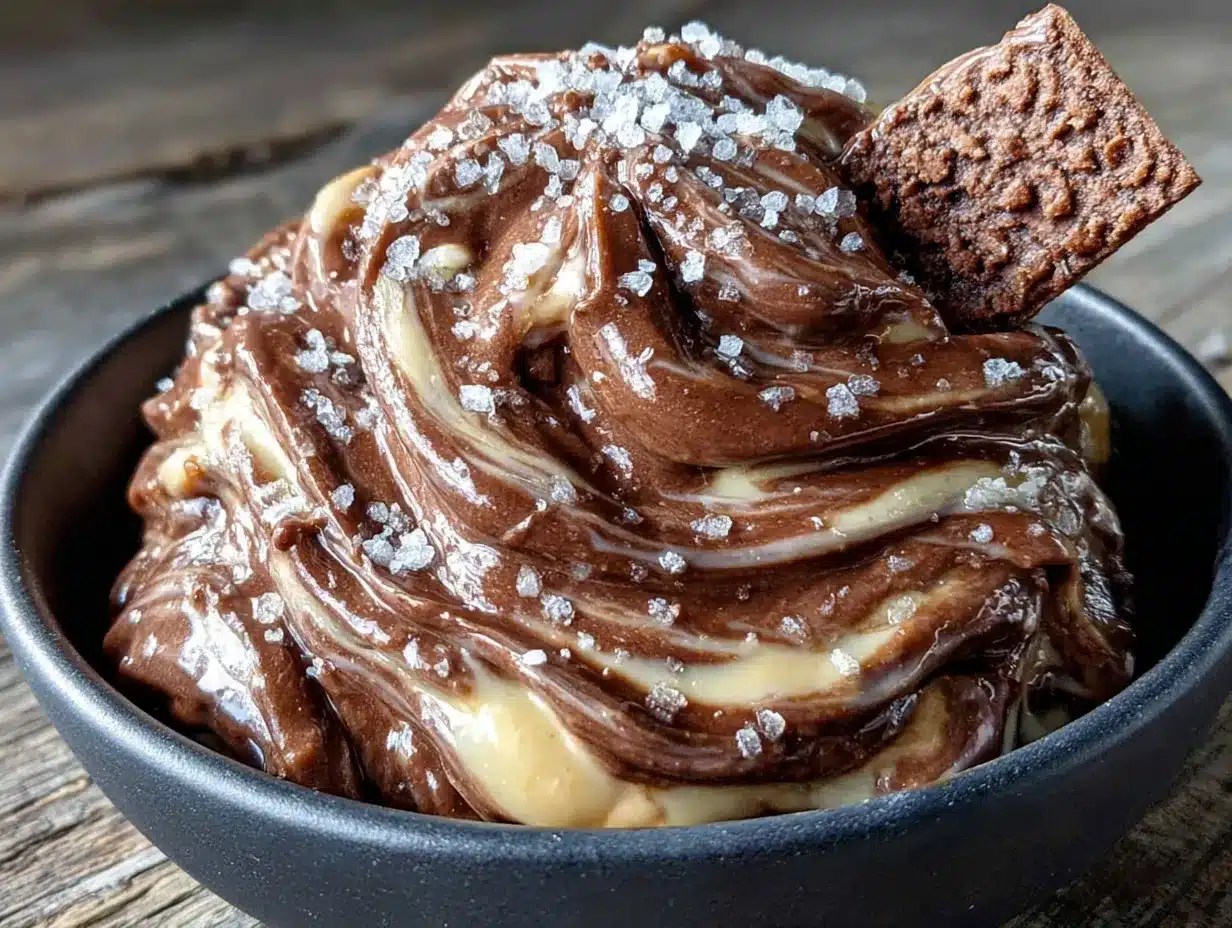
This recipe comes together in just a few minutes, but there are a few tricks to getting that perfect, creamy texture. Follow these steps closely, especially the first time you make it.
- Prepare your bananas (5 minutes): If you haven’t already, peel 3 ripe bananas and slice them into 1-inch rounds. Place the slices on a parchment-lined baking sheet in a single layer and freeze for at least 2 hours, or until completely solid. This prevents them from clumping together in the bag. Once frozen, transfer the slices to a zip-top freezer bag. They’ll keep for up to 3 months.
- Combine ingredients in blender (2 minutes): Add the frozen banana slices, 1/4 cup peanut butter, 2 tablespoons cocoa powder, 1/4 cup milk, 1 teaspoon vanilla extract, and a pinch of salt to your blender or food processor. Important: Add the milk last. This helps the blades get moving more easily and prevents the bananas from getting stuck at the bottom.
- Blend and scrape (3-5 minutes): Start blending on low speed, then gradually increase to high. The mixture will look crumbly at first—don’t panic. Stop the blender, scrape down the sides with a rubber spatula, and blend again. Repeat this process 3-4 times. The mixture will slowly transform from a chunky, frozen mess into a smooth, creamy soft-serve consistency. Sensory cue: You’ll hear the sound change from a loud, rattling noise to a smooth, quiet hum when it’s ready. The texture should be thick, smooth, and slightly stretchy, like soft-serve ice cream.
- Adjust consistency (1 minute): If the mixture is too thick and the blender is struggling, add another tablespoon of milk. If it’s too thin (which is rare), add a few more frozen banana slices or a handful of ice cubes. Taste the mixture and adjust sweetness if needed. If you want it sweeter, add a teaspoon of honey or maple syrup.
- Serve immediately or freeze (1 minute): For a soft-serve texture, scoop the ice cream into bowls and serve right away. For a firmer, scoopable ice cream, transfer the mixture to a freezer-safe container, smooth the top, and freeze for 1-2 hours. Pro tip: If you freeze it for longer than 2 hours, let it sit at room temperature for 10-15 minutes before scooping. This softens it just enough to make scooping easy.
- Add mix-ins (optional, 1 minute): If you’re adding chocolate chips, chopped peanuts, or a swirl of chocolate syrup, fold them in after blending and before freezing. This ensures they’re evenly distributed throughout the ice cream.
Troubleshooting tip: If your ice cream turns out icy instead of creamy, it usually means the bananas weren’t ripe enough or the mixture didn’t blend long enough. Riper bananas have more natural sugar and a softer texture, which creates that creamy consistency. If you’re in a hurry, you can microwave frozen bananas for 15-20 seconds to soften them slightly before blending.
Cooking Tips & Techniques
I’ve made this recipe so many times that I’ve learned a few tricks the hard way. Let me save you some trial and error.
The banana ripening trick: The number one mistake people make is using bananas that aren’t ripe enough. You want bananas that are covered in brown spots—almost looking past their prime. These have the highest sugar content and the softest texture, which translates to the creamiest ice cream. If your bananas are still yellow, you can speed up the ripening process by placing them in a paper bag with an apple overnight. Trust me, it works.
The blender patience game: The first time I made this, I almost gave up after 30 seconds of blending. The mixture looked like a pile of frozen crumbs, and I was sure I’d done something wrong. Don’t give up. The magic happens around the 2-minute mark when the bananas start to break down and release their natural sugars. Keep scraping down the sides and blending. It will come together. I’ve learned that a little patience here is worth more than any fancy equipment.
Multitasking strategy: Make a double batch while you’re at it. The recipe doubles beautifully, and having a container of this ice cream in the freezer is like having an emergency dessert on standby. I often make it while dinner is cooking, freeze it, and pull it out after the kids finish their meals. It takes less active time than baking a cake, and the payoff is huge.
Consistency tip: If you prefer a firmer ice cream, use slightly less milk (about 3 tablespoons instead of 1/4 cup) and freeze for a full 2 hours. For a softer, more milkshake-like consistency, add an extra tablespoon of milk and serve immediately. I personally love the soft-serve version—it feels more indulgent somehow.
One failure I learned from: I once tried to make this with frozen strawberries instead of bananas. It was a disaster. The texture was icy and weird, and my kids refused to eat it. Bananas are non-negotiable here—they provide the creamy base that makes this recipe work. Stick with the bananas, and you’ll be golden.
Variations & Adaptations
One of the best things about this recipe is how flexible it is. Once you’ve mastered the basic version, feel free to experiment with these variations.
- Vegan version: Use almond milk or oat milk instead of dairy milk, and make sure your peanut butter is vegan-friendly. The rest of the ingredients are naturally plant-based. This version is just as creamy and delicious as the original.
- Nut-free option: Swap the peanut butter for sunflower seed butter or WowButter. The flavor will be slightly different—more earthy and less sweet—but it’s still incredibly good. My neighbor’s son has a nut allergy, and this is his favorite treat. Just be aware that sunflower seed butter can turn a slight green color when combined with cocoa powder, but it’s completely safe to eat.
- Chocolate overload version: Add 2 tablespoons of mini chocolate chips and a swirl of sugar-free chocolate syrup after blending. This turns the ice cream into a decadent dessert that feels like a real indulgence. My kids beg for this version on weekends.
- Peanut butter cup version: Fold in chopped peanut butter cups or sugar-free peanut butter chips. The combination of creamy ice cream and crunchy candy pieces is absolutely irresistible. This is my personal favorite variation.
- Mint chocolate chip version: Add 1/4 teaspoon of peppermint extract and a handful of mini chocolate chips. The mint pairs beautifully with the chocolate and peanut butter, creating a refreshing twist on the original.
- Low-sugar version: Use unsweetened cocoa powder and natural peanut butter without added sugar. If you need extra sweetness, add a few drops of liquid stevia or monk fruit sweetener. This version is perfect for those watching their sugar intake.
Seasonal adaptation: In the summer, I love adding fresh berries to the mix. A handful of frozen raspberries or strawberries blended in gives the ice cream a fruity twist and a beautiful color. In the fall, try adding a pinch of cinnamon or pumpkin pie spice for a cozy flavor.
Serving & Storage Suggestions
This ice cream is best served slightly softened, straight from the blender or after a short time in the freezer. Here’s how to make the most of it.
Serving temperature: For soft-serve consistency, serve immediately after blending. For scoopable ice cream, freeze for 1-2 hours. If you freeze it overnight, let it sit at room temperature for 10-15 minutes before scooping. This makes it much easier to handle and brings back that creamy texture.
Presentation ideas: Serve in chilled bowls or cones for an authentic ice cream parlor feel. Top with a drizzle of warm peanut butter, a sprinkle of cocoa powder, or a few chocolate shavings. My kids love when I add a dollop of whipped cream and a cherry on top—it makes them feel like they’re getting a real treat.
Complementary dishes: This ice cream pairs beautifully with warm brownies, chocolate chip cookies, or a slice of banana bread. For a healthier option, serve alongside fresh fruit like strawberries or raspberries. The tartness of the berries cuts through the richness of the ice cream perfectly.
Storage instructions: Store any leftovers in an airtight freezer-safe container for up to 2 weeks. Press a piece of parchment paper directly onto the surface of the ice cream before sealing the container. This prevents ice crystals from forming and keeps the texture creamy. If you notice any ice crystals after a few days, simply let the ice cream soften slightly and give it a quick stir before serving.
Reheating tip: If the ice cream becomes too hard after freezing, microwave it for 10-15 seconds to soften it. Alternatively, let it sit on the counter for 15-20 minutes. The texture will return to its creamy, scoopable state.
Flavor development: The flavors actually meld together beautifully after a day or two in the freezer. The chocolate and peanut butter become more integrated, creating a more harmonious taste. I actually prefer the leftovers to the fresh version sometimes!
Nutritional Information & Benefits
This high-protein chocolate peanut butter ice cream isn’t just delicious—it’s packed with nutrients that make it a smart choice for the whole family.
Estimated nutritional values (per 1/2 cup serving): Approximately 220 calories, 8g protein, 30g carbohydrates, 10g fat, 4g fiber, and 12g sugar (naturally occurring from bananas). These values will vary slightly based on the exact ingredients you use.
Health benefits: Bananas are rich in potassium, vitamin B6, and fiber, which support heart health and digestion. Peanut butter provides healthy monounsaturated fats and plant-based protein, which help keep you full and satisfied. Cocoa powder is loaded with antioxidants called flavonoids, which have been linked to improved heart health and brain function. This combination makes for a snack that’s both nourishing and indulgent.
Dietary considerations: This recipe is naturally gluten-free and can easily be made dairy-free and vegan. It’s also free from refined sugar if you use unsweetened peanut butter and cocoa powder. The protein content makes it a great post-workout snack or a filling treat for growing kids.
Potential allergens: This recipe contains peanuts and dairy (if using cow’s milk). For nut-free and dairy-free versions, see the variations section above.
From a wellness perspective, I love that this recipe allows my family to enjoy a classic dessert without the guilt. It’s a reminder that healthy eating doesn’t have to mean deprivation. Sometimes the best choices are the ones that make everyone at the table happy.
Conclusion
This high-protein chocolate peanut butter ice cream has become a staple in my kitchen for one simple reason: it works. It’s quick enough for a weekday afternoon, healthy enough to feel good about, and delicious enough to satisfy even the most stubborn sweet tooth. Whether you’re a busy parent looking for a smarter snack, a fitness enthusiast wanting a protein-packed treat, or just someone who loves good ice cream, this recipe is for you.
I encourage you to make this recipe your own. Experiment with the variations, adjust the sweetness to your liking, and don’t be afraid to get creative with mix-ins. That’s the beauty of cooking—it’s meant to be adapted and shared. I’d love to hear how it turns out for you. Drop a comment below and let me know which variation you tried, or share a photo of your creation. Your feedback helps me create better recipes for this community.
Thank you for stopping by and giving this recipe a chance. I hope it brings as much joy to your kitchen as it has to mine. Happy blending, and remember—sometimes the best treats are the ones you make yourself.
Frequently Asked Questions
Can I use frozen banana chunks that are already frozen?
Absolutely! In fact, pre-frozen bananas are ideal. Just make sure they’re sliced before freezing so they blend more easily. If you’re using whole frozen bananas, let them thaw for 5-10 minutes before blending to prevent overworking your blender.
What if I don’t have a high-speed blender?
A standard food processor works just as well. The key is to scrape down the sides frequently and be patient. The mixture will look crumbly at first, but keep blending. It will come together into a smooth, creamy texture after a few minutes. If your machine struggles, let the bananas thaw for 5 minutes before starting.
Can I make this without peanut butter?
Yes! You can substitute the peanut butter with almond butter, cashew butter, sunflower seed butter, or even tahini for a different flavor profile. Just keep in mind that the texture and taste will change slightly. For a nut-free version, sunflower seed butter works wonderfully.
How long does this ice cream last in the freezer?
Properly stored in an airtight container, this ice cream will stay fresh for up to 2 weeks. To maintain the best texture, press a piece of parchment paper directly onto the surface before sealing the container. This prevents ice crystals from forming. If it becomes too hard, let it sit at room temperature for 10-15 minutes before serving.
Can I add protein powder to boost the protein content?
Definitely! Adding a scoop of chocolate or vanilla protein powder is a great way to increase the protein content. Just be aware that some protein powders can make the mixture thicker, so you may need to add an extra tablespoon of milk to achieve the right consistency. Start with half a scoop and adjust to your preference.
Pin This Recipe!
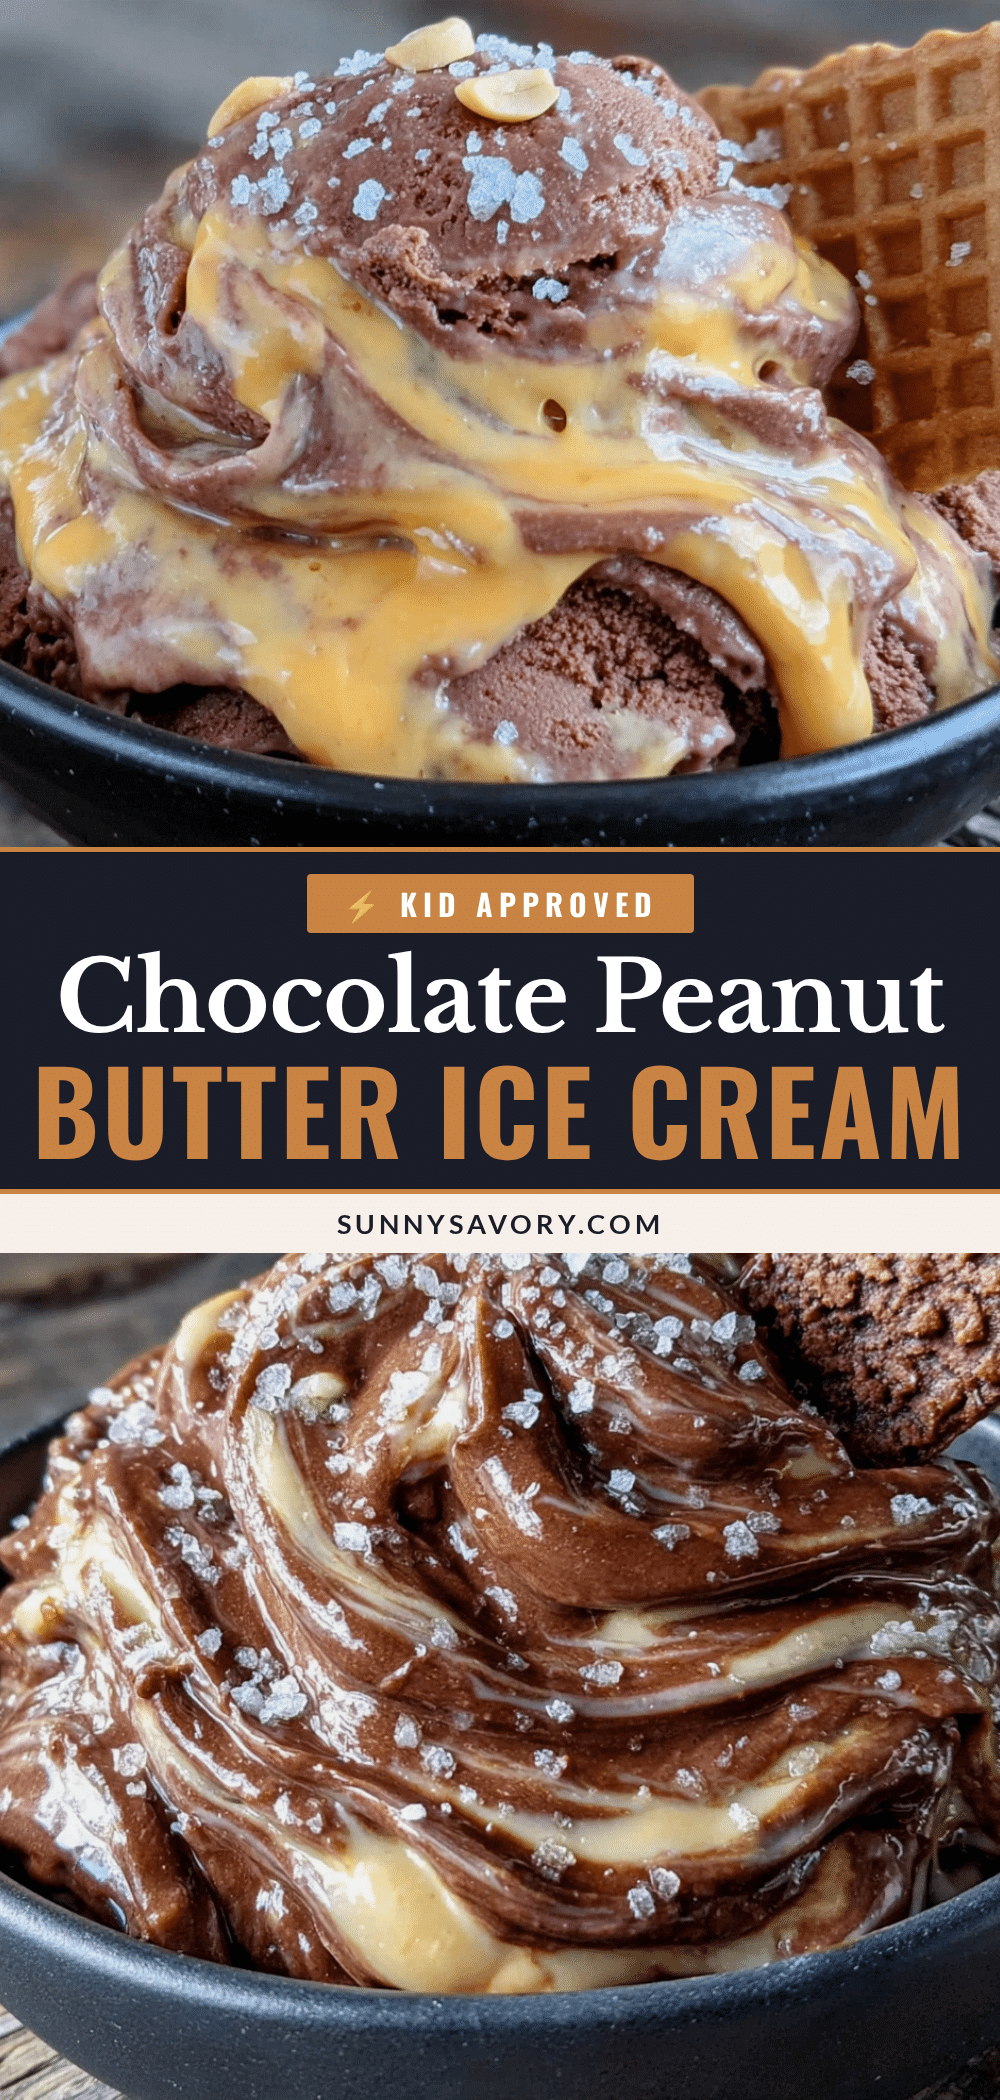
Easy High-Protein Chocolate Peanut Butter Ice Cream

A quick and creamy high-protein ice cream made with frozen bananas, peanut butter, and cocoa powder. Ready in under 10 minutes with no ice cream maker needed.
- Prep Time: 5 minutes
- Cook Time: 0 minutes
- Total Time: 10 minutes
- Yield: 4 servings 1x
- Category: Dessert
- Cuisine: American
Ingredients
- 3 large ripe bananas, sliced and frozen
- 1/4 cup (60g) creamy peanut butter
- 2 tablespoons (10g) unsweetened cocoa powder
- 1/4 cup (60ml) milk of choice
- 1 teaspoon pure vanilla extract
- Pinch of salt (optional)
- Optional mix-ins: mini chocolate chips, chopped peanuts, or sugar-free chocolate syrup
Instructions
- Prepare your bananas: Peel 3 ripe bananas and slice into 1-inch rounds. Place on a parchment-lined baking sheet in a single layer and freeze for at least 2 hours until solid. Transfer to a zip-top freezer bag for up to 3 months.
- Combine ingredients in blender: Add frozen banana slices, 1/4 cup peanut butter, 2 tablespoons cocoa powder, 1/4 cup milk, 1 teaspoon vanilla extract, and a pinch of salt to a high-speed blender or food processor. Add the milk last.
- Blend and scrape: Start blending on low speed, then gradually increase to high. The mixture will look crumbly at first. Stop, scrape down the sides with a rubber spatula, and blend again. Repeat 3-4 times until smooth and creamy like soft-serve.
- Adjust consistency: If too thick, add another tablespoon of milk. If too thin, add a few more frozen banana slices or ice cubes. Taste and adjust sweetness if needed.
- Serve immediately or freeze: For soft-serve, serve right away. For firmer ice cream, transfer to a freezer-safe container and freeze for 1-2 hours. If frozen longer, let sit at room temperature for 10-15 minutes before scooping.
- Add mix-ins (optional): Fold in chocolate chips, chopped peanuts, or chocolate syrup after blending and before freezing.
Notes
Use very ripe bananas (brown spots) for the creamiest texture. If your blender is weak, let bananas thaw for 5 minutes before blending. For a firmer texture, use 3 tablespoons of milk instead of 1/4 cup. To prevent ice crystals, press parchment paper directly onto the surface before sealing the container.
Nutrition
- Serving Size: 1/2 cup
- Calories: 220
- Sugar: 12
- Sodium: 80
- Fat: 10
- Saturated Fat: 2
- Carbohydrates: 30
- Fiber: 4
- Protein: 8
Keywords: high-protein ice cream, chocolate peanut butter ice cream, healthy ice cream, banana ice cream, no-churn ice cream, quick dessert, kid-friendly snack



