Love this? Save it for later!
Share the inspiration with your friends
My sister-in-law wasn’t trying to impress anyone. I’d stopped by to drop off a casserole dish she’d lent me, and this weird, wonderful smell hit me before I even got past the coat rack. It was garlicky and toasty, but with a sweetness I couldn’t place. I found her in the kitchen, three kids underfoot, casually slapping pepperoni onto mini pizza crusts like she was folding laundry. She didn’t even look up. “Oh, those? Just a thing I threw together for the kids’ movie night.” She called them monster faces, but what she was really doing was performing some kind of weeknight magic. I stood there, watching her work, and honestly, I felt a little jealous. Here I was, stressing over a complicated casserole, and she was making something that had her kids actually cheering. It was such a simple, unassuming moment, but it stuck with me. Maybe you’ve been there, standing in someone else’s kitchen, realizing that the best ideas aren’t the fancy ones. That night, I asked for the recipe, and I’ve been making these Quick Mini Halloween Pizza Faces for Kids ever since. They’re not just a dinner; they’re an activity, a memory, and a lifesaver for those nights when you need something fun on the table fast.
Why You’ll Love This Recipe
Let’s be real for a second. Weeknights are chaos. You’re tired, the kids are hungry, and the last thing you want is a Pinterest-fail project that takes two hours. These mini pizza faces are the opposite of that. They are the weeknight hero you didn’t know you needed. I’ve tested this with my own picky eaters, and I can tell you firsthand—it works. It’s chef-tested by a mom who has definitely burned the frozen pizza before.
- Quick & Easy: From fridge to table in under 20 minutes. Seriously. No complicated dough, no fancy sauces.
- Simple Ingredients: You probably have everything in your fridge right now. English muffins, pizza sauce, cheese, and some veggie scraps for the faces.
- Perfect for Halloween Fun: This is the ultimate hands-off activity for a Halloween party or a spooky movie night. The kids build their own monsters!
- Crowd-Pleaser: Even the most skeptical little eaters will devour these. They’re too busy having fun to realize they’re eating vegetables.
- Unbelievably Delicious: The secret is in the toasting. The English muffins get perfectly crispy on the bottom while the cheese gets bubbly and golden on top. It’s comfort food at its finest.
This isn’t just another pizza recipe. It’s the one where the kids actually help. It’s the one that uses up that half a bell pepper in the crisper drawer. It’s the one that makes you look like a fun parent without breaking a sweat. It’s the kind of dinner that makes you close your eyes after the first bite, not because it’s gourmet, but because it was easy and everyone is happy.
What Ingredients You Will Need
This recipe is built on simple, wholesome ingredients that deliver big flavor without the fuss. Everything is designed to be a pantry or fridge staple, making this a true last-minute dinner solution. You might even have everything already.
- For the Pizza Base:
- 4 English muffins, split in half (I prefer Thomas’ brand for their sturdy texture, but any brand works)
- 1/2 cup pizza sauce (store-bought is fine; I use Rao’s for a cleaner ingredient list)
- 1 1/2 cups shredded mozzarella cheese (low-moisture, part-skim works best for melting)
- For the Monster Faces (The Fun Part):
- 16 slices pepperoni (for ears, noses, or spots)
- 1/4 cup black olives, sliced (for eyes—you can use canned or fresh)
- 1/4 cup green bell pepper, cut into small strips or triangles (for eyebrows or warts)
- 1/4 cup cherry tomatoes, halved (for bloodshot eyes or big noses)
- 2 tablespoons canned corn kernels (for teeth or warts—kids love this)
- Optional: 1/4 cup mushrooms, sliced (for ears or spots)
Ingredient Selection Tips: Look for English muffins that are not too airy. You want a dense crumb so they hold up to the sauce and cheese without getting soggy. For the veggies, fresh is best for texture, but frozen corn works great in a pinch. I always keep a bag of frozen corn in the freezer for exactly this reason. If you want to make this dairy-free, use a good quality vegan mozzarella shreds—just keep an eye on it in the oven as it melts differently.
Equipment Needed
You don’t need a fancy kitchen to pull these off. I’ve made these in a tiny apartment oven and a toaster oven, and they work perfectly every time. Here’s what you’ll need:
- Baking sheet (a half-sheet pan is ideal, but any rimmed baking sheet works)
- Parchment paper or aluminum foil (for easy cleanup—trust me on this)
- Small knife and cutting board (for prepping the veggie faces)
- Spatula (for transferring the hot pizzas to plates)
- Measuring cups and spoons (for the sauce and cheese)
Personal Experience: I used to skip the parchment paper, thinking it was a waste. Then I spent 15 minutes scrubbing baked-on cheese off my baking sheet. Never again. The parchment paper makes cleanup a breeze, and it’s worth the tiny cost. If you don’t have a baking sheet, you can use a cast-iron skillet or even a pie plate. Just adjust the cooking time slightly.
Preparation Method
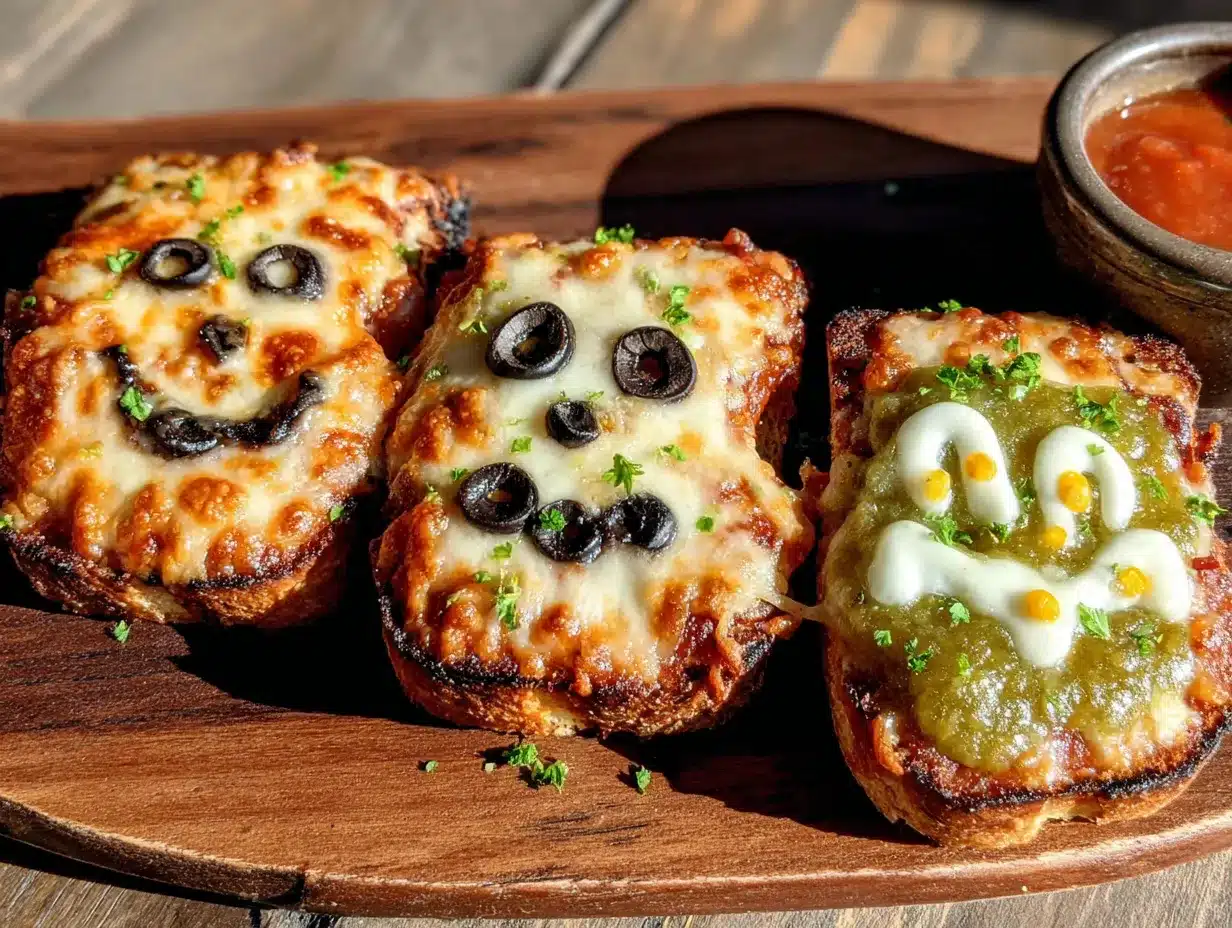
This is where the fun begins. Get the kids involved—it makes the whole process faster and more entertaining. Here’s the step-by-step method I use every time.
-
Preheat your oven to 400°F (200°C). While it’s heating, line your baking sheet with parchment paper. This is a good time to get your little helpers to wash their hands and set out the ingredients.
-
Prep the “canvas.” Split your 4 English muffins in half. You’ll have 8 mini pizza bases. Place them cut-side up on the prepared baking sheet. I like to give them a light toast for about 3 minutes in the oven before adding the toppings. This prevents them from getting soggy. You can skip this step if you’re in a huge rush, but the texture is noticeably better.
-
Lay down the “blood.” Spoon about 1 tablespoon of pizza sauce onto each muffin half. Use the back of the spoon to spread it evenly, leaving a small border around the edge. Don’t overload it—you want the base to stay crispy.
-
Add the “skin.” Sprinkle a generous amount of shredded mozzarella cheese over the sauce. Use about 2-3 tablespoons per pizza. This is the base layer that will hold all your monster features in place.
-
Build the monster faces. Now for the creative part! This is where you let your imagination run wild. Here are some ideas to get you started:
- One-Eyed Monster: Place a whole black olive slice in the center for a single eye. Use a strip of green pepper for a scar.
- Vampire: Use two halved cherry tomatoes for bloodshot eyes. Add two pepperoni slices for fangs.
- Frankenstein: Use green pepper strips for a square head and black olive slices for eyes. A small triangle of bell pepper makes a nose.
- Spider: Use eight black olive slices for legs and one for the body. Corn kernels make great eyes.
-
Bake the monsters. Place the baking sheet in the preheated oven and bake for 8-10 minutes. You’re looking for the cheese to be fully melted and bubbly, and the edges of the English muffins to be golden brown and crispy. The pepperoni will also start to curl at the edges.
-
Cool and serve. Remove the baking sheet from the oven and let the mini pizzas cool on the sheet for 2-3 minutes. This is crucial—the cheese is molten hot and will burn little mouths. Use a spatula to transfer them to plates.
Sensory Cues: At the 6-minute mark, your kitchen will smell incredible—like a pizzeria crossed with a Halloween party. The cheese should be bubbling and the edges of the muffins should look dry and toasted. If the cheese is still pale, give it another minute.
Cooking Tips & Techniques
I’ve made these dozens of times, and I’ve learned a few things the hard way. Here are my best tips to make sure your monster faces come out perfect every time.
- Don’t skip the pre-toast. I know it’s an extra step, but it’s the difference between a crispy base and a soggy one. Those extra 3 minutes in the oven are non-negotiable in my house.
- Watch the cheese. I once got distracted and left these in the oven for 12 minutes. The cheese turned into a solid, bubbly blob, and the monster faces were completely unrecognizable. Set a timer for 8 minutes and start checking.
- Let the kids go wild. The first time I made these, I tried to control the face designs. My daughter wanted to put corn on every single one. I let her. They were delicious. The messier they look, the more fun they are to eat.
- Use the broiler for extra crispiness. If you like your pepperoni extra crispy, switch the oven to broil for the last 30 seconds. Watch it like a hawk—it can go from perfect to burnt in seconds.
- Multitask like a pro. While the first batch is baking, set up a “face station” for the next batch. This keeps the assembly line moving and prevents the kids from getting bored and wandering off.
Variations & Adaptations
One of the best things about this recipe is how flexible it is. I’ve tried all sorts of variations, and they’ve all been winners. Here are a few to get you started.
- Gluten-Free Monster Faces: Swap the English muffins for gluten-free English muffins or use gluten-free bagel thins. The texture is slightly different, but they still get nice and crispy.
- Dairy-Free Version: Use a dairy-free mozzarella shreds. I like the brand Daiya for melting. You might need to add a minute or two to the baking time.
- Spooky Spider Web: Instead of monster faces, have the kids drizzle a thin line of ranch dressing or sour cream over the cheese before baking to create a spider web effect.
- Protein-Packed Pizza: Add some crumbled cooked sausage or diced ham under the cheese for extra protein. This makes them a more filling dinner option.
- Vegetarian Delight: Skip the pepperoni and load up on extra veggies. Sliced mushrooms, diced zucchini, or even small broccoli florets make great monster features.
Personal Variation I Love: I once made a “Mummy” version by cutting mozzarella cheese into thin strips and laying them across the pizza like bandages. I used two black olive slices for eyes peeking through. It was a huge hit with my nephew’s Halloween party.
Serving & Storage Suggestions
These mini pizzas are best served hot, right out of the oven. The cheese is perfectly stretchy, and the bases are at their crispiest. Here’s how to make the most of them.
- Serving Temperature: Serve immediately after the 2-minute cool-down. They’re still warm but safe for little fingers.
- Presentation Idea: Arrange the monster faces on a large platter with a side of “blood” (extra pizza sauce) for dipping. You can also add a bowl of carrot sticks and celery to look like “fingers.”
- Complementary Dishes: These pair perfectly with a simple side salad or a bowl of tomato soup. For a Halloween party, serve them alongside some spooky dirt cups for dessert.
- Storage: Leftover mini pizzas can be stored in an airtight container in the refrigerator for up to 3 days. The bases will soften, but they’re still tasty.
- Reheating: The best way to reheat them is in a toaster oven or air fryer at 350°F (175°C) for 3-4 minutes. The microwave will make them soggy, so avoid it if you can.
- Flavor Development: Honestly, these are best fresh. The magic is in the crispy base and the melted cheese. Leftovers are good, but they lose that initial wow factor.
Nutritional Information & Benefits
While these are a fun treat, they can also be part of a balanced meal. Here’s a quick look at the nutritional profile for one mini pizza (using the standard ingredients).
| Nutrient | Amount per Serving |
|---|---|
| Calories | 180 |
| Total Fat | 8g |
| Saturated Fat | 4g |
| Cholesterol | 20mg |
| Sodium | 350mg |
| Total Carbohydrates | 18g |
| Dietary Fiber | 1g |
| Sugars | 2g |
| Protein | 10g |
Health Benefits: The mozzarella cheese provides a good source of calcium and protein, which is great for growing kids. The vegetables (bell peppers, tomatoes, olives) add vitamins A and C, plus fiber. By making these at home, you control the sodium and fat content, making them a healthier alternative to frozen pizza or fast food. This recipe is also easily adaptable for gluten-free or dairy-free diets. Just be mindful of the potential allergens: dairy and gluten are the main ones here.
Conclusion
These Quick Mini Halloween Pizza Faces for Kids are more than just a recipe—they’re a weeknight win. They turn a chaotic dinner time into a fun, creative activity that the whole family can enjoy. I make these every year for our Halloween movie night, and honestly, they’ve become a tradition. The kids look forward to designing their monsters, and I look forward to the 15 minutes of peace while they’re baking. It’s a small, simple thing, but it makes a big difference on a busy night. I’d love to hear what kind of monster faces your kids come up with! Leave a comment below and share your creations. Don’t forget to pin this recipe for later, and if you try it, tag me on social media. Happy Halloween, and happy cooking!
Frequently Asked Questions
Can I use a different base instead of English muffins?
Absolutely! Mini bagels, pita bread, or even thick slices of French bread work great. Just adjust the baking time slightly—bagels might need an extra minute or two.
Can I make these ahead of time for a party?
You can prep the ingredients ahead of time by slicing the veggies and shredding the cheese. Assemble and bake right before serving for the best texture. Reheated pizzas won’t be as crispy.
My kids are picky eaters. What if they don’t like the veggies?
That’s the beauty of this recipe! Let them choose their own toppings. You can start with just cheese and pepperoni, then slowly introduce new veggies as “monster features.” The fun presentation often wins them over.
Can I freeze the assembled pizzas?
Yes! Assemble the pizzas on a baking sheet and freeze them solid (about 2 hours). Then transfer them to a freezer bag. Bake from frozen at 400°F (200°C) for 12-15 minutes, adding a few extra minutes as needed.
What’s the best way to get the cheese to look like a web?
After baking, drizzle a small amount of ranch dressing or sour cream from a squeeze bottle in a spiral pattern. Use a toothpick to drag lines from the center outwards to create the web effect. It’s super easy and looks amazing!
Pin This Recipe!
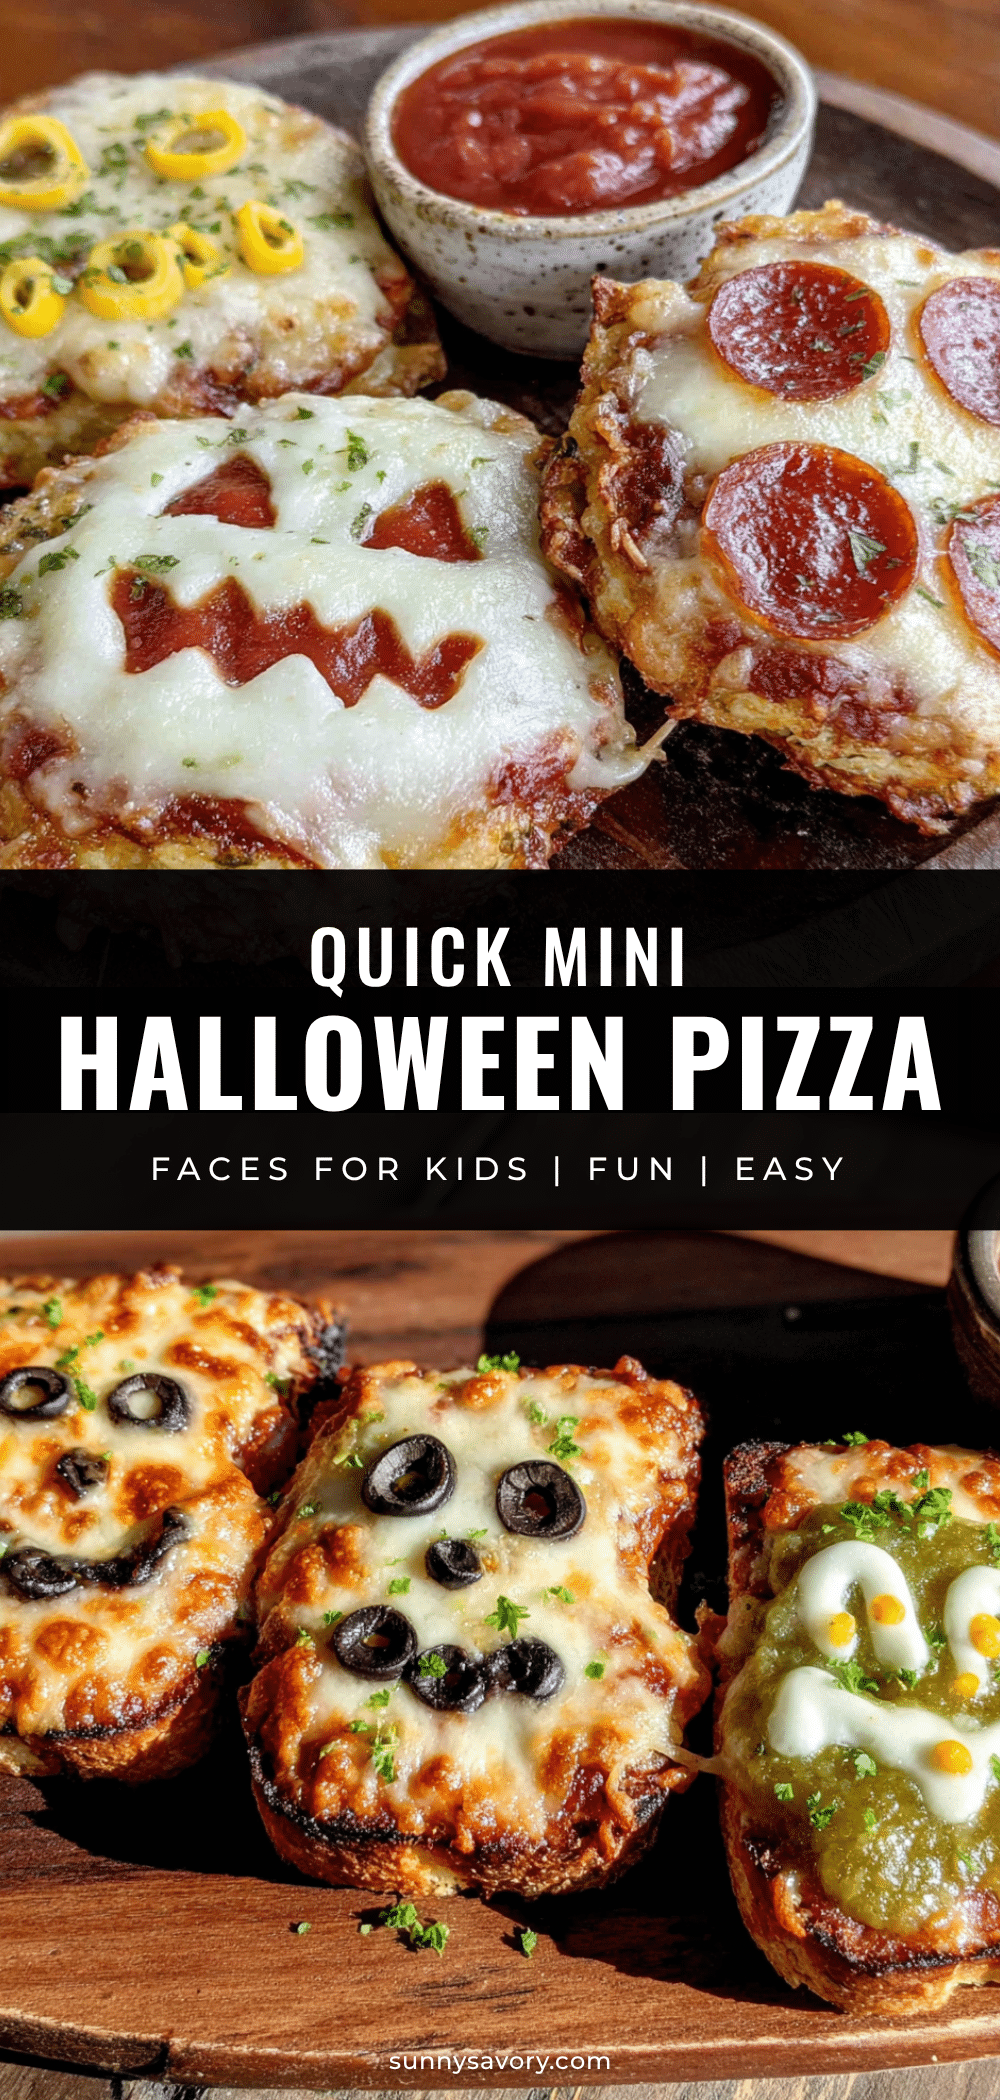
Easy Mini Halloween Pizza Faces Kids Will Love
Quick and fun mini pizza faces made with English muffins, perfect for Halloween parties or a spooky movie night. Kids can build their own monster faces with simple ingredients in under 20 minutes.
- Prep Time: 10 minutes
- Cook Time: 10 minutes
- Total Time: 20 minutes
- Yield: 8 mini pizzas 1x
- Category: Main Course
- Cuisine: American
Ingredients
- 4 English muffins, split in half
- 1/2 cup pizza sauce
- 1 1/2 cups shredded mozzarella cheese (low-moisture, part-skim)
- 16 slices pepperoni
- 1/4 cup black olives, sliced
- 1/4 cup green bell pepper, cut into small strips or triangles
- 1/4 cup cherry tomatoes, halved
- 2 tablespoons canned corn kernels
- Optional: 1/4 cup mushrooms, sliced
Instructions
- Preheat your oven to 400°F (200°C). Line a baking sheet with parchment paper.
- Split 4 English muffins in half to make 8 mini pizza bases. Place them cut-side up on the prepared baking sheet. Lightly toast for about 3 minutes in the oven to prevent sogginess.
- Spoon about 1 tablespoon of pizza sauce onto each muffin half and spread evenly, leaving a small border around the edge.
- Sprinkle a generous amount of shredded mozzarella cheese over the sauce (about 2-3 tablespoons per pizza).
- Build monster faces using pepperoni, black olives, green bell pepper, cherry tomatoes, corn, and optional mushrooms. Get creative with designs like one-eyed monsters, vampires, Frankenstein, or spiders.
- Bake for 8-10 minutes until the cheese is fully melted and bubbly, and the edges of the English muffins are golden brown and crispy.
- Remove from the oven and let cool on the baking sheet for 2-3 minutes before transferring to plates with a spatula.
Notes
Pre-toasting the English muffins prevents sogginess. Let kids design their own faces for more fun. For extra crispy pepperoni, broil for the last 30 seconds. Leftovers can be stored in an airtight container in the refrigerator for up to 3 days and reheated in a toaster oven or air fryer at 350°F (175°C) for 3-4 minutes.
Nutrition
- Serving Size: 1 mini pizza
- Calories: 180
- Sugar: 2
- Sodium: 350
- Fat: 8
- Saturated Fat: 4
- Carbohydrates: 18
- Fiber: 1
- Protein: 10
Keywords: Halloween pizza, mini pizza, kids recipe, English muffin pizza, monster faces, quick dinner, Halloween party food



