Love this? Save it for later!
Share the inspiration with your friends
My nephew asked why I couldn’t just use black olives instead of getting fancy with food coloring. I started to explain why that wouldn’t work — then stopped. He had a point, honestly.
It was a Tuesday night, the kind where you realize Halloween is tomorrow and you promised to bring something creepy to the school party. I had a dozen hard-boiled eggs in the fridge and absolutely no plan. My first instinct was to reach for the neon food coloring and make something complicated that would probably stain my countertops for weeks. But my nephew, all of eight years old, looked at me with that pure confidence kids have and said, “Aren’t olives already eyeballs?”
Let me tell you, I almost laughed. I mean, black olives? For deviled eggs? That felt wrong. I was the adult here, the one who had been making deviled eggs for years. But something made me pause. Maybe it was the clock ticking or maybe it was the look on his face, but I grabbed a can of black olives from the pantry.
And you know what? He was completely right. The black olive slices sat perfectly on top of the creamy filling, looking exactly like little monster eyeballs staring back at me. I felt a little silly for not thinking of it myself. That night, I learned that sometimes the best shortcuts come from the people who haven’t been cooking long enough to overthink everything. Maybe you’ve been there too — overcomplicating something that really doesn’t need to be that hard.
These Easy Monster Eyeball Deviled Eggs have been my go-to ever since. They take about twenty minutes from start to finish, use ingredients you probably already have, and honestly, they get the best reaction every single time. I keep making them because they remind me that sometimes the simplest idea wins.
Why You’ll Love This Recipe
Let’s be real — weeknights are chaos. Between school pickups, homework, and that pile of laundry staring at you from the corner, the last thing you need is a complicated Halloween recipe. These Easy Monster Eyeball Deviled Eggs are here to save the night.
- Quick & Easy: Comes together in under 20 minutes, perfect for busy weeknights or last-minute Halloween parties. No fancy techniques required.
- Simple Ingredients: No grocery store scavenger hunt. You likely already have eggs, mayo, mustard, and black olives in your kitchen right now.
- Perfect for Spooky Weeknights: Great for a fun dinner, school parties, potlucks, or just surprising the kids on a random Tuesday.
- Crowd-Pleaser: Kids and adults both go crazy for these. They’re creepy enough to be fun but familiar enough that even picky eaters will try them.
- Unbelievably Delicious: The creamy, tangy filling paired with the briny pop of black olive is a combination that works way better than it has any right to.
What makes this recipe different from the rest? It’s the olive trick. Most monster deviled eggs use food coloring, piped designs, or complicated garnishes that take forever. This version uses a simple black olive slice as the eyeball — it’s faster, cleaner, and honestly looks more realistic. I tested this with my nephew’s class, and it was the first platter to disappear. It’s comfort food reimagined — spooky but simple, with the same creamy satisfaction you expect from a classic deviled egg.
What Ingredients You Will Need
This recipe uses simple, everyday ingredients to deliver big flavor and that perfect creepy look. You probably have most of these in your kitchen already, which is exactly the point for a busy weeknight.
- For the eggs:
- 12 large eggs, hard-boiled and peeled (room temperature works best for peeling)
- For the filling:
- 1/3 cup mayonnaise (I prefer Hellmann’s or Duke’s for the creamiest texture)
- 1 tablespoon yellow mustard (adds that classic tang and color)
- 1 teaspoon white vinegar (brightens the flavor without being overpowering)
- 1/2 teaspoon salt
- 1/4 teaspoon black pepper
- 1/4 teaspoon paprika (plus extra for garnish)
- For the monster eyeballs:
- 1 can (6 ounces) black olives, drained (look for large, pitted olives for easier slicing)
- Optional: 1-2 tablespoons cream cheese (for a richer filling, softened)
For the eggs, I recommend using eggs that are at least a week old — they peel much easier than super fresh ones. If you’re short on time, you can buy pre-hard-boiled eggs from the store, though they’re usually a bit pricier. For the olives, look for the large, pitted black olives in the canned vegetable aisle. The jumbo ones work best because they give you a bigger slice that looks more like an eyeball. Avoid sliced olives — you want whole ones so you can cut your own rounds.
If you want to add a little extra creaminess to the filling, stir in a tablespoon or two of softened cream cheese. It’s not traditional, but it makes the texture even smoother. For a dairy-free option, use vegan mayonnaise and skip the cream cheese entirely.
Equipment Needed
You don’t need anything fancy for this recipe, which is exactly how weeknight cooking should be. Here’s what you’ll need:
- Large pot for boiling eggs (any pot works, but a wider pot helps eggs cook evenly)
- Medium mixing bowl
- Fork or potato masher for mashing the yolks
- Small spoon or piping bag for filling the eggs (a zip-top bag with the corner snipped off works great)
- Sharp knife for slicing olives
- Cutting board
- Serving platter
If you don’t have a piping bag, don’t worry. A small spoon works perfectly fine — the filling will look a little more rustic, but it still tastes amazing. I actually prefer using a spoon sometimes because it’s one less thing to wash. For slicing the olives, a paring knife works best because it gives you clean, even rounds. A serrated knife can tear the olives, so stick with something sharp and straight-edged.
Preparation Method
- Hard-boil the eggs. Place the 12 large eggs in a single layer in a large pot. Cover them with cold water by about 1 inch. Bring the water to a rolling boil over high heat. Once boiling, cover the pot, turn off the heat, and let the eggs sit for exactly 10 minutes. This gives you perfectly cooked yolks — firm but not chalky.
- Ice bath time. While the eggs are sitting, fill a large bowl with ice and cold water. After 10 minutes, transfer the eggs to the ice bath using a slotted spoon. Let them cool for at least 5 minutes. This step stops the cooking process and makes peeling so much easier. I learned this the hard way after peeling dozens of eggs that looked like they’d been through a war.
- Peel the eggs. Gently tap each egg on the counter to crack the shell all over, then roll it between your palms to loosen the shell. Start peeling from the wider end where the air pocket is — it usually comes off easier. Rinse the peeled eggs under cold water to remove any tiny shell fragments.
- Slice and separate. Using a sharp knife, slice each egg in half lengthwise. Carefully pop out the yolks into a medium mixing bowl. Arrange the egg white halves on your serving platter, cut side up.
- Make the filling. Add the 1/3 cup mayonnaise, 1 tablespoon yellow mustard, 1 teaspoon white vinegar, 1/2 teaspoon salt, 1/4 teaspoon black pepper, and 1/4 teaspoon paprika to the bowl with the yolks. Mash everything together with a fork until smooth and creamy. If you want it extra smooth, use a potato masher or a small food processor. Taste and adjust seasoning — I sometimes add a pinch more mustard if I want more tang.
- Fill the eggs. Spoon the filling into a piping bag fitted with a star tip, or simply use a small spoon. If using a zip-top bag, scoop the filling into the bag, seal it, and snip off one corner. Pipe or spoon the filling into each egg white half, dividing it evenly. Aim for a slight mound — it looks more eyeball-like when it’s a little rounded.
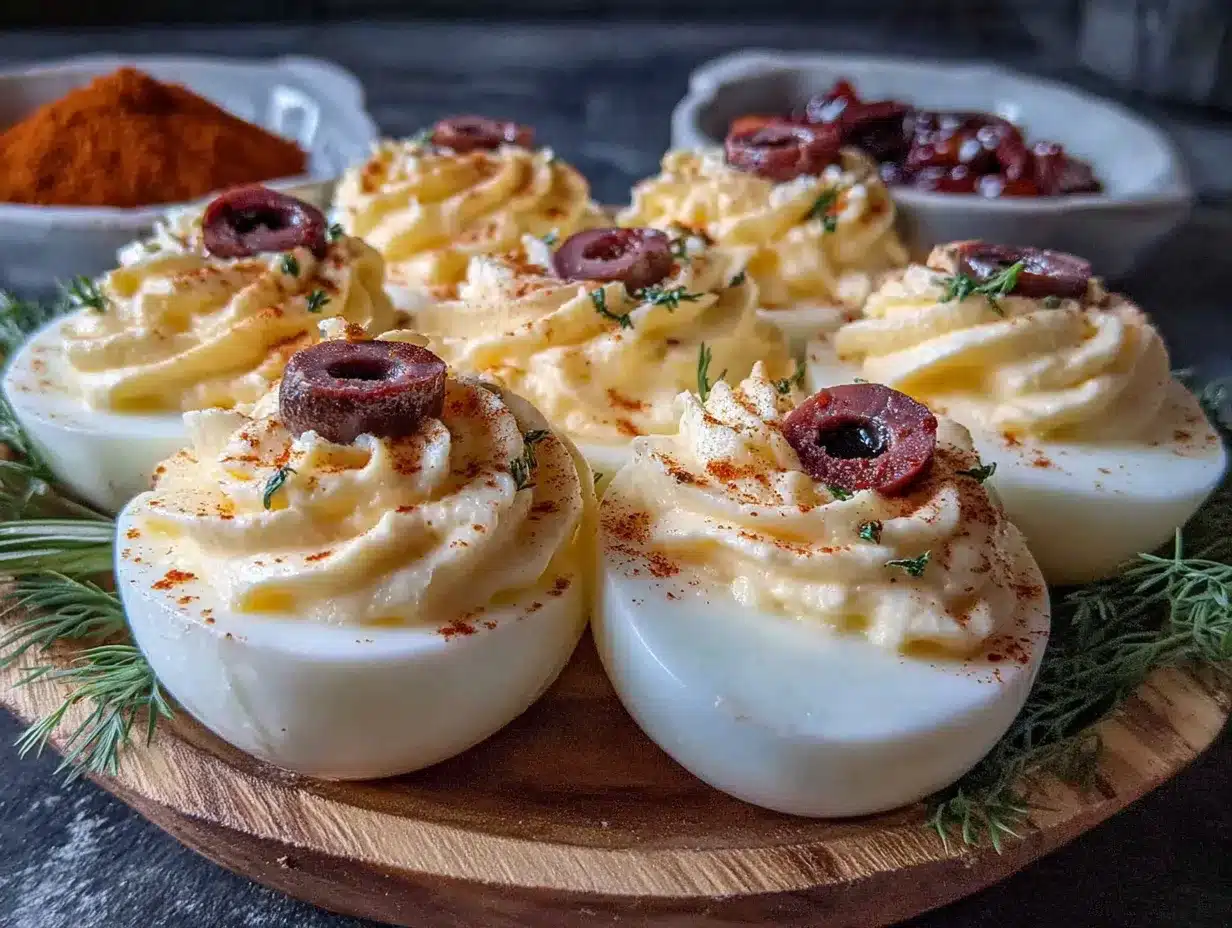
- Create the monster eyeballs. Drain the can of black olives and pat them dry with a paper towel. Slice the olives into rounds about 1/4-inch thick. You should get about 3-4 slices per olive, depending on size. Place one olive slice on top of each filled egg, pressing it gently into the filling so it stays put. The olive slice looks exactly like a creepy eyeball staring up at you.
- Finish and serve. Sprinkle a tiny pinch of paprika over the tops for extra color. Serve immediately or refrigerate until ready to serve. They hold up well for a few hours, making them perfect for parties.
Cooking Tips & Techniques
After making these Easy Monster Eyeball Deviled Eggs more times than I can count, I’ve picked up a few tricks that make the process smoother. Let me share what I’ve learned — including the mistakes I’ve made so you don’t have to.
Perfect hard-boiled eggs every time. The biggest mistake people make is overcooking the eggs. If you boil them for too long, the yolks turn gray and develop that weird sulfur smell. The 10-minute off-heat method is foolproof. I’ve tried instant pot, steaming, and baking — this stovetop method is the most consistent and requires no special equipment.
Peeling without the pain. Fresh eggs are the enemy of easy peeling. Use eggs that have been in your fridge for at least a week. The ice bath is non-negotiable — it shocks the shell and makes it release from the egg white. If you’re still struggling, try peeling the eggs under running water. The water helps wash away tiny shell pieces and gets under the membrane.
Filling texture secrets. If your filling seems too thick, add a teaspoon of mayonnaise or a splash of pickle juice. If it’s too thin, add another yolk or a tablespoon of cream cheese. The filling should be smooth enough to pipe but firm enough to hold its shape. I’ve had batches that were too runny — they still tasted great, but they looked sad on the platter.
Olive placement matters. Press the olive slice gently into the filling so it stays put. If you just lay it on top, it’ll slide off when someone picks up the egg. I learned this one at a party when half the olives ended up on the floor. A light press is all it takes.
Multitasking strategy. While the eggs are boiling and sitting in the ice bath, you can prep the olives and make the filling. This cuts the active time down to about 10 minutes. On a busy weeknight, every minute counts.
Variations & Adaptations
One of the best things about this recipe is how easy it is to change up. Here are some variations I’ve tried that worked really well:
- Spicy Monster Eyeballs: Add 1/2 teaspoon of sriracha or hot sauce to the filling for a spicy kick. The heat pairs surprisingly well with the creamy filling and briny olive. My brother-in-law requests these every Halloween.
- Guacamole Eyeballs: Swap half the mayonnaise for mashed avocado. The green filling looks even more monstrous, and the flavor is fresh and creamy. This is a great option if you’re trying to eat a little healthier on a weeknight.
- Bacon-Wrapped Eyeballs: Crumble 2-3 slices of crispy bacon and mix it into the filling. Top each egg with a small piece of bacon along with the olive. Because everything is better with bacon, right?
- Dairy-Free Version: Use vegan mayonnaise and skip any cream cheese. The filling will still be creamy and delicious. I’ve made this for a friend with dairy allergies and she couldn’t tell the difference.
- Smoked Paprika Twist: Replace regular paprika with smoked paprika for a deeper, smokier flavor. It adds a subtle barbecue-like note that makes these eggs feel a little more grown-up.
For a fun seasonal twist, try adding a drop of green or purple food coloring to the filling for extra creepy factor. My kids love when the filling is bright green — it makes the eyeballs look truly alien. Just be careful not to stain your hands or countertops.
Serving & Storage Suggestions
These Easy Monster Eyeball Deviled Eggs are best served cold or at room temperature. If you’re serving them at a party, arrange them on a platter with the olive slices facing up so everyone can see the creepy eyeballs. A dark platter or black serving tray makes the white eggs pop even more.
For a complete spooky weeknight dinner, pair these with a bowl of tomato soup (blood red, obviously) and some crusty bread cut into bone shapes. They also work great alongside a simple green salad or as part of a Halloween charcuterie board with cheese cubes, crackers, and other finger foods.
Storage: Store leftover deviled eggs in an airtight container in the refrigerator for up to 3 days. The olive slices might soften slightly over time, but they’ll still taste great. I don’t recommend freezing deviled eggs — the texture of the filling changes and becomes watery when thawed.
Make-ahead tip: You can hard-boil and peel the eggs up to 3 days in advance. Store them in a covered container in the fridge. You can also make the filling a day ahead and keep it in a piping bag in the refrigerator. When you’re ready to serve, just fill the egg whites and add the olive slices. This makes weeknight prep even faster.
The flavors actually get better after a few hours in the fridge as the filling absorbs the seasonings. So if you’re making these for a party, feel free to assemble them a few hours ahead and keep them chilled.
Nutritional Information & Benefits
Here’s the approximate nutritional breakdown for one deviled egg (based on 24 servings from 12 eggs):
| Nutrient | Amount per serving |
|---|---|
| Calories | 65 |
| Protein | 6g |
| Fat | 4.5g |
| Carbohydrates | 1g |
| Fiber | 0g |
| Sugar | 0.5g |
| Sodium | 180mg |
Eggs are a fantastic source of high-quality protein, which helps keep you full and satisfied. They also contain choline, a nutrient that supports brain health. Black olives add a small amount of healthy monounsaturated fats and a touch of iron. This recipe is naturally low in carbs and can fit into a variety of dietary patterns, including low-carb and keto lifestyles.
If you’re watching your sodium intake, you can use low-sodium olives or reduce the added salt in the filling. The mustard and vinegar provide plenty of flavor even with less salt. For a lower-fat option, use light mayonnaise or substitute half the mayo with plain Greek yogurt.
Conclusion
These Easy Monster Eyeball Deviled Eggs are proof that you don’t need complicated techniques or fancy ingredients to make something fun and delicious. They come together in under 20 minutes, use stuff you probably already have, and honestly, they’re the kind of recipe that makes people smile. My nephew still reminds me every Halloween about the olive trick, and I’m glad he does.
I’d love to hear how yours turn out. Did you try any of the variations? Did your kids help make them? Drop a comment below and let me know — I read every single one. And if you’re looking for more quick weeknight dinner ideas, don’t forget to check out our other recipes. Happy Halloween, and happy cooking!
Frequently Asked Questions
Can I make these deviled eggs ahead of time?
Yes! You can hard-boil and peel the eggs up to 3 days in advance. You can also make the filling a day ahead and store it in a piping bag in the fridge. Assemble the eggs and add the olive slices just before serving for the best presentation.
How do I get my eggs to peel easily?
Use eggs that are at least a week old — fresh eggs are harder to peel. After boiling, transfer them to an ice bath for at least 5 minutes. This shocks the shells and makes them release from the egg white. Peeling under running water also helps remove stubborn shell pieces.
Can I use a different type of olive?
Black olives work best because they look most like eyeballs. Green olives can be used, but they’ll look less creepy and more like… green olives. Kalamata olives are too soft and will fall apart when sliced. Stick with canned black olives for the best results.
Are these deviled eggs gluten-free?
Yes, this recipe is naturally gluten-free. All the ingredients — eggs, mayonnaise, mustard, vinegar, and olives — are gluten-free. Just double-check your mayonnaise label to make sure it’s certified gluten-free if you have celiac disease or a severe sensitivity.
How long will these deviled eggs keep in the fridge?
Store them in an airtight container in the refrigerator for up to 3 days. The olive slices may soften slightly over time, but they’ll still taste great. I don’t recommend leaving them out at room temperature for more than 2 hours, especially if you’re serving them at a party.
Pin This Recipe!

Easy Monster Eyeball Deviled Eggs for a Spooky Weeknight

These Easy Monster Eyeball Deviled Eggs are a quick and fun Halloween treat that comes together in under 20 minutes using simple ingredients like eggs, mayo, and black olives. Perfect for busy weeknights or last-minute parties, they’re creepy enough to be fun but familiar enough that even picky eaters will love them.
- Prep Time: 10 minutes
- Cook Time: 10 minutes
- Total Time: 20 minutes
- Yield: 24 deviled eggs (12 servings of 2 eggs each) 1x
- Category: Appetizer
- Cuisine: American
Ingredients
- 12 large eggs, hard-boiled and peeled
- 1/3 cup mayonnaise
- 1 tablespoon yellow mustard
- 1 teaspoon white vinegar
- 1/2 teaspoon salt
- 1/4 teaspoon black pepper
- 1/4 teaspoon paprika (plus extra for garnish)
- 1 can (6 ounces) black olives, drained (large, pitted)
- Optional: 1-2 tablespoons cream cheese, softened
Instructions
- Hard-boil the eggs: Place the 12 large eggs in a single layer in a large pot. Cover them with cold water by about 1 inch. Bring the water to a rolling boil over high heat. Once boiling, cover the pot, turn off the heat, and let the eggs sit for exactly 10 minutes.
- Ice bath time: While the eggs are sitting, fill a large bowl with ice and cold water. After 10 minutes, transfer the eggs to the ice bath using a slotted spoon. Let them cool for at least 5 minutes.
- Peel the eggs: Gently tap each egg on the counter to crack the shell all over, then roll it between your palms to loosen the shell. Start peeling from the wider end where the air pocket is. Rinse the peeled eggs under cold water to remove any tiny shell fragments.
- Slice and separate: Using a sharp knife, slice each egg in half lengthwise. Carefully pop out the yolks into a medium mixing bowl. Arrange the egg white halves on your serving platter, cut side up.
- Make the filling: Add the 1/3 cup mayonnaise, 1 tablespoon yellow mustard, 1 teaspoon white vinegar, 1/2 teaspoon salt, 1/4 teaspoon black pepper, and 1/4 teaspoon paprika to the bowl with the yolks. Mash everything together with a fork until smooth and creamy. Taste and adjust seasoning.
- Fill the eggs: Spoon the filling into a piping bag fitted with a star tip, or simply use a small spoon. If using a zip-top bag, scoop the filling into the bag, seal it, and snip off one corner. Pipe or spoon the filling into each egg white half, dividing it evenly. Aim for a slight mound.
- Create the monster eyeballs: Drain the can of black olives and pat them dry with a paper towel. Slice the olives into rounds about 1/4-inch thick. Place one olive slice on top of each filled egg, pressing it gently into the filling so it stays put.
- Finish and serve: Sprinkle a tiny pinch of paprika over the tops for extra color. Serve immediately or refrigerate until ready to serve.
Notes
Use eggs that are at least a week old for easier peeling. The ice bath is essential for easy peeling. For a richer filling, add 1-2 tablespoons of softened cream cheese. Press the olive slice gently into the filling to prevent it from sliding off. Store leftovers in an airtight container in the refrigerator for up to 3 days. Do not freeze.
Nutrition
- Serving Size: 2 deviled eggs
- Calories: 130
- Sugar: 1
- Sodium: 360
- Fat: 9
- Saturated Fat: 2
- Carbohydrates: 2
- Protein: 12
Keywords: deviled eggs, monster eyeball, Halloween, spooky, easy, quick, weeknight, party appetizer, black olives, kid-friendly



