Love this? Save it for later!
Share the inspiration with your friends
My brother-in-law Mark had sworn off protein shakes for three years. Called them “gym sludge” and made a face every time someone mentioned blending anything with a scoop of powder. He was that guy—the one who’d rather skip breakfast entirely than drink something that reminded him of chalky desperation. Then last Tuesday night, I caught him standing in front of my open freezer, spoon halfway to his mouth, eating directly from the Ninja Creami pint I’d made that morning. He didn’t even try to pretend he wasn’t doing it. “This isn’t a protein shake,” he said, like he was trying to convince himself. “This is cheesecake.”
And honestly? He wasn’t wrong.
I’d been messing around with the Ninja Creami for a few weeks, trying to figure out how to get that creamy, dense texture without all the heavy cream and sugar that traditional recipes demand. The first few attempts were disasters—icy, grainy, sad little pucks of disappointment. But this strawberry cheesecake version? Something clicked. The cream cheese gave it that tangy richness you expect from a real cheesecake, and the strawberries swirled through in these little jammy pockets that tasted way more indulgent than they had any right to. I mean, I was eating it for breakfast and feeling pretty smug about the whole situation.
Maybe you’ve been there—staring at your Ninja Creami, wondering if you can actually make something that tastes like a treat without blowing your whole day’s calories. Or maybe you’re just tired of spending six bucks on a single pint of “healthy” ice cream that tastes like frozen disappointment. Either way, this recipe is the one that changed my mind about what protein ice cream could actually be. It’s been in my freezer every week since that first successful batch, and I don’t see that changing anytime soon.
Why You’ll Love This Recipe
Let me tell you why this strawberry cheesecake protein pint has become my weeknight hero. It checks all the boxes that matter when you’re tired, hungry, and trying to make better choices without feeling deprived.
- Ready in Under 10 Minutes: The Ninja Creami does the hard work. Mix your base, freeze it overnight, then spin it for two minutes. That’s it. No churning, no babysitting, no complicated steps.
- Simple Ingredients: You probably have most of these in your kitchen right now. No weird stabilizers, no expensive specialty items—just real food that happens to taste like dessert.
- Perfect for Weeknight Cravings: When that 8 PM sugar hit arrives and you’re too tired to bake anything, this is your answer. It satisfies the cheesecake craving without the effort of actually making a cheesecake.
- Crowd-Pleaser: I’ve served this to protein skeptics and ice cream purists alike. Every single person has asked for the recipe. Mark still won’t admit he likes protein shakes, but he asks if I have “any of that strawberry stuff” every time he visits.
- Unbelievably Delicious: The texture is what gets people. It’s not icy or watery—it’s dense and creamy, with that slight tang from the cream cheese that makes you close your eyes on the first bite. The strawberry pieces add little bursts of sweetness that keep every spoonful interesting.
What makes this recipe different from other Ninja Creami protein pints I’ve tried? It’s the cream cheese. Most recipes skip it to save calories, but that one ingredient makes all the difference. It gives the base that authentic cheesecake flavor and helps create a smoother texture that doesn’t feel like you’re eating frozen protein water. Plus, the cottage cheese trick I discovered adds even more creaminess without making the base too thin. It’s not just another protein ice cream—it’s the one that actually tastes like the real thing.
This recipe is comfort food reimagined—healthier, faster, and way more satisfying than anything you’d buy at the store. It’s the kind of dessert that makes you feel good about what you’re eating, which is honestly the best feeling after a long day.
What Ingredients You Will Need
This recipe uses simple, wholesome ingredients to deliver that rich cheesecake flavor and creamy texture without any fuss. Most of these are pantry staples or things you probably already have in your fridge.
For the Base
- 1 cup unsweetened almond milk (or any milk you prefer—dairy milk makes it even creamier, but almond milk keeps the calories lower)
- 1/2 cup low-fat cottage cheese (I recommend Good Culture or Daisy for the best texture—look for small-curd varieties)
- 2 ounces cream cheese, softened (full-fat works best here for flavor and texture; low-fat can make the base slightly thinner)
- 1 scoop vanilla or strawberry protein powder (I use Orgain vanilla because it blends smoothly and doesn’t leave that chalky aftertaste)
- 1 tablespoon sugar-free cheesecake pudding mix (this is the secret weapon—it adds thickness and that unmistakable cheesecake flavor)
- 1 teaspoon vanilla extract (real vanilla, not imitation, if you have it)
- 1/2 cup frozen strawberries, chopped (fresh works too, but frozen gives a better texture after spinning)
- 1 tablespoon powdered erythritol or monk fruit sweetener (adjust to taste—I like mine not too sweet, so feel free to add more if you have a sweeter tooth)
The cottage cheese might seem weird, I know. But trust me on this—it blends completely smooth and adds protein and creaminess without making the base watery. You won’t taste it at all. I’ve tested this with Greek yogurt instead, and while it works, the cottage cheese version is noticeably creamier.
For the strawberries, I prefer frozen because they break up better in the Creami and create those little jammy swirls throughout the pint. If you use fresh strawberries, chop them small and consider macerating them with a pinch of sweetener first to draw out some moisture. It makes a difference in the final texture.
If you’re dairy-free, you can substitute the cottage cheese with silken tofu and use dairy-free cream cheese. The texture will be slightly less rich, but it still works beautifully. Just make sure your protein powder is plant-based too.
Equipment Needed
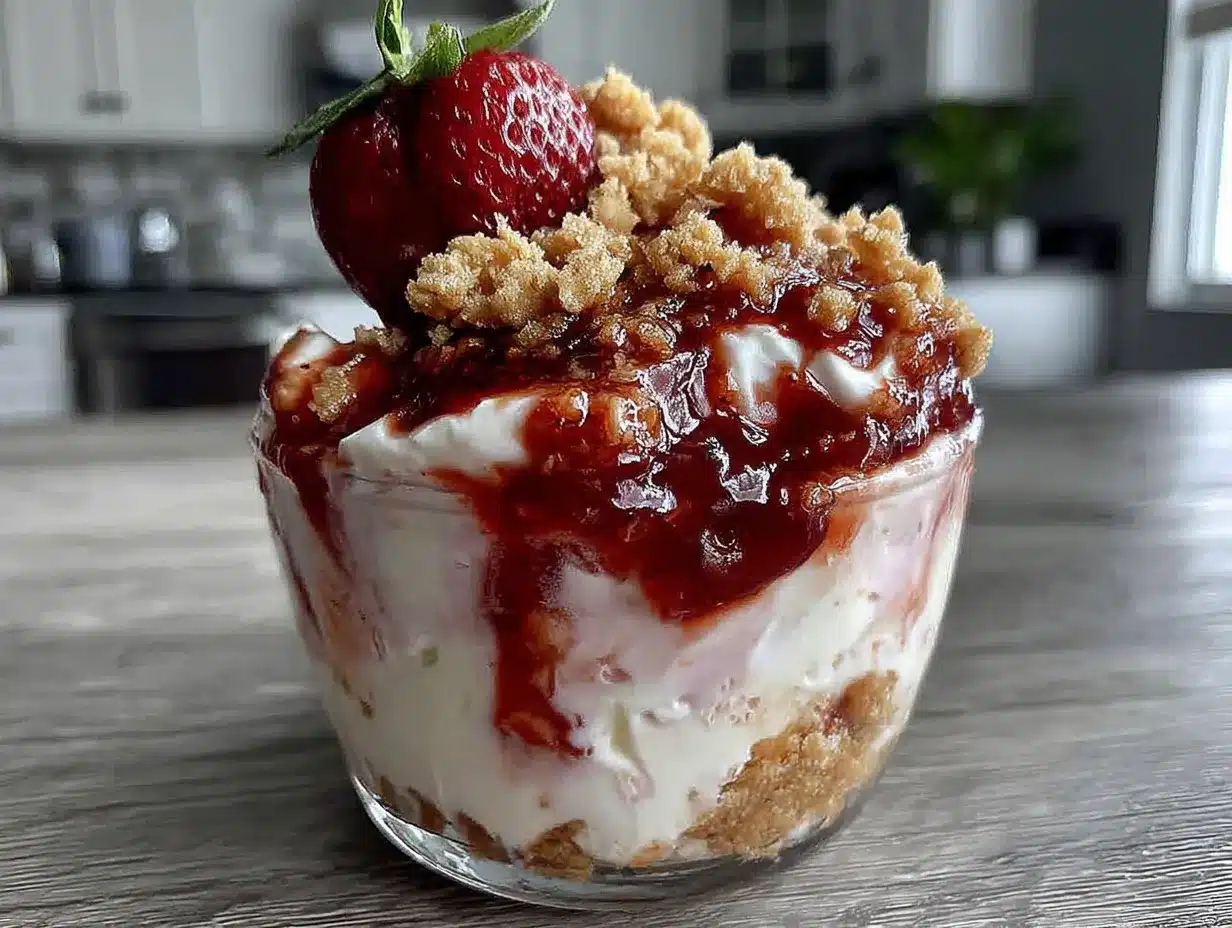
You don’t need much for this recipe, which is part of why I love it so much on busy weeknights.
- Ninja Creami ice cream maker (obviously—any model works, I use the Creami Deluxe but the original is just as good)
- Immersion blender or regular blender (to get that cottage cheese completely smooth; a regular blender works fine, just scrape down the sides)
- Ninja Creami pint container (the one that comes with your machine)
- Measuring cups and spoons (nothing fancy)
- Small bowl for softening cream cheese (microwave it for 10 seconds if you’re in a hurry)
- Spatula (to scrape every last bit into the pint—waste not, want not)
If you don’t have an immersion blender, no worries. A regular blender works perfectly. Just blend the cottage cheese and almond milk first until smooth, then add the rest of the wet ingredients and blend again. One less thing to wash, honestly. I’ve also used a food processor in a pinch, and it worked fine—just took a little longer to get everything smooth.
Pro tip: Keep your Ninja Creami pint container flat in the freezer. I learned this the hard way after a slightly tilted pint froze unevenly and the blade struggled to get through one side. Level freezing makes a huge difference in the final texture.
Preparation Method
This comes together fast, especially if you’ve made it once before and know the rhythm. Here’s exactly how I do it.
- Soften the cream cheese. Take it out of the fridge about 15 minutes before you start, or microwave it for 10-15 seconds in a small bowl. You want it soft enough to blend smoothly, not melted. I’ve forgotten this step before and ended up with tiny cream cheese lumps in my base—still tasted good, but not as smooth.
- Blend the cottage cheese and almond milk. Pour the almond milk and cottage cheese into your blender or a tall cup if using an immersion blender. Blend until completely smooth—about 30 seconds. No lumps allowed here. The cottage cheese should disappear entirely. If you see any white specks, keep blending.
- Add the remaining wet ingredients. Add the softened cream cheese, vanilla extract, and your sweetener to the blender. Blend again until everything is combined and silky smooth. Scrape down the sides once to make sure nothing’s hiding.
- Mix in the protein powder and pudding mix. Add your protein powder and sugar-free cheesecake pudding mix. Blend on low speed first so the powder doesn’t fly everywhere—I learned this after a protein powder cloud covered my entire kitchen. Then blend on medium-high for about 20 seconds until everything is incorporated. The mixture should look like a thick, creamy milkshake.
- Chop and fold in the strawberries. Take your frozen strawberries and chop them into small pieces—about the size of a pea. You don’t want huge chunks because they’ll freeze too hard and the Creami blade might struggle. Gently fold them into the base with a spatula. The mixture will thicken slightly as the cold strawberries hit it.
- Pour into the Ninja Creami pint. Pour the entire mixture into your pint container. Don’t fill it past the max fill line—I know it’s tempting, but the base needs room to expand during spinning. Tap the container on the counter a few times to release any air bubbles.
- Freeze for at least 24 hours. This is the hardest part—waiting. The surface needs to be completely flat and solid before spinning. I’ve tried spinning after 12 hours and ended up with a soupy mess. Trust me, 24 hours is non-negotiable. Make sure the pint is level in your freezer.
- Spin in the Ninja Creami. Take the frozen pint out, remove the lid, and place it in the outer bowl. Select the “Ice Cream” setting and let it do its thing. It’ll sound like it’s struggling for a few seconds—that’s normal. If it sounds really rough, you can add a tablespoon of almond milk and run it on “Re-spin.”
- Check the texture. After the first spin, the texture should be soft and creamy, like soft-serve. If it’s still crumbly or powdery, run it on “Re-spin” once more. I usually do one re-spin for the perfect creamy texture.
- Enjoy immediately or freeze for later. You can eat it right away for a soft-serve texture, or pop it back in the freezer for 30 minutes to firm up. If freezing longer than that, let it sit on the counter for 5-10 minutes before scooping.
Cooking Tips & Techniques
I’ve made this recipe probably twenty times now, and I’ve learned a few things the hard way. Here’s what I wish someone had told me before my first attempt.
Get the base smooth before freezing. This is the most important step. Any lumps in your mixture will become icy chunks after freezing. Take the extra 30 seconds to blend until completely silky. I once rushed through this step because I was hungry, and the resulting pint had these weird grainy pockets that reminded me why patience matters in cooking.
Don’t skip the pudding mix. I know it sounds like a processed shortcut, but the sugar-free cheesecake pudding mix does two things: it adds that authentic cheesecake flavor, and it helps stabilize the texture so your pint doesn’t turn into a block of ice. I’ve tried making this without it, and the texture was noticeably less creamy. It’s worth the small amount of carbs.
Let the pint sit at room temperature for 5 minutes before spinning. This is a game-changer. If you spin it straight from the freezer, the blade can struggle and you might end up with a crumbly texture. Five minutes on the counter softens the surface just enough for a perfect first spin.
Use the “Re-spin” function without shame. Sometimes the first spin leaves the texture a little icy or crumbly. That’s totally normal. Run it on “Re-spin” once or twice until it looks like real ice cream. I almost always do one re-spin, and sometimes two if I’m being picky. No judgment here.
If you forget to soften the cream cheese, microwave it for 10 seconds. Not 20 seconds—10 seconds. I’ve nuked cream cheese into a bubbling mess before, and it’s not pretty. Low and slow is the way to go.
Variations & Adaptations
This recipe is incredibly flexible, which is one of the reasons it’s become such a staple in my kitchen. Here are some variations I’ve tried and loved.
Chocolate Strawberry Cheesecake: Swap the vanilla protein powder for chocolate and add a tablespoon of cocoa powder to the base. The chocolate and strawberry combination is ridiculous—like a chocolate-covered strawberry in frozen form. My sister requested this version for her birthday, and it was gone in two days.
Dairy-Free Version: Use dairy-free cream cheese (Kite Hill works great), replace the cottage cheese with silken tofu, and use a plant-based protein powder. The texture is slightly less rich, but it’s still creamy and satisfying. I made this for a friend with dairy sensitivity, and she couldn’t tell the difference.
Lower Calorie Version: Skip the cream cheese and use an extra tablespoon of cottage cheese instead. The texture won’t be quite as dense, but it still tastes like cheesecake. I do this when I’m being extra careful with calories, and honestly, it’s still delicious. Just add a little extra vanilla extract to compensate for the missing cream cheese flavor.
Mixed Berry Cheesecake: Replace the strawberries with a mix of frozen blueberries, raspberries, and blackberries. The combination creates this gorgeous purple swirl that looks as good as it tastes. I did this with leftover berries from a summer party, and it might actually be better than the original.
Peanut Butter Strawberry Cheesecake: Add a tablespoon of peanut butter powder to the base and swirl in some actual peanut butter before freezing. The salty-sweet combination with the strawberries is next-level. Just be careful not to add too much peanut butter or the base gets too thick.
Serving & Storage Suggestions
This strawberry cheesecake protein pint is best enjoyed fresh from the Creami, but there are a few ways to serve it that make it feel even more special.
Serving Temperature: Right after spinning, the texture is soft and scoopable—like premium soft-serve. If you prefer a firmer texture, pop it in the freezer for 20-30 minutes. Let it sit on the counter for 5 minutes before scooping if it’s been in the freezer longer than that.
Presentation Ideas: Scoop into a chilled bowl and top with fresh strawberry slices and a dollop of whipped cream. For extra crunch, crumble a graham cracker or a low-carb cookie on top. I’ve also drizzled sugar-free chocolate syrup over it for a sundae situation that feels way more indulgent than it actually is.
Storage: If you don’t finish the pint in one sitting (I won’t judge you if you do), press a piece of plastic wrap directly onto the surface before putting the lid back on. This prevents ice crystals from forming. Store in the freezer for up to two weeks—though in my experience, it never lasts that long.
Reheating: If the pint gets too hard after a few days, let it sit at room temperature for 10-15 minutes, then run it on “Re-spin” with a tablespoon of almond milk. This brings back the creamy texture without making it watery. I’ve done this multiple times, and it works like a charm.
Flavor Development: Honestly, this pint tastes best within the first three days. The strawberry flavor is brightest, and the texture is at its peak. After that, the strawberries can get a little icy, but it’s still perfectly edible—just not quite as good.
Nutritional Information & Benefits
This recipe is designed to fit into a balanced diet without making you feel like you’re missing out. Here’s the rough breakdown per serving (the whole pint, because who are we kidding).
- Calories: Approximately 320-350 calories (depending on your protein powder and milk choice)
- Protein: 30-35 grams
- Carbohydrates: 15-20 grams (mostly from the strawberries and cottage cheese)
- Fat: 12-15 grams (from the cream cheese and cottage cheese)
- Fiber: 2-3 grams
- Sugar: 8-10 grams (naturally occurring from strawberries and dairy)
The cottage cheese and protein powder make this a high-protein dessert that actually keeps you full. I’ve eaten this as a post-dinner treat and woken up the next morning still feeling satisfied. The cream cheese adds calcium and a little healthy fat that helps with satiety. Plus, strawberries are packed with vitamin C and antioxidants—so you’re basically eating a health food, right?
This recipe is naturally gluten-free and can be made low-carb by using a low-carb protein powder and adjusting the sweetener. If you’re watching your sugar intake, the sugar-free pudding mix and erythritol keep things in check without sacrificing flavor.
Conclusion
This Ninja Creami strawberry cheesecake protein pint is the kind of recipe that makes you feel like you’re getting away with something. It tastes like a decadent dessert, but it’s packed with protein and made with real ingredients that won’t leave you feeling sluggish. I’ve made it for myself on tired Tuesday nights, for friends who swore they didn’t like protein ice cream, and for my brother-in-law Mark who still won’t admit he’s been converted.
The best part? You can tweak it to fit exactly what you’re craving. More strawberries, less sweetener, a different protein powder flavor—it’s forgiving and flexible. I love recipes that feel like a canvas rather than a rigid formula, and this one definitely delivers that.
I’d love to hear how yours turns out. Did you try a variation I haven’t thought of? Did you convince a protein skeptic in your own life? Drop a comment below and let me know—I read every single one, and your ideas might just inspire my next batch. Until then, happy spinning, and may your freezer always have a pint waiting.
Frequently Asked Questions
Can I use fresh strawberries instead of frozen?
Yes, but chop them small and consider macerating them with a pinch of sweetener first to draw out some moisture. Frozen strawberries break up better in the Creami and create those jammy swirls that make this recipe so good.
How long do I need to freeze the pint before spinning?
At least 24 hours. I know it’s tempting to try sooner, but the surface needs to be completely flat and solid. I’ve tested 12 hours and ended up with a soupy mess. Patience pays off here.
Can I make this without a Ninja Creami?
This recipe is specifically designed for the Ninja Creami. Without it, you’d need an ice cream maker with a built-in compressor, and the texture wouldn’t be the same. If you don’t have a Creami, look for recipes specifically designed for your machine.
What protein powder works best?
I prefer vanilla protein powder because it complements the strawberry and cheesecake flavors without competing. Orgain vanilla blends smoothly and doesn’t leave a chalky aftertaste. Whey protein tends to give the creamiest texture, but plant-based works too—just expect a slightly different mouthfeel.
Can I double this recipe?
Absolutely. Just make sure you have two pint containers and a large enough blender. The base will keep in the fridge for up to three days before freezing, so you can make a double batch and freeze the second pint later in the week.
Pin This Recipe!
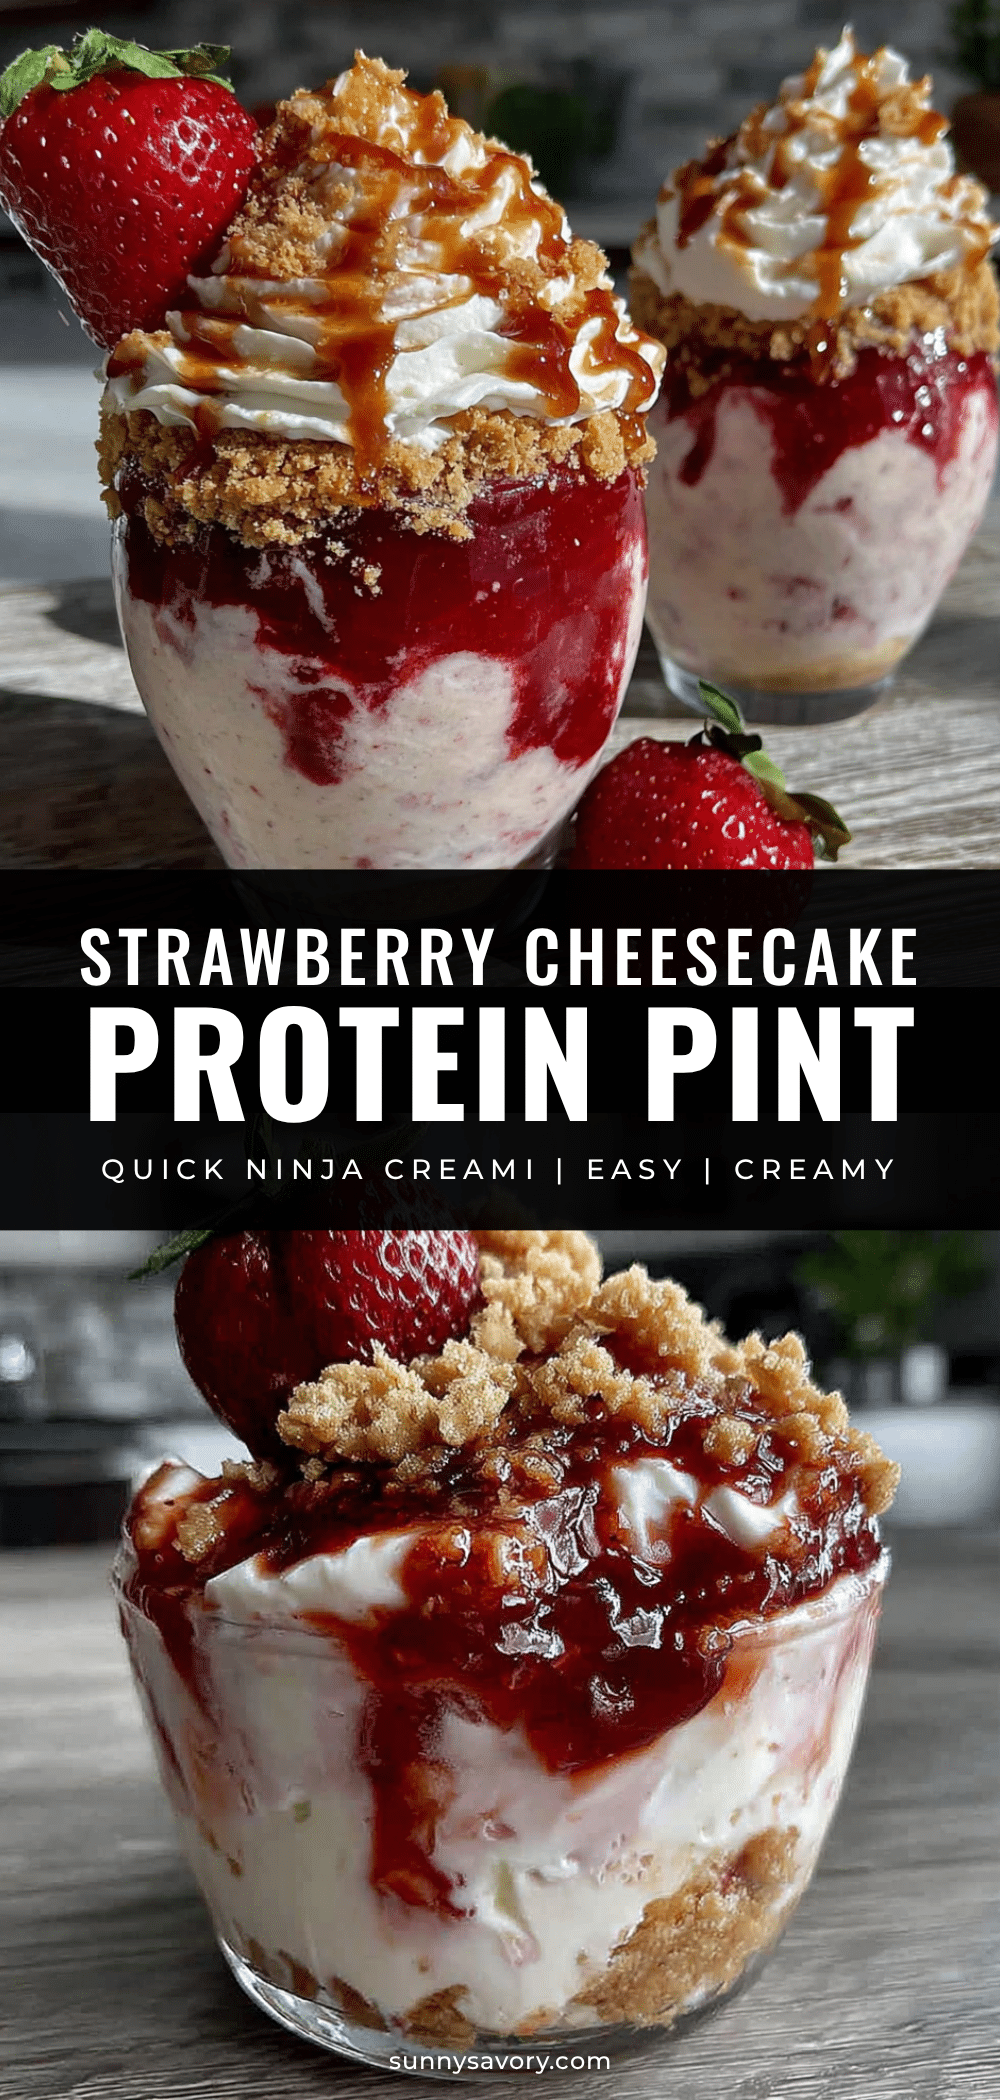
Easy Ninja Creami Strawberry Cheesecake Protein Pint Recipe
A creamy, high-protein strawberry cheesecake ice cream made in the Ninja Creami. This guilt-free dessert tastes like real cheesecake but is packed with protein and simple ingredients.
- Prep Time: 10 minutes
- Cook Time: 0 minutes
- Total Time: 24 hours 10 minutes (includes freezing time)
- Yield: 1 pint (1 serving) 1x
- Category: Dessert
- Cuisine: American
Ingredients
- 1 cup unsweetened almond milk (or any milk you prefer)
- 1/2 cup low-fat cottage cheese
- 2 ounces cream cheese, softened
- 1 scoop vanilla or strawberry protein powder
- 1 tablespoon sugar-free cheesecake pudding mix
- 1 teaspoon vanilla extract
- 1/2 cup frozen strawberries, chopped
- 1 tablespoon powdered erythritol or monk fruit sweetener
Instructions
- Soften the cream cheese. Take it out of the fridge about 15 minutes before you start, or microwave it for 10-15 seconds in a small bowl.
- Blend the cottage cheese and almond milk. Pour the almond milk and cottage cheese into your blender or a tall cup if using an immersion blender. Blend until completely smooth—about 30 seconds.
- Add the remaining wet ingredients. Add the softened cream cheese, vanilla extract, and your sweetener to the blender. Blend again until everything is combined and silky smooth.
- Mix in the protein powder and pudding mix. Add your protein powder and sugar-free cheesecake pudding mix. Blend on low speed first, then on medium-high for about 20 seconds until everything is incorporated.
- Chop and fold in the strawberries. Take your frozen strawberries and chop them into small pieces—about the size of a pea. Gently fold them into the base with a spatula.
- Pour into the Ninja Creami pint. Pour the entire mixture into your pint container. Don’t fill it past the max fill line. Tap the container on the counter a few times to release any air bubbles.
- Freeze for at least 24 hours. Make sure the pint is level in your freezer.
- Spin in the Ninja Creami. Take the frozen pint out, remove the lid, and place it in the outer bowl. Select the ‘Ice Cream’ setting and let it do its thing.
- Check the texture. After the first spin, the texture should be soft and creamy. If it’s still crumbly or powdery, run it on ‘Re-spin’ once more.
- Enjoy immediately or freeze for later. You can eat it right away for a soft-serve texture, or pop it back in the freezer for 30 minutes to firm up.
Notes
For best texture, freeze the pint for at least 24 hours and let it sit at room temperature for 5 minutes before spinning. If the texture is crumbly after the first spin, use the ‘Re-spin’ function. Press plastic wrap directly onto the surface before storing to prevent ice crystals.
Nutrition
- Serving Size: 1 pint
- Calories: 320350
- Sugar: 810
- Sodium: 300400
- Fat: 1215
- Saturated Fat: 68
- Carbohydrates: 1520
- Fiber: 23
- Protein: 3035
Keywords: Ninja Creami, strawberry cheesecake, protein ice cream, high protein dessert, healthy ice cream, low sugar, gluten free, keto friendly



