Love this? Save it for later!
Share the inspiration with your friends
I wasn’t expecting cooking advice from my accountant, but there I was, sitting in his cluttered office during tax season, watching him pull a crumpled napkin out of his desk drawer. “You’re always talking about food on your blog,” he said, pushing the napkin across the mountain of receipts. “My wife makes these no-bake cookie things. The kids go crazy for them.” I stared at the napkin covered in chocolate smudges and what looked like coffee stains. It had “Avalanche Cookies” scribbled across the top in purple ink. Honestly, I almost laughed. But something about the way he talked about them—how his picky seven-year-old would eat three in a row, how they saved him during a chaotic week when the stove broke—made me tuck that napkin into my purse.
The next Saturday, with a kitchen full of hungry kids and a pantry that was looking pretty sad, I remembered the napkin. I had white chocolate chips, some peanut butter, and a box of crisp rice cereal that was about to expire. Maybe you’ve been there—staring at random ingredients, wondering if they could possibly turn into something edible. I threw everything together in about fifteen minutes, making a mess on the counter and accidentally dropping a spatula on the floor. When I pulled those little mounds out of the fridge an hour later, my oldest kid took one bite and said, “Mom, these are better than the ones from the bakery.” And honestly? She wasn’t wrong.
That accountant’s napkin recipe has become my secret weapon for every potluck, school party, and last-minute dessert emergency. It’s the kind of recipe that feels like cheating—no oven, no fancy techniques, just simple ingredients that somehow turn into something magical. I keep making it because it reminds me that good food doesn’t need to be complicated. Sometimes the best recipes come from the most unexpected places, scribbled on napkins by people who just love feeding their families.
Why You’ll Love This Recipe
Let me tell you why these Easy No-Bake Avalanche Cookies have earned a permanent spot in my recipe binder. After testing this recipe at least a dozen times (my family has been very patient taste-testers), I can confidently say these cookies deliver on every level.
- Quick & Easy: You can have these ready in under 20 minutes of active time. No oven, no mixer, no complicated steps. Just melt, stir, scoop, and chill.
- Simple Ingredients: You probably have most of these in your pantry right now. White chocolate chips, peanut butter, crisp rice cereal, and a few mix-ins. No special grocery trips required.
- Budget-Friendly: This recipe costs about half of what you’d pay for similar cookies at a bakery. And you get way more cookies out of it.
- Perfect for Busy Families: These cookies save me on hectic weeknights when someone needs a treat for a school event or when company shows up unexpectedly.
- Crowd-Pleaser: I’ve brought these to three different potlucks and watched adults and kids alike grab seconds. The combination of creamy white chocolate and crunchy cereal is just irresistible.
- No-Bake Miracle: When the summer heat makes turning on the oven feel impossible, these cookies come to the rescue. No sweat, literally.
What makes these different from other no-bake cookies? It’s the texture. The white chocolate and peanut butter create this silky, creamy coating that clings perfectly to every piece of cereal. And the mini chocolate chips add little pockets of rich chocolate that melt on your tongue. I’ve tried other versions that turn out too sticky or too dry, but this one hits that perfect sweet spot every single time.
These cookies are the kind that make you close your eyes after the first bite. They’re comfort food at its simplest—no fuss, no stress, just pure satisfaction. Perfect for impressing your kids without spending hours in the kitchen, or for treating yourself after a long day.
What Ingredients You Will Need
This recipe uses simple, everyday ingredients that work together to create something truly special. Here’s everything you’ll need, along with a few tips I’ve picked up along the way.
For the Cookie Base
- 12 ounces white chocolate chips (I prefer Ghirardelli or Guittard for the smoothest melt—they don’t seize up as easily as store brands)
- 1/2 cup creamy peanut butter (Jif or Skippy work great; avoid natural peanut butter that separates, as it can make the mixture greasy)
- 3 cups crisp rice cereal (like Rice Krispies—make sure they’re fresh and not stale for the best crunch)
- 1 cup mini marshmallows (the mini ones melt more evenly, but you can chop up regular marshmallows if that’s what you have)
- 1/2 cup mini chocolate chips (semi-sweet or milk chocolate both work; mini chips distribute better than regular-sized ones)
- 1/4 teaspoon salt (optional, but it really balances the sweetness—trust me on this one)
Ingredient Tips and Substitutions
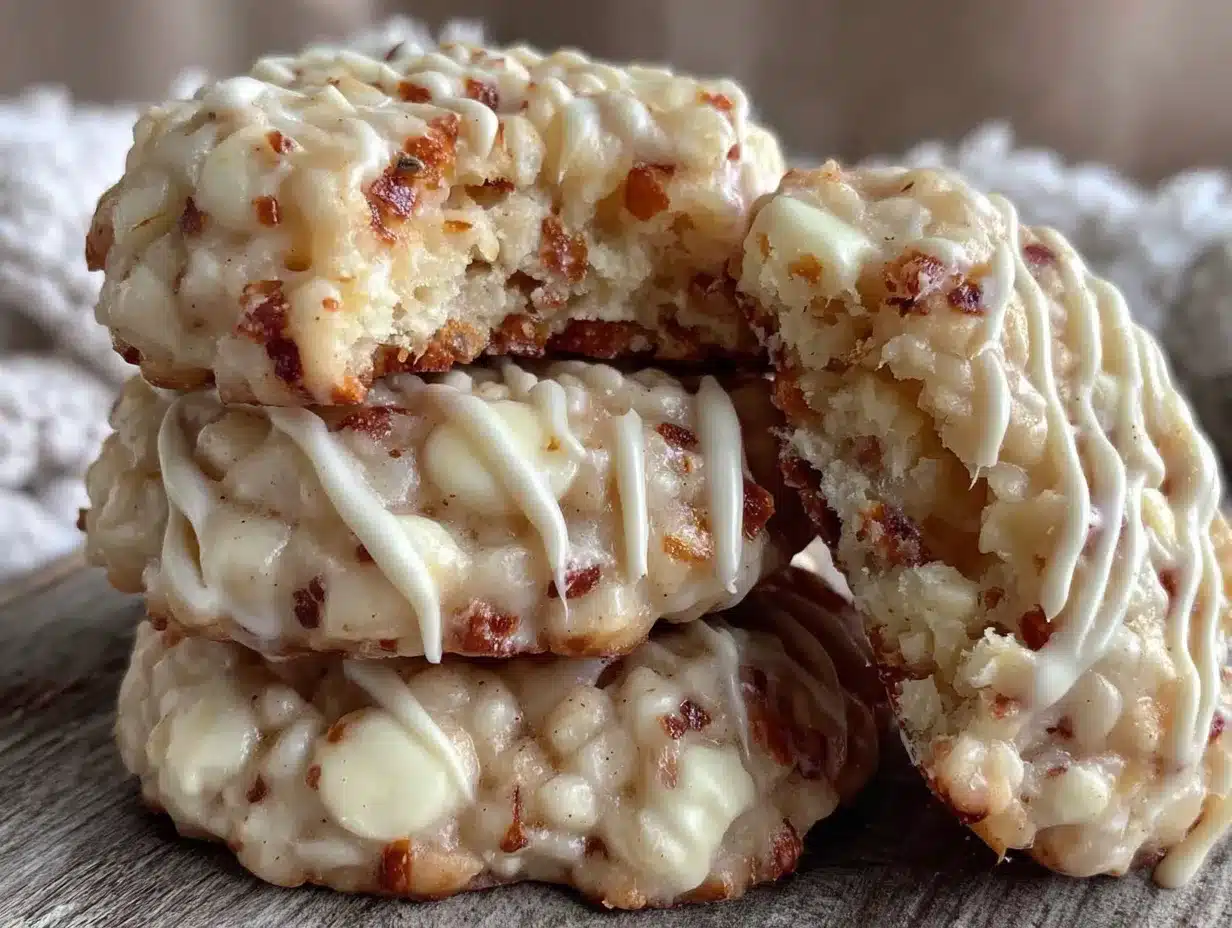
Let me share what I’ve learned from making these cookies more times than I can count. The white chocolate is the star here, so use good-quality chips if you can. Cheap white chocolate sometimes has a waxy texture that just doesn’t taste right. If you’re in a pinch, white melting wafers (like Candiquik) work too, though the flavor is slightly different.
For the peanut butter, stick with the regular processed kind. Natural peanut butter has too much oil that separates out, and it can make your cookies greasy instead of creamy. I learned this the hard way when I tried to be “healthier” and ended up with a sad, oily mess.
The crisp rice cereal should be fresh. If your box has been open for months, the cereal will be soft and your cookies won’t have that satisfying crunch. Same goes for the mini marshmallows—fresh ones are soft and pillowy, while old ones get hard and chewy.
If someone in your family has a peanut allergy, you can substitute sunflower seed butter or WowButter. The flavor changes a bit, but they still taste fantastic. For a nut-free version, use sunflower seed butter and make sure your chocolate chips are processed in a nut-free facility.
You can also swap the mini chocolate chips for white chocolate chips if you want an all-white cookie, or use butterscotch chips for a different flavor profile. My sister-in-law adds dried cranberries and calls them “holiday cookies.” Get creative!
Equipment Needed
You don’t need much to make these Easy No-Bake Avalanche Cookies, which is part of their beauty. Here’s what you’ll need:
- Large microwave-safe bowl (glass or ceramic works best—plastic can warp with hot chocolate)
- Spatula or wooden spoon (for stirring the melted chocolate and mixing everything together)
- Baking sheet or large plate (lined with parchment paper or wax paper—don’t skip the lining, or you’ll be scraping cookies off)
- Cookie scoop or tablespoon (a #40 cookie scoop makes perfectly sized cookies, but two spoons work fine too)
- Measuring cups and spoons (for accurate ingredient measurements)
- Refrigerator space (you’ll need room for the baking sheet to chill flat)
If you don’t have a microwave, you can melt the white chocolate and peanut butter in a double boiler on the stovetop. Just be careful not to overheat the chocolate—white chocolate burns easily. I’ve ruined more than one batch by walking away for thirty seconds too long.
For a budget-friendly option, use a regular dinner plate instead of a baking sheet. And if you don’t have a cookie scoop, a regular tablespoon works perfectly—just shape the cookies with your hands after scooping. They won’t be perfectly round, but they’ll taste just as good.
One more tip: keep your parchment paper handy before you start melting. Once the mixture is ready, you need to work quickly before it sets up. Having everything prepped makes the process so much smoother.
Preparation Method
Let me walk you through this step by step. I’ve made these cookies so many times that I could do it in my sleep, but I’ll share every detail so you get perfect results on your first try.
- Line your baking sheet with parchment paper. This is important—don’t skip it. The cookies will stick to unlined surfaces, and you’ll be picking pieces of wax paper off your cookies for days. I speak from experience.
- Place the white chocolate chips and peanut butter in a large microwave-safe bowl. Make sure the bowl is big enough to hold all the cereal later—you don’t want to have to transfer everything to a bigger bowl mid-recipe.
- Microwave in 30-second intervals, stirring well between each interval. This usually takes about 1.5 to 2 minutes total. The mixture should be smooth and completely melted. Be patient—rushing this step can burn the chocolate. I once tried to do 60-second intervals and ended up with grainy, scorched chocolate that I had to throw away.
- Let the mixture cool for 2-3 minutes. This is crucial. If you add the marshmallows and cereal while the chocolate is too hot, the marshmallows will melt completely and you’ll lose that lovely texture. The mixture should feel warm but not hot to the touch.
- Gently fold in the mini marshmallows, crisp rice cereal, and mini chocolate chips. Use a folding motion rather than stirring—this keeps the cereal from breaking into tiny pieces. Stir just until everything is evenly coated. You’ll see the white chocolate mixture clinging to every little piece of cereal, which is exactly what you want.
- Work quickly now—the mixture will start to set as it cools. Using a cookie scoop or two spoons, drop rounded tablespoons of the mixture onto the prepared baking sheet. Space them about an inch apart—they won’t spread, so you can fit quite a few on one sheet.
- If the mixture becomes too stiff to scoop, pop the bowl in the microwave for 10-15 seconds. This softens it just enough to keep working. I’ve done this multiple times and it works perfectly.
- Optional: Press a few extra mini chocolate chips or marshmallows on top of each cookie. This makes them look prettier, but honestly, it’s totally unnecessary. They taste amazing either way.
- Place the baking sheet in the refrigerator for at least 30 minutes. The cookies need this time to firm up completely. If you’re impatient like me, you can try one after 20 minutes—it’ll be soft but still delicious.
- Once set, transfer the cookies to an airtight container. Store them in the refrigerator for up to a week, or in the freezer for up to three months.
A few sensory cues to help you along: When the white chocolate and peanut butter are properly melted, the mixture should look glossy and smooth, like thick honey. When you fold in the cereal, you should hear a soft crackling sound—that’s the fresh cereal staying crunchy. The finished cookies should hold their shape when picked up, but give slightly when you bite into them.
Cooking Tips & Techniques
After making these Easy No-Bake Avalanche Cookies more times than I can count, I’ve collected a few tricks that make the process even smoother. Let me share what I’ve learned.
The biggest mistake people make is overheating the white chocolate. White chocolate is more delicate than milk or dark chocolate—it burns at a lower temperature. If your mixture looks grainy or separated, you’ve overheated it. Unfortunately, there’s no saving it at that point. Always microwave in short bursts and stir thoroughly between each one. When you think it’s almost done, stir for another 30 seconds—the residual heat will finish the melting process.
Temperature matters more than you think. If your kitchen is hot and humid, the cookies might not set as firmly. On humid days, I refrigerate the mixture for 5 minutes before scooping, which helps the cookies hold their shape better. On cold winter days, they set up beautifully at room temperature in about 45 minutes.
Don’t overmix the cereal. I learned this the hard way when I made a batch that turned into mush because I stirred too vigorously. Use a gentle folding motion, just until everything is combined. You want some texture variation—some clusters of marshmallow, some pieces of cereal that are barely coated. That unevenness is what makes each bite interesting.
Here’s a timing strategy that saves me every time: I melt the white chocolate mixture first, then while it’s cooling, I measure out all the other ingredients. That way, when it’s time to mix, everything is ready to go. I also prep my baking sheet before I start melting, so I’m not scrambling for parchment paper with sticky hands.
If your cookies aren’t setting properly, you might have used too much cereal or not enough white chocolate. The ratio is important—too much cereal and the cookies will be dry and crumbly. Stick with the measurements I’ve given, and you’ll get perfect results every time.
One more thing: These cookies are forgiving. If you accidentally add too much cereal, just add a little more melted white chocolate to balance it out. If the mixture seems too wet, add a handful more cereal. Cooking should be flexible—don’t stress about perfection.
Variations & Adaptations
One of the best things about this recipe is how easy it is to customize. Here are some variations I’ve tried and loved.
Chocolate Peanut Butter Avalanche Cookies
Swap the white chocolate chips for milk chocolate or semi-sweet chocolate chips. The combination of chocolate and peanut butter is a classic for a reason. You can also add a tablespoon of cocoa powder to the melted chocolate for an extra-rich flavor.
Peppermint Holiday Avalanche Cookies
Add 1/2 teaspoon of peppermint extract to the melted white chocolate mixture, and fold in 1/4 cup of crushed candy canes along with the cereal. These are perfect for Christmas cookie exchanges and always get rave reviews.
Gluten-Free Avalanche Cookies
Use certified gluten-free crisp rice cereal (like Rice Krispies, which are gluten-free in the US) and make sure your white chocolate chips are gluten-free. Everything else in the recipe is naturally gluten-free, so this is an easy adaptation.
Vegan Avalanche Cookies
Use dairy-free white chocolate chips (Enjoy Life makes a good one) and substitute the peanut butter with a natural nut or seed butter. Skip the marshmallows or use vegan marshmallows (Dandies brand works great). The texture will be slightly different, but still delicious.
Birthday Cake Avalanche Cookies
Add 1/4 cup of rainbow sprinkles to the mixture along with the cereal. Use white chocolate chips and add 1/2 teaspoon of vanilla extract for that classic birthday cake flavor. These are always a hit at kids’ parties.
My personal favorite variation? I add 1/4 cup of shredded coconut and 1/4 cup of chopped dried apricots along with the cereal. The combination of sweet, tangy, and crunchy is absolutely addictive. My husband calls them “tropical avalanche cookies” and requests them every time we have company.
Serving & Storage Suggestions
These Easy No-Bake Avalanche Cookies are best served cold, straight from the refrigerator. The cold temperature keeps the white chocolate firm and the cereal crunchy. If you leave them out at room temperature for too long, they’ll soften up and lose some of that satisfying texture.
For a pretty presentation, arrange the cookies on a white platter or cake stand. You can dust them with a little powdered sugar (though honestly, they’re sweet enough without it) or drizzle melted chocolate over the top. I like to serve them alongside fresh berries—the tartness of raspberries or strawberries balances the sweetness perfectly.
These cookies pair beautifully with a glass of cold milk, a cup of hot coffee, or even a scoop of vanilla ice cream for an extra-indulgent dessert. For parties, I sometimes crumble them over ice cream sundaes for a crunchy topping.
Storage Instructions: Keep the cookies in an airtight container in the refrigerator for up to one week. Layer them between sheets of parchment paper to prevent sticking. If you’re stacking them, be gentle—they can be a little fragile.
Freezer Instructions: These cookies freeze beautifully. Place them in a single layer on a baking sheet and freeze for 1 hour, then transfer to a freezer-safe bag or container. They’ll keep for up to three months. To serve, let them thaw in the refrigerator for about 30 minutes, or eat them straight from the freezer—they’re delicious frozen too!
Reheating Tip: You don’t really need to reheat these cookies, but if you want a softer texture, let them sit at room temperature for 5-10 minutes before serving. The flavors actually develop and deepen after a day in the fridge, so they taste even better on day two.
Nutritional Information & Benefits
Here’s the nutritional breakdown for one cookie (based on 24 cookies per batch):
| Nutrient | Amount per Cookie |
|---|---|
| Calories | 145 |
| Total Fat | 8g |
| Saturated Fat | 4g |
| Cholesterol | 5mg |
| Sodium | 65mg |
| Total Carbohydrates | 17g |
| Dietary Fiber | 1g |
| Sugars | 12g |
| Protein | 3g |
While these cookies are definitely a treat, they do offer a few nutritional perks. The peanut butter provides protein and healthy fats that help keep you full. The crisp rice cereal adds a little iron and B vitamins. And the white chocolate contains calcium from the milk solids.
For those with dietary concerns: These cookies contain dairy (white chocolate), peanuts (peanut butter), and gluten (crisp rice cereal—though gluten-free versions are available). They are egg-free and can be made vegan with simple substitutions.
I believe in balance—these cookies are meant to be enjoyed as an occasional treat, not an everyday snack. But when you do indulge, they’re absolutely worth every bite. Life is too short to skip dessert.
Conclusion
These Easy No-Bake Avalanche Cookies have become a staple in my kitchen for good reason. They’re quick, simple, and absolutely delicious—the kind of recipe that saves you on busy days and impresses everyone who tries them. Whether you’re making them for a school bake sale, a holiday party, or just because you need a sweet treat after a long week, they never disappoint.
I love this recipe because it reminds me that you don’t need fancy ingredients or complicated techniques to create something wonderful. Sometimes the best things in life come from a crumpled napkin and a little bit of faith. That accountant had no idea he was sharing a recipe that would become one of my most-requested desserts.
Now it’s your turn. Give these cookies a try, and don’t be afraid to make them your own. Add your favorite mix-ins, adjust the sweetness, or experiment with different chocolates. Cooking should be fun, and this recipe is the perfect place to play around.
I’d love to hear how they turn out! Drop a comment below and let me know what variations you tried, or share a photo of your cookies. Happy baking—or should I say, happy no-baking!
Frequently Asked Questions
Can I use milk chocolate instead of white chocolate?
Absolutely! Milk chocolate or semi-sweet chocolate both work beautifully. Just keep in mind that darker chocolate will make the cookies less sweet and more rich. You might want to add an extra tablespoon of sugar if you’re using dark chocolate.
Why did my cookies turn out greasy?
This usually happens when the white chocolate and peanut butter are overheated, or when natural peanut butter is used. Natural peanut butter has separated oils that can make the mixture greasy. Stick with processed peanut butter and melt your ingredients gently to avoid this issue.
Can I make these cookies nut-free?
Yes! Substitute the peanut butter with sunflower seed butter, WowButter, or another nut-free alternative. Just make sure your chocolate chips and other ingredients are processed in a nut-free facility if you’re serving someone with a severe allergy.
How long do these cookies last?
Stored in an airtight container in the refrigerator, these cookies stay fresh for up to one week. They also freeze well for up to three months. The texture is best when eaten within the first few days, but they’ll still taste great after that.
Can I double this recipe?
Definitely! This recipe doubles beautifully. Just make sure you have a large enough bowl to mix everything together. You might need to melt the white chocolate and peanut butter in batches if your microwave isn’t big enough for double the quantity.
Pin This Recipe!