Love this? Save it for later!
Share the inspiration with your friends
I was staring into my pantry last Tuesday, willing a snack to materialize. You know that feeling when you’re hungry, but not hungry enough to actually cook something? My three-year-old was tugging at my sleeve, and I had exactly fifteen minutes before we needed to leave for preschool pickup. The usual suspects were there—a half-empty bag of oats, some sticky honey, and a jar of peanut butter with maybe two tablespoons left at the bottom. Not exactly promising.
Then I remembered a trick my neighbor Carla had mentioned months ago at the community garden. She was showing me how she made snacks for her kids without turning on the oven during the summer heatwave. “You just smash it all together and let the fridge do the work,” she said, waving a spatula like it was no big deal. I’d nodded politely and promptly forgot about it until that very moment, staring at my sad pantry shelf.
Honestly, I was skeptical. No-bake granola bars sounded like one of those Pinterest fails waiting to happen. But I was desperate, and the clock was ticking. I grabbed the oats, dumped in the peanut butter, drizzled the honey, and started mixing with a wooden spoon that had seen better days. The mixture looked nothing like the perfect squares you see in magazines—it was lumpy, a bit sticky, and honestly kind of ugly. I pressed it into a pan, threw it in the fridge, and crossed my fingers.
When I pulled those bars out an hour later, I almost laughed. They held together. They actually tasted good. My kid devoured one in about thirty seconds flat. And that’s how these easy no-bake peanut butter granola bars became my emergency snack hero. Maybe you’ve been there too—standing in your kitchen, wondering how something so simple could save your whole week. Let me tell you, these bars are that simple.
Why You’ll Love This Recipe
These aren’t just any granola bars. They’re the kind that make you feel like you’ve hacked the system. No oven required, no complicated steps, and no weird ingredients you have to hunt down at three different stores.
- Quick & Easy: Five minutes of hands-on time. I’m not exaggerating. Mix, press, chill. That’s it.
- Simple Ingredients: Oats, peanut butter, honey, and a few mix-ins. You probably have everything right now.
- Perfect for Busy Families: Lunchboxes, after-school snacks, pre-workout fuel—these bars handle it all without complaint.
- Crowd-Pleaser: I’ve brought these to playdates, potlucks, and even a book club meeting. They disappear every single time.
- Unbelievably Delicious: The chewy texture with that salty-sweet peanut butter flavor? It’s comfort food that actually works with your schedule.
What makes these different from other recipes is the ratio. I tested this about six times before I got it right. Too much honey and they fall apart. Too little and they’re dry. This version hits that sweet spot where the bars hold together but still feel soft and satisfying. Plus, you can customize them a hundred ways without messing up the texture.
This is the recipe that makes you close your eyes after the first bite. It’s snack time reimagined—healthier than store-bought, faster than baking, and with the same soul-soothing satisfaction that only homemade food brings.
What Ingredients You Will Need
This recipe uses simple, wholesome ingredients to deliver bold flavor and satisfying texture without the fuss. Most of these are pantry staples you probably already have on hand.
- Rolled oats – 2 cups (180g). Use old-fashioned rolled oats, not quick oats. Quick oats turn mushy and the bars won’t hold their shape. I prefer Bob’s Red Mill for consistent texture.
- Creamy peanut butter – 1 cup (240g). Natural peanut butter works, but make sure it’s well-stirred. If the oil separates too much, the bars can be greasy. Skippy or Jif give the most reliable results.
- Honey – ½ cup (170g). This is the glue that holds everything together. Local honey adds nice flavor variation. For a vegan version, use maple syrup, but reduce it to ⅓ cup since it’s thinner.
- Chopped peanuts – ½ cup (60g). Adds crunch. You can skip these if you want smoother bars, or substitute with any nut or seed.
- Dark chocolate chips – ½ cup (90g). I like 60% cacao for balance. Milk chocolate works too, but the bars get sweeter. White chocolate? Honestly, try it—it’s surprisingly good.
- Flaxseed meal – 2 tablespoons (14g). Optional, but it helps bind the bars and adds fiber. You can substitute with chia seeds or just leave it out.
- Vanilla extract – 1 teaspoon. Pure vanilla makes a difference. Imitation works in a pinch, but the flavor is noticeably flat.
- Salt – ¼ teaspoon. If your peanut butter is salted, reduce this to a pinch. Salt balances the sweetness and makes the peanut butter flavor pop.
For substitutions, almond butter works beautifully if you have a peanut allergy. Just know the flavor will be milder. Sunflower seed butter is another option, but the bars might turn slightly green from a natural reaction—don’t worry, it’s harmless and tastes fine.
Equipment Needed
You don’t need much for this recipe. That’s the beauty of no-bake cooking.
- Mixing bowl – A large bowl gives you room to stir without flinging oats everywhere. I use a glass Pyrex bowl because it doesn’t slide around.
- Wooden spoon or spatula – The mixture gets thick. A sturdy spoon helps. Silicone spatulas work too, but you’ll need some arm muscle.
- 8×8 inch baking pan – This size gives you thick, satisfying bars. A 9×9 pan works but the bars will be thinner. Line it with parchment paper for easy removal.
- Parchment paper – Non-negotiable. Without it, you’ll be scraping peanut butter off your pan for days. Leave overhang on two sides for lifting.
- Measuring cups and spoons – For accuracy. I’ve eyeballed this before and regretted it.
- Refrigerator – The most important tool. The bars need at least one hour to set, preferably two.
If you don’t have an 8×8 pan, use a loaf pan and cut the bars smaller. A glass dish works fine too—just add 15 minutes to the chilling time since glass holds temperature differently.
Preparation Method
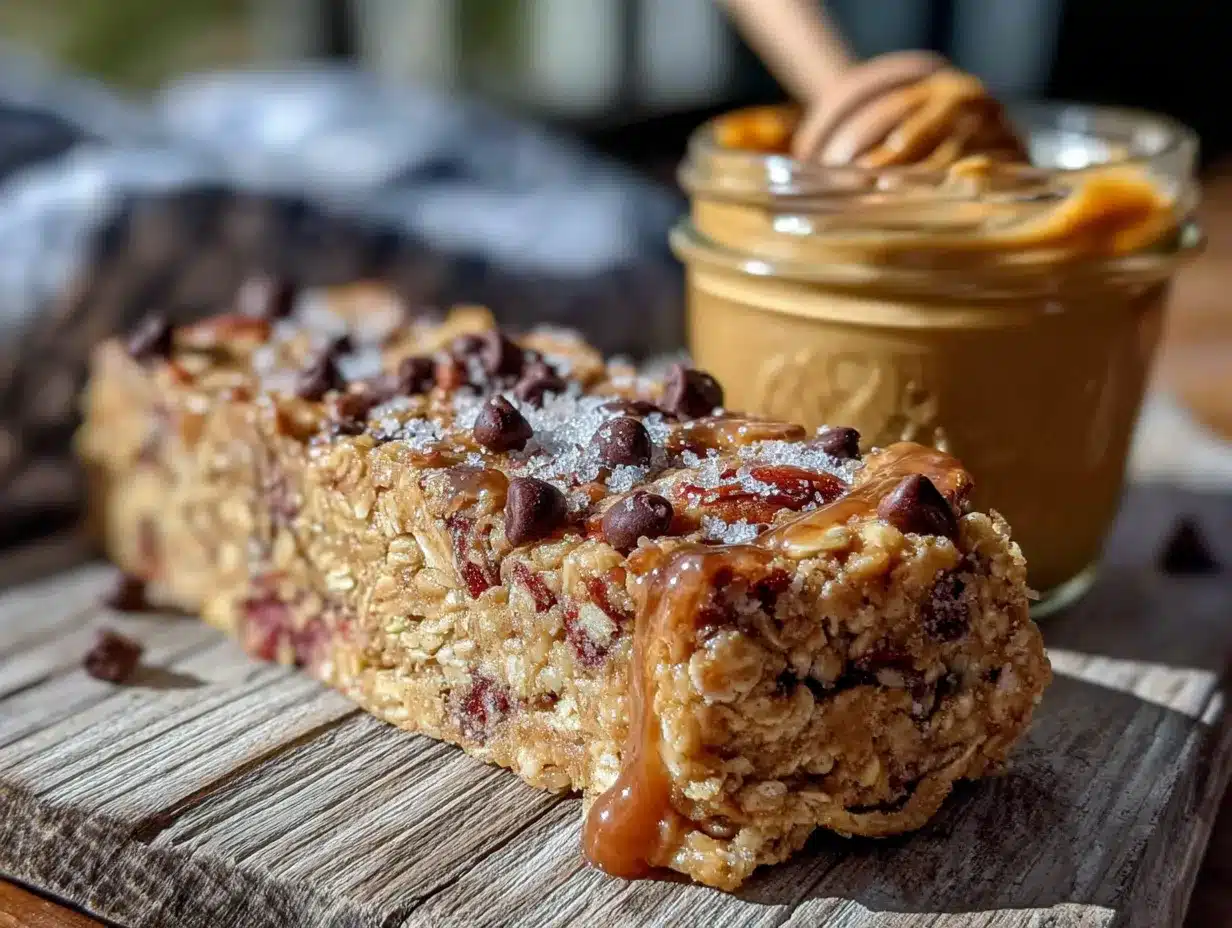
This is where the magic happens. Follow these steps and you’ll have perfect granola bars every time.
- Line your pan. Cut a piece of parchment paper to fit your 8×8 pan, leaving about 2 inches of overhang on two opposite sides. This creates handles for lifting the bars out later. Press it into the corners—don’t worry if it wrinkles a bit.
- Mix the wet ingredients. In a large microwave-safe bowl, combine 1 cup peanut butter and ½ cup honey. Microwave for 30 seconds. Stir. If it’s still stiff, microwave another 15 seconds. You want it warm and runny, not hot. Stir in 1 teaspoon vanilla extract and ¼ teaspoon salt.
- Add the dry ingredients. Pour in 2 cups rolled oats, ½ cup chopped peanuts, ½ cup chocolate chips, and 2 tablespoons flaxseed meal. Stir vigorously. The mixture will be thick and sticky. Your arm might get tired—that’s normal. Keep going until every oat is coated.
- Check the consistency. The mixture should hold together when you squeeze a handful. If it’s too crumbly, add a tablespoon of warm honey. If it’s too wet, add a tablespoon of oats. Trust your hands here—they know better than any recipe.
- Press into the pan. Dump the mixture into your lined pan. Use a spatula or your hands to press it down firmly. Really lean into it. I mean it—press hard. Uneven pressing leads to crumbly bars. Spend a full minute on this step. The top should be flat and smooth.
- Chill. Place the pan in the refrigerator for at least 1 hour. Two hours is better. Overnight is ideal if you have the time. The bars need this time to set properly.
- Cut and serve. Lift the bars out using the parchment overhang. Place on a cutting board. Use a sharp knife to cut into 12 squares. Wipe the knife clean between cuts for neat edges. Store in an airtight container in the fridge.
A quick note: if your mixture feels too dry, your peanut butter might be too thick. Next time, warm it longer before mixing. If it’s too sticky, you might have used too much honey. Adjust as you go—cooking is about feeling, not just following rules.
Cooking Tips & Techniques
I’ve made this recipe at least twenty times, and I’ve learned a few things the hard way. Let me save you some trouble.
Don’t skip the chilling time. I know it’s tempting to cut into them after 30 minutes. I’ve done it. They fall apart. The bars need that full hour for the honey and peanut butter to firm up and hold everything together. Patience pays off here.
Press harder than you think you need to. This is the number one mistake people make. Loose pressing creates crumbly bars that disintegrate when you bite into them. Use the bottom of a measuring cup or a glass to really compact the mixture. Your future self will thank you.
Warm your knife for clean cuts. Run your knife under hot water, dry it, then cut. The heat helps slice through the sticky mixture without dragging. Wipe the blade between each cut. This gives you those beautiful, clean edges that look professional.
Toast your oats for deeper flavor. Spread the oats on a baking sheet and toast at 350°F for 8-10 minutes. Let them cool completely before mixing. This adds a nutty, toasty flavor that takes these bars from good to unforgettable. I do this when I have extra time, which isn’t often, but it’s worth it.
Watch out for sticky fingers. When pressing the mixture, wet your hands slightly with cold water. The mixture won’t stick to you as much. It’s a small trick that makes a big difference.
I once forgot to add the oats and only realized after I’d pressed the peanut butter mixture into the pan. I had to scrape it all out and start over. It was messy and frustrating, but honestly, it taught me to double-check my ingredients before mixing. Learn from my mistake.
Variations & Adaptations
This recipe is incredibly flexible. Here are some ways to make it your own.
Chocolate Peanut Butter Dream: Swap ¼ cup of the oats for ¼ cup cocoa powder. Add an extra tablespoon of honey to balance the bitterness. You get a fudgy, brownie-like bar that tastes indulgent but isn’t.
Trail Mix Crunch: Replace the chocolate chips and peanuts with 1 cup of your favorite trail mix. Chop any large pieces first. I use a mix of dried cranberries, almonds, and pumpkin seeds. The tartness from the cranberries cuts through the sweetness beautifully.
Vegan-Friendly Version: Use maple syrup instead of honey. Reduce it to ⅓ cup since maple syrup is thinner. Add 2 tablespoons of coconut oil to help with binding. The texture will be slightly softer, but still delicious.
Gluten-Free Adaptation: Use certified gluten-free oats. Most oats are naturally gluten-free, but cross-contamination can happen. Bob’s Red Mill makes a reliable gluten-free option. Everything else in the recipe is already gluten-free.
Lower Sugar Option: Reduce honey to ⅓ cup and add 2 tablespoons of unsweetened applesauce. The bars will be less sweet but still hold together. Add an extra ¼ cup of oats to compensate for the moisture.
My personal favorite variation? I add ¼ cup of shredded coconut and 2 tablespoons of chia seeds. The coconut gives a chewy texture, and the chia seeds add a nice pop. It reminds me of the granola bars my aunt used to make when I was a kid.
Serving & Storage Suggestions
These bars are best served cold or at room temperature. Straight from the fridge, they’re firm and chewy. Let them sit out for 5 minutes, and they soften slightly—perfect for little kids or anyone with sensitive teeth.
For presentation, cut the bars neatly and arrange them on a wooden board. Sprinkle a few extra chocolate chips and chopped peanuts on top for visual appeal. They look impressive with almost no effort.
Storage: Keep the bars in an airtight container in the refrigerator. They’ll stay fresh for up to 2 weeks. Layer them with parchment paper between each bar to prevent sticking. I use a glass container with a tight lid—plastic works too, but glass keeps them fresher longer.
Freezing: These bars freeze beautifully. Wrap each bar individually in plastic wrap, then place them in a freezer-safe bag. They’ll keep for up to 3 months. Grab one straight from the freezer for a quick snack. They thaw in about 10 minutes at room temperature.
Reheating: You don’t need to reheat these, but if you want a softer texture, microwave a bar for 10 seconds. Be careful—chocolate chips can get hot quickly. I prefer them cold, but my husband likes them slightly warm. To each their own.
The flavors actually develop over time. Day-old bars taste better than fresh ones. The honey and peanut butter meld together, and the oats absorb the moisture, creating a more cohesive texture. If you can resist eating them all on day one, you’ll be rewarded on day two.
Nutritional Information & Benefits
These bars are a balanced snack with protein, healthy fats, and complex carbohydrates to keep you full and energized.
| Nutrient | Per Bar (1 of 12) |
|---|---|
| Calories | 245 |
| Protein | 8g |
| Fat | 14g |
| Carbohydrates | 26g |
| Fiber | 4g |
| Sugar | 14g |
Health Benefits: Peanut butter provides plant-based protein and heart-healthy monounsaturated fats. Oats are rich in beta-glucan, which supports heart health and helps regulate blood sugar. Flaxseed meal adds omega-3 fatty acids and extra fiber for digestive health. Dark chocolate offers antioxidants—yes, it counts as a health food in moderation.
Dietary Considerations: This recipe is naturally dairy-free if you use dairy-free chocolate chips. It’s vegetarian and can be made vegan with maple syrup. For nut-free versions, use sunflower seed butter and omit the peanuts. Always check labels if you have specific allergies.
I personally love that these bars give me sustained energy without the crash that comes from processed snacks. They’re my go-to for long afternoons when I need to focus but don’t want a heavy meal.
Conclusion
These easy no-bake peanut butter granola bars have become a staple in my kitchen for a reason. They’re quick, they’re forgiving, and they taste like something you’d pay good money for at a fancy café. But the best part? You made them yourself, in your own kitchen, with ingredients you already had.
I encourage you to make these your own. Add what you love, leave out what you don’t. Maybe you’ll discover a combination I haven’t tried yet. That’s the beauty of simple recipes—they’re a starting point, not a final destination.
I’d love to hear how yours turn out. Did you add coconut? Swap the chocolate for dried fruit? Forget to press hard enough and end up with crumbly bars? (Been there.) Share your experience in the comments below. Your version might inspire someone else to try something new.
Here’s to more homemade snacks, less stress, and the simple joy of a really good granola bar. Happy snacking!
Frequently Asked Questions
Can I use quick oats instead of rolled oats?
You can, but the texture will be different. Quick oats absorb moisture faster and can make the bars mushy. Rolled oats give a chewier, more satisfying texture. If you only have quick oats, reduce the honey by 2 tablespoons to compensate.
Why are my granola bars falling apart?
This usually happens for two reasons: not enough binding ingredient or not pressing firmly enough. Make sure you’re using the full amount of honey and peanut butter. And really press the mixture down hard into the pan. Use the bottom of a glass to compact it evenly.
How long do these bars last at room temperature?
They can sit out for a few hours, but for longer storage, keep them in the fridge. At room temperature, the honey softens and the bars can get sticky. Refrigeration keeps them firm and fresh for up to two weeks.
Can I make these without chocolate chips?
Absolutely. The chocolate chips are optional. You can replace them with dried fruit like raisins, cranberries, or chopped dates. Just keep the total volume the same—about ½ cup of mix-ins.
Are these bars safe for school lunches?
Check your school’s policy on nuts first. If nut-free is required, use sunflower seed butter instead of peanut butter and omit the peanuts. Sunflower seed butter works well, though the bars may have a slightly green tint from a natural reaction—it’s safe and doesn’t affect the taste.
Pin This Recipe!
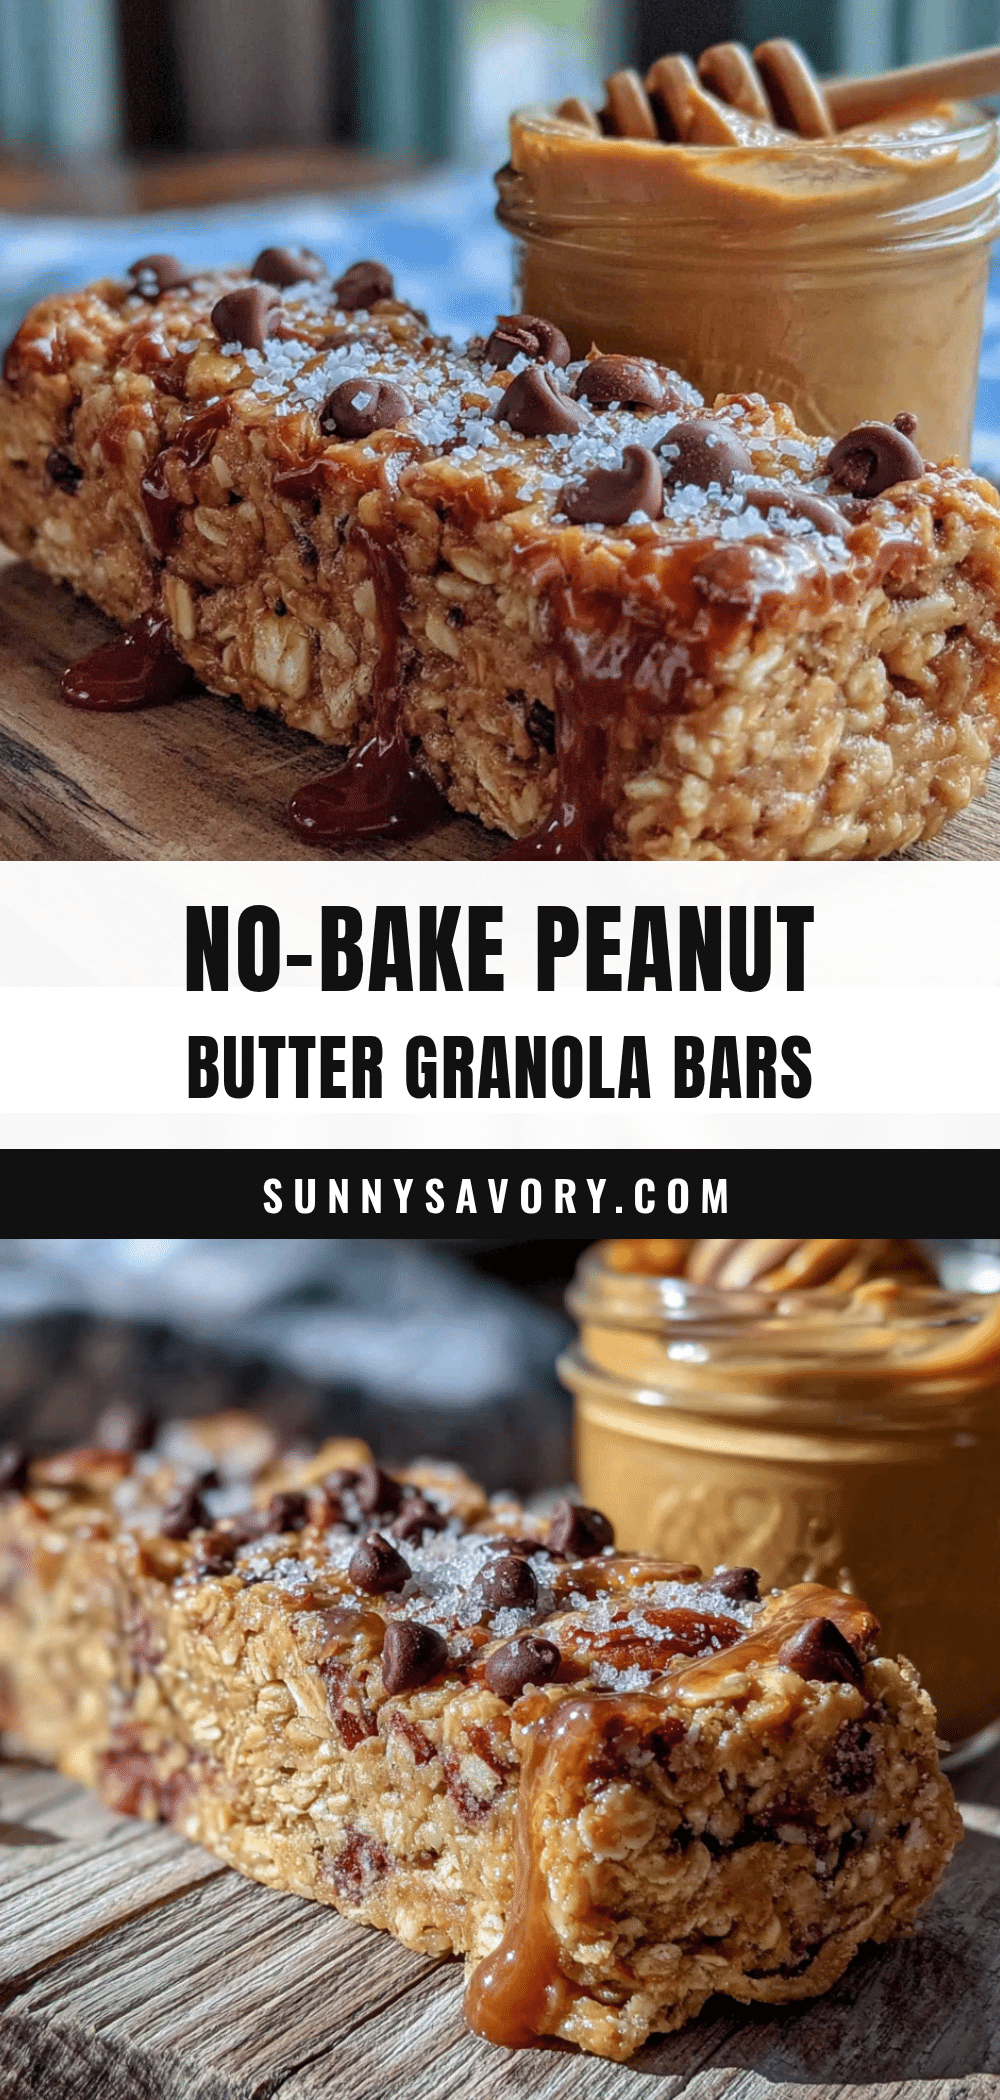
Easy No-Bake Peanut Butter Granola Bars
These no-bake peanut butter granola bars are quick, easy, and made with simple pantry ingredients. Perfect for busy families, they require just 5 minutes of hands-on time and deliver a chewy, satisfying snack that everyone loves.
- Prep Time: 5 minutes
- Cook Time: 0 minutes
- Total Time: 1 hour 5 minutes (includes chilling)
- Yield: 12 bars 1x
- Category: Snack
- Cuisine: American
Ingredients
- 2 cups (180g) rolled oats
- 1 cup (240g) creamy peanut butter
- ½ cup (170g) honey
- ½ cup (60g) chopped peanuts
- ½ cup (90g) dark chocolate chips
- 2 tablespoons (14g) flaxseed meal
- 1 teaspoon vanilla extract
- ¼ teaspoon salt
Instructions
- Line an 8×8 inch baking pan with parchment paper, leaving about 2 inches of overhang on two opposite sides.
- In a large microwave-safe bowl, combine 1 cup peanut butter and ½ cup honey. Microwave for 30 seconds, stir, then microwave another 15 seconds if needed until warm and runny. Stir in 1 teaspoon vanilla extract and ¼ teaspoon salt.
- Add 2 cups rolled oats, ½ cup chopped peanuts, ½ cup chocolate chips, and 2 tablespoons flaxseed meal. Stir vigorously until every oat is coated and the mixture is thick and sticky.
- Check the consistency: squeeze a handful—it should hold together. If too crumbly, add a tablespoon of warm honey; if too wet, add a tablespoon of oats.
- Transfer the mixture to the lined pan. Press down firmly with a spatula or your hands (wet your hands slightly to prevent sticking) for about a minute until flat and smooth.
- Refrigerate for at least 1 hour, preferably 2 hours or overnight, until firm.
- Lift the bars out using the parchment overhang. Place on a cutting board and cut into 12 squares with a sharp knife (warm the knife under hot water and wipe clean between cuts for neat edges).
- Store in an airtight container in the refrigerator.
Notes
For best results, use old-fashioned rolled oats, not quick oats. Press the mixture firmly into the pan to prevent crumbling. Chill for at least 1 hour. For vegan version, use maple syrup instead of honey (reduce to ⅓ cup) and add 2 tablespoons coconut oil. Bars can be frozen for up to 3 months.
Nutrition
- Serving Size: 1 bar
- Calories: 245
- Sugar: 14
- Sodium: 120
- Fat: 14
- Saturated Fat: 3
- Carbohydrates: 26
- Fiber: 4
- Protein: 8
Keywords: no-bake granola bars, peanut butter granola bars, easy snack, healthy snack, kid-friendly, no-bake recipe, 5-minute recipe



