Love this? Save it for later!
Share the inspiration with your friends
The fall bake sale was in six hours and I’d completely forgotten. I mean, I’d been so wrapped up in work deadlines and school drop-offs that the email about the PTA fundraiser had buried itself somewhere in my inbox. Everyone else would be bringing those elaborate, bakery-worthy creations—the kind with handmade fondant and layers that took two days to assemble. I had a half-block of cream cheese, a can of pumpkin puree, and maybe forty-five minutes before I needed to leave. Let me tell you, that kind of panic is a powerful motivator.
I remember standing in my kitchen, staring into the fridge like it owed me something. My neighbor Sarah had texted me a photo of her triple-layer caramel apple cake she’d started the night before. Honestly, I was this close to just grabbing a box of store-bought cookies and calling it a day. But then I spotted that can of pumpkin, and a memory surfaced of a mini cheesecake recipe I’d been tinkering with last Thanksgiving. It was lighter than the traditional dense version—I’d swapped in some Greek yogurt and a bit of cornstarch for a creamier texture. I figured, why not? It was a gamble, but I had nothing to lose.
I threw everything together in a single bowl, pressed some crushed graham crackers into a mini muffin tin (which I’d actually forgotten I owned), and poured in the filling. They baked in a fraction of the time a full cheesecake takes, and the smell that filled my kitchen—warm cinnamon, nutmeg, and that sweet pumpkin aroma—was enough to make me forget my panic for a minute. I pulled them out, let them cool, and popped one in my mouth to taste test. The texture was ridiculously smooth, almost mousse-like, and the pumpkin flavor was cozy without being heavy. I packed them up, still a little skeptical, and headed to the bake sale.
Here’s the thing: they were gone in twenty minutes. People kept asking me for the recipe, and one mom actually said they were the best thing on the table. I was honestly a little sheepish about it. I mean, I’d made them out of desperation, not skill. But that’s the thing about this recipe—it’s simple enough to pull off when you’re in a bind, but it tastes like you spent hours. Maybe you’ve been there, scrambling for a last-minute dish that doesn’t look last-minute. These little pumpkin cheesecake bites are that recipe. They stayed with me because they proved that you don’t need a ton of time or fancy ingredients to make something truly special.
Why You’ll Love This Recipe
Let’s be honest—there are a lot of pumpkin cheesecake recipes out there. But these Light & Creamy Mini Pumpkin Cheesecake Bites are different. They’re not just another version; they’re the version you’ll actually want to make again and again. I’ve tested this recipe more times than I can count, tweaking the ratios until the texture was just right—light, airy, and impossibly creamy without being heavy or dense. It’s the kind of recipe that makes you look like a pro, even if you’re just a home cook who forgot about a bake sale.
- Quick & Easy: These come together in about 30 minutes of active time and bake in just 18-20 minutes. Perfect for busy weeknights or when you need a last-minute dessert.
- Simple Ingredients: No fancy grocery trips needed. You likely already have cream cheese, eggs, pumpkin puree, and basic pantry spices in your kitchen.
- Perfect for Fall Gatherings: Great for Thanksgiving, Halloween parties, potlucks, or just a cozy night in. They’re bite-sized, so they’re easy to serve and eat.
- Crowd-Pleaser: I’ve made these for kids’ parties and adult dinner parties, and they always get rave reviews. The mini size makes them feel special and indulgent.
- Unbelievably Delicious: The texture is what sets them apart—it’s light and creamy, almost like a pumpkin mousse with a buttery graham cracker crust. You won’t believe they’re not full-fat.
What makes this recipe different is the technique. Instead of relying on heavy cream or loads of cream cheese for richness, I use a combination of Greek yogurt and a small amount of cornstarch. The yogurt adds tang and creaminess without the extra calories, while the cornstarch helps stabilize the filling so it sets up perfectly without cracking. It’s a little trick I picked up from testing different cheesecake methods, and honestly, it works like a charm. This isn’t just another pumpkin cheesecake recipe—it’s a lighter, more satisfying version that doesn’t compromise on flavor or texture.
What Ingredients You Will Need
This recipe uses simple, wholesome ingredients to deliver that perfect balance of creamy texture and warm pumpkin flavor. Most of these are pantry staples, especially if you do a lot of fall baking. Here’s what you’ll need, along with a few tips to get the best results.
For the Crust
- Graham cracker crumbs (1 cup / 120g): You can buy pre-crushed crumbs or crush your own. I prefer the texture of homemade crumbs—just pulse whole graham crackers in a food processor until fine. (Look for honey or cinnamon grahams for extra flavor.)
- Unsalted butter, melted (3 tablespoons / 42g): Adds richness and helps the crust hold together. If you only have salted butter, just reduce the added salt in the filling by a pinch.
- Granulated sugar (1 tablespoon / 12g): A little sweetness to balance the buttery, toasty flavor of the crust.
- Pinch of salt: Enhances all the flavors. Don’t skip it—even in the crust, it makes a difference.
For the Cheesecake Filling
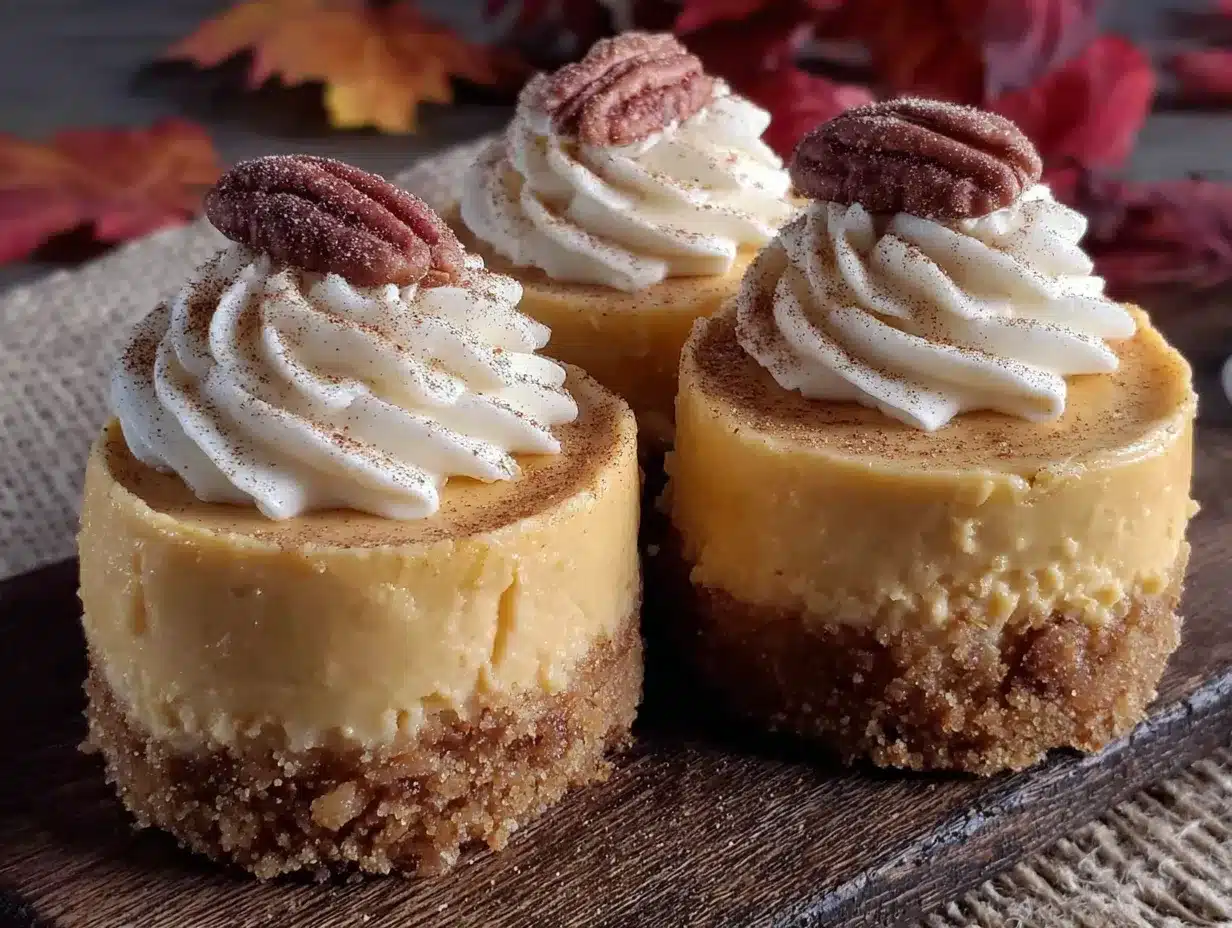
- Cream cheese, softened (8 ounces / 226g): Use full-fat cream cheese for the creamiest texture. Low-fat versions can work, but the filling won’t be as rich. Let it come to room temperature for about 30 minutes before mixing—this prevents lumps.
- Pumpkin puree (1/2 cup / 120g): Make sure you’re using 100% pure pumpkin puree, not pumpkin pie filling. I recommend Libby’s for consistent texture and flavor. (Homemade pumpkin puree works too, but drain it slightly to remove excess moisture.)
- Greek yogurt, plain (1/4 cup / 60g): This is the secret ingredient for a light and creamy texture. It adds tang and richness without the extra fat of heavy cream. Use full-fat or 2% Greek yogurt for best results.
- Granulated sugar (1/3 cup / 66g): Just enough sweetness to complement the pumpkin and spices without overwhelming them.
- Light brown sugar, packed (2 tablespoons / 25g): Adds a hint of molasses flavor that pairs beautifully with pumpkin. Don’t substitute with dark brown sugar unless you want a deeper, more intense flavor.
- Large egg (1): Helps bind the filling and gives it structure. Make sure it’s at room temperature so it emulsifies smoothly.
- Vanilla extract (1 teaspoon): Use pure vanilla extract for the best flavor. It rounds out the spices and adds warmth.
- Cornstarch (1 tablespoon / 8g): This is the stabilizer that prevents cracks and gives the cheesecake a silky texture. Don’t skip it—it’s not the same with flour.
- Pumpkin pie spice (1 teaspoon): You can use store-bought or make your own with a mix of cinnamon, nutmeg, ginger, and cloves. I recommend using a good-quality blend for consistent flavor.
- Ground cinnamon (1/2 teaspoon): Adds extra warmth and depth. I always add a little more cinnamon than the recipe calls for because I love it.
Optional Toppings
- Whipped cream: A dollop of lightly sweetened whipped cream on top is the perfect finishing touch. Use coconut whipped cream for a dairy-free option.
- Caramel sauce: Drizzle a little salted caramel over the top for extra indulgence. It pairs beautifully with the pumpkin and spices.
- Chopped pecans: Toasted pecans add a nice crunch and nutty flavor. Toast them in a dry skillet for 2-3 minutes until fragrant.
Equipment Needed
You don’t need any fancy gadgets for this recipe, which is part of why I love it. Here’s what you’ll need to get started:
- Mini muffin pan: This is essential for creating the bite-sized shape. A standard 24-cup mini muffin pan works perfectly. If you only have a 12-cup pan, you’ll need to bake in batches.
- Mixing bowls: One medium bowl for the crust and one large bowl for the filling. A glass or stainless steel bowl works best for even mixing.
- Electric hand mixer or stand mixer: While you can mix by hand, an electric mixer makes it much easier to get a smooth, lump-free filling. I prefer a hand mixer for this recipe because it’s less cleanup.
- Food processor or zip-top bag: For crushing the graham crackers. A food processor gives you fine, even crumbs, but a zip-top bag and a rolling pin work just as well.
- Measuring cups and spoons: Accurate measurements are key for baking. Use dry measuring cups for the crumbs and sugar, and liquid measuring cups for the pumpkin puree.
- Rubber spatula: For scraping down the sides of the bowl and making sure everything is well combined.
- Mini tart shaper or shot glass: To press the crust evenly into the mini muffin cups. A shot glass is the perfect size for this.
- Cooling rack: For cooling the cheesecake bites evenly after baking. This helps prevent condensation from making the crust soggy.
If you don’t have a mini muffin pan, you can use a regular muffin pan with paper liners, but you’ll need to adjust the baking time (expect 25-30 minutes). I’ve also used silicone mini muffin molds, which work great and make removal even easier. Just place them on a baking sheet for stability.
Preparation Method
Now let’s get to the fun part—making these little bites of fall heaven. Follow these steps closely, and you’ll have perfect mini cheesecakes every time.
- Preheat your oven to 325°F (160°C). Line a 24-cup mini muffin pan with paper liners or lightly grease the cups with non-stick spray. I prefer liners because they make removal a breeze, but greasing works too.
- Make the crust. In a medium bowl, combine 1 cup of graham cracker crumbs, 1 tablespoon of granulated sugar, and a pinch of salt. Pour in 3 tablespoons of melted unsalted butter and stir with a fork until the mixture looks like wet sand. It should clump together when you squeeze it.
- Press the crust into the pan. Spoon about 1 heaping teaspoon of the crust mixture into each mini muffin cup. Use a mini tart shaper or the bottom of a shot glass to press the crumbs down firmly and evenly. The crust should be about 1/4-inch thick. Don’t skip this step—a firm crust prevents crumbling later.
- Bake the crusts. Place the pan in the preheated oven and bake for 5 minutes. This sets the crust and gives it a nice toasty flavor. Remove from the oven and let it cool while you make the filling. (Leave the oven on.)
- Make the filling. In a large mixing bowl, beat 8 ounces of softened cream cheese with an electric hand mixer on medium speed until smooth and creamy, about 1 minute. Scrape down the sides of the bowl with a rubber spatula.
- Add the sugars and spices. Add 1/3 cup granulated sugar, 2 tablespoons packed light brown sugar, 1 teaspoon pumpkin pie spice, and 1/2 teaspoon ground cinnamon. Beat on medium speed until well combined, about 30 seconds. Scrape down the bowl again.
- Add the pumpkin and yogurt. Add 1/2 cup pumpkin puree and 1/4 cup Greek yogurt. Beat on low speed until just combined. Don’t overmix—you don’t want to incorporate too much air, which can cause cracks.
- Add the egg and vanilla. Add 1 large egg and 1 teaspoon vanilla extract. Beat on low speed until just combined. Then add 1 tablespoon of cornstarch and beat on low until it disappears into the batter. The filling should be smooth and silky, with no lumps.
- Fill the cups. Spoon the filling into each mini muffin cup, filling them almost to the top. A small cookie scoop works great for this—it keeps the portions even. You should have enough filling for exactly 24 cups.
- Bake the cheesecake bites. Place the pan in the oven and bake for 16-18 minutes, or until the edges are set and the centers are just slightly jiggly. They will continue to set as they cool. Don’t overbake—that’s the number one cause of dry, cracked cheesecake.
- Cool completely. Remove the pan from the oven and let it cool on a wire rack for 30 minutes. Then transfer the pan to the refrigerator and chill for at least 2 hours, or overnight. This step is crucial for the texture to develop properly.
- Remove from the pan. Once chilled, carefully remove the cheesecake bites from the muffin pan. If you used liners, they’ll come out easily. If you greased the pan, run a thin knife around the edges to loosen them.
Cooking Tips & Techniques
I’ve made this recipe more times than I can count, and I’ve learned a few things along the way. Here are my best tips to ensure success every time.
- Room temperature ingredients are non-negotiable. Cold cream cheese and eggs will create a lumpy filling that won’t bake evenly. Let them sit on the counter for 30 minutes before you start. Trust me, it makes a huge difference.
- Don’t overmix the filling. Once you add the egg, mix on low speed and stop as soon as it’s incorporated. Overmixing incorporates too much air, which can cause the cheesecake to puff up and then crack as it cools.
- Use a water bath… or not. For full-sized cheesecakes, a water bath is essential. But for these mini bites, it’s not necessary. The small size and short baking time mean they bake evenly without one. Just don’t overbake them.
- Check for doneness with a gentle jiggle. The centers should wobble slightly when you shake the pan. If they look completely set, they’re overbaked. Remember, they’ll continue to set as they cool.
- Chill them thoroughly. I know it’s tempting to dig in right away, but these need at least 2 hours in the fridge to firm up. Overnight is even better—the flavors meld and the texture becomes impossibly creamy.
- One mistake I made early on: I once tried to speed up the cooling process by putting them in the freezer. Big mistake. The texture turned icy and grainy. Always chill them in the refrigerator for the best results.
Variations & Adaptations
One of the best things about this recipe is how versatile it is. Here are a few ways to make it your own.
- Gluten-Free Version: Swap the graham cracker crumbs for gluten-free graham crackers or use crushed gluten-free cookies like shortbread. I’ve also used almond flour mixed with a little butter and sugar for a nutty, low-carb crust.
- Dairy-Free Option: Use dairy-free cream cheese (like Kite Hill or Tofutti) and a dairy-free yogurt (coconut or soy-based). The texture will be slightly different, but still delicious. I’ve tested this with Kite Hill, and it works beautifully.
- Spice It Up: Add a pinch of cayenne pepper or a dash of cardamom to the filling for a warm, spicy kick. I love adding a little cardamom—it pairs so well with the pumpkin and cinnamon.
- Chocolate Lover’s Twist: Stir in 1/4 cup of mini chocolate chips to the filling before baking. The chocolate melts into little pockets of richness that complement the pumpkin perfectly.
- Maple Pecan Variation: Add 2 tablespoons of maple syrup to the filling and top each bite with a toasted pecan half before baking. The maple adds a deep, autumnal sweetness that’s just divine.
- No-Bake Option: If you’re short on time, you can make a no-bake version by folding the filling into 1 cup of whipped cream and spooning it into pre-baked crusts. Chill for 4 hours until set. It’s lighter and fluffier, but just as delicious.
Serving & Storage Suggestions
These mini pumpkin cheesecake bites are perfect for so many occasions. Here’s how to serve and store them for the best experience.
- Serving Temperature: Serve them cold, straight from the fridge. The texture is at its best when chilled—firm but creamy, with a smooth mouthfeel. If you leave them out too long, they’ll soften and lose their structure.
- Presentation Ideas: Arrange them on a platter and top each one with a tiny dollop of whipped cream and a sprinkle of cinnamon or nutmeg. For a more festive look, add a small candied pecan or a drizzle of caramel sauce.
- Complementary Dishes: These pair beautifully with a hot cup of coffee, spiced chai, or a glass of cold milk. For a dessert spread, serve them alongside apple crisp, pumpkin bread, or a simple vanilla panna cotta.
- Storage: Store any leftovers in an airtight container in the refrigerator for up to 5 days. Place a sheet of parchment paper between layers to prevent them from sticking together.
- Freezing Instructions: These freeze beautifully! Place the cheesecake bites on a baking sheet and freeze until solid, about 1 hour. Then transfer them to a freezer-safe bag or container. They’ll keep for up to 3 months. Thaw in the refrigerator overnight before serving.
- Flavor Development: Honestly, these taste even better on the second day. The flavors have time to meld, and the texture becomes even creamier. So don’t be afraid to make them a day ahead—they’ll be even more delicious.
Nutritional Information & Benefits
These Light & Creamy Mini Pumpkin Cheesecake Bites are a healthier take on a classic dessert, but they still feel indulgent. Here’s a look at what you’re getting in each bite.
| Nutrient | Amount Per Serving (1 bite) |
|---|---|
| Calories | 95 |
| Total Fat | 6g |
| Saturated Fat | 3.5g |
| Cholesterol | 25mg |
| Sodium | 85mg |
| Total Carbohydrates | 9g |
| Dietary Fiber | 1g |
| Sugars | 6g |
| Protein | 2g |
| Vitamin A | 15% DV |
| Calcium | 2% DV |
| Iron | 2% DV |
Pin This Recipe!
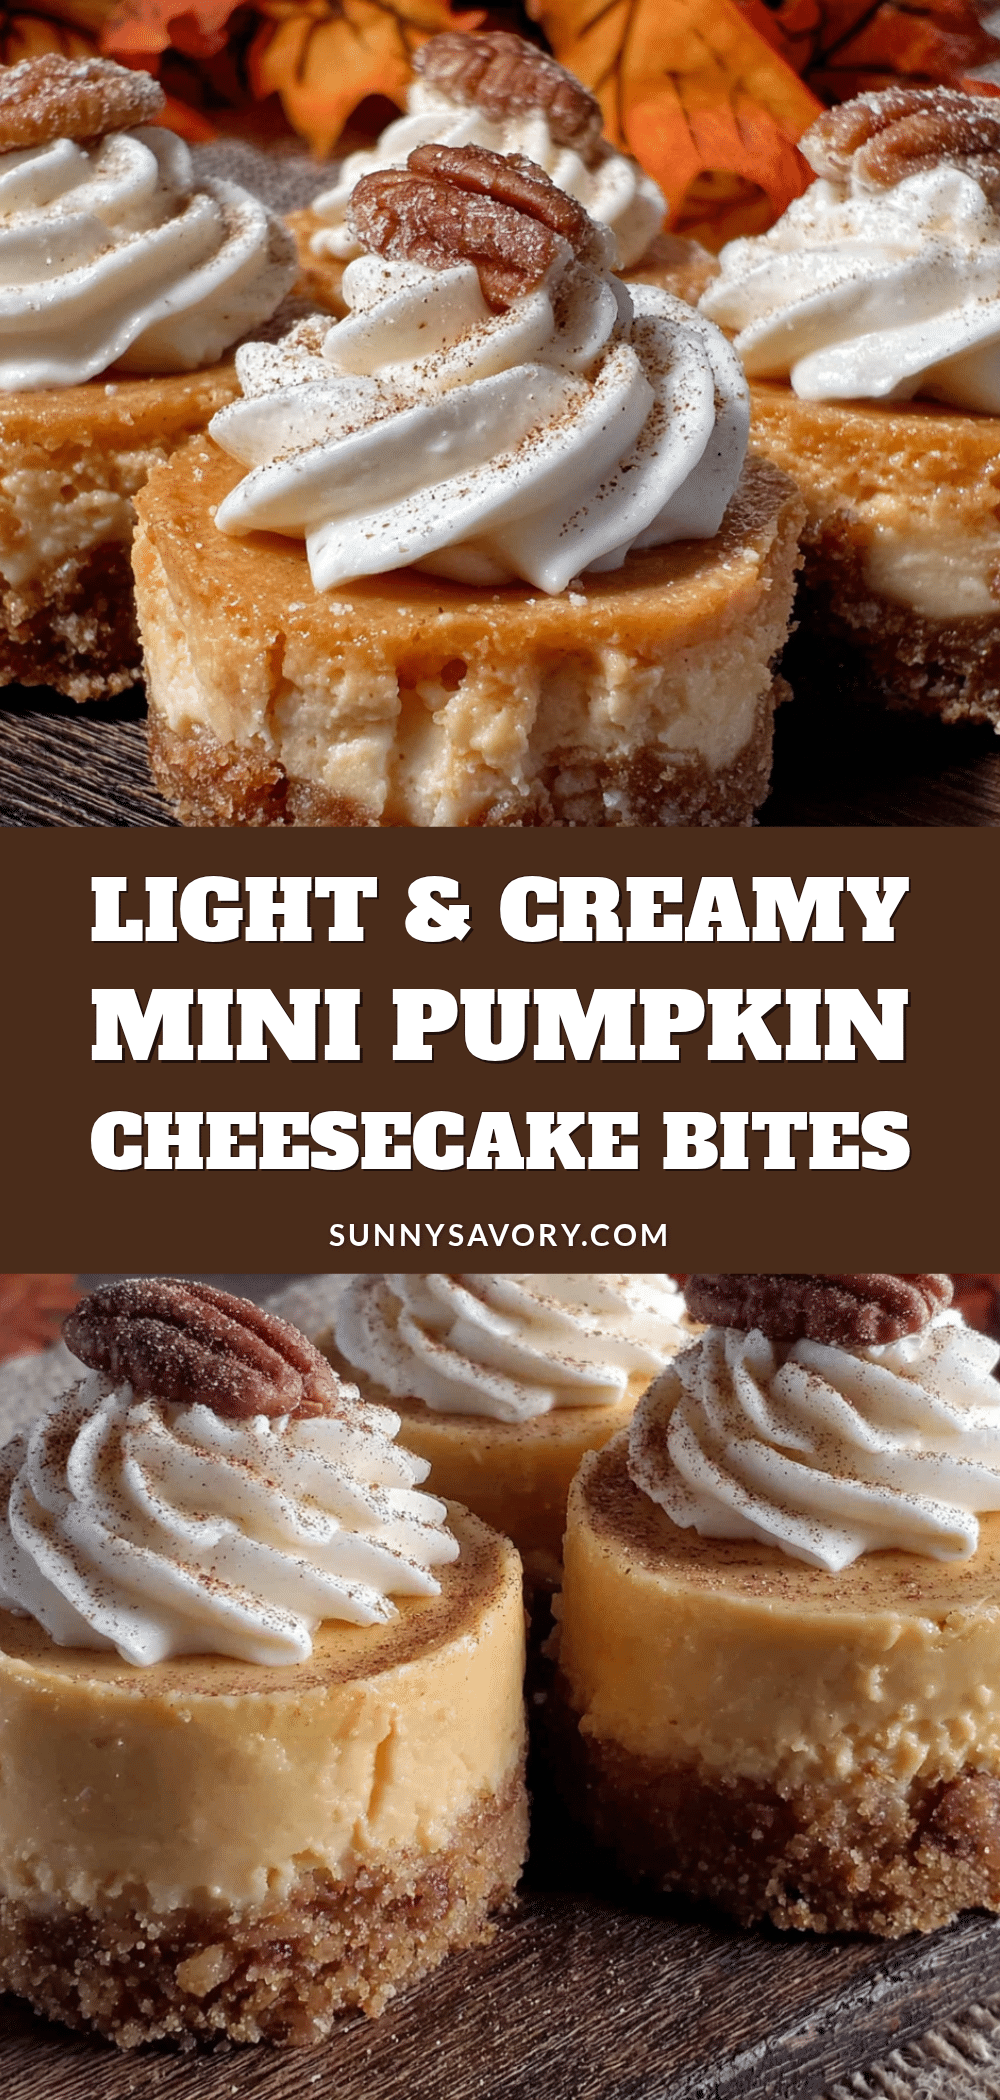
Light & Creamy Mini Pumpkin Cheesecake Bites
These light and creamy mini pumpkin cheesecake bites are the perfect last-minute dessert for fall gatherings. Made with simple ingredients and a secret Greek yogurt trick, they’re quick to make and taste like you spent hours.
- Prep Time: 30 minutes
- Cook Time: 18 minutes
- Total Time: 2 hours 48 minutes (includes chilling)
- Yield: 24 servings 1x
- Category: Dessert
- Cuisine: American
Ingredients
- 1 cup (120g) graham cracker crumbs
- 3 tablespoons (42g) unsalted butter, melted
- 1 tablespoon (12g) granulated sugar
- Pinch of salt
- 8 ounces (226g) cream cheese, softened
- 1/2 cup (120g) pumpkin puree
- 1/4 cup (60g) plain Greek yogurt
- 1/3 cup (66g) granulated sugar
- 2 tablespoons (25g) light brown sugar, packed
- 1 large egg
- 1 teaspoon vanilla extract
- 1 tablespoon (8g) cornstarch
- 1 teaspoon pumpkin pie spice
- 1/2 teaspoon ground cinnamon
- Optional: whipped cream, caramel sauce, chopped pecans for topping
Instructions
- Preheat your oven to 325°F (160°C). Line a 24-cup mini muffin pan with paper liners or lightly grease the cups with non-stick spray.
- Make the crust: In a medium bowl, combine 1 cup graham cracker crumbs, 1 tablespoon granulated sugar, and a pinch of salt. Pour in 3 tablespoons melted unsalted butter and stir with a fork until the mixture looks like wet sand.
- Press the crust into the pan: Spoon about 1 heaping teaspoon of the crust mixture into each mini muffin cup. Use a mini tart shaper or the bottom of a shot glass to press the crumbs down firmly and evenly, about 1/4-inch thick.
- Bake the crusts: Place the pan in the preheated oven and bake for 5 minutes. Remove from the oven and let cool while you make the filling. Leave the oven on.
- Make the filling: In a large mixing bowl, beat 8 ounces softened cream cheese with an electric hand mixer on medium speed until smooth and creamy, about 1 minute. Scrape down the sides of the bowl.
- Add the sugars and spices: Add 1/3 cup granulated sugar, 2 tablespoons packed light brown sugar, 1 teaspoon pumpkin pie spice, and 1/2 teaspoon ground cinnamon. Beat on medium speed until well combined, about 30 seconds. Scrape down the bowl again.
- Add the pumpkin and yogurt: Add 1/2 cup pumpkin puree and 1/4 cup Greek yogurt. Beat on low speed until just combined. Do not overmix.
- Add the egg and vanilla: Add 1 large egg and 1 teaspoon vanilla extract. Beat on low speed until just combined. Then add 1 tablespoon cornstarch and beat on low until it disappears into the batter. The filling should be smooth and silky.
- Fill the cups: Spoon the filling into each mini muffin cup, filling them almost to the top. A small cookie scoop works great for even portions.
- Bake the cheesecake bites: Place the pan in the oven and bake for 16-18 minutes, or until the edges are set and the centers are just slightly jiggly.
- Cool completely: Remove the pan from the oven and let it cool on a wire rack for 30 minutes. Then transfer the pan to the refrigerator and chill for at least 2 hours, or overnight.
- Remove from the pan: Once chilled, carefully remove the cheesecake bites from the muffin pan. If you used liners, they’ll come out easily. If you greased the pan, run a thin knife around the edges to loosen them.
Notes
Room temperature ingredients are essential for a smooth filling. Do not overmix the batter to avoid cracks. Chill thoroughly for at least 2 hours for best texture. These can be made ahead and taste even better the next day. For gluten-free, use gluten-free graham crackers. For dairy-free, use dairy-free cream cheese and yogurt.
Nutrition
- Serving Size: 1 bite
- Calories: 95
- Sugar: 6
- Sodium: 85
- Fat: 6
- Saturated Fat: 3.5
- Carbohydrates: 9
- Fiber: 1
- Protein: 2
Keywords: mini pumpkin cheesecake bites, light pumpkin cheesecake, easy pumpkin dessert, fall dessert, bite-sized cheesecake, pumpkin cheesecake recipe



