Love this? Save it for later!
Share the inspiration with your friends
I used to think hot cocoa bombs were nothing but a sugar bomb wrapped in a gimmick. For years. I mean, I’d see them all over social media, these gorgeous spheres of chocolate just waiting to explode in a mug of warm milk, and honestly? I rolled my eyes every single time. It felt like dessert pretending to be a drink. Then my sister, who knows my skepticism all too well, dropped a box of them off on my doorstep last December. “Just try one,” she said. “And don’t judge it before it melts.”
A week passed. The box sat on my counter, staring at me. Finally, on a snowy Tuesday afternoon when the kids were driving me up the wall, I caved. I heated up some oat milk, dropped one of those peppermint bombs in my favorite ceramic mug, and watched it happen. The shell cracked. The steam rose. And that first sip? It was like a cozy hug for my insides, but without that weird, syrupy sweetness that usually ruins things. I was caught. Red-handed, with a mug in my hand and a sheepish grin on my face.
So here I am, the convert, sharing my own version. Because if I’m going to make these, I’m going to make them better. This lightened-up peppermint hot cocoa bombs recipe cuts the sugar by half, sneaks in a bit of protein, and uses real peppermint flavor that doesn’t taste like toothpaste. It’s the kind of thing that makes you feel good about indulging. Maybe you’ve been there, too—watching those gorgeous videos and thinking, “That looks amazing, but I can’t eat that.” Well, now you can. Let me show you how.
Why You’ll Love This Recipe
This isn’t just another pretty drink. These lightened-up peppermint hot cocoa bombs are designed for real life, where you want something special without the sugar crash. I’ve tested this recipe about six times to get the balance just right, and let me tell you, the final version is a winner.
- Quick & Easy: From start to finish, you’re looking at about 30 minutes of active work. The hardest part is waiting for the chocolate shells to set in the fridge.
- Simple Ingredients: No weird sugar alcohols or hard-to-find specialty items. You probably have most of these in your pantry already, except maybe the peppermint extract.
- Perfect for Cozy Nights: These make the best winter treat for movie nights, snow days, or when you just need something warm and comforting after a long week.
- Crowd-Pleaser: I brought a batch to my book club last month, and even the ladies who “don’t do sweets” went back for seconds. They couldn’t believe they were lightened up.
- Unbelievably Delicious: The combo of rich dark chocolate, cool peppermint, and creamy milk is pure magic. It feels indulgent, but it’s actually pretty sensible.
What makes these different from every other hot cocoa bomb out there is the secret swap. Instead of loading up on powdered sugar and heavy cream, I use a blend of unsweetened cocoa powder, a touch of maple syrup, and a scoop of collagen peptides for a little protein boost. The texture stays silky, the flavor is deep and complex, and you don’t get that weird artificial aftertaste. It’s comfort food reimagined—healthier, faster, but with the same soul-soothing satisfaction.
What Ingredients You Will Need
This recipe uses simple, wholesome ingredients to deliver that rich, minty flavor without the sugar overload. Most of these are pantry staples, and the few that aren’t are easy to find at any grocery store.
For the Chocolate Shells
- 1 cup dark chocolate chips (I prefer 70% cacao for a deeper flavor and less sugar; Ghirardelli works beautifully)
- 1 teaspoon coconut oil (helps thin the chocolate for easier molding and gives a nice shine)
For the Hot Cocoa Mix (Inside Each Bomb)

- 2 tablespoons unsweetened cocoa powder (use Dutch-processed for a smoother, richer taste if you have it)
- 1 tablespoon maple syrup powder or coconut sugar (maple syrup powder dissolves better; coconut sugar adds a caramel note)
- 1 tablespoon collagen peptides or powdered milk (optional, but adds creaminess and a little protein; I use Vital Proteins brand)
- 1/4 teaspoon peppermint extract (look for pure peppermint extract, not mint, for the best flavor)
- Pinch of sea salt (balances the sweetness and enhances the chocolate)
For Decoration & Assembly
- Crushed sugar-free peppermint candies (or regular, if you prefer; I crush them in a ziplock bag with a rolling pin)
- 1-2 tablespoons extra melted chocolate (for sealing the bombs)
For the milk, you can use any kind you like. I’ve tested these with whole milk, oat milk, and almond milk, and they all work great. Oat milk gives the creamiest texture, in my opinion. If you want to keep things really light, unsweetened almond milk is a solid choice.
Equipment Needed
You don’t need a fancy kitchen setup for these. Here’s what I use every time I make a batch:
- Half-sphere silicone mold (1.5-inch size works best; I got a set of two on Amazon for under ten bucks)
- Small microwave-safe bowl (for melting chocolate)
- Pastry brush or small spoon (for spreading chocolate in the molds)
- Baking sheet (to hold the molds flat in the fridge)
- Ziplock bag and rolling pin (for crushing peppermint candies)
- Small piping bag or ziplock bag with a tiny corner snipped off (for drizzling melted chocolate to seal the bombs)
If you don’t have a silicone mold, you can use a plastic one, but silicone makes it so much easier to pop the shells out without breaking them. I learned that the hard way after cracking three shells in a row with a cheap plastic mold. Trust me on this one.
Preparation Method
Alright, let’s get to the fun part. Follow these steps, and you’ll have a batch of beautiful lightened-up peppermint hot cocoa bombs ready in no time.
- Melt the chocolate. Add the dark chocolate chips and coconut oil to a small microwave-safe bowl. Microwave in 30-second bursts, stirring after each, until completely smooth. Be careful not to overheat it—burnt chocolate is a tragedy. It should look glossy and feel warm, not hot, to the touch.
- Line the molds. Using a pastry brush or the back of a small spoon, carefully paint a thin, even layer of melted chocolate inside each cavity of your silicone mold. Make sure you get all the way up to the edges. Don’t worry if it’s not perfect; imperfections add character. Pop the mold in the fridge for 10-15 minutes, or until the chocolate is firm and no longer shiny.
- Make the cocoa mix. While the shells are setting, stir together the unsweetened cocoa powder, maple syrup powder (or coconut sugar), collagen peptides, peppermint extract, and a pinch of sea salt in a small bowl. The mixture will look a bit clumpy from the extract, and that’s totally fine. Set it aside.
- Remove the shells. Gently flex the silicone mold to pop the chocolate shells out. They should come out easily. If they crack, don’t panic—you can patch them with a little melted chocolate later. Place half of the shells on a clean plate or cutting board, with the open side facing up.
- Fill the bombs. Spoon about 1 to 1.5 teaspoons of the cocoa mix into each shell. Don’t overfill them; you need room to seal the top. Tap the shell gently on the counter to settle the powder.
- Seal the bombs. Warm up a small plate in the microwave for about 20 seconds. Press the rim of an empty shell onto the warm plate for a few seconds to melt the edge just a tiny bit. Then, carefully place it on top of a filled shell, pressing gently to seal. If there are gaps, use a small piping bag filled with leftover melted chocolate to fill them in. It’s okay if it’s messy—you’ll cover it with decorations anyway.
- Decorate. Drizzle a little melted chocolate over the top of each sealed bomb and immediately sprinkle with crushed peppermint candies. You can also add a tiny swirl of white chocolate if you’re feeling fancy. Place the finished bombs back in the fridge for another 10 minutes to set the decorations.
- Make your drink. When you’re ready to enjoy, heat up 8-10 ounces of your favorite milk until it’s steaming (but not boiling). Place one bomb in a mug and pour the hot milk over it. Watch it melt, stir, and enjoy. The peppermint aroma that hits your nose is just incredible.
Cooking Tips & Techniques
I’ve made enough mistakes with these bombs to write a small book. Here’s what I’ve learned so you don’t have to repeat my failures.
First, tempering the chocolate is optional but helpful. If you want that satisfying snap when you bite into the shell, you’ll need to temper the chocolate. I usually skip it for home batches because I’m lazy, but if you’re gifting these, it makes them look professional. Just melt two-thirds of your chocolate, then stir in the remaining third until it melts from the residual heat. It’s a little fussy, but worth it for the snap.
Second, don’t overfill the molds. I did that once, and the shells came out lumpy and uneven. A thin, even layer is all you need. Think of it like painting a wall—two thin coats are better than one thick coat.
Third, if your shells crack when you try to remove them, don’t throw them away. You can patch them with a dab of melted chocolate, or just crumble them up and use them as topping for ice cream or yogurt. Waste not, want not, right?
Finally, timing is everything. I like to make the shells and the filling while the kids are doing homework. Then I assemble everything after dinner while the coffee is brewing. It breaks the process into manageable chunks and makes it feel less like a chore.
Variations & Adaptations
One of the best things about this recipe is how flexible it is. Here are a few ways I’ve changed it up over the months.
- Dairy-Free Version: Use dairy-free dark chocolate chips and coconut oil. For the filling, skip the collagen peptides and use powdered coconut milk instead. It works perfectly and tastes just as creamy.
- Extra Minty Version: My husband loves things that taste like a candy cane exploded in his mouth. For him, I add an extra 1/8 teaspoon of peppermint extract and stir in a few crushed peppermint pieces into the cocoa mix. It’s intense, but he loves it.
- Spiced Hot Cocoa Bombs: For a winter twist, add a pinch of cinnamon, a tiny pinch of cayenne, and a dash of nutmeg to the cocoa mix. It gives the hot chocolate a Mexican hot chocolate vibe that’s perfect for snowy nights.
- White Chocolate Peppermint Bombs: Swap the dark chocolate for high-quality white chocolate chips (I use Pascha brand for a dairy-free option). The sweetness pairs beautifully with the peppermint. Just be extra careful when melting white chocolate because it burns easily.
Serving & Storage Suggestions
These lightened-up peppermint hot cocoa bombs are best served fresh, but they store surprisingly well. Here’s how I handle them.
For serving, I recommend using a clear glass mug so you can watch the bomb dissolve. It’s half the fun, honestly. Heat your milk to about 150°F—steaming but not boiling—and pour it directly over the bomb. Let it sit for about 30 seconds before stirring to allow the chocolate to fully melt. The peppermint aroma that comes up is just lovely.
For storage, keep the bombs in an airtight container in the refrigerator for up to two weeks. Layer them between sheets of parchment paper so they don’t stick together. You can also freeze them for up to three months. Just let them thaw in the fridge overnight before using. I’ve found that the flavor actually gets a little better after a day or two as the peppermint mellows into the chocolate.
If you’re giving these as gifts, wrap each bomb individually in a small cellophane bag tied with a ribbon. They look adorable and make people feel so special.
Nutritional Information & Benefits
I’m not a nutritionist, but I do pay attention to what goes into my body, and I love that these bombs let me have my treat and eat it too. Here’s the rough breakdown per bomb (using oat milk and sugar-free peppermint candies):
- Calories: Approximately 180-200
- Fat: 12g (mostly from the dark chocolate)
- Carbohydrates: 18g (with 10g of sugar)
- Protein: 6g (thanks to the collagen peptides)
- Fiber: 3g
The dark chocolate is rich in antioxidants, and the peppermint can help with digestion. Plus, using maple syrup powder instead of refined sugar means a lower glycemic impact. It’s not health food, but it’s a much smarter choice than the store-bought versions that can pack 40 grams of sugar per serving. For me, it’s about balance—enjoying something delicious without feeling terrible afterward.
Conclusion
So there you have it. My little conversion story turned into a recipe I genuinely look forward to making every winter. These lightened-up peppermint hot cocoa bombs are proof that you don’t have to sacrifice flavor or fun to eat a little smarter. They’re cozy, they’re festive, and they make the perfect gift for anyone who loves a warm drink on a cold day.
I’d love to hear how yours turn out. Did you add your own twist? Did your kids try to eat them before they hit the mug? Drop a comment below and let me know. And if you share them on social media, tag me—I want to see your beautiful creations. Until next time, stay warm and keep stirring.
Frequently Asked Questions
Can I use milk chocolate instead of dark chocolate?
Absolutely. Just keep in mind that milk chocolate has more sugar, so the bombs will be a bit sweeter. You might want to reduce or skip the maple syrup powder in the filling to balance it out.
My chocolate shells keep cracking. What am I doing wrong?
This usually happens when the chocolate layer is too thick or the mold isn’t flexible enough. Try using a silicone mold and painting a thinner layer. Also, make sure the chocolate is fully set before you try to pop them out.
Can I make these without a silicone mold?
You can, but it’s trickier. Some people use plastic Easter egg molds or even shape the chocolate over the back of a small spoon. For the easiest results, I really recommend investing in a silicone half-sphere mold. They’re cheap and reusable.
How do I make these completely sugar-free?
Use sugar-free dark chocolate chips (like Lily’s brand), a monk fruit or erythritol-based sweetener in the filling, and sugar-free peppermint candies. The texture will be slightly different, but the taste is still great.
Why did my hot cocoa bomb not melt completely?
Your milk might not have been hot enough. Aim for milk that’s steaming but not boiling—around 150°F. Also, make sure the chocolate shell isn’t too thick. A thin shell melts much more easily and evenly.
Pin This Recipe!
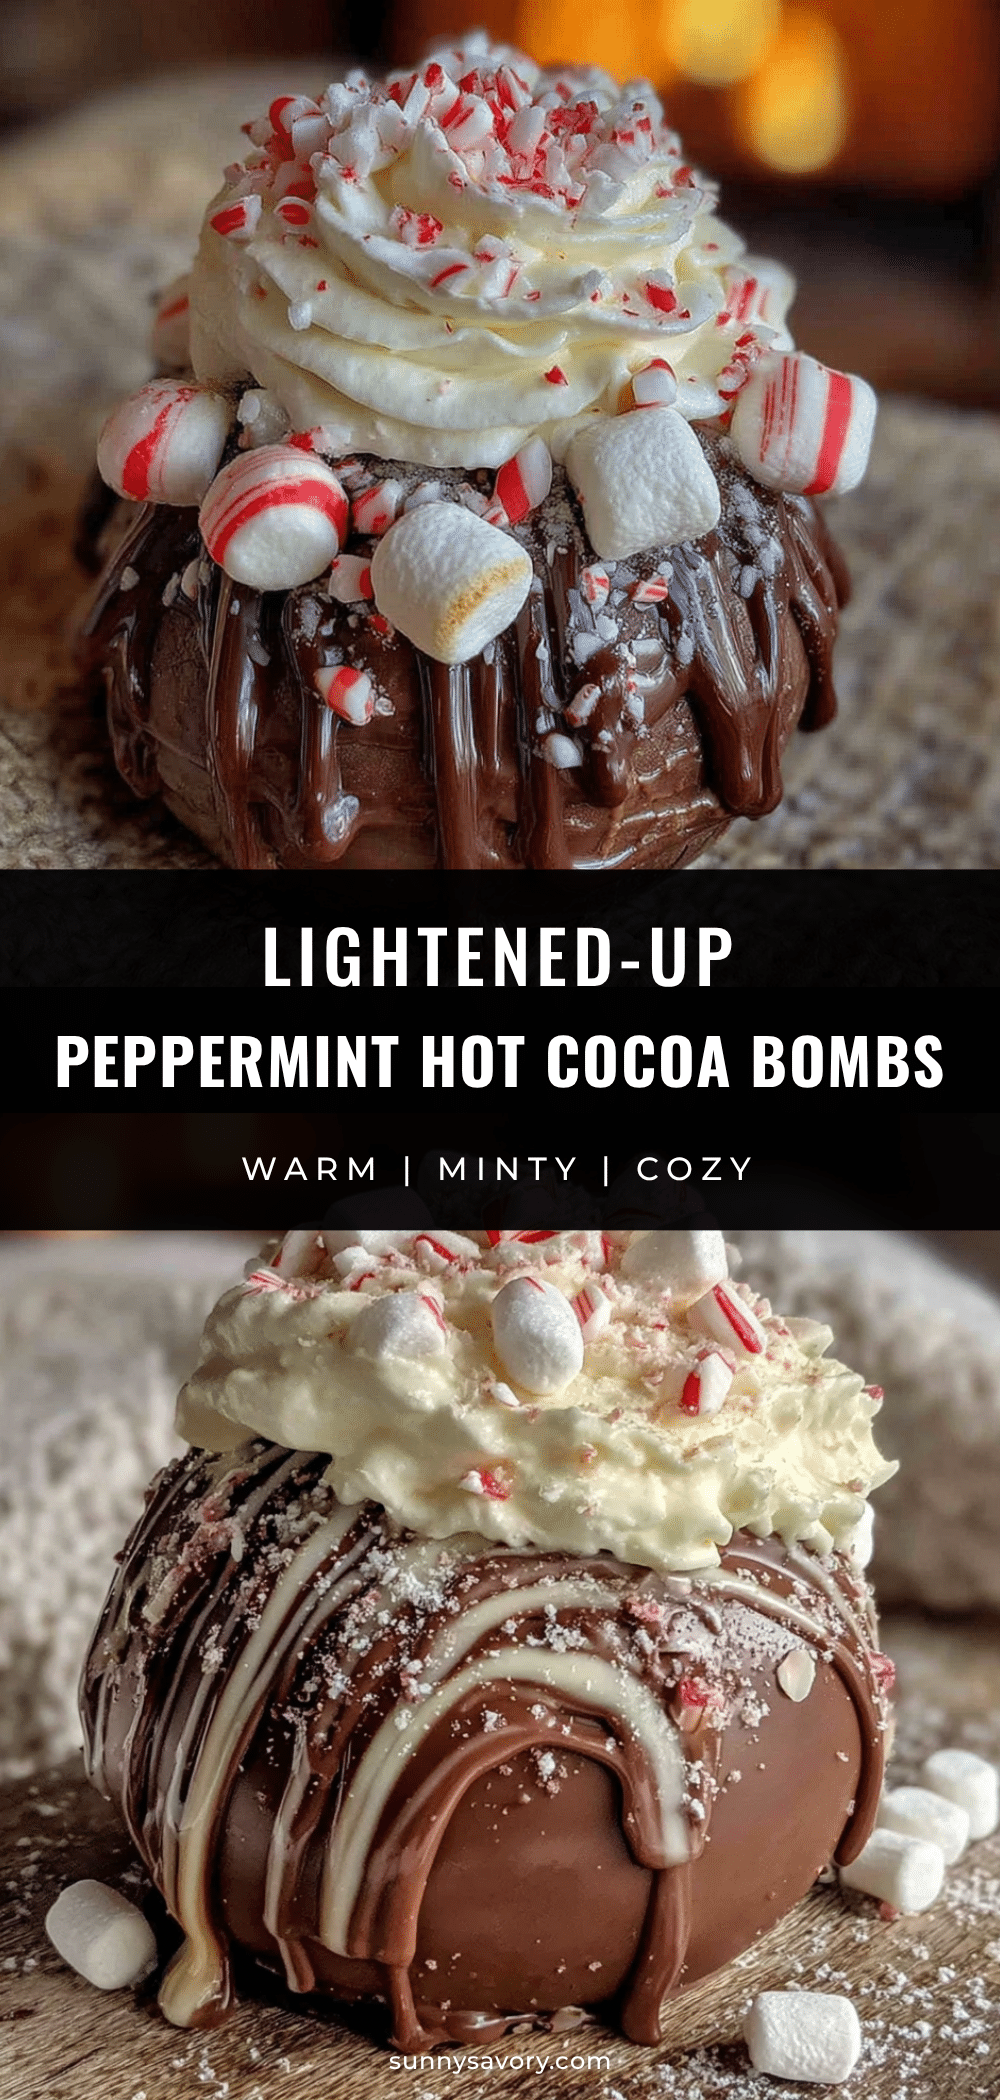
Lightened-Up Peppermint Hot Cocoa Bombs – Easy Homemade Recipe

These lightened-up peppermint hot cocoa bombs cut the sugar by half, sneak in a bit of protein, and use real peppermint flavor. They’re the perfect cozy winter treat that feels indulgent but is actually pretty sensible.
- Prep Time: 30 minutes
- Cook Time: 0 minutes
- Total Time: 30 minutes (plus chilling time)
- Yield: 6 servings 1x
- Category: Dessert
- Cuisine: American
Ingredients
- 1 cup dark chocolate chips (70% cacao preferred)
- 1 teaspoon coconut oil
- 2 tablespoons unsweetened cocoa powder (Dutch-processed preferred)
- 1 tablespoon maple syrup powder or coconut sugar
- 1 tablespoon collagen peptides or powdered milk (optional)
- 1/4 teaspoon peppermint extract (pure, not mint)
- Pinch of sea salt
- Crushed sugar-free peppermint candies (or regular)
- 1–2 tablespoons extra melted chocolate (for sealing)
Instructions
- Melt the chocolate: Add dark chocolate chips and coconut oil to a small microwave-safe bowl. Microwave in 30-second bursts, stirring after each, until completely smooth.
- Line the molds: Using a pastry brush or small spoon, paint a thin, even layer of melted chocolate inside each cavity of a silicone half-sphere mold. Refrigerate for 10-15 minutes until firm.
- Make the cocoa mix: In a small bowl, stir together unsweetened cocoa powder, maple syrup powder (or coconut sugar), collagen peptides, peppermint extract, and a pinch of sea salt. Set aside.
- Remove the shells: Gently flex the silicone mold to pop out the chocolate shells. Place half of the shells on a clean plate with the open side facing up.
- Fill the bombs: Spoon about 1 to 1.5 teaspoons of the cocoa mix into each shell. Tap gently to settle the powder.
- Seal the bombs: Warm a small plate in the microwave for 20 seconds. Press the rim of an empty shell onto the warm plate to melt the edge slightly, then place it on top of a filled shell, pressing gently to seal. Use leftover melted chocolate to fill any gaps.
- Decorate: Drizzle melted chocolate over each sealed bomb and immediately sprinkle with crushed peppermint candies. Refrigerate for 10 minutes to set.
- Make your drink: Heat 8-10 ounces of milk until steaming (not boiling). Place one bomb in a mug and pour hot milk over it. Stir and enjoy.
Notes
Tempering chocolate is optional but gives a satisfying snap. Don’t overfill molds; thin layers work best. Cracked shells can be patched with melted chocolate or crumbled for toppings. Store in an airtight container in the refrigerator for up to 2 weeks or freeze for up to 3 months.
Nutrition
- Serving Size: 1 bomb with 8-10 oz
- Calories: 190
- Sugar: 10
- Sodium: 50
- Fat: 12
- Saturated Fat: 7
- Carbohydrates: 18
- Fiber: 3
- Protein: 6
Keywords: hot cocoa bombs, peppermint hot cocoa, lightened up hot cocoa, healthy hot chocolate, winter treat, homemade hot cocoa bombs



