Love this? Save it for later!
Share the inspiration with your friends
I was standing in the middle of a hardware store last October—one of those big, fluorescent-lit places with the smell of lumber and rubber—when a woman walked past me carrying a pumpkin-scented candle. That was it. The fake, waxy pumpkin smell hit me, and suddenly I was eleven years old, sitting on a cracked vinyl stool in my aunt’s tiny kitchen in Ohio.
She wasn’t much of a baker, honestly. Most of her cooking came from boxes or cans. But every fall, for no reason I ever figured out, she’d make these sticky, imperfect cinnamon rolls that smelled like the whole season had been crammed into one pan. They were always a little lopsided, sometimes a bit underdone in the center. And they were the best thing I’d ever eaten.
She passed away a few years ago, and I haven’t had one since. I mean, I’ve tried other pumpkin rolls from bakeries and cafes, but they’re always too perfect, too polished. They don’t have that slightly messy, homemade soul that hers did. So last week, I finally decided to stop looking and start recreating. I pulled out my mixing bowls, grabbed a can of pumpkin puree, and spent three days getting it right. You know that feeling when you’re chasing a taste you can barely remember? That was me, covered in flour, probably muttering to myself.
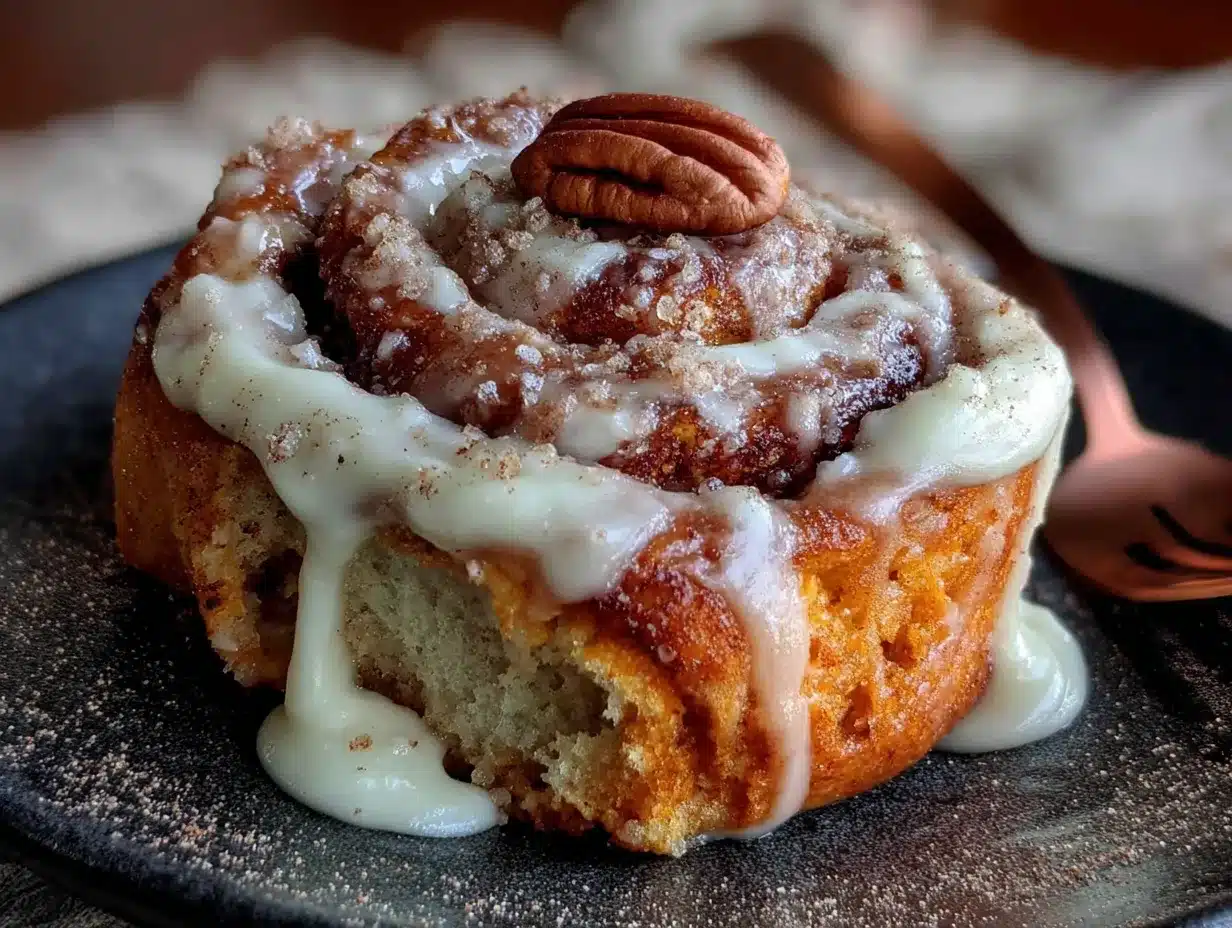
This is what came out of that mess. These Perfect Pumpkin Cinnamon Rolls with Maple Cream Cheese Icing aren’t fancy or fussy. They’re soft, a little rustic, and absolutely drowning in that sweet, maple-kissed icing. They taste like the memory I’ve been trying to catch for years. And honestly? I think she’d approve.
Why You’ll Love This Recipe
Let me tell you—I’ve made a lot of cinnamon rolls in my time. Some were triumphs. Some were hockey pucks that I fed to the birds. These pumpkin cinnamon rolls are the ones I keep coming back to, and here’s why they’ll become your go-to, too.
- Soft and Pillowy Texture : The pumpkin puree keeps these rolls incredibly tender and moist. No dry, sad spirals here. The dough practically melts in your mouth.
- Real Pumpkin Flavor : This isn’t one of those recipes where the pumpkin gets lost. It’s front and center, backed up by warm spices like cinnamon, nutmeg, and a hint of cloves.
- That Maple Cream Cheese Icing : Oh, this icing. It’s tangy, sweet, and has that deep, almost caramel-like maple flavor that just sings with the pumpkin. It’s the kind of icing you want to eat with a spoon.
- Surprisingly Manageable : Yes, it’s a yeast dough. But I promise, this recipe is forgiving. Even if you’re a little nervous about working with yeast, the pumpkin helps keep the dough soft and easy to handle.
- Perfect for Fall Mornings : Whether it’s a cozy Saturday breakfast, a Thanksgiving morning treat, or something to bring to a brunch, these rolls feel special without requiring a culinary degree.
- Crowd-Pleaser : I brought a batch to my neighbor’s potluck last week, and the pan was empty in fifteen minutes. People were asking for the recipe before they’d even swallowed.
This isn’t just another pumpkin roll recipe. It’s the one I’ve tweaked and tested until the dough rose perfectly every time, the filling stayed put, and the icing didn’t slide right off. It’s comfort food, reimagined for fall. And it’s the kind of recipe that makes you close your eyes after that first warm, gooey bite.
What Ingredients You Will Need
This recipe uses simple, wholesome ingredients that come together to create something truly magical. Most of these are pantry staples, especially if you’ve done any fall baking before. Let me walk you through what you’ll need and why each one matters.
For the Dough
- 3/4 cup (180 ml) warm milk (about 110°F) — Whole milk works best for richness, but 2% will do. The warmth is crucial to activate the yeast.
- 2 1/4 teaspoons (7g) active dry yeast (one standard packet) — I use Red Star or Fleischmann’s. Don’t use instant yeast unless you adjust the method.
- 1/2 cup (100g) granulated sugar — Feeds the yeast and adds sweetness to the dough.
- 1/2 cup (120g) pumpkin puree — Not pumpkin pie filling! Make sure it’s 100% pure pumpkin. I like Libby’s for its consistent texture.
- 1 large egg, room temperature — Helps with structure and richness.
- 3 tablespoons (42g) unsalted butter, melted and slightly cooled — Adds tenderness and flavor.
- 1 teaspoon vanilla extract — Just a little bump of warmth.
- 3 1/2 cups (440g) all-purpose flour, plus more for dusting — Spoon and level your flour; don’t scoop it directly from the bag.
- 1/2 teaspoon salt — Balances the sweetness and strengthens the dough.
- 1 teaspoon ground cinnamon — Because it’s pumpkin season.
- 1/2 teaspoon ground nutmeg — Freshly grated if you have it, but pre-ground works fine.
For the Filling
- 1/2 cup (113g) unsalted butter, softened to room temperature — Not melted, just soft enough to spread.
- 3/4 cup (150g) packed brown sugar — Light or dark works; dark gives a deeper molasses flavor.
- 2 tablespoons ground cinnamon — Yes, this much. It’s a cinnamon roll, after all.
- 1/4 teaspoon ground cloves — A tiny pinch goes a long way. Adds that “something special” warmth.
For the Maple Cream Cheese Icing
- 4 ounces (113g) cream cheese, softened — Full-fat is best for that thick, luscious texture.
- 3 tablespoons (42g) unsalted butter, softened
- 1 1/2 cups (180g) powdered sugar, sifted if lumpy
- 3 tablespoons pure maple syrup — Please, please use the real stuff. Not pancake syrup. The flavor difference is night and day.
- 1/2 teaspoon vanilla extract
- Pinch of salt — Just to cut the sweetness.
I recommend using a good-quality pumpkin puree for the best color and flavor. If you’re dairy-free, you can substitute the butter with a plant-based version and the cream cheese with a dairy-free alternative, just make sure they’re both well-softened.
Equipment Needed
You don’t need a professional kitchen to make these rolls, but a few key tools will make the process much smoother. Here’s what I used.
- Stand mixer with dough hook — This is my preferred method. It does the kneading work for you. A hand mixer with dough hooks can work, but it’s a bit more labor-intensive. You can also knead by hand; it just takes about 10 minutes of elbow grease.
- Large mixing bowl — For the initial mixing if you’re going the hand-kneading route.
- 9×13-inch baking pan — Glass or metal works. I prefer glass because I can see the bottom browning. Grease it well with butter or non-stick spray.
- Rolling pin — A standard one, nothing fancy. If you don’t have one, a clean wine bottle works in a pinch. I’ve been there.
- Sharp knife or bench scraper — For cutting the rolls. A serrated knife also works. Dental floss (unflavored) is a neat trick for clean cuts!
- Kitchen scale — Not essential, but I highly recommend it for measuring flour accurately. It’s a game-changer.
- Plastic wrap or a clean kitchen towel — For covering the dough while it rises.
- Cooling rack — For letting the rolls cool slightly before icing.
My stand mixer is a KitchenAid, and it’s been through dozens of batches of these rolls. If you’re on a budget, a simple hand-me-down mixer or even a sturdy wooden spoon and some patience will get the job done.
Preparation Method
Alright, let’s get to the good part. I’m going to walk you through this step by step, with all the little notes I wish someone had told me the first time I made these. Take your time, and don’t rush the rises.
- Activate the yeast. In the bowl of your stand mixer (or a large bowl if kneading by hand), combine the warm milk, 1 tablespoon of the granulated sugar, and the active dry yeast. Give it a quick stir and let it sit for 5-10 minutes until it’s foamy and smells like bread. If it doesn’t foam, your milk was too hot or too cold, or your yeast is old. Start over if needed—yeast is a living thing, and it’s worth getting right.
- Build the dough. Add the remaining sugar, pumpkin puree, egg, melted butter, and vanilla extract to the yeast mixture. Stir until combined. In a separate bowl, whisk together 3 cups of the flour, salt, cinnamon, and nutmeg. Gradually add the dry ingredients to the wet mixture, mixing on low speed with the dough hook until a shaggy dough forms.
- Knead the dough. With the mixer on medium-low, knead for about 5-7 minutes, adding the remaining 1/2 cup of flour a little at a time until the dough pulls away from the sides of the bowl and feels smooth and slightly tacky (not sticky). If kneading by hand, turn the dough out onto a lightly floured surface and knead for 8-10 minutes. The dough should be soft and supple. A good test: poke it gently with your finger. It should spring back slowly.
- First rise. Form the dough into a ball and place it in a lightly greased bowl, turning it once to coat the top. Cover the bowl tightly with plastic wrap and a clean kitchen towel. Let it rise in a warm, draft-free place for 1 to 1.5 hours, or until it has doubled in size. I like to put mine in the oven with the light on (but the oven off).
- Prepare the filling. While the dough rises, make the filling. In a medium bowl, beat together the softened butter, brown sugar, cinnamon, and cloves until it forms a smooth, spreadable paste. Set it aside at room temperature.
- Roll out the dough. Once the dough has risen, punch it down gently to release the air. Turn it out onto a lightly floured surface. Roll it into a large rectangle, about 16 inches by 12 inches, and about 1/4-inch thick. Don’t stress about perfect edges—a little rustic is fine.
- Add the filling. Spread the filling evenly over the entire surface of the dough, leaving a 1/2-inch border along one of the long edges. This bare edge will help seal the roll. If the filling is a little stiff, warm it in the microwave for 10 seconds to make it spreadable.
- Roll and cut. Starting from the long edge opposite the bare border, tightly roll the dough into a log. Pinch the seam to seal it. Using a sharp knife or bench scraper, cut the log into 12 equal slices, each about 1.5 inches thick. I like to cut the log in half first, then cut each half into six pieces. It helps keep them even.
- Second rise. Arrange the rolls in your greased 9×13-inch baking pan, cut-side up, leaving a little space between each one. They’ll expand as they rise. Cover the pan loosely with plastic wrap or a towel and let them rise for another 30-45 minutes, until they’re puffy and touching each other.
- Bake. Preheat your oven to 350°F (175°C). Bake the rolls for 20-25 minutes, or until they’re golden brown on top and the center rolls feel set when you gently press them. If the tops are browning too quickly, tent the pan loosely with foil for the last 5 minutes. Let them cool in the pan on a wire rack for about 10 minutes before icing.
- Make the icing. While the rolls cool, make the icing. In a medium bowl, beat the softened cream cheese and butter together until smooth and creamy. Gradually add the powdered sugar, beating on low speed until combined. Add the maple syrup, vanilla, and a pinch of salt, then beat on medium-high until the icing is light, fluffy, and spreadable.
- Ice and serve. Spread the icing generously over the warm rolls. Don’t be shy—pile it on. The warmth will help it melt slightly into all the nooks and crannies. Serve immediately while they’re still warm and gooey.
Cooking Tips & Techniques
After making these rolls more times than I can count, I’ve learned a few things the hard way. Here are my best tips to make sure your first batch (or your tenth) turns out perfectly.
- Don’t skip the yeast proof. I know it’s tempting to just dump everything together, but taking that five minutes to make sure your yeast is alive and happy saves you from a dense, flat disaster. If it doesn’t foam, your milk was too hot (killed the yeast) or too cold (didn’t activate it). Aim for 110°F—warm to the touch, like bathwater.
- Go easy on the flour. Pumpkin puree adds moisture, so the dough might feel a little tacky. That’s okay. Add flour only until the dough pulls away from the bowl. Too much flour makes the rolls tough. I’ve made that mistake, and they came out like breadsticks. Not great.
- Use a thermometer if you have one. For the milk temperature, yes. But also for the internal temperature of the baked rolls. They’re done when they reach about 190°F in the center. It’s a foolproof way to know they’re cooked through without guessing.
- Let the rolls cool slightly before icing. If you ice them straight out of the oven, the icing will melt into a puddle. Wait about 10 minutes. You want the rolls warm enough to soften the icing but not hot enough to make it runny. That sweet spot is key.
- Cut with floss for perfect slices. Slide a long piece of unflavored dental floss under the log, cross the ends over the top, and pull. It gives you clean, even cuts without squishing the dough. This was a game-changer for me.
Variations & Adaptations
One of the best things about this recipe is how flexible it is. Here are a few ways I’ve adapted it over the years, depending on my mood or what I have on hand.
- Gluten-Free Version: Substitute the all-purpose flour with a good 1-to-1 gluten-free baking flour blend that contains xanthan gum. The dough will be a bit stickier, so flour your hands and surface well. The texture won’t be exactly the same, but it’s surprisingly good. I’ve made this for a friend with celiac, and she said it was the best gluten-free cinnamon roll she’d ever had.
- Vegan Adaptation: Use plant-based milk (unsweetened almond or oat works well), a flax egg (1 tablespoon ground flaxseed + 3 tablespoons water, let sit for 5 minutes), and vegan butter and cream cheese. The dough might be slightly less tender, but the flavor is still incredible.
- Nutty Twist: Sprinkle 1/2 cup of chopped pecans or walnuts over the filling before rolling. The nuts toast slightly during baking and add a lovely crunch against the soft dough. I do this every Thanksgiving morning.
- Extra Spiced: Add 1/4 teaspoon of ground ginger and a pinch of cardamom to the filling for a more complex, chai-like flavor profile. It’s subtle but makes the rolls feel extra special.
- Overnight Method: After arranging the rolls in the pan for the second rise, cover them tightly with plastic wrap and refrigerate overnight (up to 12 hours). In the morning, let them sit at room temperature for 30 minutes while the oven preheats, then bake as directed. This is a lifesaver for holiday mornings.
Serving & Storage Suggestions
These rolls are best served warm, fresh from the oven, with a generous smear of that maple cream cheese icing melting into every swirl. But let’s be real—you might have leftovers. Here’s how to handle them.
Serving: I like to serve these on a big platter, still in the pan, so everyone can grab their own. They’re perfect with a hot cup of coffee or a tall glass of cold milk. For a brunch spread, pair them with scrambled eggs and fruit salad to balance the sweetness. Honestly, I’ve also eaten them for dinner. No judgment here.
Storage: Store any leftover rolls in an airtight container at room temperature for up to 2 days. The icing will stay soft and delicious. If you need to keep them longer, pop them in the refrigerator for up to 5 days. Just let them come to room temperature before serving, or warm them up.
Reheating: The microwave works in a pinch—about 20 seconds for one roll. But for the best texture, reheat them in a 300°F oven for 5-10 minutes, covered loosely with foil. They’ll come out tasting almost as good as fresh. I’ve also reheated them in an air fryer at 300°F for 3 minutes, and it was surprisingly great.
Freezing: You can freeze the unbaked rolls. After the second rise, wrap the entire pan tightly in plastic wrap and then foil. Freeze for up to 3 months. When you’re ready to bake, thaw them in the refrigerator overnight, then let them sit at room temperature for 30 minutes before baking. You can also freeze baked, un-iced rolls. Thaw, reheat, and ice fresh.
Nutritional Information & Benefits
Let’s be honest—these are a treat. But that doesn’t mean they can’t have a few redeeming qualities. Here’s a rough estimate of what you’re looking at per roll (based on 12 servings).
| Nutrient | Amount Per Roll |
|---|---|
| Calories | ~380 |
| Total Fat | 18g |
| Saturated Fat | 11g |
| Carbohydrates | 52g |
| Sugar | 30g |
| Protein | 6g |
| Fiber | 2g |
| Vitamin A | 45% DV |
The pumpkin puree is a great source of Vitamin A and fiber, which is something, right? The cream cheese and butter add calcium and a bit of protein. But mostly, this is a recipe for joy. I believe in balance—eat your vegetables, and then enjoy a warm, gooey cinnamon roll without guilt. Life’s too short.
Conclusion
These Perfect Pumpkin Cinnamon Rolls with Maple Cream Cheese Icing are more than just a recipe to me. They’re a little time machine, a way to hold onto a memory and share it with the people I love. Every time I pull a pan of these out of the oven, I think about that tiny kitchen in Ohio, and I smile.
I hope you’ll make them for your own people—whether that’s a house full of kids on a Saturday morning, a table of friends at a fall brunch, or just yourself on a quiet afternoon. Don’t worry if they’re not perfect. Mine never are. That’s kind of the point.
If you try this recipe, I’d love to hear about it. Leave a comment below and tell me how they turned out, or share a photo on Pinterest and tag me. Did you try a variation? Did you burn the bottoms like I did my first time? (It’s okay, scrape off the black bits and keep going.) Let’s keep this conversation going. Happy baking, friends.
Frequently Asked Questions
Can I use canned pumpkin pie filling instead of pure pumpkin puree?
No, please don’t. Pumpkin pie filling is already sweetened and spiced, which will throw off the balance of the dough and make the rolls overly sweet and potentially gummy. Stick with 100% pure pumpkin puree for the best results.
My dough is really sticky. What did I do wrong?
It’s probably not you—it’s the pumpkin. Pumpkin puree varies in moisture content. If the dough is too sticky to handle, add a tablespoon of flour at a time while kneading until it becomes smooth and tacky but not sticky. Resist the urge to dump in a lot of flour at once, or the rolls will be dense.
Can I make these rolls without a stand mixer?
Absolutely. You can mix the dough by hand with a wooden spoon and then knead it on a floured surface for about 8-10 minutes. It’s a great arm workout! Just make sure you knead until the dough is smooth and elastic.
How do I know when the rolls are fully baked?
The tops should be golden brown, and the center of the rolls should feel set when you gently press them. If you have an instant-read thermometer, the internal temperature should be around 190°F. If the tops are browning too quickly, tent the pan with foil for the last 5 minutes of baking.
Can I skip the maple syrup in the icing and use something else?
You can, but the flavor will change significantly. If you don’t have maple syrup, you can substitute it with an equal amount of honey or brown rice syrup. For a non-maple version, use 1 teaspoon of maple extract mixed with 3 tablespoons of milk or cream. It won’t be the same, but it’ll still be delicious.
Pin This Recipe!
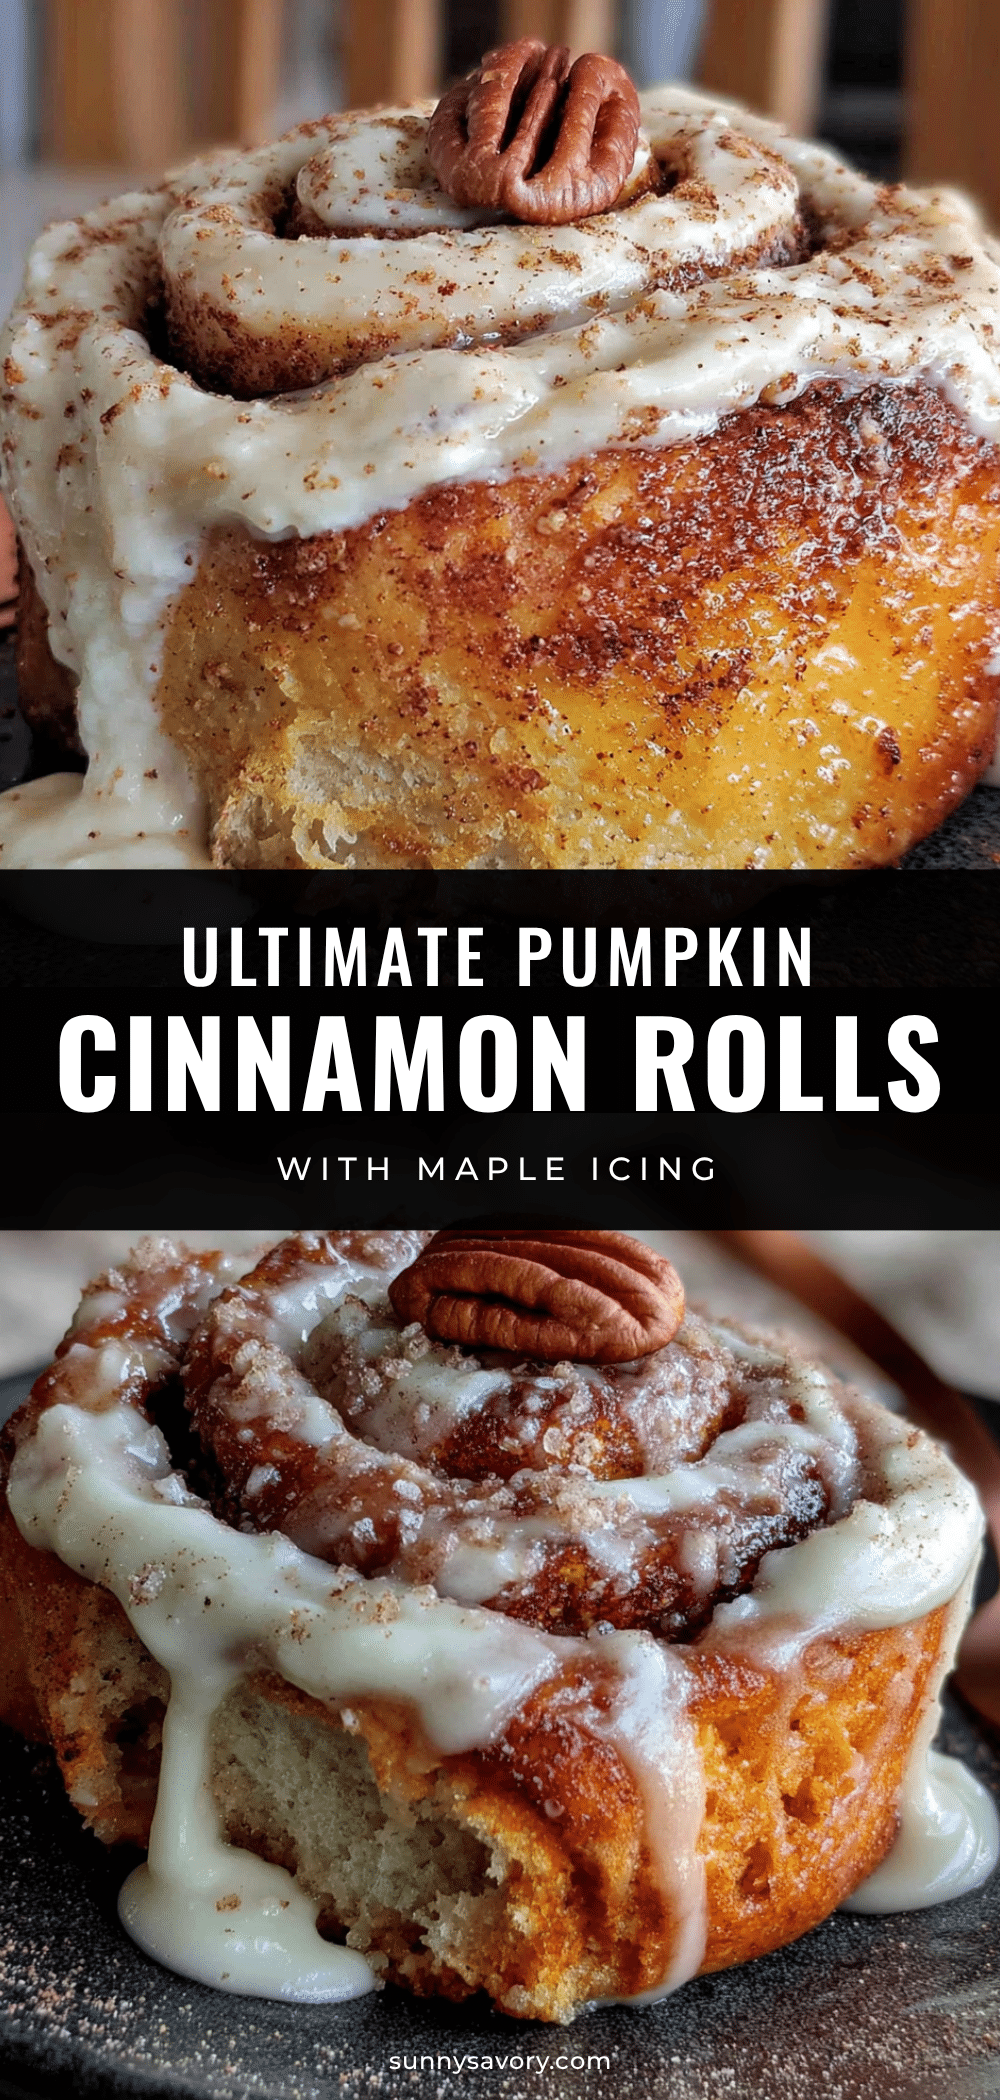
Perfect Pumpkin Cinnamon Rolls with Maple Cream Cheese Icing
Soft, pillowy pumpkin cinnamon rolls with a warm spice filling, topped with a tangy maple cream cheese icing. This recipe recreates a cherished memory of imperfect, homemade rolls that taste like fall.
- Prep Time: 30 minutes
- Cook Time: 25 minutes
- Total Time: 2 hours 30 minutes (includes rising time)
- Yield: 12 servings 1x
- Category: Breakfast, Dessert
- Cuisine: American
Ingredients
- 3/4 cup (180 ml) warm milk (about 110°F)
- 2 1/4 teaspoons (7g) active dry yeast
- 1/2 cup (100g) granulated sugar
- 1/2 cup (120g) pumpkin puree (100% pure, not pie filling)
- 1 large egg, room temperature
- 3 tablespoons (42g) unsalted butter, melted and slightly cooled
- 1 teaspoon vanilla extract
- 3 1/2 cups (440g) all-purpose flour, plus more for dusting
- 1/2 teaspoon salt
- 1 teaspoon ground cinnamon
- 1/2 teaspoon ground nutmeg
- 1/2 cup (113g) unsalted butter, softened (for filling)
- 3/4 cup (150g) packed brown sugar (light or dark)
- 2 tablespoons ground cinnamon
- 1/4 teaspoon ground cloves
- 4 ounces (113g) cream cheese, softened (for icing)
- 3 tablespoons (42g) unsalted butter, softened (for icing)
- 1 1/2 cups (180g) powdered sugar, sifted if lumpy
- 3 tablespoons pure maple syrup
- 1/2 teaspoon vanilla extract
- Pinch of salt
Instructions
- Activate the yeast: In the bowl of a stand mixer, combine warm milk, 1 tablespoon of granulated sugar, and active dry yeast. Stir and let sit for 5-10 minutes until foamy.
- Build the dough: Add remaining sugar, pumpkin puree, egg, melted butter, and vanilla extract to the yeast mixture. Stir until combined. In a separate bowl, whisk together 3 cups of flour, salt, cinnamon, and nutmeg. Gradually add dry ingredients to wet mixture, mixing on low speed until a shaggy dough forms.
- Knead the dough: With mixer on medium-low, knead for 5-7 minutes, adding remaining 1/2 cup of flour a little at a time until dough pulls away from sides and feels smooth and slightly tacky. If kneading by hand, turn out onto floured surface and knead 8-10 minutes.
- First rise: Form dough into a ball and place in a lightly greased bowl, turning to coat. Cover with plastic wrap and a towel. Let rise in a warm place for 1 to 1.5 hours, until doubled in size.
- Prepare the filling: In a medium bowl, beat together softened butter, brown sugar, cinnamon, and cloves until smooth and spreadable. Set aside at room temperature.
- Roll out the dough: Punch down risen dough and turn out onto a lightly floured surface. Roll into a 16×12-inch rectangle, about 1/4-inch thick.
- Add the filling: Spread filling evenly over dough, leaving a 1/2-inch border along one long edge.
- Roll and cut: Starting from the long edge opposite the bare border, tightly roll dough into a log. Pinch seam to seal. Cut into 12 equal slices, about 1.5 inches thick.
- Second rise: Arrange rolls in a greased 9×13-inch baking pan, cut-side up. Cover loosely and let rise for 30-45 minutes until puffy and touching.
- Bake: Preheat oven to 350°F (175°C). Bake rolls for 20-25 minutes until golden brown and center rolls feel set. Let cool in pan on a wire rack for 10 minutes.
- Make the icing: In a medium bowl, beat softened cream cheese and butter until smooth. Gradually add powdered sugar, beating on low. Add maple syrup, vanilla, and pinch of salt, then beat on medium-high until light and fluffy.
- Ice and serve: Spread icing generously over warm rolls. Serve immediately while warm and gooey.
Notes
Don’t skip the yeast proof; ensure milk is at 110°F. Go easy on the flour—dough should be tacky, not sticky. Let rolls cool 10 minutes before icing. For clean cuts, use unflavored dental floss. For overnight method, refrigerate after second rise and let sit at room temperature 30 minutes before baking.
Nutrition
- Serving Size: 1 roll
- Calories: 380
- Sugar: 30
- Sodium: 200
- Fat: 18
- Saturated Fat: 11
- Carbohydrates: 52
- Fiber: 2
- Protein: 6
Keywords: pumpkin cinnamon rolls, maple cream cheese icing, fall baking, yeast rolls, pumpkin recipes, cinnamon rolls



