Love this? Save it for later!
Share the inspiration with your friends
I was at the hardware store last Saturday, trying to figure out which caulk was best for my leaky kitchen sink. Not exactly the place you’d expect to get a life-changing recipe, right? But there I was, standing in the plumbing aisle, when the store manager—a guy named Rick who definitely looked like he knew more about pipe wrenches than pastry—started telling me about homemade butter. He said his grandmother used to make it every week, and that once you try it, you’ll never go back to the store-bought stuff. I almost laughed. Butter from a hardware store guy? But he was so passionate about it, describing the way the cream transforms and that tangy, rich flavor, that I had to give it a try. Honestly, I was just looking for caulk, but I walked out with a quart of heavy cream and a mission.
That first batch was a glorious, messy success. I mean, I splashed buttermilk all over my counter and the dog was licking the mixer paddle for a solid ten minutes. But that taste? Unreal. This quick homemade cultured butter in a stand mixer has completely changed my kitchen game. It’s one of those things that sounds fancy and complicated, but it’s honestly one of the simplest, most satisfying things you can make. Maybe you’ve been there, staring at the butter section in the grocery store, wondering if there’s something better out there. Trust me, there is. And it starts with a simple quart of cream and a little bit of patience.
Why You’ll Love This Recipe
Let’s be real for a second. Making your own butter might sound like something only a pioneer or a professional chef would do. But this quick homemade cultured butter in a stand mixer is the opposite of complicated. It’s the kind of project that makes you feel like a kitchen genius with almost zero effort. I’ve tested this method more times than I can count, tweaking the culturing time and the washing technique to get it just right. Here’s why this recipe is a total game-changer for anyone who loves good food.
- Incredibly Quick & Easy: From cream to finished butter in about 15 minutes of active time. The stand mixer does all the hard work for you.
- Simple, Whole-Food Ingredients: You only need two things: heavy cream and cultured buttermilk. No weird additives or preservatives.
- Unbelievably Delicious: The culturing process gives it a slight tang that you just can’t get from store-bought butter. It’s richer, creamier, and more flavorful.
- Perfect for Any Occasion: Slather it on crusty bread for a weeknight dinner, use it in your weekend baking, or present it as a fancy hostess gift. It fits everywhere.
- Cost-Effective: Making your own butter can actually be cheaper than buying high-quality artisan butter from the store, especially if you catch cream on sale.
This isn’t just another butter recipe. The secret is in the culturing step. By letting the cream sit with a bit of buttermilk overnight, you develop that complex, tangy flavor that makes European-style butters so sought after. It’s comfort food at its most basic and most satisfying. When you spread this on a piece of warm toast, you’ll close your eyes and wonder why you didn’t start making it sooner. It’s perfect for impressing dinner guests without any stress, or for turning a simple weeknight baked potato into something truly memorable.
What Ingredients You Will Need
This recipe is a beautiful example of how simple ingredients can create something extraordinary. We’re using just two main players here, and each one has a specific job to do. The magic of this quick homemade cultured butter in a stand mixer comes from how these two things work together.
- Heavy Cream (4 cups / 1 quart): This is your base. You want to use heavy cream or heavy whipping cream, not half-and-half or light cream. The higher fat content (at least 36%) is what gives you a good yield and a rich, creamy texture. I personally look for cream that is not ultra-pasteurized if I can find it, as it tends to culture a bit more predictably, but ultra-pasteurized works just fine.
- Cultured Buttermilk (¼ cup / 60 ml): This is the secret ingredient that gives the butter its signature tang. Don’t confuse this with the “seasoned” buttermilk you might use for pancakes. You want real, live cultured buttermilk. The live cultures in the buttermilk will ferment the cream slightly, creating that wonderful, complex flavor. I usually grab a small carton of the brand from my local grocery store—it works perfectly every time.
- Salt (optional, to taste): If you want salted butter, you’ll add this at the very end. I recommend using a flaky sea salt like Maldon or a fine sea salt. The amount is up to you—I usually start with about ½ teaspoon and go from there. You can always add more, but you can’t take it out.
- Ice Water (for washing): You’ll need about 1-2 cups of ice-cold water to wash the butter. This step is crucial for removing excess buttermilk, which helps your butter last longer and prevents it from turning rancid quickly. Make sure the water is really cold—add a few ice cubes to it.
Ingredient Selection Tips: If you can get your hands on cream from a local dairy, do it. The flavor difference is noticeable. For the buttermilk, look for a brand that lists live active cultures on the label. Some brands just use thickeners and flavorings, which won’t work the same way. If you’re dairy-free, this recipe unfortunately won’t work, as the science relies on dairy fat and cultures.
Equipment Needed
You don’t need a lot of fancy gear to make this recipe, which is part of its charm. The stand mixer does all the heavy lifting. Here’s exactly what you’ll need to make this quick homemade cultured butter in a stand mixer.
- Stand Mixer: This is non-negotiable for the “quick” part. You could do it by hand with a jar, but that takes forever and will wear out your arm. A stand mixer with the whisk attachment is your best friend here. I use my KitchenAid, and it handles a quart of cream with no problem.
- Fine-Mesh Strainer or Cheesecloth: You’ll need this to drain the buttermilk from the butter solids. A fine-mesh strainer works great. If you’re using cheesecloth, line the strainer with a double layer.
- Large Bowl: You’ll need a big bowl to catch the buttermilk as it separates. A standard mixing bowl works perfectly.
- Spatula or Wooden Spoon: For pressing the butter and working the ice water into it during the washing stage. A silicone spatula is my go-to because it’s flexible and easy to clean.
- Butter Molds or Parchment Paper: For shaping and storing your finished butter. You can use a fancy butter mold if you have one, or simply shape the butter into a log using parchment paper. I usually just roll mine into a log and twist the ends like a piece of candy.
Budget-Friendly Alternative: If you don’t have a stand mixer, you can use a hand mixer with the whisk attachments. It will take a bit longer and you’ll need to hold it steady, but it works. Just be prepared for a bit of splashing!
Preparation Method
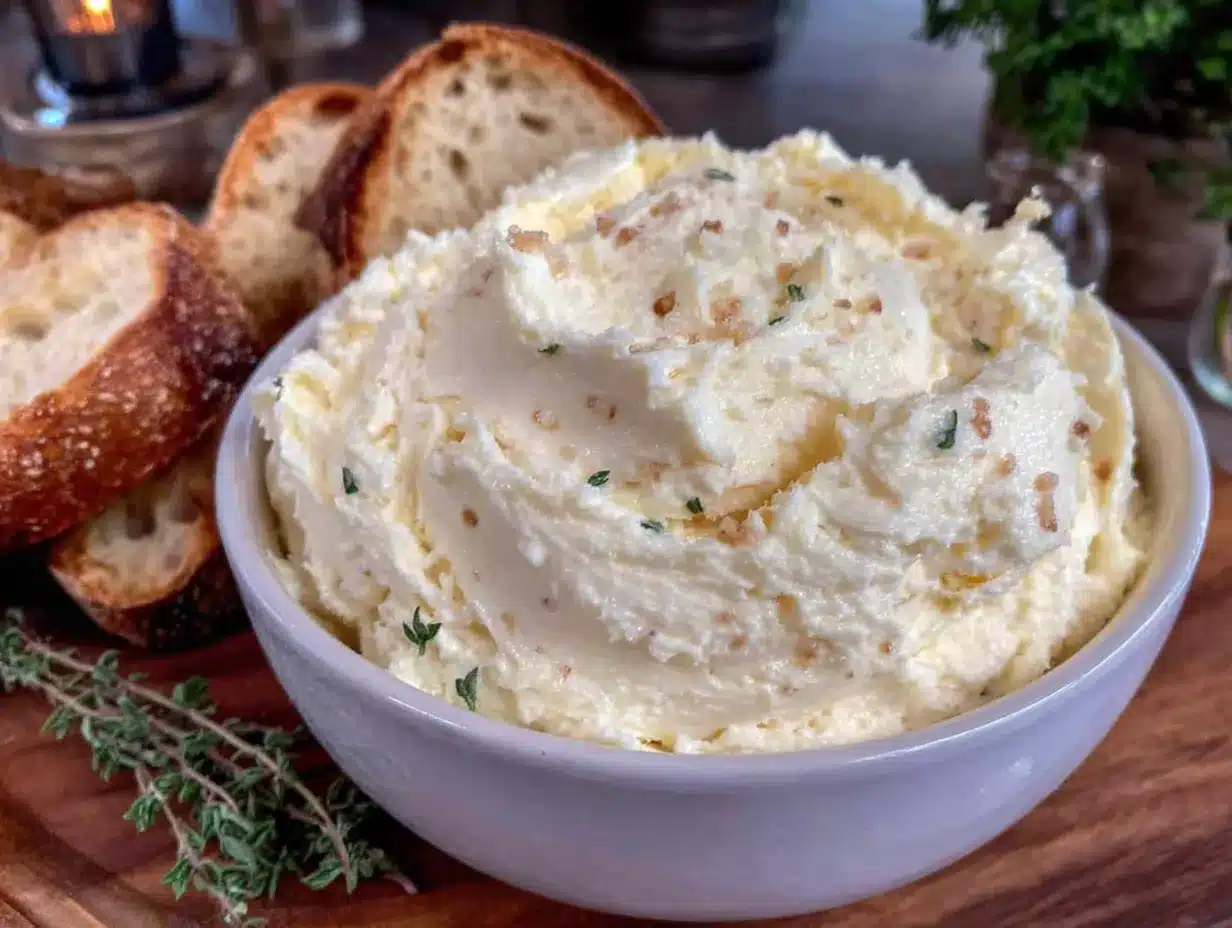
Alright, let’s get to the fun part. Making this quick homemade cultured butter in a stand mixer is a process that feels a little like a science experiment and a little like magic. Follow these steps, and you’ll have gorgeous, tangy butter in no time.
- Culture the Cream (Overnight, 12-24 hours): Pour your 4 cups of heavy cream into a clean glass bowl or jar. Add the ¼ cup of cultured buttermilk and stir gently to combine. Cover the bowl with a clean kitchen towel or plastic wrap and let it sit at room temperature (around 70°F/21°C) for 12 to 24 hours. The cream will thicken slightly and develop a tangy smell, a bit like sour cream. Don’t worry if it looks a little lumpy—that’s exactly what you want. I usually start this in the evening and let it sit until the next afternoon.
- Chill the Cultured Cream (30 minutes): After the culturing period, pop the cream in the refrigerator for about 30 minutes. This step is important! Cold cream whips faster and makes a better butter. If the cream is too warm, it will take forever to separate. Trust me, I learned this the hard way one summer afternoon.
- Whip the Cream (5-10 minutes): Pour the chilled cultured cream into the bowl of your stand mixer. Fit it with the whisk attachment. Start on low speed to avoid splashing, then gradually increase to medium-high. At first, you’ll get whipped cream. Keep going. The mixture will go through a few stages: soft peaks, stiff peaks, and then it will start to look slightly grainy and curdled. This is good! The buttermilk will start to separate from the yellow butter solids.
- Separate the Butter and Buttermilk (2 minutes): Once you see a distinct separation—yellow clumps of butter floating in a thin, white liquid—stop the mixer. Place your fine-mesh strainer over a large bowl. Pour the contents of the mixer bowl into the strainer. The liquid that drains out is real, fresh buttermilk! Save it for pancakes, biscuits, or drinking. The yellow solids left in the strainer are your butter.
- Wash the Butter (5 minutes): This is the most important step for a long-lasting butter. Put the butter solids back into the mixer bowl (you don’t need to clean it first). Pour about ½ cup of ice-cold water over the butter. Using the paddle attachment (or just a spatula if you’re gentle), mix the butter and water on the lowest speed for about 30 seconds. The water will turn cloudy. Pour this water out through your strainer. Repeat this process 3-4 times, or until the water runs clear. The cloudiness is residual buttermilk, and if you leave it in, your butter will spoil faster. You’ll feel the butter get firmer and more cohesive as you wash it.
- Salt the Butter (Optional, 1 minute): Once the water runs clear, you have pure butter. If you want salted butter, now is the time. Sprinkle your salt over the butter and mix it in with a spatula or on the lowest speed of the mixer until it’s evenly distributed. Taste a little bit and adjust if needed. I like to add a generous pinch of flaky sea salt.
- Shape and Store (5 minutes): Gather the butter into a ball in your hands (the cold water will make your hands cold, but it helps keep the butter firm). Place it on a piece of parchment paper. Shape it into a log, a block, or press it into a small ramekin. Wrap it tightly in the parchment paper and store it in the refrigerator. It will firm up completely in about an hour.
Troubleshooting Tip: If your cream is taking forever to separate, it might be too warm. Pop the mixer bowl in the fridge for 15 minutes and try again. Also, make sure you’re using heavy cream, not whipping cream, which has a lower fat content.
Cooking Tips & Techniques
After making this quick homemade cultured butter in a stand mixer more times than I can count, I’ve picked up a few tricks that make the process smoother and the results even better. Let me share some of the lessons I learned the hard way so you don’t have to.
First, don’t walk away from the mixer during the whipping stage. The transition from whipped cream to butter happens fast, and if you leave it too long, you’ll end up with butter that’s flying around the bowl and making a mess. I once got distracted by a phone call and came back to find butter chunks all over my kitchen walls. Not my finest moment.
The washing step is where most people go wrong. I used to skip it or just do one quick rinse, and my butter would go bad within a week. Now, I’m religious about washing it until the water runs clear. It makes a huge difference in shelf life. Also, make sure your water is ice-cold. Warm water will start to melt the butter and make it greasy instead of firm and creamy.
Finally, don’t throw away that buttermilk! It’s a beautiful byproduct. I use it in my pancakes, biscuits, and even in salad dressings. It has a more complex flavor than store-bought buttermilk because it’s the real deal. If you don’t plan to use it right away, you can freeze it in ice cube trays and pop out a cube whenever you need it.
Variations & Adaptations
One of the best things about this quick homemade cultured butter in a stand mixer is how easily you can customize it. Once you’ve mastered the basic method, the possibilities are endless. Here are a few of my favorite variations to keep things interesting.
Herb & Garlic Butter: This is my go-to for steak nights or for spreading on crusty bread. After you’ve washed and salted the butter, fold in 2 tablespoons of finely chopped fresh herbs (parsley, chives, and thyme are a great combo) and 1-2 cloves of minced garlic. Mix it well and shape it into a log. It’s incredible on grilled corn on the cob, too.
Honey Cinnamon Butter: For a sweet treat that’s perfect on pancakes, waffles, or toast, add 2-3 tablespoons of honey and ½ teaspoon of ground cinnamon to your finished butter. Mix it in thoroughly. This one is a huge hit with kids, and it makes a wonderful gift when wrapped up nicely.
Smoked Salt Butter: If you want a savory butter with a deep, complex flavor, swap your regular sea salt for smoked salt. Start with ½ teaspoon and adjust to taste. The smoky flavor pairs beautifully with the tang of the cultured butter. It’s fantastic on a baked potato or a simple piece of grilled fish.
Serving & Storage Suggestions
This butter is a star all on its own, but how you serve and store it can make a big difference. Here’s what I’ve learned about getting the most out of your quick homemade cultured butter in a stand mixer.
Serving Temperature: For the best flavor and spreadability, take your butter out of the refrigerator about 15-20 minutes before you plan to use it. Cold butter is hard to spread, but room temperature butter is a dream. It allows all those complex, tangy flavors to really shine through.
Presentation Ideas: Serve it on a small butter dish or a wooden board. If you’ve made a flavored version, you can garnish the top with a pinch of the same herbs or spices you used. For a dinner party, I like to press the butter into a small ramekin and create a swirl on top with a knife. It looks so elegant with almost no effort.
Storage Instructions: Wrap your butter tightly in parchment paper or plastic wrap, or store it in an airtight container. It will keep in the refrigerator for up to 3-4 weeks. Because we washed it so thoroughly, it will last much longer than standard homemade butter.
Freezing Instructions: This butter freezes beautifully. Wrap it tightly in a double layer of plastic wrap, then place it in a freezer-safe bag. It will keep for up to 6 months. When you’re ready to use it, just thaw it in the refrigerator overnight. The flavor stays fantastic.
Flavor Development: The flavor of cultured butter actually deepens a bit after a day or two in the fridge. So don’t be disappointed if it tastes even better on day two than it did on day one. It’s one of those things that just gets better with time.
Nutritional Information & Benefits
Let’s talk about what’s actually in this butter. While it’s still butter—so it’s high in fat and calories—making it yourself means you know exactly what’s in it. This quick homemade cultured butter in a stand mixer is a whole food with a surprisingly good nutritional profile compared to some processed spreads.
Estimated Nutritional Values (per 1 tablespoon serving):
- Calories: 100-110
- Total Fat: 11-12g
- Saturated Fat: 7-8g
- Cholesterol: 30-35mg
- Sodium: 0-30mg (depending on salt added)
- Carbohydrates: 0g
- Protein: 0g
Health Benefits: Butter from grass-fed cows is rich in fat-soluble vitamins like A, D, E, and K2. It also contains conjugated linoleic acid (CLA), which has been linked to various health benefits. The culturing process may also make the butter slightly easier to digest for some people, as the fermentation breaks down some of the lactose. It’s a natural, unprocessed fat that can be part of a healthy diet when used in moderation.
Dietary Considerations: This recipe is naturally gluten-free, low-carb, and keto-friendly. The main allergen to be aware of is dairy. It is not suitable for those with a dairy allergy or lactose intolerance (though the culturing process reduces lactose slightly).
Conclusion
So there you have it. A simple, two-ingredient recipe that will completely change the way you think about butter. That chance encounter with Rick in the hardware store led me to one of my favorite kitchen projects, and I honestly can’t imagine going back to the store-bought stuff now. This quick homemade cultured butter in a stand mixer is more than just a condiment—it’s an experience. It’s the smell of fresh cream, the satisfying slap of the butter separating, and the pure joy of spreading something you made with your own hands on a piece of warm bread.
I really hope you give this a try. Don’t be afraid to experiment with different flavors or to make a big batch to share with friends. It’s one of those recipes that feels special without being fussy. If you make it, I’d love to hear about it. Drop a comment below and let me know what flavor variation you tried, or tag me in your photos. Until next time, happy cooking—and happy butter making!
Frequently Asked Questions
Can I make this without a stand mixer?
Absolutely! While a stand mixer is the fastest and easiest method, you can use a hand mixer with whisk attachments. It will take a bit longer and you’ll need to hold it steady, but it works. You can even make it in a mason jar by shaking it vigorously—though that takes a good 15-20 minutes and a lot of arm strength!
Why did my cream not separate into butter?
This usually happens for one of two reasons. First, your cream might not be cold enough. Chilling the cultured cream for 30 minutes before whipping is crucial. Second, you might be using cream with a low fat content, like light cream or half-and-half. Stick with heavy cream or heavy whipping cream (at least 36% milk fat).
How long does homemade cultured butter last?
If you wash it thoroughly (until the water runs clear), it will last 3-4 weeks in the refrigerator. If you skip the washing step or don’t wash it well, it will spoil much faster, sometimes in just a week. You can also freeze it for up to 6 months.
Can I use this butter for baking?
Yes, you can! The flavor is incredible in baked goods. However, keep in mind that homemade butter has a slightly higher water content than some commercial butters. For most recipes, like cookies or cakes, it works perfectly. For very delicate pastries like croissants or puff pastry, you might want to use a commercial butter with a very specific fat content for the best lamination.
What can I do with the leftover buttermilk?
Don’t throw it away! This is real, live buttermilk, and it’s fantastic for baking. Use it in pancakes, waffles, biscuits, scones, or salad dressings. You can even drink it straight if you like the tangy flavor. It will keep in the refrigerator for about a week, or you can freeze it in ice cube trays for later use.
Pin This Recipe!
Perfect Quick Homemade Cultured Butter in a Stand Mixer

This quick homemade cultured butter in a stand mixer is incredibly easy and yields a rich, tangy, and delicious butter that will change your kitchen game forever. With just two main ingredients and about 15 minutes of active time, you can create a gourmet staple that’s perfect for any occasion.
- Prep Time: 15 minutes
- Cook Time: 0 minutes
- Total Time: 12-24 hours (including culturing time) + 15 minutes active time
- Yield: About 1 pound (16 servings of 1 tablespoon each) 1x
- Category: Condiment
- Cuisine: American
Ingredients
- 4 cups (1 quart) heavy cream (at least 36% milk fat)
- ¼ cup (60 ml) cultured buttermilk (with live active cultures)
- Salt (optional, to taste; e.g., ½ teaspoon flaky sea salt)
- Ice water (for washing, about 1-2 cups)
Instructions
- Culture the cream: Pour the heavy cream into a clean glass bowl or jar. Add the cultured buttermilk and stir gently to combine. Cover with a clean kitchen towel or plastic wrap and let sit at room temperature (around 70°F/21°C) for 12 to 24 hours until thickened and tangy.
- Chill the cultured cream: After culturing, refrigerate the cream for about 30 minutes. Cold cream whips faster and yields better butter.
- Whip the cream: Pour the chilled cultured cream into the bowl of a stand mixer fitted with the whisk attachment. Start on low speed to avoid splashing, then gradually increase to medium-high. Whip until the cream separates into yellow butter solids and thin, white buttermilk (about 5-10 minutes).
- Separate the butter and buttermilk: Place a fine-mesh strainer over a large bowl. Pour the contents of the mixer bowl into the strainer. Reserve the liquid buttermilk for another use. The yellow solids in the strainer are your butter.
- Wash the butter: Return the butter solids to the mixer bowl. Add about ½ cup of ice-cold water. Mix on the lowest speed with the paddle attachment (or use a spatula) for about 30 seconds. Pour out the cloudy water through the strainer. Repeat this process 3-4 times until the water runs clear.
- Salt the butter (optional): Once the water runs clear, add salt to taste (e.g., ½ teaspoon flaky sea salt). Mix with a spatula or on the lowest speed until evenly distributed.
- Shape and store: Gather the butter into a ball with your hands. Place on parchment paper and shape into a log, block, or press into a ramekin. Wrap tightly and refrigerate. It will firm up completely in about an hour.
Notes
For best results, use heavy cream with at least 36% milk fat and not ultra-pasteurized if possible. The culturing time can vary from 12 to 24 hours; longer culturing yields a tangier butter. Washing the butter thoroughly is crucial for extending its shelf life. The leftover buttermilk is a valuable byproduct—use it in pancakes, biscuits, or dressings. The butter can be frozen for up to 6 months.
Nutrition
- Serving Size: 1 tablespoon
- Calories: 100110
- Sodium: 30
- Fat: 1112
- Saturated Fat: 78
Keywords: homemade butter, cultured butter, stand mixer butter, easy butter recipe, tangy butter, homemade dairy, butter from scratch



