Love this? Save it for later!
Share the inspiration with your friends
“Why can’t you just use a cookie cutter after they’re baked?” My teenage niece, Maya, asked this while I was elbow-deep in red velvet batter, meticulously trying to pipe it into a heart-shaped pan. I started to explain why that wouldn’t work—the edges would be messy, the brownies would crumble, it was a surefire way to ruin the whole batch. Then I stopped. Honestly, I had no good reason other than “that’s not how I’ve always done it.” So, on a random Tuesday night in January, I handed her the spatula and let her take the lead.
She baked the brownies in a standard square pan, let them cool completely (the hardest part, let me tell you), and then pressed a heart-shaped cookie cutter into the center. The first one came out perfect. I mean, *perfect*. The edges were clean, the crumb was intact, and it looked like something from a fancy bakery. I felt a little sheepish, standing there with red-stained fingers from my overly complicated method. She just smiled and said, “Told you.” That moment stuck with me. It wasn’t just about the brownies; it was about letting go of the “right” way to do something and trusting a simpler path.
Maybe you’ve been there, overcomplicating a recipe because you think it needs to be harder to be good. These red velvet brownies are proof that the opposite is true. They’re rich, fudgy, and have that classic tangy-sweet red velvet flavor that makes them perfect for Valentine’s Day. The heart shape adds that extra touch of love, but honestly, the recipe itself is so easy you’ll be making it for every occasion—not just February 14th. I keep making them because they remind me that sometimes the best ideas come from the people who aren’t afraid to ask “why not?”
Why You’ll Love This Recipe
Let’s be real—Valentine’s Day desserts can be a stress-fest. You want something impressive but don’t have hours to spend in the kitchen. These red velvet heart brownies are your answer. I’ve tested this recipe at least a dozen times (my family is officially tired of red velvet, but I’m not), and it consistently delivers that perfect fudgy texture with a crackly top.
- Incredibly Easy: No complicated piping or special pans needed. Just bake, cool, and cut into hearts. Even a beginner can nail this.
- Simple Ingredients: You probably have most of these in your pantry right now. No hunting down obscure extracts or specialty flours.
- Perfect for Valentine’s Day: The heart shape and rich red color make it the ultimate romantic dessert. It’s also great for Galentine’s parties or classroom treats.
- Crowd-Pleaser: I’ve brought these to three different gatherings, and they disappear every single time. Kids and adults both go crazy for them.
- Unbelievably Fudgy: The texture is that perfect middle ground between a brownie and a cake—dense, moist, and melt-in-your-mouth good.
What makes this recipe different? It’s the combination of a classic red velvet flavor with a foolproof brownie base. I use a touch of buttermilk and vinegar to get that signature tang, plus a generous amount of cocoa powder for depth. The heart shape isn’t just cute—it’s a conversation starter. When you set these out on a platter, people actually stop and smile. That’s the kind of reaction you want when you’re hosting.
This recipe isn’t just good—it’s the kind that makes you close your eyes after the first bite. It’s comfort food reimagined as something special. Perfect for impressing your date without breaking a sweat, or turning a simple Tuesday night into a celebration.
What Ingredients You Will Need
This recipe uses simple, mostly pantry-staple ingredients to deliver that classic red velvet flavor and fudgy texture. The magic happens when you get the balance of cocoa, buttermilk, and red food coloring just right.
For the Brownies:
- 1/2 cup (113g) unsalted butter, melted (I use Challenge butter—it has a higher fat content that makes the brownies extra tender)
- 1 cup (200g) granulated sugar (adds sweetness and helps create that crackly top)
- 2 large eggs, room temperature (room temperature eggs incorporate better, giving a smoother batter)
- 1 teaspoon vanilla extract (pure vanilla, not imitation—trust me on this)
- 1 tablespoon red food coloring (gel food coloring works best for a vibrant red without thinning the batter)
- 1 tablespoon unsweetened cocoa powder (I prefer Hershey’s Special Dark for a richer flavor)
- 1/2 cup (60g) all-purpose flour (spoon and level it—don’t scoop directly from the bag)
- 1/4 teaspoon salt (balances the sweetness and enhances the chocolate)
- 1/2 teaspoon baking powder (gives just a little lift without making them cakey)
- 1 tablespoon buttermilk (adds tanginess and tenderness; you can make your own by adding 1 teaspoon vinegar to regular milk)
- 1/2 teaspoon white vinegar (reacts with the baking powder for a lighter texture)
For the Cream Cheese Frosting (Optional but Recommended):
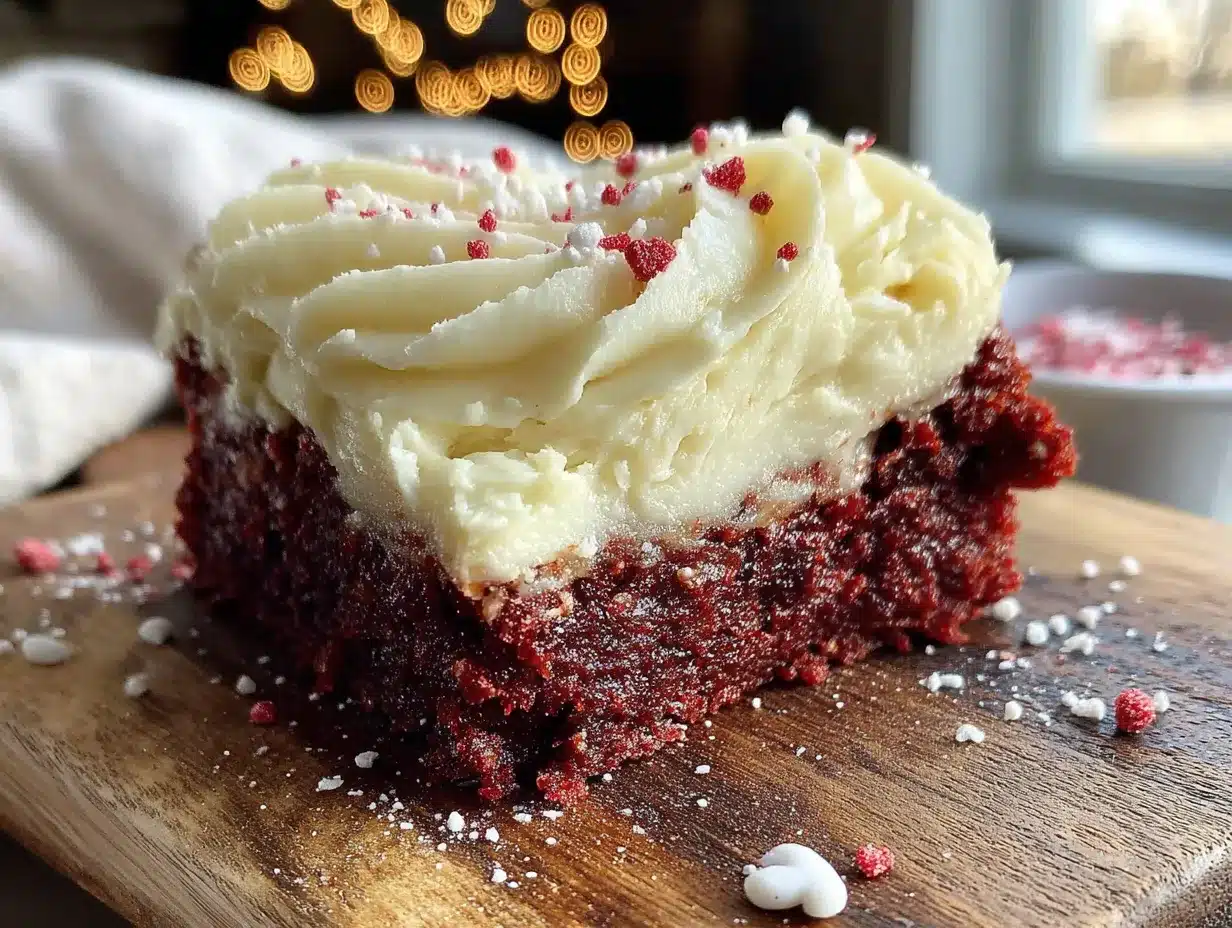
- 4 oz (113g) cream cheese, softened (Philadelphia brand is my go-to for consistent results)
- 1/4 cup (56g) unsalted butter, softened
- 1 cup (120g) powdered sugar (sift it first to avoid lumps)
- 1/2 teaspoon vanilla extract
Ingredient Selection Tips: Look for a high-quality red gel food coloring—I recommend Americolor Super Red. Liquid food coloring can make the batter too thin. For the cocoa powder, natural unsweetened is fine, but Dutch-processed gives a milder chocolate flavor that pairs beautifully with the cream cheese frosting. If you’re dairy-free, use vegan butter and a dairy-free cream cheese alternative like Kite Hill.
Substitution Guidance: No buttermilk? No problem. Add 1 teaspoon of lemon juice or vinegar to regular milk and let it sit for 5 minutes. For a gluten-free version, swap the all-purpose flour with a 1:1 gluten-free baking flour blend. I’ve tried this with Bob’s Red Mill, and it works perfectly.
Equipment Needed
You don’t need anything fancy for these red velvet heart brownies. Here’s what you’ll need:
- 8×8 inch square baking pan (metal pans give the best edges, but glass works too)
- Parchment paper (for easy lifting—this is non-negotiable if you want clean edges)
- Mixing bowls (one large, one medium)
- Whisk (for the dry ingredients and the batter)
- Rubber spatula (for folding and scraping every last bit of batter)
- Heart-shaped cookie cutter (2.5 to 3 inches wide—metal cutters cut cleaner than plastic)
- Cooling rack (allows air to circulate so the brownies cool evenly)
- Electric mixer or hand whisk (for the frosting, if you’re making it)
Budget-Friendly Options: If you don’t have a heart-shaped cookie cutter, you can use a sharp knife to cut the brownies into squares and arrange them on a platter in a heart shape. Or, use a stencil made from cardboard. For the pan, any 8×8 inch baking dish works—even a disposable aluminum one in a pinch.
Personal Note: I’ve tried using silicone pans, and while they’re non-stick, the brownies don’t get those crispy edges that brownie lovers crave. Stick with metal if you can. And please, please line your pan with parchment paper. I once forgot, and I spent 20 minutes chiseling brownie chunks out of the corners. Not fun.
Preparation Method
This is where the magic happens. Follow these steps carefully, and you’ll have perfect red velvet heart brownies every time.
- Preheat and Prep: Preheat your oven to 350°F (175°C). Line your 8×8 inch pan with parchment paper, leaving some overhang on two opposite sides. This creates “handles” for lifting the brownies out later. Lightly grease the parchment with butter or non-stick spray.
- Melt the Butter: In a large microwave-safe bowl, melt the 1/2 cup of unsalted butter in 30-second intervals, stirring between each. You want it just melted—not hot. Let it cool for 2 minutes. If it’s too hot, it’ll cook the eggs when you add them.
- Mix Sugar and Eggs: Add the 1 cup of granulated sugar to the melted butter and whisk until combined. It’ll look a little grainy—that’s fine. Add the 2 room-temperature eggs, one at a time, whisking well after each. The mixture should be smooth and slightly thickened. Stir in the 1 teaspoon of vanilla extract.
- Add the Red Velvet Color: In a small bowl, mix the 1 tablespoon of red food coloring with the 1 tablespoon of unsweetened cocoa powder to form a paste. This prevents the cocoa from clumping. Add this paste to the wet ingredients and whisk until the color is uniform. It should be a vibrant, deep red.
- Combine Dry Ingredients: In a separate medium bowl, whisk together the 1/2 cup of all-purpose flour, 1/4 teaspoon of salt, and 1/2 teaspoon of baking powder. Make sure there are no lumps.
- Fold Dry into Wet: Gradually add the dry ingredients to the wet mixture, folding gently with a rubber spatula. Mix just until you see the last streak of flour disappear. Overmixing will make the brownies tough.
- Add Buttermilk and Vinegar: In a tiny bowl or measuring cup, combine the 1 tablespoon of buttermilk and the 1/2 teaspoon of white vinegar. Pour this into the batter and fold it in gently. The batter will be thick and glossy—that’s what you want.
- Bake: Pour the batter into the prepared pan and spread it evenly with your spatula. Bake for 20-25 minutes, or until a toothpick inserted into the center comes out with a few moist crumbs attached. If it comes out clean, you’ve overbaked them. Start checking at the 20-minute mark.
- Cool Completely: Place the pan on a cooling rack and let the brownies cool completely in the pan. This is crucial—if you try to cut them while they’re warm, they’ll fall apart. I know it’s tempting, but wait at least 1 hour. For best results, refrigerate for 30 minutes after cooling.
- Cut into Hearts: Once completely cool, use the parchment handles to lift the brownie block out of the pan and onto a cutting board. Press your heart-shaped cookie cutter firmly into the brownie, wiggling it slightly to release the edges. Lift straight up. Repeat until you’ve cut out as many hearts as possible. You’ll get about 6-8 hearts from one batch, depending on the size of your cutter.
- Make the Frosting (Optional): In a medium bowl, beat the softened cream cheese and butter together until smooth and creamy. Add the sifted powdered sugar and vanilla extract, and beat until fluffy. If it’s too thick, add a teaspoon of milk. Pipe or spread a small dollop onto each heart brownie.
Sensory Cues: When you pull the brownies from the oven, the top should be set and slightly crackly. The edges will be pulling away from the pan just a bit. The smell is intoxicating—chocolatey with a hint of tanginess from the buttermilk. When you press the center gently, it should spring back slightly but still feel soft underneath.
Troubleshooting Tip: If your brownies are too cakey, you likely overmixed the batter or overbaked them. Next time, stop mixing as soon as the flour disappears, and pull them out at the 20-minute mark even if they look slightly underdone. They’ll continue to set as they cool.
Cooking Tips & Techniques
I’ve made these red velvet heart brownies more times than I can count, and I’ve learned a few things the hard way. Here’s what I wish someone had told me.
Don’t Overbake, Seriously. This is the number one mistake. Red velvet brownies are meant to be fudgy, not cakey. Pull them out when a toothpick comes out with moist crumbs, not clean. I once left them in for 28 minutes because I got distracted by a phone call, and they were dry and crumbly. Learn from my failure.
Cool Before Cutting. I know, I know—you want to see those hearts immediately. But warm brownies are fragile. Let them cool completely, then pop them in the fridge for 30 minutes. This firms up the structure, making the cookie cutter glide through like butter. The edges will be clean and sharp.
Use a Sharp Cookie Cutter. A dull cutter will squish the edges instead of cutting them. If your cutter is a bit dull, dip it in powdered sugar before pressing down—it helps it slide through without sticking. Also, press straight down and lift straight up. No twisting, or you’ll get ragged edges.
Multitasking Strategy: While the brownies are baking, make the frosting and get your serving platter ready. Once they’re cooling, you can clean up the kitchen. That way, when they’re ready to cut, you’re just focusing on the fun part.
Consistency Tip: For the most uniform hearts, use a ruler to mark where you’ll press the cutter. I eyeball it, and sometimes I end up with a half-heart on the edge. Not a big deal—I just eat those myself. But if you’re serving guests, a little planning goes a long way.
Variations & Adaptations
One of the best things about this recipe is how flexible it is. Here are some ways to make it your own.
1. Gluten-Free Version: Substitute the all-purpose flour with a 1:1 gluten-free baking flour blend. I’ve used Cup4Cup, and the texture is almost identical. Just be careful not to overmix, as gluten-free batters can get gummy.
2. Vegan Red Velvet Brownies: Replace the butter with vegan butter (like Miyoko’s), use flax eggs (1 tablespoon ground flaxseed + 3 tablespoons water per egg), and swap the buttermilk for almond milk with a teaspoon of apple cider vinegar. The texture will be slightly denser but still delicious.
3. White Chocolate Drizzle: Instead of cream cheese frosting, melt 1/2 cup of white chocolate chips with 1 teaspoon of coconut oil and drizzle it over the hearts. The white chocolate against the red velvet is stunning for Valentine’s Day.
4. Mini Heart Bites: Use a small heart-shaped cutter (1.5 inches) to make bite-sized brownies. These are perfect for party platters or gift bags. You’ll get about 12-15 mini hearts from one batch.
5. Peppermint Red Velvet: Add 1/2 teaspoon of peppermint extract to the batter along with the vanilla. Top with crushed candy canes for a festive holiday twist. I tried this last Christmas, and it was a huge hit.
Personal Variation: My favorite adaptation is adding a layer of cheesecake swirl. Before baking, drop spoonfuls of cream cheese mixture (4 oz cream cheese, 1/4 cup sugar, 1 egg) onto the batter and swirl with a knife. It creates these beautiful marbled hearts that taste incredible.
Serving & Storage Suggestions
These red velvet heart brownies are made for sharing. Here’s how to serve them like a pro.
Serving Temperature: Serve at room temperature for the best texture. If you’ve refrigerated them, let them sit out for 15-20 minutes before serving. The frosting softens slightly, and the brownies become perfectly fudgy again.
Presentation Tips for Hosting: Arrange the heart brownies on a white platter in a single layer, slightly overlapping. Dust with powdered sugar through a fine-mesh sieve for a snowy effect. Add a few fresh raspberries or strawberries around the edges for color contrast. If you’re feeling extra fancy, drizzle some melted dark chocolate over the top.
What to Serve Alongside: These pair beautifully with a glass of cold milk, a hot latte, or even a glass of red wine (try a fruity Merlot). For a dessert spread, serve them alongside vanilla bean ice cream and fresh whipped cream. The richness of the brownie balances perfectly with something cold and creamy.
Storage Instructions: Store unfrosted brownies in an airtight container at room temperature for up to 3 days. If frosted, keep them in the refrigerator for up to 5 days. The brownies actually get more moist and flavorful on day two—the flavors meld together beautifully.
Freezing Instructions: These freeze like a dream. Place the cut hearts on a baking sheet and freeze until solid (about 1 hour). Transfer to a freezer-safe bag or container, separating layers with parchment paper. They’ll keep for up to 3 months. Thaw at room temperature for 30 minutes before serving.
Reheating Tip: If you want that just-baked warmth, pop a heart brownie in the microwave for 10-15 seconds. It’ll be soft and gooey, almost like a molten lava cake. Just be careful not to overheat—10 seconds is plenty.
Nutritional Information & Benefits
Let’s be honest—these are a treat, not a health food. But knowing what’s in them helps you enjoy them mindfully.
Estimated Nutritional Values (per heart brownie without frosting):
- Calories: 220
- Fat: 12g
- Carbohydrates: 28g
- Protein: 3g
- Sugar: 20g
- Fiber: 1g
Health Benefits of Key Ingredients: Cocoa powder is rich in antioxidants called flavonoids, which can help reduce inflammation and improve heart health. Buttermilk provides a small amount of calcium and protein. And hey, dark red foods like beets (which give red velvet its color in some recipes) are packed with nutrients—though we’re using food coloring here, so take that with a grain of salt!
Dietary Considerations: This recipe contains gluten, dairy, and eggs. For a gluten-free version, see the variations section above. For dairy-free, use vegan butter and a dairy-free cream cheese alternative. The recipe is not suitable for vegans unless adapted.
Potential Allergens: Wheat (gluten), dairy (butter, buttermilk, cream cheese), eggs. Always check your food coloring for any hidden allergens—most are safe, but some brands may contain soy.
Personal Wellness Perspective: I believe in balance. These brownies are a celebration food, meant to be enjoyed on special occasions. I don’t stress about the sugar content when I’m making them for Valentine’s Day. Life is short—eat the heart-shaped brownie.
Conclusion
These perfect heart-shaped red velvet brownies are more than just a dessert—they’re a little act of love. Whether you’re making them for a partner, a friend, or just because you deserve something beautiful, they deliver every single time. The fudgy texture, the vibrant red color, the adorable heart shape—it all comes together in a recipe that’s surprisingly simple but looks like you spent hours on it.
I love this recipe because it reminds me that sometimes the best things come from letting go of control. My niece Maya taught me that. So go ahead, make these brownies your own. Use a different frosting, add some sprinkles, skip the hearts and cut them into squares if you want. The point is to enjoy the process and share the results with people you care about.
I’d love to hear how yours turn out! Drop a comment below and tell me about your Valentine’s Day dessert plans. Did you try a variation? Did your heart cutters work perfectly? Share your photos and tag me—I can’t wait to see your beautiful creations. Happy baking, and happy Valentine’s Day!
Frequently Asked Questions
Can I make these red velvet brownies ahead of time for a party?
Absolutely! You can bake the brownies up to 2 days in advance. Store them unfrosted in an airtight container at room temperature. Cut them into hearts and add frosting on the day you plan to serve them for the freshest look.
Why did my brownies turn out cakey instead of fudgy?
This usually happens for two reasons: overmixing the batter or overbaking. Mix just until the flour disappears, and pull the brownies out of the oven at the 20-minute mark even if they look slightly underdone. They’ll continue to set as they cool.
Can I use natural red food coloring instead of gel?
You can, but gel food coloring gives a much more vibrant red color without thinning the batter. Liquid food coloring requires more volume to achieve the same shade, which can affect the texture. I highly recommend gel for this recipe.
How do I get clean, sharp heart shapes without the brownies crumbling?
The secret is patience. Let the brownies cool completely, then refrigerate them for 30 minutes before cutting. Use a sharp metal cookie cutter and press straight down without twisting. Dip the cutter in powdered sugar between cuts to prevent sticking.
Can I freeze the heart-shaped brownies after cutting them?
Yes! Place the cut hearts on a baking sheet and freeze until solid, then transfer to a freezer-safe bag. They’ll keep for up to 3 months. Thaw at room temperature for 30 minutes before serving. For best results, freeze without frosting and add it after thawing.
Pin This Recipe!
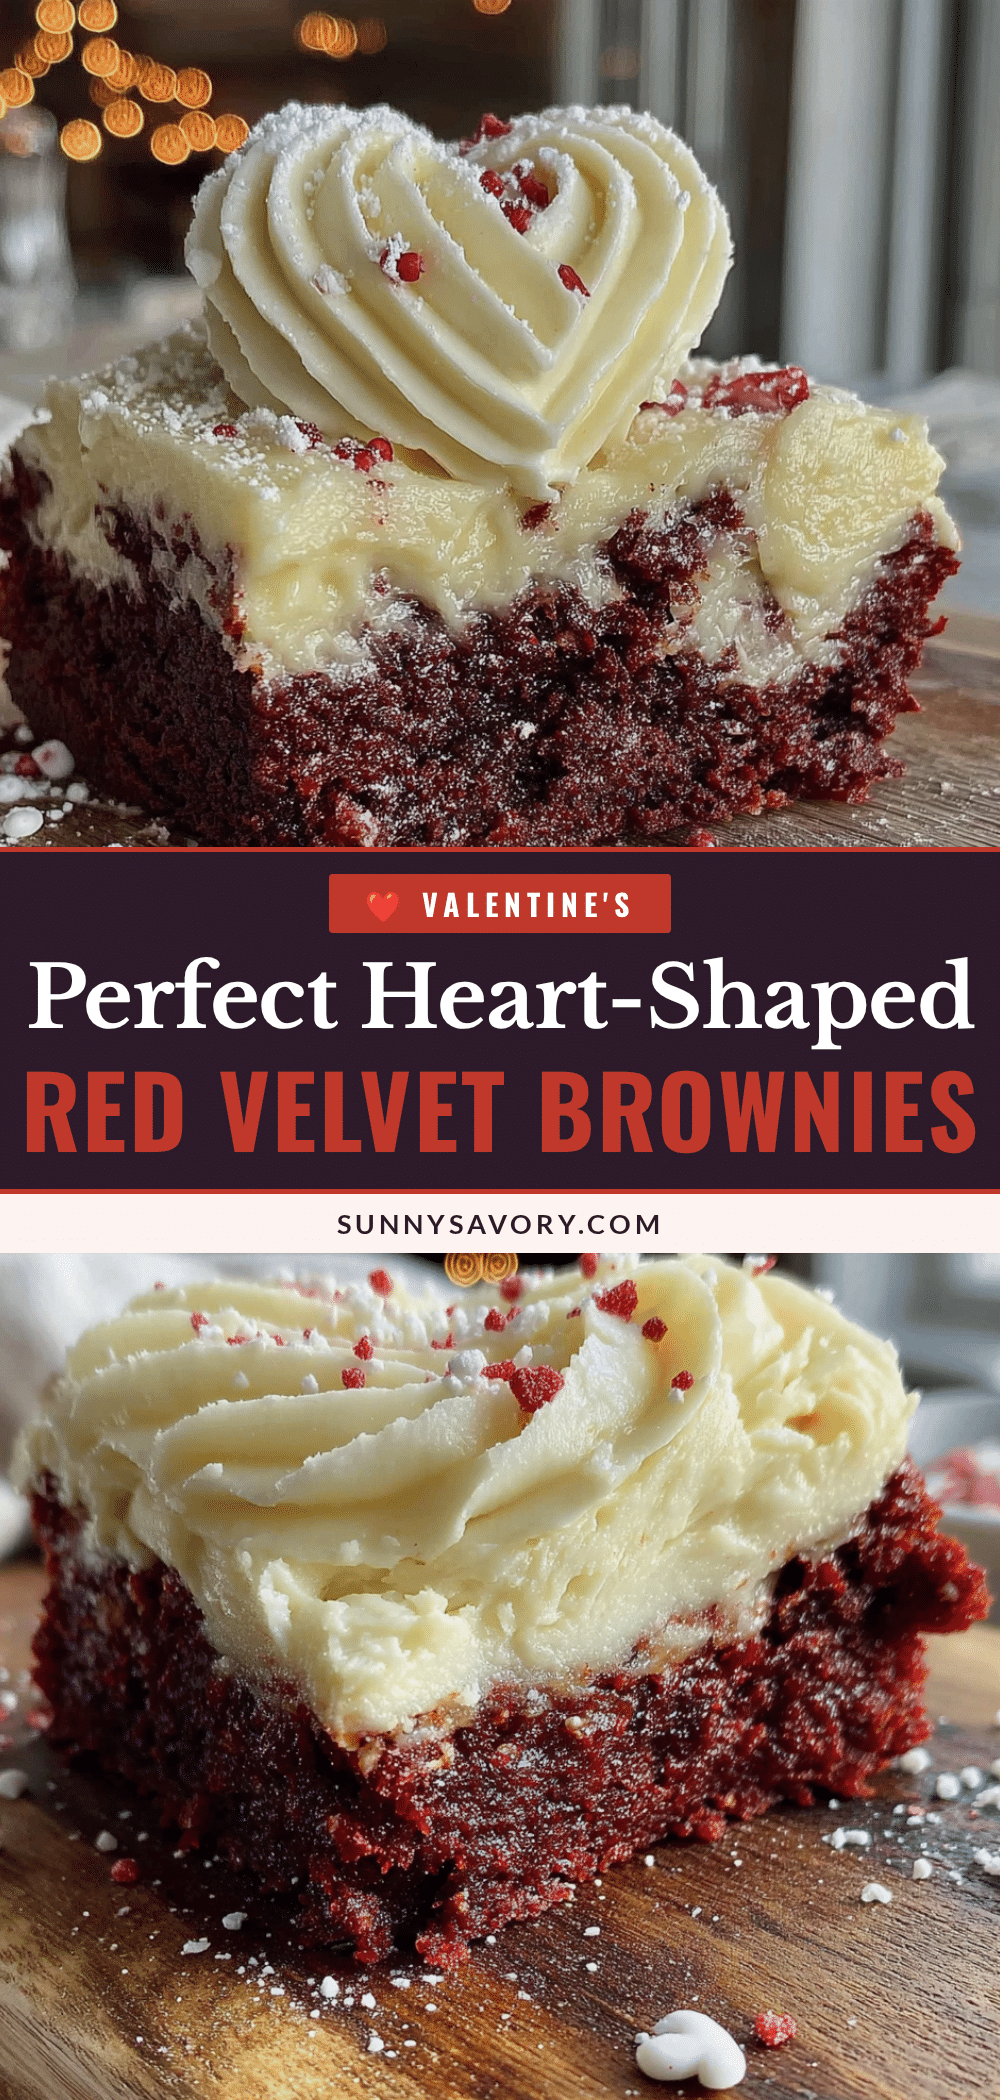
Perfect Red Velvet Heart Brownies Easy Valentine’s Dessert Recipe
These fudgy red velvet brownies are cut into adorable hearts using a cookie cutter, making them the perfect easy Valentine’s Day dessert. A simple, foolproof recipe that delivers rich, tangy-sweet flavor with a crackly top.
- Prep Time: 15 minutes
- Cook Time: 25 minutes
- Total Time: 1 hour 40 minutes (includes cooling)
- Yield: 6-8 servings 1x
- Category: Dessert
- Cuisine: American
Ingredients
- 1/2 cup (113g) unsalted butter, melted
- 1 cup (200g) granulated sugar
- 2 large eggs, room temperature
- 1 teaspoon vanilla extract
- 1 tablespoon red food coloring (gel preferred)
- 1 tablespoon unsweetened cocoa powder
- 1/2 cup (60g) all-purpose flour
- 1/4 teaspoon salt
- 1/2 teaspoon baking powder
- 1 tablespoon buttermilk
- 1/2 teaspoon white vinegar
- 4 oz (113g) cream cheese, softened (for frosting)
- 1/4 cup (56g) unsalted butter, softened (for frosting)
- 1 cup (120g) powdered sugar, sifted (for frosting)
- 1/2 teaspoon vanilla extract (for frosting)
Instructions
- Preheat oven to 350°F (175°C). Line an 8×8 inch square baking pan with parchment paper, leaving overhang on two sides. Lightly grease the parchment.
- In a large microwave-safe bowl, melt the butter in 30-second intervals. Let cool for 2 minutes.
- Add sugar to the melted butter and whisk until combined. Add eggs one at a time, whisking well after each. Stir in vanilla extract.
- In a small bowl, mix red food coloring with cocoa powder to form a paste. Add to the wet ingredients and whisk until uniform.
- In a separate medium bowl, whisk together flour, salt, and baking powder.
- Gradually fold dry ingredients into wet mixture with a rubber spatula until just combined. Do not overmix.
- In a tiny bowl, combine buttermilk and vinegar. Fold into the batter gently. Batter will be thick and glossy.
- Pour batter into prepared pan and spread evenly. Bake for 20-25 minutes, until a toothpick inserted in the center comes out with a few moist crumbs.
- Cool completely in the pan on a cooling rack (at least 1 hour). For best results, refrigerate for 30 minutes after cooling.
- Lift brownie block out of pan using parchment handles. Press a heart-shaped cookie cutter firmly into the brownie, lifting straight up. Repeat to cut out hearts.
- For frosting: Beat softened cream cheese and butter until smooth. Add sifted powdered sugar and vanilla, beat until fluffy. Pipe or spread onto each heart brownie.
Notes
For clean heart shapes, cool brownies completely and refrigerate 30 minutes before cutting. Use a sharp metal cookie cutter and press straight down without twisting. Dip cutter in powdered sugar between cuts to prevent sticking. Brownies can be stored unfrosted at room temperature for up to 3 days, or frosted in the refrigerator for up to 5 days. Freeze cut hearts for up to 3 months.
Nutrition
- Serving Size: 1 heart brownie (wit
- Calories: 220
- Sugar: 20
- Sodium: 150
- Fat: 12
- Saturated Fat: 7
- Carbohydrates: 28
- Fiber: 1
- Protein: 3
Keywords: red velvet brownies, heart brownies, Valentine's Day dessert, easy brownies, fudgy brownies, cream cheese frosting



