Love this? Save it for later!
Share the inspiration with your friends
The school potluck was in six hours and I’d completely forgotten. My son’s kindergarten class was having an end-of-year celebration, and every other parent was signing up for elaborate dishes—homemade lasagnas, gourmet salads, fancy desserts from actual bakeries. I had a pound of ground pork thawing on the counter, a half-empty bag of flour, and a bunch of chives that were starting to wilt in the fridge. Honestly, I almost just ordered pizza and called it a day.
But then I remembered that my grandmother used to make these little dumplings whenever we were short on time and money. She called them “pocket dinners” because everything you needed was tucked inside. So I rolled up my sleeves, got flour all over my favorite sweater (and my hair, and the cat), and started making potstickers from scratch. No fancy equipment, no specialty ingredients—just me, a rolling pin, and a prayer that these would actually stick together.
The panic was real. I kept checking the clock while folding each dumpling, wondering if I was wasting precious time on something that would fall apart in the pan. But you know that feeling when you just go with it and hope for the best? That was me, standing over a hot skillet, holding my breath as the first batch sizzled. When the bottoms turned golden and crispy, I actually laughed out loud. They looked like real potstickers!
I packed up a tray of these crispy pork and chive potstickers, still warm from the pan, and rushed to the school. The other parents had set up their fancy dishes on decorated platters. I just put my tray next to a stack of napkins and tried to hide the flour on my shirt. Within fifteen minutes, the tray was empty. A mom actually came up to me and asked for the recipe. Another dad said they tasted just like the ones from his favorite Chinese restaurant. The teacher told me the kids had been fighting over the last one.
That’s when I realized something—you don’t need fancy ingredients or hours of prep to make something that people absolutely love. These potstickers became my go-to for every school event, birthday party, and last-minute gathering. They’re the recipe that keeps winning without even trying, and I think you’re going to love them just as much.
Why You’ll Love This Recipe
Let me tell you why these crispy pork chive potstickers have become a staple in my kitchen and probably will in yours too. I’ve made them dozens of times, tweaked the filling, adjusted the cooking time, and even burned a batch or two (we don’t talk about that). Every time, they come out better than the last.
- Kid-Approved and Picky-Eater Friendly: My kids gobble these up without any fuss. The filling is mild, savory, and not too strong—perfect for little taste buds that haven’t quite learned to love bold flavors yet.
- Budget-Friendly Ingredients: You probably already have most of what you need in your pantry. Ground pork is affordable, chives are cheap, and the dough uses basic flour and water. No special trips to an Asian grocery store required.
- Freezer-Friendly for Busy Nights: Make a big batch on Sunday and freeze them for those crazy weeknights when you don’t have time to cook. They reheat beautifully and taste just as good as fresh.
- Fun Family Activity: Get the kids involved in folding the dumplings! It’s messy, it’s fun, and it’s a great way to spend time together in the kitchen. My four-year-old makes “potstickers” that look more like little pillows, but they still taste amazing.
- Restaurant Quality at Home: That crispy, golden bottom with the tender, juicy filling? You can absolutely achieve that in your own kitchen. I promise it’s easier than it looks.
What makes these potstickers different from every other recipe out there? It’s the balance. The filling isn’t too salty or too bland. The wrapper is thin but sturdy enough to hold up to pan-frying. And that crispy-lacy bottom? It comes from a simple trick that I learned after burning my first few batches. Trust me, once you try this method, you’ll never go back to store-bought dumplings.
These potstickers are the kind of food that makes you close your eyes after the first bite. They’re comfort food—simple, satisfying, and made with love. Whether you’re feeding a crowd or just your family on a Tuesday night, this recipe delivers every single time.
What Ingredients You Will Need
This recipe uses simple, everyday ingredients that work together to create something truly special. The beauty of these crispy pork chive potstickers is that you don’t need anything fancy—just good, honest ingredients that you can find at any grocery store.
For the Dough
- 2 cups all-purpose flour (plus extra for dusting) — I use Gold Medal or King Arthur Flour for consistent results. The protein content matters here; all-purpose gives you the perfect chew without being too tough.
- ¾ cup warm water (around 110°F) — Not too hot, or you’ll kill the gluten development. Warm tap water works perfectly.
- ½ teaspoon salt — Just a touch to season the wrapper itself. You can skip this if you’re watching sodium.
- 1 tablespoon vegetable oil — This keeps the dough soft and pliable. Any neutral oil works—canola, avocado, or even olive oil in a pinch.
For the Filling
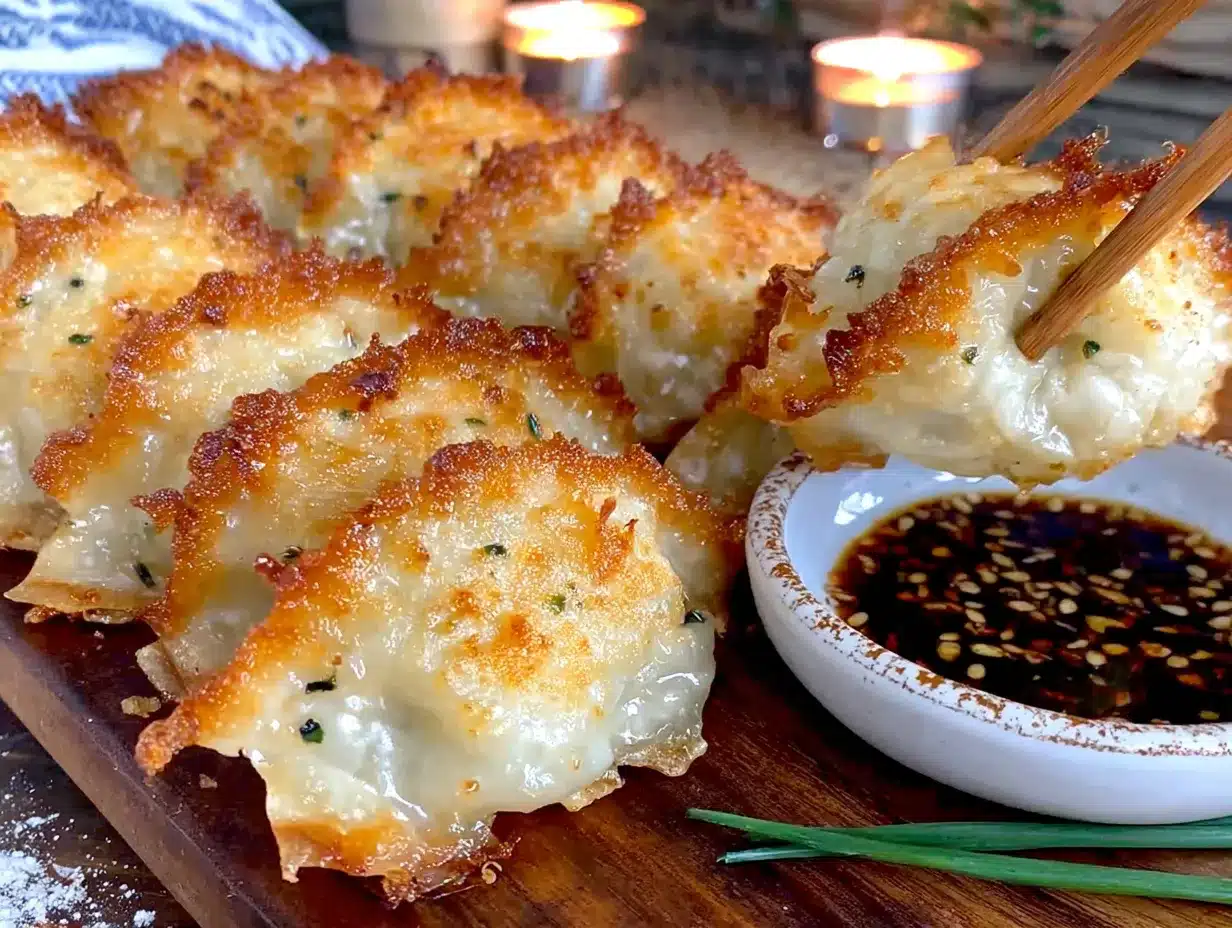
- 1 pound ground pork — I prefer 80/20 blend for the juiciest filling. Leaner pork works but can be a bit dry. If you want to swap, ground chicken or turkey works great too.
- 1 cup finely chopped fresh chives — These give the potstickers their signature mild onion flavor. You can also use green onions or scallions in a pinch.
- 2 cloves garlic, minced — Fresh garlic is non-negotiable here. The jarred stuff just doesn’t have the same punch.
- 1 tablespoon soy sauce — I recommend low-sodium soy sauce so you can control the salt level. Tamari works for gluten-free.
- 1 tablespoon sesame oil — This is where the magic happens. Toasted sesame oil adds that unmistakable nutty flavor that makes potstickers taste authentic.
- 1 teaspoon grated fresh ginger — A microplane makes this super easy. Don’t skip it—ginger and pork are a match made in heaven.
- ¼ teaspoon white pepper — Black pepper works, but white pepper gives that classic Chinese restaurant flavor. You can find it in the spice aisle.
- 1 egg, lightly beaten — This helps bind the filling together so it doesn’t fall apart during cooking.
For Cooking
- 2 tablespoons vegetable oil — For pan-frying. You need enough to coat the bottom of the pan evenly.
- ⅓ cup water — This creates the steam that cooks the potstickers through while the bottoms get crispy.
For the Dipping Sauce
- ¼ cup soy sauce
- 2 tablespoons rice vinegar
- 1 teaspoon sesame oil
- 1 teaspoon sugar
- 1 teaspoon chili oil or sriracha (optional, for adults who want heat)
One thing I’ve learned over the years—don’t overthink the ingredients. The first time I made these, I used regular black pepper because I didn’t have white pepper, and they were still delicious. The most important thing is fresh chives and good quality pork. Everything else is flexible.
If you’re feeding a crowd, this recipe doubles beautifully. I often make a double batch and freeze half for later. Just don’t skip the sesame oil in the filling—it really makes a difference in the overall flavor profile.
Equipment Needed
You don’t need a fancy kitchen to make these potstickers from scratch. Here’s what you’ll need:
- Large mixing bowl — For the dough and the filling. I use separate bowls for each.
- Rolling pin — A standard wooden rolling pin works perfectly. If you don’t have one, a clean wine bottle works in a pinch (I’ve done it!).
- Sharp knife or bench scraper — For cutting the dough into even pieces. A pizza cutter also works great.
- Non-stick skillet or well-seasoned cast iron pan — This is crucial for getting that crispy bottom without sticking. I prefer a 12-inch non-stick skillet for even cooking.
- Spatula — A thin, flexible spatula works best for flipping the potstickers without breaking them.
- Lid that fits your skillet — You need this for the steaming step. If your pan doesn’t have a lid, use a baking sheet or foil.
- Small bowl — For the dipping sauce and for the water you’ll use to seal the dumplings.
- Baking sheet lined with parchment paper — To hold the formed potstickers while you work. If you’re freezing them, this is essential.
I’ve made these potstickers in a tiny apartment kitchen with a warped non-stick pan and a wooden spoon as my only tool. They still came out amazing. Don’t let a lack of fancy equipment stop you from trying this recipe. The most important tool you have is your hands—and maybe a little patience while you learn to fold.
One tip: if you’re using a cast iron pan, make sure it’s well-seasoned. I learned this the hard way when my first batch stuck so badly I had to scrape them off with a metal spatula. A good non-stick surface makes all the difference.
Preparation Method
Alright, let’s get cooking! I’ll walk you through every step so you can make these crispy pork chive potstickers with confidence. Take your time—rushing is the number one mistake I see people make.
Step 1: Make the Dough (15 minutes + 30 minutes resting)
In a large bowl, combine the flour and salt. Make a well in the center and pour in the warm water and vegetable oil. Mix with a fork until a shaggy dough forms. Turn it out onto a lightly floured surface and knead for about 8 minutes until smooth and elastic. The dough should feel soft and slightly warm—like a baby’s cheek, honestly. Shape it into a ball, cover with plastic wrap or a damp towel, and let it rest for 30 minutes. This resting time is crucial; it relaxes the gluten so the dough is easier to roll out later.
Step 2: Prepare the Filling (10 minutes)
While the dough rests, make the filling. In a medium bowl, combine the ground pork, chopped chives, minced garlic, soy sauce, sesame oil, grated ginger, white pepper, and beaten egg. Use your hands to mix everything together—it’s the best way to ensure everything is evenly distributed. Don’t overmix, or the filling will become tough. Just mix until everything is combined. Cover and refrigerate while you work on the wrappers.
Step 3: Roll Out the Wrappers (20 minutes)
After the dough has rested, divide it into two equal portions. Keep one portion covered while you work with the other. Roll the dough into a long log about 1 inch thick. Cut the log into 20 equal pieces. Roll each piece into a small ball, then flatten it into a disc with your palm. Using a rolling pin, roll each disc into a circle about 3½ inches in diameter. The edges should be slightly thinner than the center. Don’t stress about making them perfect—my first few always look like blobs. Stack the wrappers on a plate with a little flour between each one to prevent sticking.
Step 4: Fold the Potstickers (20 minutes)
Hold one wrapper in your palm and place about 1 tablespoon of filling in the center. Dip your finger in a small bowl of water and moisten the edge of the wrapper. Fold the wrapper in half to form a half-moon shape. Pinch the center of the sealed edge to secure it. Starting from one end, make small pleats along the edge, pressing firmly to seal. You should end up with about 4-5 pleats per potsticker. Place each finished potsticker on a parchment-lined baking sheet, making sure they don’t touch each other. Repeat with the remaining wrappers and filling.
If you’re feeling overwhelmed, don’t worry. My first potstickers looked like sad little ravioli. The more you make, the better you’ll get. And even the ugly ones taste amazing, I promise.
Step 5: Cook the Potstickers (10 minutes per batch)
Heat 1 tablespoon of vegetable oil in a non-stick skillet over medium-high heat. Once the oil is shimmering, arrange the potstickers in a single layer, flat side down. Don’t overcrowd the pan—you want them to have space to crisp up. Cook for 2-3 minutes until the bottoms are golden brown. Carefully pour in ⅓ cup of water and immediately cover with a lid. Reduce the heat to medium and let them steam for 5 minutes. The water will evaporate and create steam that cooks the filling through. Remove the lid and cook for another 1-2 minutes until the bottoms are crispy again. Use a spatula to transfer them to a plate, crispy side up.
The first time I made these, I peeked under the lid too early and let all the steam escape. The potstickers came out tough and chewy. Learn from my mistake—keep that lid on until the timer goes off!
Step 6: Make the Dipping Sauce (2 minutes)
While the potstickers cook, whisk together the soy sauce, rice vinegar, sesame oil, and sugar in a small bowl. Add chili oil if you want some heat. This sauce keeps in the fridge for up to a week.
Cooking Tips & Techniques
After making these potstickers more times than I can count, I’ve picked up a few tricks that make a huge difference. Let me share them with you so you can avoid my mistakes.
Don’t overfill the wrappers. I know it’s tempting to stuff them full, but too much filling makes them impossible to seal properly. You’ll end up with potstickers that burst open in the pan, and nobody wants that. A heaping tablespoon is perfect.
Keep the wrappers covered. Unused dough dries out fast. Always keep the wrappers you’re not working with under a damp paper towel or plastic wrap. Dry wrappers crack when you try to fold them, and they won’t seal properly. I learned this the hard way when I had to toss half a batch of wrappers because they turned into little crackers.
Use the right pan temperature. Medium-high heat is your friend for the initial sear, but don’t go higher or you’ll burn the bottoms before the filling cooks through. If you hear aggressive sizzling, turn the heat down a notch. The potstickers should sizzle gently, not angrily.
Let them rest before serving. After cooking, let the potstickers sit on the plate for a minute or two. This allows the filling to set and the juices to redistribute. Cutting into them immediately will result in a soggy mess. Trust me, I’ve been there.
Batch cooking strategy. If you’re making a large batch, keep the cooked potstickers warm in a 200°F oven on a baking sheet while you finish the rest. They’ll stay crispy for up to 30 minutes without drying out.
Freezing for later. Arrange the uncooked potstickers on a parchment-lined baking sheet and freeze until solid, about 2 hours. Transfer them to a freezer bag. To cook from frozen, add an extra 2 minutes to the steaming time. No need to thaw first!
One more thing—don’t be afraid to experiment with the folding technique. There’s no “right” way to fold a potsticker. Some people make pleats, some just pinch the edges together. As long as they’re sealed, they’ll taste great. The first batch I ever made looked like a toddler’s art project, but they were still the hit of the party.
Variations & Adaptations
One of the best things about this recipe is how adaptable it is. Here are some variations I’ve tried and loved:
Vegetarian Version
Swap the ground pork with finely chopped mushrooms, crumbled firm tofu, or a mixture of both. Add an extra tablespoon of soy sauce and a splash of mushroom seasoning for umami. My vegetarian friend raved about this version—she said it was better than the pork version!
Gluten-Free Option
Use a gluten-free all-purpose flour blend for the wrappers. I’ve had good luck with Bob’s Red Mill 1-to-1 Baking Flour. The dough is a bit trickier to work with—it’s less elastic—but it’s totally doable. Just be gentle when rolling and folding. Also, use tamari instead of soy sauce for the filling and dipping sauce.
Spicy Pork Version
Add 1 tablespoon of gochujang (Korean chili paste) or sriracha to the pork filling. This gives the potstickers a nice kick without being overwhelming. My husband loves this version, and it’s great for adults who want a little heat.
Shrimp and Pork Combo
Replace half the ground pork with finely chopped raw shrimp. The shrimp adds a sweetness and texture that’s absolutely divine. Just make sure to chop the shrimp very fine so it mixes evenly with the pork.
Baked Version (Healthier Option)
Instead of pan-frying, arrange the potstickers on a parchment-lined baking sheet, brush with a little oil, and bake at 400°F for 15-18 minutes until golden and crispy. They won’t have that signature lacy bottom, but they’re still delicious and much lower in fat.
I’ve tried all of these variations, and they each have their own charm. The vegetarian version is surprisingly satisfying, and the shrimp combo is fancy enough for a dinner party. Don’t be afraid to experiment and find your favorite!
Serving & Storage Suggestions
These potstickers are incredibly versatile when it comes to serving. Here’s how I like to enjoy them:
Serving Temperature: Serve them hot off the pan for the best texture. The contrast between the crispy bottom and the tender, juicy filling is at its peak right after cooking. If you’re serving a crowd, keep them warm in a low oven as I mentioned earlier.
Presentation: Arrange the potstickers on a platter with the crispy side up. Drizzle a little soy sauce or chili oil over the top for color. Sprinkle with sesame seeds and extra chopped chives for a restaurant-quality look. My kids love when I arrange them in a circle pattern—it makes them feel special.
What to Serve With: These potstickers pair beautifully with steamed rice, a simple cucumber salad, or stir-fried vegetables. For a complete meal, serve them alongside a bowl of hot and sour soup or miso soup. They’re also great as an appetizer for a larger Asian-inspired feast.
Storage: Leftover cooked potstickers can be stored in an airtight container in the refrigerator for up to 3 days. To reheat, pan-fry them in a little oil over medium heat until heated through and crispy again. Avoid microwaving—it makes them soggy and sad.
Freezing: As mentioned, uncooked potstickers freeze beautifully. Cooked potstickers can also be frozen, but they won’t be as crispy when reheated. If you’re freezing cooked ones, let them cool completely, then arrange them on a baking sheet and freeze until solid. Transfer to a freezer bag and reheat in a hot skillet or air fryer.
Flavor Development: Here’s a secret—the potstickers actually taste better the next day! The flavors in the filling have time to meld together, making them even more delicious. My family fights over the leftovers.
Nutritional Information & Benefits
While these potstickers are definitely a treat, they do offer some nutritional benefits. Here’s a rough estimate per serving (6 potstickers):
| Nutrient | Amount |
|---|---|
| Calories | 380 |
| Protein | 22g |
| Carbohydrates | 38g |
| Fat | 16g |
| Saturated Fat | 4g |
| Sodium | 580mg |
| Fiber | 2g |
| Sugar | 2g |
Health Benefits: The pork provides high-quality protein and essential B vitamins, especially B12. Chives are packed with vitamins A, C, and K, plus antioxidants that support immune health. Garlic and ginger offer anti-inflammatory properties and can aid digestion. The sesame oil provides healthy fats that are good for heart health.
Dietary Considerations: This recipe can be made gluten-free with the right flour blend. It’s naturally dairy-free and nut-free. If you’re watching sodium, use low-sodium soy sauce and reduce the salt in the dough.
Potential Allergens: Contains wheat (in the wrappers) and soy (in the soy sauce). If you have allergies, use gluten-free flour and coconut aminos as a soy sauce substitute.
I’m not a nutritionist, but I believe in balance. These potstickers are a wonderful way to enjoy a homemade meal that’s satisfying without being overly indulgent. Plus, the protein and veggies make them a more balanced option than takeout.
Conclusion
These crispy pork chive potstickers have become a beloved staple in my kitchen, and I have a feeling they’ll become one in yours too. They’re proof that you don’t need fancy ingredients or hours of prep to create something truly special. With simple pantry staples and a little bit of patience, you can make restaurant-quality dumplings that your whole family will love.
What I love most about this recipe is how forgiving it is. Your first batch might not look perfect, and that’s totally okay. The beauty of homemade food is in the imperfections—the slightly uneven pleats, the ones that burst open a little, the ones that get extra crispy because you forgot to set the timer. Each batch tells a story, and each story makes the food taste better.
I encourage you to make these potstickers your own. Add extra garlic if you love garlic. Swap the chives for green onions if that’s what you have. Make them spicy or keep them mild. The recipe is a starting point, but your kitchen is where the magic happens.
So go ahead—get your hands a little floury, make a mess, and enjoy every bite. And when you make them (because I know you will), come back and tell me how they turned out. Leave a comment below, share a photo, or tag me on social media. I love hearing about your kitchen victories, big and small.
Happy cooking, and remember—the best potstickers are the ones made with love.
Frequently Asked Questions
Can I use store-bought wrappers instead of making them from scratch?
Absolutely! Store-bought wonton or gyoza wrappers work perfectly and save a lot of time. You can find them in the refrigerated section of most grocery stores. Just follow the package instructions for folding and cooking.
How do I prevent the potstickers from sticking to the pan?
Make sure your pan is well-heated before adding the oil, and use enough oil to coat the bottom evenly. A non-stick skillet is your best friend here. If you’re using stainless steel or cast iron, make sure it’s properly seasoned and hot before adding the potstickers.
Can I make these potstickers ahead of time?
Yes! You can prepare the potstickers up to the folding stage and refrigerate them for up to 24 hours before cooking. Just keep them covered with plastic wrap so they don’t dry out. You can also freeze them for up to 3 months.
What’s the best way to reheat leftover potstickers?
Pan-frying is the best method. Heat a little oil in a skillet over medium heat, add the potstickers, and cook for 2-3 minutes on each side until heated through and crispy. An air fryer at 375°F for 3-4 minutes also works great. Avoid microwaving—it makes them soggy.
Can I make the filling without pork?
Definitely! Ground chicken, turkey, beef, or even a plant-based meat substitute all work well. Just adjust the seasoning to taste, as different proteins have different flavor profiles. Shrimp is also a fantastic alternative.
Pin This Recipe!
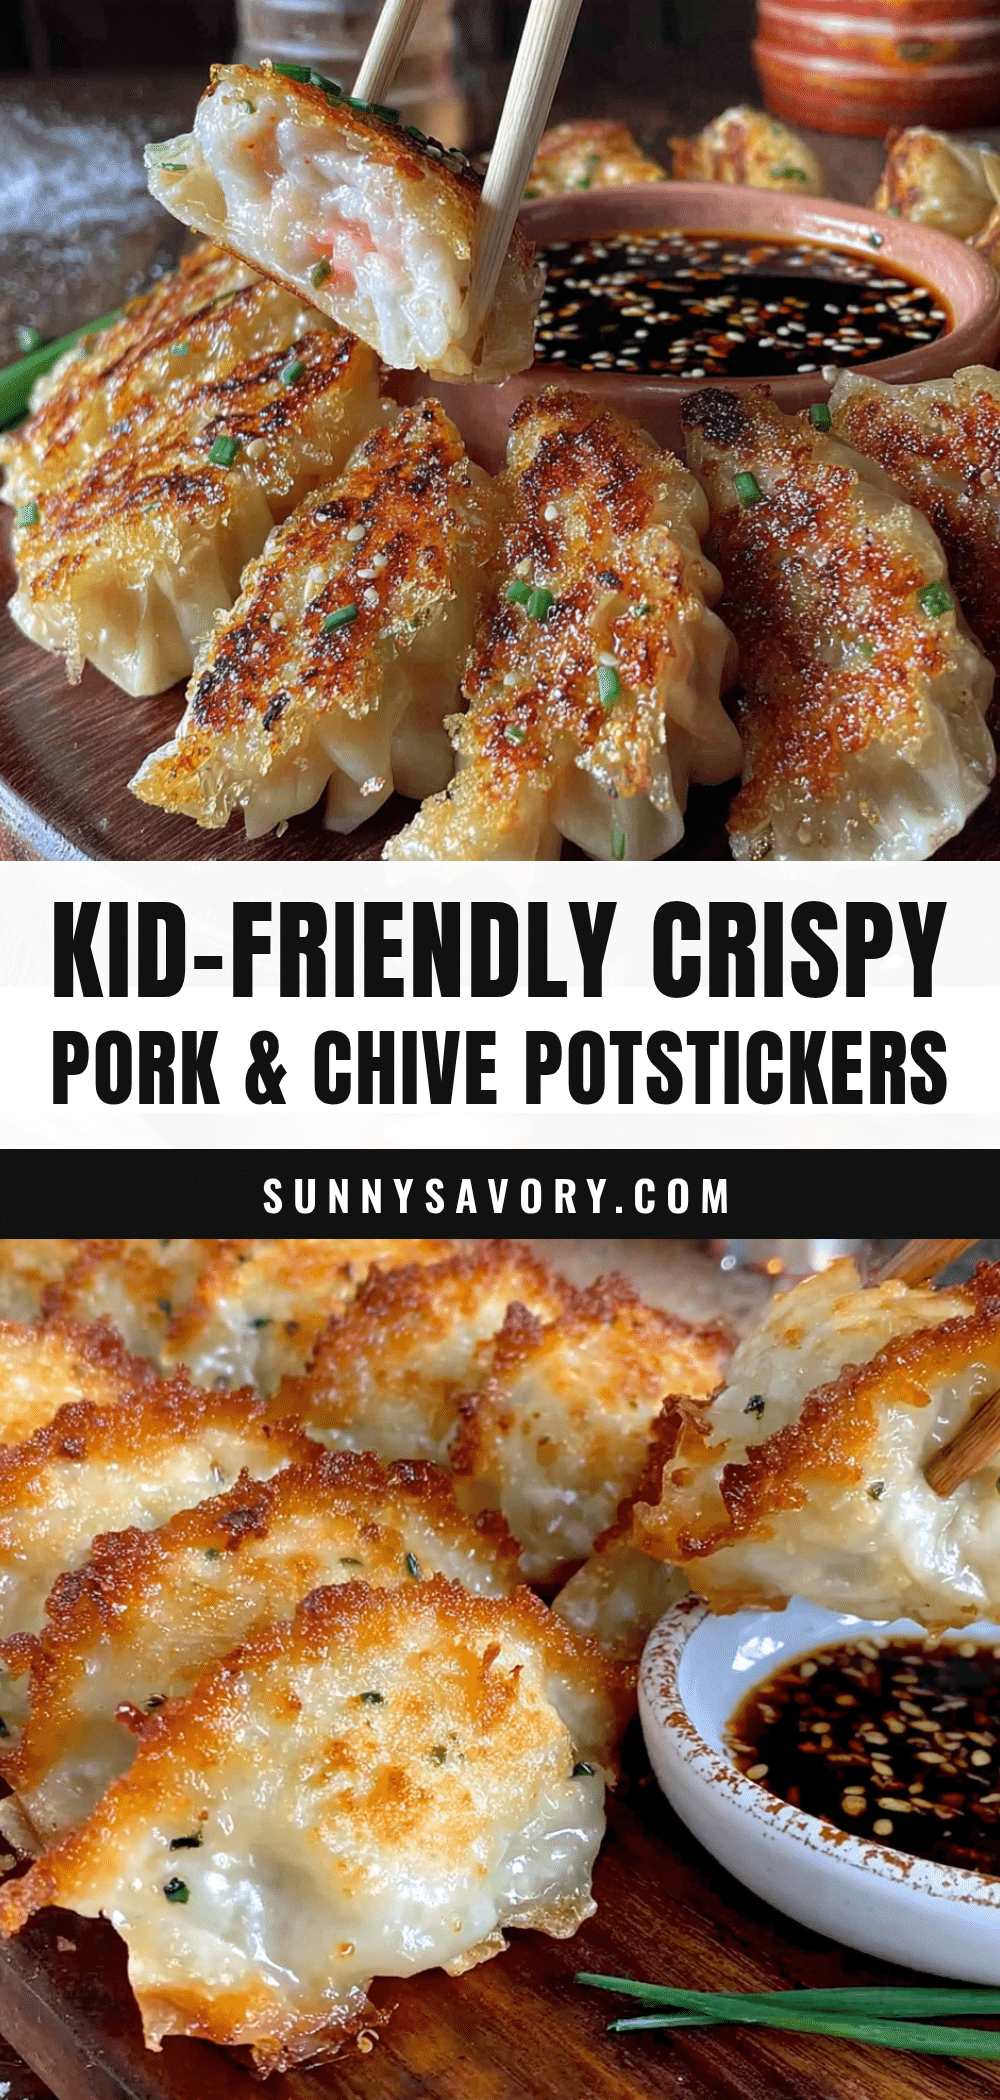
Quick & Easy Crispy Pork Chive Potstickers

These crispy pork chive potstickers are made from scratch with simple pantry staples. They’re kid-approved, budget-friendly, and freezer-friendly, perfect for last-minute gatherings or busy weeknights.
- Prep Time: 1 hour 5 minutes
- Cook Time: 10 minutes per batch
- Total Time: 1 hour 15 minutes
- Yield: 4 servings (6 potstickers per serving) 1x
- Category: Appetizer
- Cuisine: Chinese
Ingredients
- 2 cups all-purpose flour (plus extra for dusting)
- ¾ cup warm water (around 110°F)
- ½ teaspoon salt
- 1 tablespoon vegetable oil
- 1 pound ground pork (80/20 blend)
- 1 cup finely chopped fresh chives
- 2 cloves garlic, minced
- 1 tablespoon soy sauce (low-sodium recommended)
- 1 tablespoon sesame oil (toasted)
- 1 teaspoon grated fresh ginger
- ¼ teaspoon white pepper
- 1 egg, lightly beaten
- 2 tablespoons vegetable oil (for pan-frying)
- ⅓ cup water (for steaming)
- ¼ cup soy sauce (for dipping sauce)
- 2 tablespoons rice vinegar (for dipping sauce)
- 1 teaspoon sesame oil (for dipping sauce)
- 1 teaspoon sugar (for dipping sauce)
- 1 teaspoon chili oil or sriracha (optional, for dipping sauce)
Instructions
- Make the dough: In a large bowl, combine flour and salt. Make a well in the center and pour in warm water and vegetable oil. Mix with a fork until a shaggy dough forms. Turn out onto a lightly floured surface and knead for about 8 minutes until smooth and elastic. Shape into a ball, cover with plastic wrap or a damp towel, and let rest for 30 minutes.
- Prepare the filling: In a medium bowl, combine ground pork, chopped chives, minced garlic, soy sauce, sesame oil, grated ginger, white pepper, and beaten egg. Mix with your hands until just combined. Cover and refrigerate while you work on the wrappers.
- Roll out the wrappers: Divide rested dough into two equal portions. Keep one covered. Roll the other into a 1-inch thick log and cut into 20 equal pieces. Roll each piece into a ball, flatten into a disc, then roll into a 3½-inch circle with edges slightly thinner than the center. Stack with a little flour between each.
- Fold the potstickers: Hold one wrapper in your palm and place about 1 tablespoon of filling in the center. Moisten the edge with water, fold in half to form a half-moon, and pinch the center to seal. Make 4-5 small pleats along the edge, pressing firmly to seal. Place on a parchment-lined baking sheet without touching. Repeat with remaining wrappers and filling.
- Cook the potstickers: Heat 1 tablespoon vegetable oil in a non-stick skillet over medium-high heat. Arrange potstickers in a single layer, flat side down. Cook for 2-3 minutes until bottoms are golden brown. Carefully pour in ⅓ cup water and immediately cover with a lid. Reduce heat to medium and steam for 5 minutes. Remove lid and cook for another 1-2 minutes until bottoms are crispy again. Transfer to a plate, crispy side up.
- Make the dipping sauce: Whisk together soy sauce, rice vinegar, sesame oil, and sugar in a small bowl. Add chili oil if desired.
Notes
Don’t overfill the wrappers; keep unused wrappers covered with a damp paper towel; use medium-high heat for the initial sear; let potstickers rest before serving; freeze uncooked potstickers on a baking sheet before transferring to a freezer bag; cook from frozen with an extra 2 minutes of steaming.
Nutrition
- Serving Size: 6 potstickers
- Calories: 380
- Sugar: 2
- Sodium: 580
- Fat: 16
- Saturated Fat: 4
- Carbohydrates: 38
- Fiber: 2
- Protein: 22
Keywords: potstickers, pork, chive, dumplings, crispy, homemade, freezer-friendly, kid-friendly



