Love this? Save it for later!
Share the inspiration with your friends
It was 10:47 PM on a very ordinary Tuesday, and I had a very specific, almost irrational craving for something that tasted like fall but required absolutely none of the effort. I wanted pumpkin cheesecake—the kind with a buttery crust and that silky, spiced filling. But I didn’t have a springform pan, I didn’t have the patience for a water bath, and honestly, I didn’t have the energy to wait for anything to bake for an hour. What I had was a box of graham crackers, a brick of cream cheese that was suspiciously close to its expiration date, and the half-empty can of pumpkin puree from last weekend’s pancake experiment. Then the idea arrived, fully formed like a little gift from my sleep-deprived brain: cheesecake bars, but fast. And maybe, just maybe, I could make them look spooky enough to justify eating them on a random weeknight in October. I grabbed a toothpick, crossed my fingers, and started swirling. The power went out for a split second—just long enough to make me fumble for my phone’s flashlight—but I kept going. You know that feeling when a recipe just works, even when everything around you is slightly chaotic? This was that recipe. And I keep making it because it tastes like I spent hours, when really, I was done before my tea got cold.
Why You’ll Love This Recipe
Let me tell you, I’ve tested this one about five times now, and each time I’m shocked at how good it is for how little work it requires. This isn’t just another pumpkin dessert—this is the one you’ll make when you want to impress people without breaking a sweat.
- Quick & Easy: From start to finish, this is a 30-minute recipe. The oven does most of the work while you clean up the small mess you made.
- Simple Ingredients: You probably have 90% of these in your pantry right now. No trips to a specialty store for obscure extracts or hard-to-find spices.
- Perfect for Weeknights: Got a sudden craving? Or maybe you need a dessert for tomorrow’s potluck and you’re out of time? This is your answer.
- Crowd-Pleaser: I brought these to a work gathering and three people asked for the recipe before the plate was empty. Kids love the spiderweb design, adults love the creamy texture.
- Unbelievably Delicious: The contrast between the tangy cheesecake layer and the warm, spiced pumpkin is honestly perfect. The crust stays crunchy, the filling stays creamy—it’s comfort food that doesn’t weigh you down.
What makes this different from all those other pumpkin cheesecake recipes out there? It’s the speed, honestly. Most cheesecake bars require chilling for hours or a complicated water bath. This one uses a simple press-in crust and a no-fuss filling that sets up beautifully in the oven. Plus, the spiderweb design is way easier than it looks—I promise, if I can do it at 11 PM with a toothpick and bad lighting, you can do it too.
What Ingredients You Will Need
This recipe uses simple, pantry-friendly ingredients to deliver that rich, creamy pumpkin cheesecake flavor without any fuss. Most of these are staples you probably already have, especially if you’ve been baking this season.
For the Crust
- Graham cracker crumbs, 1 ½ cups (about 12 full sheets, crushed finely) — I prefer using Honey Maid brand for consistent texture
- Granulated sugar, ¼ cup (adds just enough sweetness to balance the salty butter)
- Unsalted butter, 6 tablespoons, melted (use salted butter and skip the added salt if that’s all you have)
- Pinch of salt, ⅛ teaspoon (optional if using salted butter)
For the Cheesecake Layer
- Cream cheese, 16 ounces (two 8-ounce blocks), softened to room temperature — Philadelphia brand gives the smoothest result
- Granulated sugar, ½ cup
- Large eggs, 2, at room temperature
- Vanilla extract, 1 teaspoon (pure vanilla extract makes a difference here)
- Sour cream, ¼ cup (adds tanginess and makes the texture extra silky)
For the Pumpkin Layer
- Pumpkin puree, ¾ cup (not pumpkin pie filling—make sure it’s 100% pure pumpkin)
- Brown sugar, ¼ cup, packed (light or dark both work; dark gives deeper flavor)
- Pumpkin pie spice, 1 teaspoon (or make your own: ½ tsp cinnamon, ¼ tsp ginger, ⅛ tsp nutmeg, ⅛ tsp cloves)
- Ground cinnamon, ½ teaspoon (for extra warmth)
For the Spiderweb Design
- Reserved cheesecake batter, about ¼ cup (you’ll set this aside before adding pumpkin)
Substitution Guidance: For a gluten-free version, use gluten-free graham crackers or crushed gluten-free cookies. You can swap the sour cream with full-fat Greek yogurt in a pinch—it works but the texture will be slightly less rich. If you don’t have pumpkin pie spice, just use cinnamon with a tiny pinch of nutmeg and ginger. I’ve done it before when my spice rack was bare, and it still tasted great.
Equipment Needed
You don’t need a fancy kitchen for this recipe, which is exactly how I like it. Here’s what you’ll need:
- 8×8-inch baking pan — This is the sweet spot for bar thickness. A 9×9 works too, but your bars will be slightly thinner and may bake faster.
- Parchment paper — Line the pan with two overlapping sheets, leaving overhang on two sides. This makes lifting the bars out so much easier. Trust me on this one.
- Mixing bowls — One medium bowl for the crust, one large bowl for the cheesecake batter.
- Electric hand mixer or stand mixer — You can whisk by hand if your arm is strong, but a mixer gives you that silky-smooth cream cheese texture without lumps.
- Toothpick or skewer — For creating the spiderweb design. A regular toothpick works perfectly.
- Measuring cups and spoons — Standard set will do.
- Spatula — For scraping every last bit of that delicious batter.
I’ve made this with a cheap hand mixer I got from a discount store, and it worked just fine. Don’t feel pressured to have professional equipment. The only thing I’d recommend spending a little extra on is good parchment paper—the cheap stuff sticks and tears, and that’s just frustrating.
Preparation Method
Let’s get into it. This whole process takes about 10 minutes of active work and 20 minutes of baking. I’ve broken it down so you can follow along without any stress.
- Preheat your oven to 350°F (175°C). While it’s heating up, line your 8×8 baking pan with parchment paper, leaving about 2 inches of overhang on two opposite sides. This will be your handle for lifting the bars out later.
- Make the crust. In a medium bowl, combine 1 ½ cups graham cracker crumbs, ¼ cup granulated sugar, and a pinch of salt. Pour in 6 tablespoons of melted butter and stir with a fork until the mixture looks like wet sand and holds together when you squeeze it. Press this mixture firmly into the bottom of your prepared pan. I use the bottom of a measuring cup to get it really even and compact. Bake for 8 minutes, then set aside to cool slightly while you make the filling.
- Beat the cream cheese. In a large bowl, beat 16 ounces of softened cream cheese with an electric mixer on medium speed until it’s smooth and fluffy—about 2 minutes. Scrape down the sides of the bowl with a spatula. Add ½ cup granulated sugar and beat for another minute until combined.
- Add the eggs and vanilla. Add the 2 eggs, one at a time, beating on low speed after each addition just until incorporated. Don’t overmix here—you don’t want to incorporate too much air, which can cause cracks. Add 1 teaspoon vanilla extract and ¼ cup sour cream, and mix on low until smooth.
- Reserve some batter. Scoop out about ¼ cup of this plain cheesecake batter into a small bowl. This will be used for the spiderweb design later. Set it aside for now.
- Make the pumpkin layer. To the remaining cheesecake batter in the large bowl, add ¾ cup pumpkin puree, ¼ cup packed brown sugar, 1 teaspoon pumpkin pie spice, and ½ teaspoon cinnamon. Mix on low speed until everything is combined and the batter is a uniform orange color. It should look smooth and thick.
- Assemble the bars. Pour the pumpkin cheesecake batter over the pre-baked crust. Spread it evenly with a spatula, making sure it reaches all the corners.
- Create the spiderweb design. This is the fun part! Take the reserved plain cheesecake batter and drop small spoonfuls (about 6 to 8) randomly over the top of the pumpkin layer. Don’t spread them—just let them sit as little dollops. Now, take a toothpick or skewer and drag it through each dollop, pulling outward from the center to create a web-like pattern. Start from the center of a dollop and drag outward in a straight line, then repeat from the same center in different directions to create a starburst effect. Wipe the toothpick clean between each web to keep the lines sharp. It doesn’t have to be perfect—imperfect webs look more organic and spooky anyway.
- Bake. Place the pan in the preheated oven and bake for 20 to 22 minutes. The edges should look set and slightly puffed, but the center should still have a slight jiggle when you gently shake the pan. Don’t overbake—the cheesecake will continue to set as it cools.
- Cool and chill. Let the bars cool completely on a wire rack at room temperature, about 30 minutes. Then transfer the pan to the refrigerator and chill for at least 2 hours, or overnight if you have the time. This step is crucial for clean slices and the best texture.
- Slice and serve. Once fully chilled, use the parchment overhang to lift the entire block of cheesecake bars out of the pan. Place it on a cutting board and use a sharp knife to cut into 16 squares (4 rows by 4 rows). Wipe the knife clean between cuts for neat edges.
Cooking Tips & Techniques
I’ve made this recipe enough times to know exactly where things can go wrong, so let me save you the trouble.
Room temperature ingredients matter. I know, I know—every recipe says this. But with cheesecake, it’s actually non-negotiable. Cold cream cheese creates lumps that no amount of mixing will fully fix. Leave your cream cheese and eggs on the counter for about 30 minutes before starting. If you forgot (which I do all the time), you can soften the cream cheese in the microwave for about 10 seconds on low power.
Don’t overmix after adding eggs. This was a hard lesson for me. The first time I made these, I beat the batter vigorously after adding the eggs, and the bars cracked right down the middle. Mix on low speed and stop as soon as the eggs disappear into the batter.
The jiggle test is your friend. When you pull the pan out of the oven, the center should wobble slightly when you shake it—like firm Jell-O, not liquid. If it’s completely solid, you’ve overbaked it. If it’s sloshing, give it 3 more minutes. I usually check at 20 minutes and go from there.
Chill time isn’t optional. I once tried to cut these after only an hour in the fridge because I was impatient, and they were a mess. The bars need that full 2 hours to set properly. Overnight is even better—the flavors meld and the texture becomes incredibly creamy.
For cleaner slices, use a hot knife. Run your knife under hot water and dry it off before each cut. This gives you those beautiful, clean edges that look like they came from a bakery.
Variations & Adaptations
One of the best things about this recipe is how flexible it is. Here are some ways I’ve changed it up depending on what I had on hand or who I was serving.
Gluten-Free Version: Swap the graham crackers for gluten-free graham crackers or crushed gluten-free ginger snaps. The ginger snaps actually add a lovely warm spice that complements the pumpkin beautifully. I did this for a friend with celiac disease, and she said it was better than the original.
Vegan Adaptation: Use vegan cream cheese (I like the brand Miyoko’s for its creaminess), a flax egg (1 tablespoon ground flaxseed mixed with 3 tablespoons water per egg), and vegan butter for the crust. The texture will be slightly less firm, so chill them for at least 4 hours. I tested this once for a vegan potluck, and honestly, I was surprised at how well it worked.
Extra Spicy Version: Add ¼ teaspoon of cayenne pepper or a pinch of black pepper to the pumpkin layer. The heat contrasts beautifully with the sweet, creamy cheesecake. This is my personal favorite variation—I love a little warmth that sneaks up on you.
Chocolate Twist: Drizzle melted dark chocolate over the cooled bars before slicing. Or, for a real treat, add ¼ cup of mini chocolate chips to the crust mixture before pressing it into the pan. The chocolate pairs surprisingly well with the pumpkin spices.
No-Bake Version: If you don’t want to turn on the oven, you can set these in the refrigerator instead. Use a no-bake cheesecake recipe as the base (using gelatin or cornstarch to set), and follow the same assembly and chilling instructions. The texture will be lighter and mousse-like, but still delicious.
Serving & Storage Suggestions
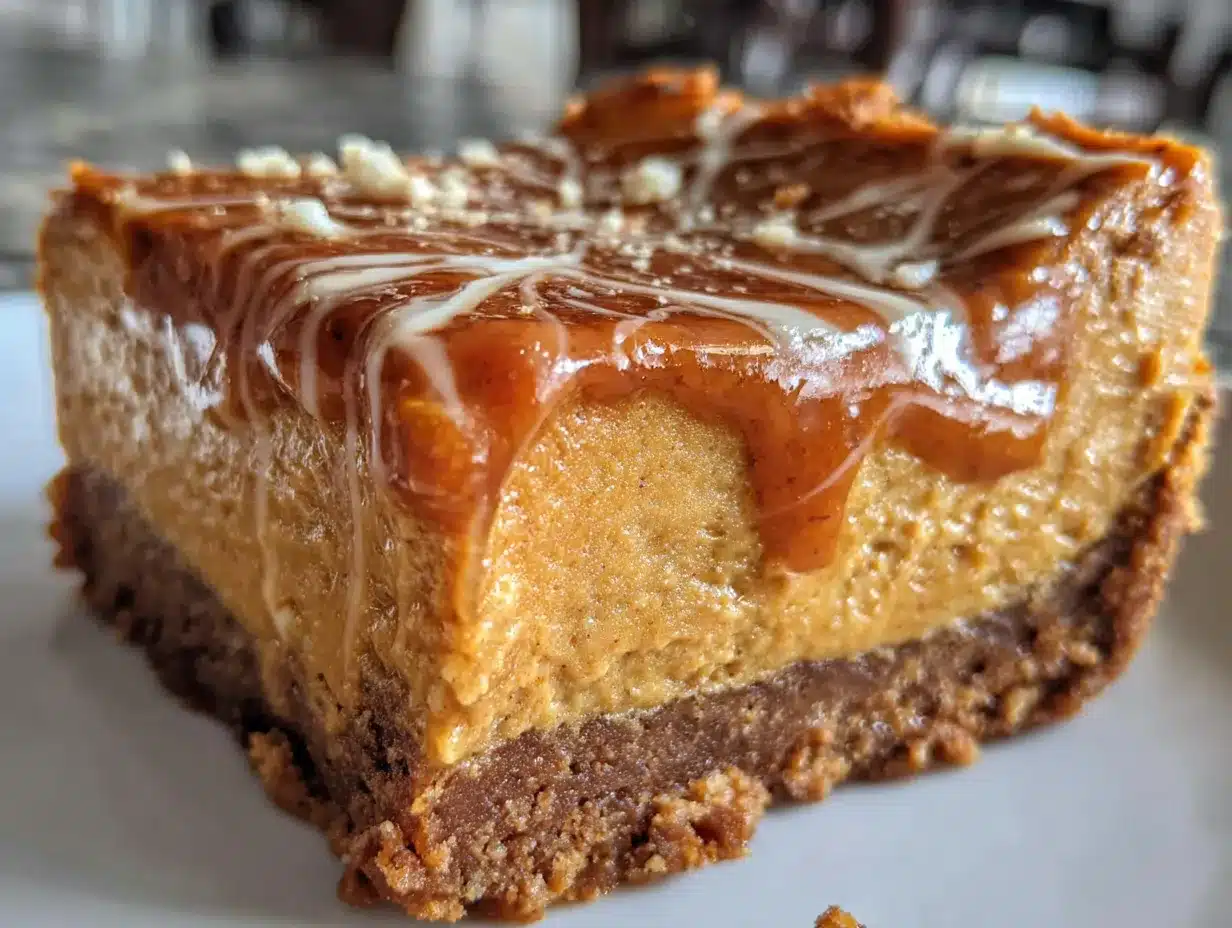
These spiderweb pumpkin cheesecake bars are best served cold, straight from the fridge. The texture is at its creamiest when they’re well-chilled, and the spiderweb design shows up more clearly against the cold surface.
Serving Ideas: I like to serve these on a simple white platter to let the design pop. A light dusting of cinnamon or a tiny dollop of whipped cream on each bar adds a nice touch. For a Halloween party, arrange them on a black or orange plate and add some candy spiders around the edges for fun.
Drink Pairings: A warm cup of chai tea or a spiced latte is perfect alongside these bars. For a dessert spread, they pair beautifully with a glass of cold milk or a scoop of vanilla ice cream. If you’re serving adults, a small glass of bourbon or a dark rum cocktail complements the pumpkin spice notes.
Storage Instructions: Store any leftovers in an airtight container in the refrigerator for up to 5 days. Place a sheet of parchment paper between layers if you’re stacking them to prevent sticking. These bars actually taste better on the second day—the flavors have time to meld and deepen.
Freezing: You can freeze these bars for up to 3 months. Wrap each bar individually in plastic wrap, then place them in a freezer-safe bag or container. To thaw, transfer them to the refrigerator overnight. I’ve pulled these out for unexpected guests more times than I can count, and no one ever guesses they were frozen.
Reheating: Honestly, I prefer these cold. But if you want a warm dessert, you can microwave a single bar for about 10 seconds—just enough to take the chill off without melting the design.
Nutritional Information & Benefits
Here’s the approximate nutritional breakdown for one bar (based on 16 servings):
- Calories: 245
- Total Fat: 15g
- Saturated Fat: 9g
- Cholesterol: 65mg
- Sodium: 210mg
- Total Carbohydrates: 24g
- Dietary Fiber: 1g
- Sugars: 18g
- Protein: 5g
Pumpkin is packed with vitamin A and fiber, which supports eye health and digestion. The cream cheese provides calcium and protein, though it’s also higher in fat—so these are definitely a treat, not an everyday snack. If you’re watching your sugar intake, you can reduce the sugar to ⅓ cup in the cheesecake layer and use a sugar substitute like monk fruit in the crust. These bars are vegetarian and can be made gluten-free with the substitutions mentioned above. They contain dairy and gluten in the standard version, so be mindful if you’re serving someone with allergies.
I personally love that this dessert feels indulgent but uses real, whole ingredients. No artificial flavors or preservatives—just butter, cream cheese, pumpkin, and warm spices. That’s something I can feel good about serving to my family.
Conclusion
These quick spiderweb pumpkin cheesecake bars are proof that you don’t need hours in the kitchen to create something beautiful and delicious. They’re perfect for busy weeknights when you want a seasonal treat without the fuss, and they’re impressive enough to serve at a Halloween party or fall gathering. The spiderweb design is deceptively easy—it looks like you spent ages on it, but really, it’s just a toothpick and a few swirls.
I love this recipe because it captures everything I want in a fall dessert: warm spices, creamy texture, and a buttery crust, all without requiring a complicated technique or a sink full of dishes. It’s the kind of recipe that makes you look like a hero when you’re short on time.
Now I want to hear from you! Have you tried making these spiderweb pumpkin cheesecake bars? Did you add your own twist? Let me know in the comments below—I love seeing how you make recipes your own. And if you share a photo on Pinterest or Instagram, tag me so I can see your beautiful creations. Happy baking, friends!
Frequently Asked Questions
Can I use pumpkin pie filling instead of pumpkin puree?
I wouldn’t recommend it. Pumpkin pie filling already has sugar and spices added, which will throw off the sweetness and texture of the cheesecake layer. Stick with 100% pure pumpkin puree for the best results. If that’s all you have, reduce the brown sugar by half and skip the added spices.
How do I know when the cheesecake bars are done baking?
The edges should look set and slightly puffed, but the center should still jiggle when you gently shake the pan. Think of it like firm Jell-O—it should wobble, not slosh. If the center is completely solid, you’ve overbaked them, which can cause cracks.
Can I make these ahead of time for a party?
Absolutely! In fact, I recommend it. These bars taste even better after chilling overnight because the flavors have time to meld. You can make them up to 2 days in advance and store them in the refrigerator. Just wait to cut them until you’re ready to serve for the freshest look.
My spiderweb design didn’t turn out clearly. What went wrong?
This usually happens if the reserved cheesecake batter is too thick or too thin. If it’s too thick, it won’t spread when you drag the toothpick. If it’s too thin, it will blend into the pumpkin layer. Aim for a consistency similar to the pumpkin batter—you can thin it with a few drops of milk if needed. Also, make sure you’re wiping the toothpick clean between each web to keep the lines distinct.
Can I double this recipe for a larger crowd?
Yes! Double all the ingredients and use a 9×13-inch baking pan instead of an 8×8. The baking time will increase slightly—start checking at 28 minutes. The spiderweb design will need more dollops to cover the larger surface area. I’ve done this for Thanksgiving, and it worked perfectly.
Pin This Recipe!
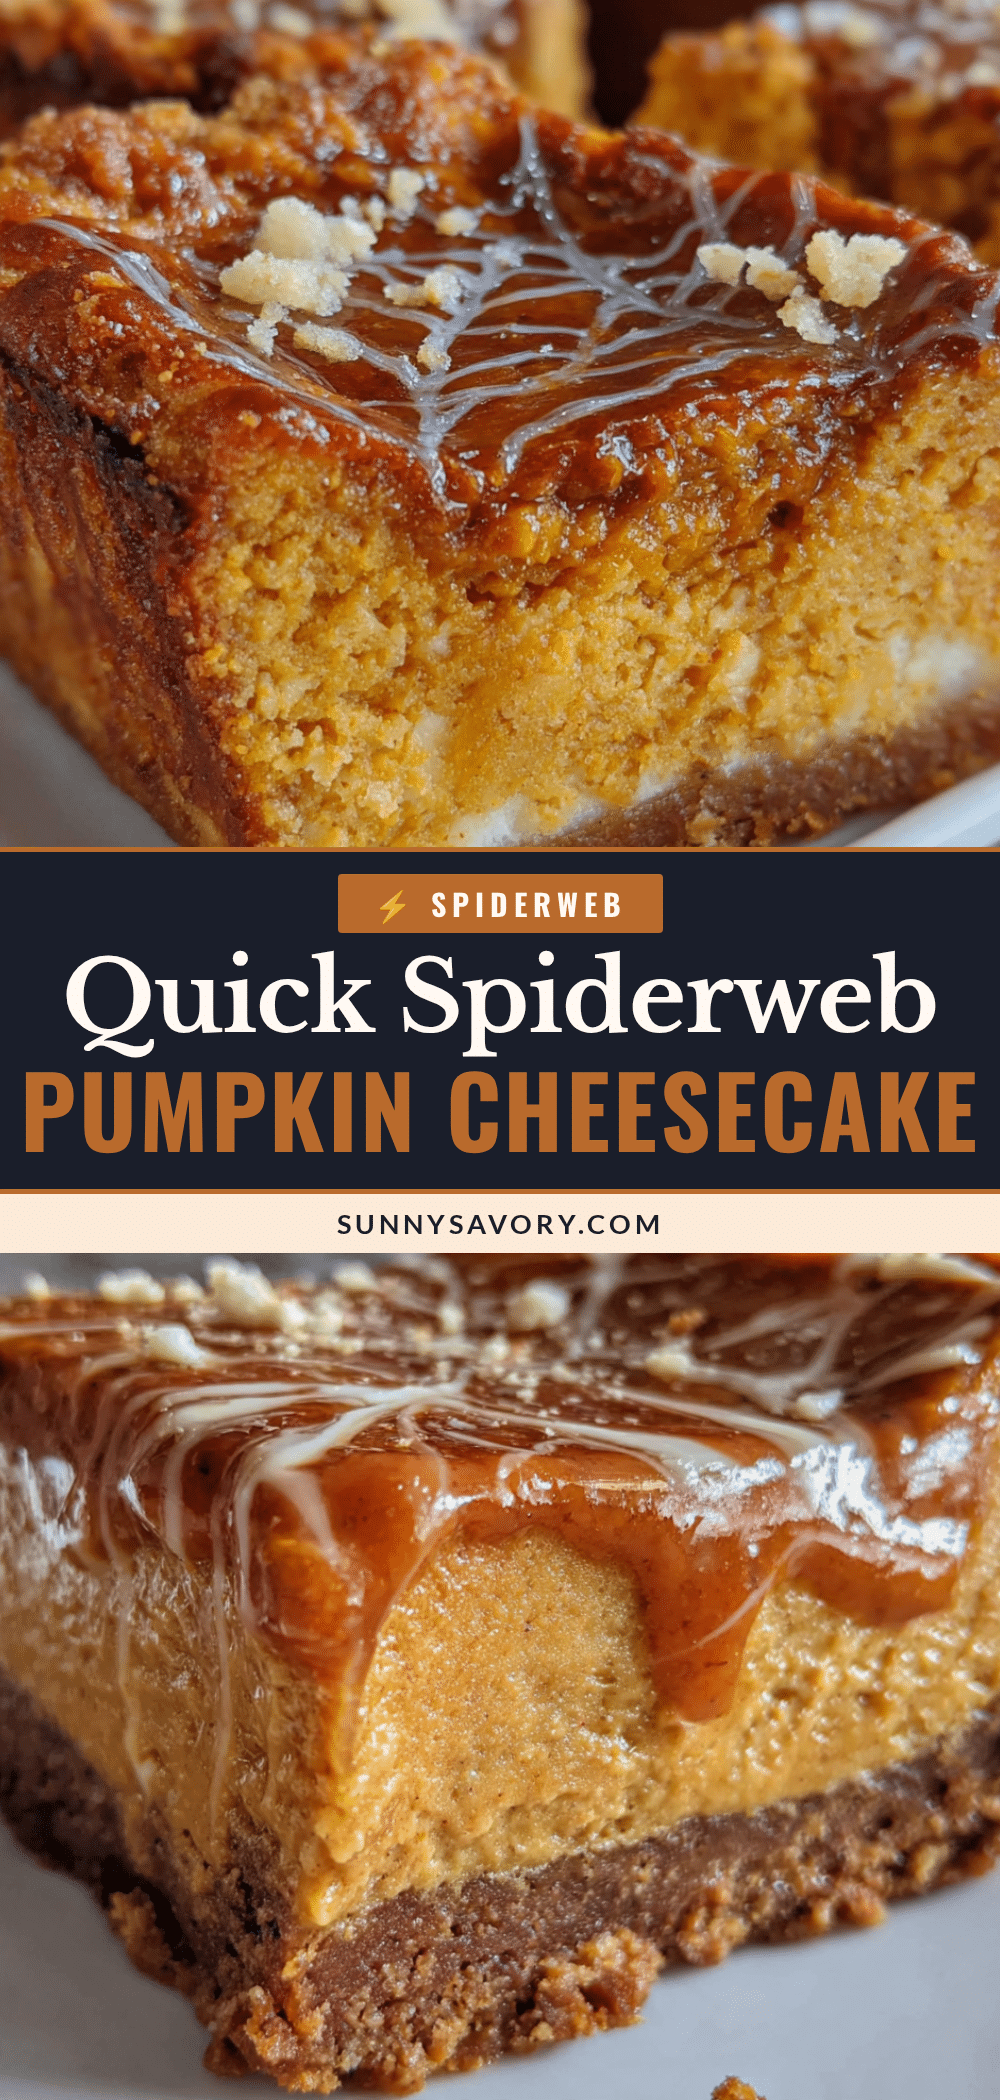
Quick Spiderweb Pumpkin Cheesecake Bars (Easy 30-Min Recipe)
These quick spiderweb pumpkin cheesecake bars are proof that you don’t need hours in the kitchen to create something beautiful and delicious. They’re perfect for busy weeknights when you want a seasonal treat without the fuss, and they’re impressive enough to serve at a Halloween party or fall gathering.
- Prep Time: 10 minutes
- Cook Time: 20 minutes
- Total Time: 30 minutes
- Yield: 16 servings 1x
- Category: Dessert
- Cuisine: American
Ingredients
- 1 ½ cups graham cracker crumbs (about 12 full sheets, crushed finely)
- ¼ cup granulated sugar
- 6 tablespoons unsalted butter, melted
- ⅛ teaspoon salt (optional if using salted butter)
- 16 ounces cream cheese (two 8-ounce blocks), softened to room temperature
- ½ cup granulated sugar
- 2 large eggs, at room temperature
- 1 teaspoon vanilla extract
- ¼ cup sour cream
- ¾ cup pumpkin puree (not pumpkin pie filling)
- ¼ cup brown sugar, packed
- 1 teaspoon pumpkin pie spice
- ½ teaspoon ground cinnamon
- ¼ cup reserved cheesecake batter (for spiderweb design)
Instructions
- Preheat your oven to 350°F (175°C). Line an 8×8-inch baking pan with parchment paper, leaving about 2 inches of overhang on two opposite sides.
- Make the crust: In a medium bowl, combine 1 ½ cups graham cracker crumbs, ¼ cup granulated sugar, and a pinch of salt. Pour in 6 tablespoons melted butter and stir with a fork until the mixture looks like wet sand and holds together when squeezed. Press firmly into the bottom of the prepared pan. Bake for 8 minutes, then set aside to cool slightly.
- Beat the cream cheese: In a large bowl, beat 16 ounces softened cream cheese with an electric mixer on medium speed until smooth and fluffy, about 2 minutes. Scrape down the sides. Add ½ cup granulated sugar and beat for another minute until combined.
- Add the eggs and vanilla: Add the 2 eggs, one at a time, beating on low speed after each addition just until incorporated. Add 1 teaspoon vanilla extract and ¼ cup sour cream, and mix on low until smooth.
- Reserve some batter: Scoop out about ¼ cup of the plain cheesecake batter into a small bowl for the spiderweb design. Set aside.
- Make the pumpkin layer: To the remaining cheesecake batter, add ¾ cup pumpkin puree, ¼ cup packed brown sugar, 1 teaspoon pumpkin pie spice, and ½ teaspoon cinnamon. Mix on low speed until combined and uniform in color.
- Assemble the bars: Pour the pumpkin cheesecake batter over the pre-baked crust and spread evenly with a spatula.
- Create the spiderweb design: Drop small spoonfuls (about 6 to 8) of the reserved plain cheesecake batter randomly over the top. Use a toothpick or skewer to drag through each dollop, pulling outward from the center to create a web-like pattern. Wipe the toothpick clean between each web.
- Bake: Place the pan in the preheated oven and bake for 20 to 22 minutes. The edges should look set and slightly puffed, but the center should still have a slight jiggle when gently shaken.
- Cool and chill: Let the bars cool completely on a wire rack at room temperature, about 30 minutes. Then refrigerate for at least 2 hours, or overnight.
- Slice and serve: Once fully chilled, use the parchment overhang to lift the bars out of the pan. Cut into 16 squares (4 rows by 4 rows) using a sharp knife, wiping clean between cuts.
Notes
Room temperature ingredients are crucial for a smooth cheesecake batter. Don’t overmix after adding eggs to prevent cracks. The jiggle test is key: center should wobble like firm Jell-O when done. Chill time is essential for clean slices—at least 2 hours, preferably overnight. For cleaner cuts, use a hot knife (run under hot water and dry before each cut).
Nutrition
- Serving Size: 1 bar
- Calories: 245
- Sugar: 18
- Sodium: 210
- Fat: 15
- Saturated Fat: 9
- Carbohydrates: 24
- Fiber: 1
- Protein: 5
Keywords: pumpkin cheesecake bars, spiderweb cheesecake, easy pumpkin dessert, Halloween dessert, fall dessert, quick cheesecake bars, 30-minute recipe



