Love this? Save it for later!
Share the inspiration with your friends
Prep time: 5 minutes | Cook time: 10 minutes | Total time: 15 minutes | Servings: Makes about 4 cups
Introduction
I was at the hardware store last November, of all places, buying a new snow shovel. The guy behind the counter, an older man named Frank with a flannel shirt and a no-nonsense attitude, rang me up. Then, out of nowhere, he said, “You’re gonna make your gravy the day before the bird, right?”
I blinked. I wasn’t expecting cooking advice from a hardware store clerk, but there I was, clutching a shovel, listening to him describe exactly how to make turkey gravy from scratch. He told me his wife had been doing it for forty years, and that the secret wasn’t in the roasting pan—it was in the freezer. Honestly, I almost laughed. But Frank was serious. He said the best gravy came from a stock you made a month ahead, thickened with a roux you made a week before, and finished with drippings you simmered for ten minutes on the big day.
I went home, a little skeptical, and tried it. And you know what? That man was a genius. This isn’t just a recipe I found online; it’s a system I learned from a guy selling paint thinner. It changed my entire Thanksgiving. Maybe you’ve been there—stressed, juggling a hot turkey, trying to whisk lumps out of gravy while guests are at the table. This method frees you from all that. It’s the kind of kitchen wisdom that makes you wonder why you didn’t learn it years ago. I keep making it because it actually works, and it makes the holiday feel less like a marathon and more like a celebration.
Why You’ll Love This Recipe
Let me tell you, this gravy is a game-changer. It’s not just good—it’s the kind that makes people close their eyes after the first bite. I’ve tested this method across three Thanksgivings, two Christmases, and a random Tuesday when I needed comfort food. It always delivers.
- Quick & Easy: Comes together in under 10 minutes on the big day. No last-minute whisking or panic.
- Simple Ingredients: You probably have everything in your pantry or freezer right now. No fancy grocery trips needed.
- Perfect for the Holidays: Great for Thanksgiving, Christmas, or any Sunday roast where you want to impress without the stress.
- Crowd-Pleaser: Always gets rave reviews. Even my picky uncle asks for seconds.
- Unbelievably Rich: The texture and flavor combo is next-level comfort food. It’s velvety, savory, and deeply satisfying.
What makes this recipe different from the rest? It’s the make-ahead method. Most people think gravy has to be made in the moment, but this approach lets you control the flavor and texture without the holiday chaos. It’s comfort food reimagined—faster, smarter, but with the same soul-soothing satisfaction.
What Ingredients You Will Need
This recipe uses simple, wholesome ingredients to deliver bold flavor and satisfying texture without the fuss. Most of these are pantry staples, and you can easily swap things out based on what you have.
- Turkey Wings or Drumsticks: (about 2 lbs) These are the backbone of your stock. They’re cheap and packed with flavor. I prefer wings for the collagen, which gives the gravy body.
- Chicken or Turkey Stock: (4 cups, low-sodium) Use a good brand like Kitchen Basics or Swanson. If you have homemade stock, even better. (adds depth)
- Unsalted Butter: (4 tablespoons) This is for the roux. I like Land O’Lakes for consistent results.
- All-Purpose Flour: (¼ cup) The thickener. You can use a gluten-free blend if needed, but the texture will be slightly different.
- Turkey Drippings: (½ cup, reserved from roasting) This is where the magic happens. The drippings add that unmistakable roasted flavor.
- Fresh Thyme: (2 sprigs) Adds an earthy, aromatic note. Dried works in a pinch, but fresh is better.
- Bay Leaf: (1 leaf) For a subtle background flavor.
- Salt and Black Pepper: (to taste) Go easy on the salt since the stock and drippings are already seasoned.
- Optional: White Wine or Sherry: (¼ cup) For deglazing. It adds a lovely acidity that balances the richness. I like a dry sherry.
Equipment Needed
You don’t need a professional kitchen for this. Just a few basic tools that you probably already own.
- Large Stockpot or Dutch Oven: For making the stock. A 6-quart pot is perfect. I use my old Le Creuset, but any heavy-bottomed pot works.
- Fine-Mesh Strainer: Essential for a silky-smooth gravy. A cheesecloth-lined strainer works too, but a fine-mesh one is easier to clean.
- Whisk: A good whisk is your best friend here. It helps prevent lumps in the roux. I prefer a silicone whisk because it won’t scratch your pan.
- Measuring Cups and Spoons: Accuracy matters, especially for the roux.
- Mason Jars or Freezer-Safe Containers: For storing the stock and roux. I use quart-sized mason jars. They’re cheap and easy to label.
- Fat Separator: Optional, but handy for separating the drippings from the fat. A simple glass one from the grocery store works fine.
Preparation Method
This is the fun part. The key is to break it down into three stages: the stock, the roux, and the final gravy. Do the first two ahead of time, and the last step takes ten minutes on the day.
Stage 1: Make the Stock (Up to 3 Months Ahead)
- Place the turkey wings or drumsticks in a large stockpot. Cover them with 8 cups of cold water. Add the bay leaf and a pinch of salt.
- Bring to a boil over high heat, then reduce to a simmer. Skim off any foam that rises to the surface. This is just impurities, and removing it keeps the stock clear.
- Simmer for 2 to 3 hours, until the meat is falling off the bones and the liquid has reduced by about half. You should have about 4 cups of rich, golden stock.
- Remove the turkey pieces. Let them cool, then pick off any meat (save it for soup or sandwiches!). Strain the stock through a fine-mesh strainer into a large bowl. Discard the solids.
- Let the stock cool completely. Transfer to mason jars or freezer-safe containers. Leave an inch of headspace for expansion. Label and freeze for up to 3 months.
Stage 2: Make the Roux (Up to 1 Month Ahead)
- In a small saucepan, melt the butter over medium heat. Once it’s foaming, add the flour all at once. Whisk constantly.
- Cook the roux for 2 to 3 minutes, whisking the whole time. It should smell nutty and look like wet sand. Don’t let it brown—we want a blond roux for gravy.
- Remove from heat and let the roux cool in the pan. Transfer it to a small container or a zip-top bag. It will solidify as it cools. Refrigerate for up to a month, or freeze for longer.
Stage 3: Finish the Gravy (10 Minutes on the Day)
- On the big day, remove your stock and roux from the fridge or freezer. Thaw the stock in a saucepan over low heat. The roux can be used cold—just scoop it out.
- After you’ve roasted your turkey, pour the drippings from the roasting pan into a fat separator. Let it sit for a minute, then pour the defatted drippings into a measuring cup. You should have about ½ cup. If you have less, supplement with extra stock.
- In a medium saucepan, heat the defatted drippings over medium heat. If you’re using wine or sherry, add it now and scrape up any browned bits from the pan. Let it reduce by half, about 2 minutes.
- Add your homemade stock (about 4 cups) to the pan. Bring it to a gentle simmer.
- Whisk in the cold roux, a tablespoon at a time. Keep whisking until the gravy thickens. This should take about 3 to 5 minutes. Don’t dump it all in at once—add it slowly to control the thickness.
- Add the fresh thyme sprigs. Simmer for 2 more minutes. Taste and adjust seasoning with salt and pepper. Remove the thyme sprigs before serving.
- Your gravy is ready! It should be silky, rich, and deeply savory. Serve immediately, or keep it warm in a thermos or a slow cooker on low.
Cooking Tips & Techniques
I’ve made plenty of gravy mistakes over the years. Here’s what I’ve learned so you don’t have to repeat my failures.
- Don’t rush the stock. A quick simmer won’t extract enough flavor. Give it the full 2 to 3 hours. Your patience will be rewarded.
- Watch the roux closely. It can go from blond to burnt in seconds. Keep whisking, and don’t walk away. If it smells like popcorn, you’re on the right track. If it smells like burnt toast, start over.
- Cold roux is your friend. Adding a cold roux to hot liquid prevents lumps. It’s a pro trick that makes a huge difference. Trust me on this one.
- Season at the end. The stock and drippings are already salty, so wait until the gravy is finished before adding more salt. You can always add, but you can’t take away.
- Strain again if needed. If you see any lumps, pour the finished gravy through a fine-mesh strainer. It’s a quick fix that makes it look restaurant-quality.
Variations & Adaptations
This gravy is forgiving. Here are a few ways to make it your own.
- Gluten-Free Version: Swap the all-purpose flour for a gluten-free all-purpose blend or cornstarch. If using cornstarch, mix 2 tablespoons with 2 tablespoons of cold water to make a slurry, then whisk it into the hot stock. The texture will be slightly glossier, but still delicious.
- Herb-Infused Gravy: Add a sprig of rosemary or sage along with the thyme. It gives the gravy a more complex, aromatic flavor. I did this for Christmas one year, and it was a hit.
- Mushroom Gravy: Sauté 8 ounces of sliced cremini mushrooms in butter before adding the stock. It adds an earthy, umami richness that’s perfect for a vegetarian holiday table. Use vegetable stock instead of turkey stock.
- Make it Dairy-Free: Use a high-quality vegan butter or olive oil for the roux. The flavor will be slightly different, but the texture will be just as silky.
- Spicy Kick: Add a pinch of cayenne pepper or a dash of smoked paprika at the end. It won’t make the gravy spicy, just more interesting.
Serving & Storage Suggestions
This gravy is best served warm, but it’s flexible.
- Serving Temperature: Serve it hot, straight from the saucepan. If you need to hold it, pour it into a thermos or a slow cooker on the “warm” setting. It will stay silky for up to 2 hours.
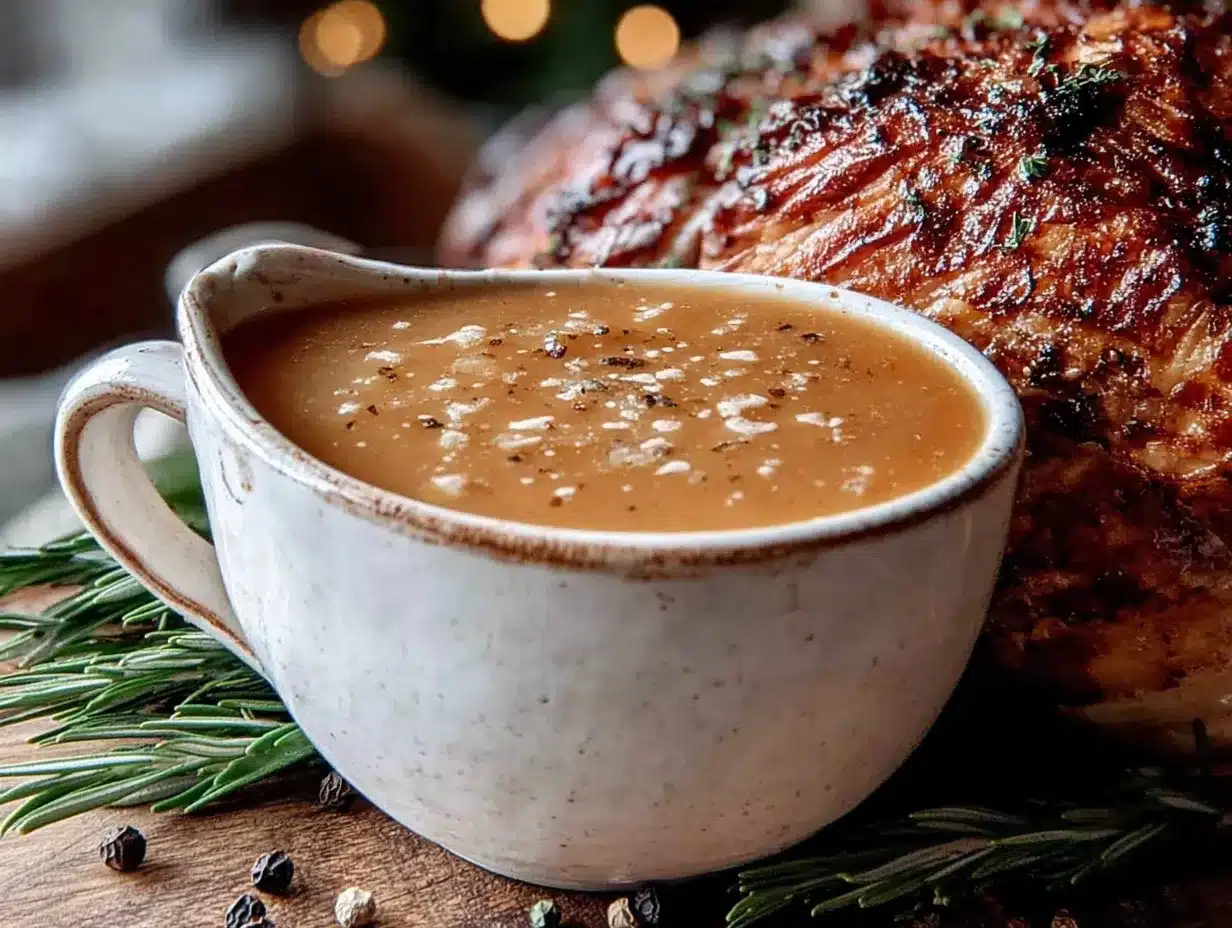
- Presentation: Pour it into a warmed gravy boat. Garnish with a fresh thyme sprig for a pop of color. It looks beautiful on a holiday table.
- Complementary Dishes: This gravy is perfect over roasted turkey, mashed potatoes, stuffing, or even biscuits. It’s also amazing on poutine—yes, I’ve tried it.
- Storage: Let the gravy cool completely, then transfer it to an airtight container. Refrigerate for up to 4 days. The flavors will meld and intensify, making it even better the next day.
- Reheating: Reheat gently on the stovetop over low heat, whisking occasionally. If it’s too thick, thin it with a splash of stock or water. You can also microwave it in 30-second bursts, stirring between each.
- Freezing: This gravy freezes beautifully. Pour it into a freezer-safe bag or container, leaving an inch of headspace. Freeze for up to 3 months. Thaw in the refrigerator overnight, then reheat as directed.
Nutritional Information & Benefits
This gravy is rich, but it’s made from whole ingredients. Here’s a rough estimate per ¼-cup serving.
| Nutrient | Amount |
|---|---|
| Calories | 110 |
| Total Fat | 8g |
| Saturated Fat | 4g |
| Cholesterol | 25mg |
| Sodium | 350mg |
| Total Carbohydrates | 6g |
| Dietary Fiber | 0g |
| Sugars | 1g |
| Protein | 3g |
The turkey stock is rich in collagen, which is great for joint health and skin elasticity. The thyme adds a dose of vitamin C and antioxidants. If you use a low-sodium stock, you can control the salt content easily. This recipe is naturally dairy-free if you use olive oil instead of butter, and gluten-free if you swap the flour for cornstarch. It’s a balanced, wholesome way to add flavor to your holiday meal without processed additives.
Conclusion
This make-ahead turkey gravy is more than just a recipe—it’s a strategy. It’s the difference between a stressed-out cook and a relaxed host who actually gets to enjoy the meal. I love this recipe because it lets me focus on what matters: the people around the table.
I encourage you to try it your way. Swap the herbs, adjust the thickness, or add a splash of wine. Make it yours. And when you do, I’d love to hear about it. Drop a comment below and tell me how it turned out, or share your own twist on this gravy. Did you use a different herb? Did you make it for a different holiday? Let me know!
Thanks for reading, and happy cooking. Here’s to a holiday season full of good food and even better company.
Frequently Asked Questions
Can I use chicken instead of turkey for the stock?
Absolutely. Chicken wings or drumsticks work perfectly. The flavor will be slightly different, but still delicious. It’s a great option if you can’t find turkey parts.
Can I make the gravy without drippings?
Yes, you can. The gravy will still be good, just less “roasted” in flavor. Use an extra tablespoon of butter and a splash of soy sauce or Worcestershire sauce to add depth.
Why did my gravy turn out lumpy?
Lumps usually happen when the roux is added too quickly or the liquid is too cold. Make sure your stock is simmering, and whisk the roux in a little at a time. If it’s too late, just strain the gravy through a fine-mesh strainer.
Can I double this recipe?
Yes, this recipe scales beautifully. Just double all the ingredients. The cooking time for the stock might increase slightly, but the final gravy will still come together in about 10 minutes.
How far ahead can I make the stock and roux?
The stock can be frozen for up to 3 months. The roux can be refrigerated for up to a month or frozen for even longer. I usually make both in early November, so I’m ready for Thanksgiving without any last-minute work.
Pin This Recipe!

Rich Make-Ahead Turkey Gravy from Scratch: Easy 10-Minute Recipe

This make-ahead turkey gravy is a game-changer for holiday cooking. Made from scratch with a rich turkey stock and a simple roux, it comes together in just 10 minutes on the big day, freeing you from last-minute stress.
- Prep Time: 5 minutes
- Cook Time: 10 minutes
- Total Time: 15 minutes
- Yield: 4 cups
- Category: Sauce
- Cuisine: American
Ingredients
- Turkey Wings or Drumsticks (about 2 lbs)
- Chicken or Turkey Stock (4 cups, low-sodium)
- Unsalted Butter (4 tablespoons)
- All-Purpose Flour (¼ cup)
- Turkey Drippings (½ cup, reserved from roasting)
- Fresh Thyme (2 sprigs)
- Bay Leaf (1 leaf)
- Salt and Black Pepper (to taste)
- Optional: White Wine or Sherry (¼ cup)
Instructions
- Stage 1: Make the Stock (Up to 3 Months Ahead): Place the turkey wings or drumsticks in a large stockpot. Cover them with 8 cups of cold water. Add the bay leaf and a pinch of salt.
- Bring to a boil over high heat, then reduce to a simmer. Skim off any foam that rises to the surface.
- Simmer for 2 to 3 hours, until the meat is falling off the bones and the liquid has reduced by about half. You should have about 4 cups of rich, golden stock.
- Remove the turkey pieces. Let them cool, then pick off any meat (save it for soup or sandwiches!). Strain the stock through a fine-mesh strainer into a large bowl. Discard the solids.
- Let the stock cool completely. Transfer to mason jars or freezer-safe containers. Leave an inch of headspace for expansion. Label and freeze for up to 3 months.
- Stage 2: Make the Roux (Up to 1 Month Ahead): In a small saucepan, melt the butter over medium heat. Once it’s foaming, add the flour all at once. Whisk constantly.
- Cook the roux for 2 to 3 minutes, whisking the whole time. It should smell nutty and look like wet sand. Don’t let it brown—we want a blond roux for gravy.
- Remove from heat and let the roux cool in the pan. Transfer it to a small container or a zip-top bag. It will solidify as it cools. Refrigerate for up to a month, or freeze for longer.
- Stage 3: Finish the Gravy (10 Minutes on the Day): On the big day, remove your stock and roux from the fridge or freezer. Thaw the stock in a saucepan over low heat. The roux can be used cold—just scoop it out.
- After you’ve roasted your turkey, pour the drippings from the roasting pan into a fat separator. Let it sit for a minute, then pour the defatted drippings into a measuring cup. You should have about ½ cup. If you have less, supplement with extra stock.
- In a medium saucepan, heat the defatted drippings over medium heat. If you’re using wine or sherry, add it now and scrape up any browned bits from the pan. Let it reduce by half, about 2 minutes.
- Add your homemade stock (about 4 cups) to the pan. Bring it to a gentle simmer.
- Whisk in the cold roux, a tablespoon at a time. Keep whisking until the gravy thickens. This should take about 3 to 5 minutes. Don’t dump it all in at once—add it slowly to control the thickness.
- Add the fresh thyme sprigs. Simmer for 2 more minutes. Taste and adjust seasoning with salt and pepper. Remove the thyme sprigs before serving.
- Your gravy is ready! It should be silky, rich, and deeply savory. Serve immediately, or keep it warm in a thermos or a slow cooker on low.
Notes
Don’t rush the stock; a full 2-3 hour simmer extracts maximum flavor. Watch the roux closely to avoid burning. Adding cold roux to hot liquid prevents lumps. Season at the end as stock and drippings are already salty. Strain again if lumps appear. The gravy can be made gluten-free by using a gluten-free flour blend or cornstarch slurry. For a dairy-free version, use olive oil instead of butter. The stock can be frozen for up to 3 months, and the roux can be refrigerated for up to a month.
Nutrition
- Serving Size: ¼ cup
- Calories: 110
- Sugar: 1
- Sodium: 350
- Fat: 8
- Saturated Fat: 4
- Carbohydrates: 6
- Protein: 3
Keywords: turkey gravy, make-ahead gravy, Thanksgiving gravy, easy gravy, homemade gravy, holiday gravy, rich gravy, from scratch



