Love this? Save it for later!
Share the inspiration with your friends
There used to be this tiny café tucked away on a side street in Portland—the kind of place with mismatched chairs and a chalkboard menu that changed daily. They called it The Sip, and they made a hot cocoa bar every December that was absolutely legendary. When they closed their doors three winters ago, I honestly felt a little lost. That first Christmas without their peppermint whipped cream felt incomplete, like the holidays were missing something essential. After seven tries—some disasters, some decent—I finally cracked it. This hot cocoa bar with peppermint whipped cream is my love letter to those cozy afternoons, and let me tell you, it’s even better than I remember.
You know that feeling when you take a sip of something and it just wraps around you like a warm blanket? That’s what this hot cocoa bar does. It’s not just a drink—it’s an experience, a little moment of joy you can share with everyone you love. I spent months tweaking the ratios, testing different cocoas, and perfecting that peppermint whip until it was light as air but packed with just the right cool, minty punch. And honestly, the best part? Watching people’s faces light up when they build their own cup. It’s pure magic.
Maybe you’ve been there too—chasing a flavor from a place that no longer exists, trying to bottle up a memory. This recipe is for you. It’s for the hosts who want to impress, the friends who gather around the table, and anyone who believes that the holidays should taste like something special. So grab your favorite mug, and let’s make some cocoa that’ll steal the show.
Why You’ll Love This Hot Cocoa Bar with Peppermint Whipped Cream
This isn’t just another hot cocoa recipe—it’s a whole experience designed to make you feel like a hosting superstar. I’ve tested this setup at three different holiday gatherings, and every single time, it’s the first thing to disappear. Here’s why this hot cocoa bar with peppermint whipped cream is going to become your new holiday tradition:
- Quick & Easy: The cocoa base comes together in under 15 minutes, and the whipped cream takes just 5 minutes with a hand mixer. Perfect for those last-minute guest arrivals or when you’re juggling a million holiday tasks.
- Simple Ingredients: No weird specialty items here. Cocoa powder, sugar, milk, cream—these are pantry staples you probably already have on hand. The peppermint extract is the only “special” ingredient, and it’s easy to find at any grocery store.
- Perfect for Gatherings: This hot cocoa bar is designed for hosting. Set it up buffet-style before guests arrive, and let everyone customize their own cup. It’s interactive, fun, and takes the pressure off you.
- Crowd-Pleaser: I’ve served this to kids, grandparents, and everyone in between. The combination of rich, creamy cocoa with that cool peppermint whip is universally loved. Even the folks who claim they don’t like hot cocoa end up going back for seconds.
- Unbelievably Delicious: The secret is in the double-cocoa punch—using both cocoa powder and melted chocolate chips in the base. It gives you that deep, velvety richness that store-bought packets just can’t touch. And the peppermint whipped cream? It’s light, fluffy, and has that perfect hint of mint that cuts through the sweetness.
What makes this hot cocoa bar different from every other recipe out there is the attention to detail. I spent weeks testing the perfect cocoa-to-milk ratio, figuring out how to keep the whipped cream stable for hours, and finding the best toppings that don’t get soggy. This isn’t just a recipe—it’s a system that works, every single time. And honestly, seeing everyone gather around the table, laughing and creating their perfect cups, is the kind of moment that makes all the effort worth it.
What Ingredients You Will Need
This hot cocoa bar with peppermint whipped cream uses simple, wholesome ingredients that come together to create something truly special. I’ve tested each component multiple times, and these specific ingredients deliver the best results without any fuss. Here’s everything you’ll need:
For the Hot Cocoa Base
- 1/2 cup unsweetened cocoa powder (I prefer Ghirardelli or Droste for the richest flavor)
- 1/2 cup granulated sugar (adjust to taste, but this gives a nice balanced sweetness)
- 1/4 teaspoon salt (don’t skip this—it enhances the chocolate flavor)
- 4 cups whole milk (for the creamiest texture; 2% works too but won’t be as luxurious)
- 1 cup heavy cream (this is the secret to that velvety mouthfeel)
- 4 ounces semi-sweet chocolate chips (use a good quality brand like Guittard or Enjoy Life for dairy-free)
- 1 teaspoon vanilla extract (pure, not imitation)
For the Peppermint Whipped Cream
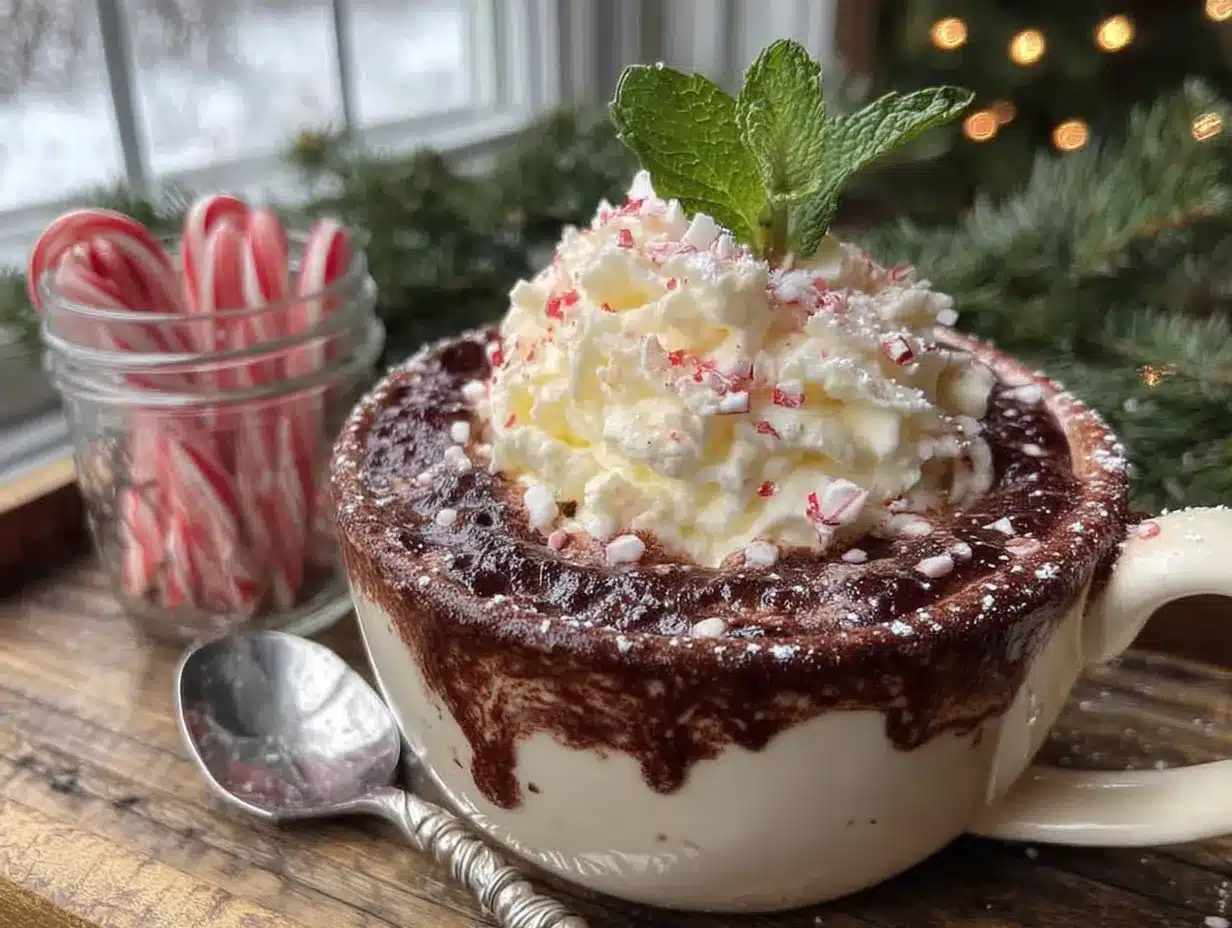
- 1 cup heavy whipping cream (must be cold for best results)
- 2 tablespoons powdered sugar (helps stabilize the cream)
- 1/2 teaspoon peppermint extract (start with less and add more to taste—it’s potent!)
- 1/4 teaspoon vanilla extract (rounds out the mint flavor beautifully)
For the Topping Bar
- Crushed candy canes or peppermint candies (about 1/2 cup, crushed in a zip-top bag)
- Mini marshmallows (the tiny ones work best for even distribution)
- Chocolate shavings or curls (use a vegetable peeler on a chocolate bar)
- Caramel sauce (for drizzling—homemade or store-bought like Ghirardelli)
- Chocolate syrup (optional, but adds extra indulgence)
- Sea salt flakes (Maldon is my favorite—it adds that fancy touch)
Ingredient Tips: Look for full-fat dairy here—it really makes a difference in the final texture. If you’re dairy-sensitive, you can substitute oat milk and coconut cream, but the texture won’t be quite as rich. For the peppermint extract, I recommend Nielsen-Massey or Simply Organic—they have a clean, pure mint flavor without any artificial aftertaste. And please, don’t use pre-crushed candy canes; they lose their freshness and crunch. Crush them yourself right before serving for the best texture.
Equipment Needed
You don’t need a ton of fancy equipment to pull off this hot cocoa bar with peppermint whipped cream, but having the right tools makes the process so much smoother. Here’s what I use every time:
- Large saucepan or Dutch oven (4-quart capacity is ideal for the cocoa base)
- Whisk (a sturdy balloon whisk works best to prevent lumps)
- Electric hand mixer or stand mixer (for the whipped cream—you can do it by hand, but your arm will thank you)
- Mixing bowls (one large for the cream, one small for toppings)
- Measuring cups and spoons
- Zip-top bag and rolling pin (for crushing candy canes)
- Slow cooker or thermal carafe (to keep the cocoa warm during serving)
- Mugs or heatproof cups (I love using clear glass mugs so guests can see the layers)
- Small bowls or ramekins (for arranging the toppings)
- Piping bag or zip-top bag with corner snipped (for a pretty whipped cream presentation)
Budget-Friendly Alternatives: If you don’t have a slow cooker, just keep the cocoa on the stovetop over the lowest heat, stirring occasionally. No piping bag? A spoon works perfectly fine for dolloping the cream. And honestly, I’ve used a plastic bag and a wooden spoon to crush candy canes more times than I can count—it works like a charm.
Preparation Method
Let’s walk through this step by step. I’ve tested this hot cocoa bar with peppermint whipped cream at least a dozen times, so trust me when I say these details matter. Take your time, and enjoy the process.
- Make the cocoa base (10 minutes): In your large saucepan, whisk together the cocoa powder, sugar, and salt until there are no lumps. This dry-mix step is crucial—if you skip it, you’ll end up with clumps of cocoa floating in your milk. Add about 1/2 cup of the milk and whisk into a smooth paste. This is called a “slurry,” and it’s the secret to silky-smooth cocoa.
- Add the remaining liquids (5 minutes): Pour in the rest of the milk and the heavy cream, whisking constantly. Turn the heat to medium and bring it to a gentle simmer—not a boil! You’ll see tiny bubbles around the edges of the pan, and the mixture will start to steam. This takes about 5-7 minutes. Keep whisking every minute or so to prevent a skin from forming on top.
- Add the chocolate and vanilla (3 minutes): Once the mixture is hot and steaming, remove it from the heat and add the chocolate chips. Let them sit for 30 seconds to soften, then whisk until completely smooth and glossy. Stir in the vanilla extract. Taste it here—if you want it sweeter, add a tablespoon more sugar. If you want it more chocolatey, add an extra ounce of chocolate chips.
- Keep warm (for serving): Transfer the cocoa to your slow cooker set on “warm” or pour it into a thermal carafe. It will stay hot for up to 2 hours. If you’re using the stovetop, keep it over the lowest possible heat and stir every 10 minutes. Don’t let it boil—it will scorch and develop a bitter taste.
- Make the peppermint whipped cream (5 minutes): In a large mixing bowl, combine the cold heavy cream, powdered sugar, peppermint extract, and vanilla extract. Using your hand mixer or stand mixer with the whisk attachment, beat on medium-high speed until soft peaks form. This takes about 2-3 minutes. Be careful not to over-whip—you want it light and fluffy, not stiff and buttery. If you go too far, add a tablespoon of cold cream and gently fold it in.
- Prepare the toppings (10 minutes): While the cream is chilling in the fridge, get your toppings ready. Place the crushed candy canes in a small bowl. Put the mini marshmallows, chocolate shavings, and sea salt in separate bowls. If you’re using caramel or chocolate sauce, pour them into small squeeze bottles or ramekins with spoons.
- Assemble the bar (5 minutes): Arrange everything on your serving table. Place the slow cooker or carafe of cocoa in the center. Surround it with the bowl of peppermint whipped cream (keep it on ice if your gathering is more than an hour). Arrange the topping bowls around it in a visually pleasing way. I like to put the colorful toppings like candy canes and marshmallows front and center.
- Serve and enjoy: Let guests ladle their own cocoa into mugs, add a generous dollop of peppermint whipped cream, and go wild with the toppings. Encourage them to layer—a little crunch from the candy canes, a drizzle of caramel, a pinch of sea salt. The combinations are endless!
Sensory Cues: At step 2, the cocoa should smell deeply chocolatey and look like dark, glossy paint when you whisk it. The whipped cream at step 5 should hold a soft peak when you lift the whisk—it should droop slightly but not collapse. The candy canes should be crushed into pieces about the size of small peas—not powder, not chunks.
Cooking Tips & Techniques
After making this hot cocoa bar with peppermint whipped cream more times than I can count, I’ve learned a few things the hard way. Let me save you from my mistakes.
The biggest mistake people make is boiling the milk. I did it my first time, and the cocoa turned out grainy and had a weird skin on top. Milk proteins are delicate—they curdle and separate when boiled. Always keep it at a gentle simmer, just below the boiling point. If you see bubbles breaking the surface aggressively, you’ve gone too far. Pull it off the heat immediately and whisk in a splash of cold milk to bring the temperature down.
Another common issue is over-whipping the cream. I once got distracted by a phone call and came back to what looked like butter. Peppermint whipped cream is best when it’s soft and billowy—stop the mixer as soon as you see those soft peaks forming. The cream should mound on a spoon but still have a slight droop. If you accidentally over-whip, don’t toss it! Add a tablespoon of cold cream and gently fold it in with a spatula. It won’t be perfect, but it’ll still taste great.
Timing is everything when hosting. Here’s my strategy: Make the cocoa base and whipped cream up to 24 hours in advance. Store the cocoa in the fridge and the whipped cream in an airtight container. On the day of your gathering, reheat the cocoa gently on the stovetop or in the slow cooker. Give the whipped cream a quick whisk to fluff it back up. This way, you’re not scrambling when guests arrive—you’re just setting up the bar and enjoying the party.
For the best texture, crush your candy canes right before serving. They start to soften and lose their crunch within about 30 minutes of being exposed to air. I’ve made the mistake of crushing them the night before, and by the time guests arrived, they were sticky and clumpy. Fresh is best here.
One last tip: taste your peppermint extract before adding it to the cream. Different brands have different strengths—some are super potent, others are milder. Start with 1/4 teaspoon, taste the cream, and add more if needed. You can always add, but you can’t take away.
Variations & Adaptations
This hot cocoa bar with peppermint whipped cream is incredibly versatile. I’ve adapted it for different diets, seasons, and taste preferences, and it always works. Here are some of my favorite variations:
Dairy-Free Version: Use full-fat oat milk and canned coconut cream (the thick part from a refrigerated can of full-fat coconut milk). The cocoa will be slightly thinner but still delicious. For the whipped cream, chill the coconut cream overnight and whip it with powdered sugar and peppermint extract. It’s not as stable as dairy cream, so serve it immediately.
Vegan Version: Follow the dairy-free instructions above, but use dairy-free chocolate chips (Enjoy Life makes great ones). Sweeten with maple syrup instead of sugar for a more natural flavor. Top with vegan marshmallows—Dandies brand is my go-to.
Mocha Twist: Add 2 teaspoons of instant espresso powder to the cocoa base along with the dry ingredients. It doesn’t make the cocoa taste like coffee—it just deepens the chocolate flavor and adds a subtle richness. I tried this on a whim last Christmas, and it’s now my husband’s favorite version.
Spiced Hot Cocoa: Add 1/2 teaspoon of cinnamon, a pinch of nutmeg, and a tiny pinch of cayenne pepper to the cocoa base. The warmth of the spices pairs beautifully with the cool peppermint whipped cream. This is perfect for a cozy winter evening by the fire.
Kid-Friendly Option: Skip the peppermint extract in the whipped cream and use vanilla extract instead. Set out a bowl of sprinkles, chocolate chips, and colorful marshmallows alongside the candy canes. Kids love building their own creations, and it keeps them entertained for ages.
Make It Boozy (Adults Only): Set out small bottles of peppermint schnapps, Irish cream, or bourbon next to the cocoa. Guests can add a splash to their mugs for an extra-warm holiday treat. I recommend about 1 ounce per cup—enough to taste but not overpower the chocolate.
Serving & Storage Suggestions
This hot cocoa bar with peppermint whipped cream is designed to be the centerpiece of your gathering, but it also stores beautifully if you have leftovers. Here’s how to make the most of it.
Serving Temperature: Serve the cocoa piping hot—around 160°F (71°C) is ideal. The peppermint whipped cream should be cold, straight from the fridge. The contrast between the hot cocoa and the cool, creamy topping is what makes this so magical. I recommend keeping the whipped cream in a bowl set over a larger bowl of ice to keep it cold throughout the event.
Presentation Tips: Arrange your toppings in a rainbow of colors—the red and white of the candy canes, the white marshmallows, the dark chocolate shavings. Use small glass bowls or ramekins for a polished look. Place a small ladle in the cocoa pot and a large spoon in the whipped cream. Provide napkins and small plates for guests to hold their toppings as they build their cups.
What to Serve Alongside: This hot cocoa bar pairs beautifully with classic sugar cookies, gingerbread men, or a plate of chocolate-dipped shortbread. I also love setting out a cheese board with sharp cheddar and apple slices—the savory-sweet contrast is surprisingly perfect.
Storage Instructions: Leftover cocoa can be stored in an airtight container in the fridge for up to 3 days. Reheat it gently on the stovetop or in the microwave (stir every 30 seconds). The peppermint whipped cream will keep in the fridge for up to 2 days, but it will deflate slightly. Give it a quick whisk before serving to bring back some volume. The toppings should be stored separately at room temperature—candy canes in an airtight container, marshmallows in their bag, and chocolate shavings in a cool, dry place.
Freezer Tips: You can freeze the cocoa base for up to 3 months. Let it cool completely, pour it into a freezer-safe container, and leave 1 inch of headspace for expansion. Thaw in the fridge overnight and reheat gently. Unfortunately, the peppermint whipped cream doesn’t freeze well—it becomes grainy when thawed. Make it fresh for best results.
Flavor Development: The cocoa actually tastes even better the next day! The flavors meld together overnight, creating a deeper, more complex chocolate taste. This is why I always make the base a day ahead when I’m hosting. Just reheat and serve—it’s a game-changer.
Nutritional Information & Benefits
While this hot cocoa bar with peppermint whipped cream is definitely a treat, it does offer some surprising nutritional benefits. Here’s a breakdown per serving (1 cup of cocoa with 2 tablespoons of whipped cream and 1 tablespoon of toppings):
- Calories: Approximately 320-380 calories per serving
- Fat: 22g (14g saturated)
- Carbohydrates: 34g (28g sugar)
- Protein: 7g
- Calcium: 25% of your daily needs (from the milk and cream)
- Iron: 15% of your daily needs (from the cocoa powder and chocolate)
Health Benefits: Cocoa powder is actually rich in antioxidants called flavonoids, which can help reduce inflammation and improve heart health. The milk provides calcium and vitamin D for strong bones. And the peppermint in the whipped cream can aid digestion—a nice bonus after a heavy holiday meal. Of course, this is still an indulgent treat, but it’s not entirely empty calories.
Dietary Considerations: This recipe is naturally vegetarian. For gluten-free, ensure your chocolate chips and candy canes are certified gluten-free (most are). For a lower-sugar version, reduce the sugar in the cocoa to 1/4 cup and use unsweetened whipped cream. For a lower-fat option, use 2% milk and skip the heavy cream in the cocoa base—it won’t be as rich, but it’ll still be delicious.
Potential Allergens: This recipe contains dairy and may contain traces of soy (in some chocolate chips). If you’re serving a crowd, label the toppings clearly so guests can make informed choices. I always set out a small card next to the cocoa listing the main allergens.
Conclusion
This hot cocoa bar with peppermint whipped cream is more than just a recipe—it’s a way to bring people together. I’ve watched friends who barely know each other bond over building their perfect cups, laughing at each other’s topping combinations, and going back for seconds (and thirds). There’s something about a DIY hot cocoa bar that breaks the ice and creates those warm, fuzzy holiday memories we all crave.
I hope you’ll try this for your next gathering. Don’t be afraid to customize it—swap in your favorite toppings, adjust the sweetness, or add your own twist. The beauty of this setup is that it’s endlessly adaptable. And honestly, even if you just make it for yourself on a quiet winter night, it’s worth every minute of effort. That first sip, with the cool peppermint cream melting into the rich, velvety cocoa? Pure comfort.
I’d love to hear how it goes! Leave a comment below and tell me what toppings you chose, or share a photo of your hot cocoa bar on social media. Tag me so I can see your beautiful creations. And if you have a variation that blew your mind, please share it—I’m always looking for new ideas. Now go make some cocoa and spread a little holiday cheer!
Frequently Asked Questions
Can I make this hot cocoa bar ahead of time for a party?
Absolutely! The cocoa base can be made up to 24 hours in advance and stored in the fridge. Reheat it gently on the stovetop or in a slow cooker before serving. The peppermint whipped cream can also be made a day ahead—just give it a quick whisk to fluff it back up before setting out the bar.
How do I keep the peppermint whipped cream from deflating during a party?
Keep the bowl of whipped cream set over a larger bowl filled with ice. This keeps it cold and stable for up to 2 hours. You can also make it slightly stiffer than usual by whipping it to medium peaks instead of soft peaks—it will hold up better without becoming grainy.
Can I use a dairy-free milk alternative in this recipe?
Yes! Full-fat oat milk is my top recommendation because it has a creamy texture similar to dairy milk. Coconut milk also works well but will add a slight coconut flavor. Avoid almond milk or rice milk—they’re too thin and won’t give you that rich, velvety consistency.
What’s the best way to crush candy canes for the topping?
Place the candy canes in a sturdy zip-top bag and seal it tightly. Use a rolling pin or a heavy-bottomed pan to gently crush them into small pieces. I prefer pieces about the size of small peas—not too fine or they’ll dissolve too quickly, and not too chunky or they’ll be hard to eat. Do this right before serving for the best crunch.
How many servings does this recipe make?
This recipe makes about 6-8 generous servings of cocoa, depending on mug size. The peppermint whipped cream yields about 2 cups, which is plenty for topping all the servings with a generous dollop. If you’re serving a larger crowd, simply double the recipe—it scales beautifully.
Pin This Recipe!
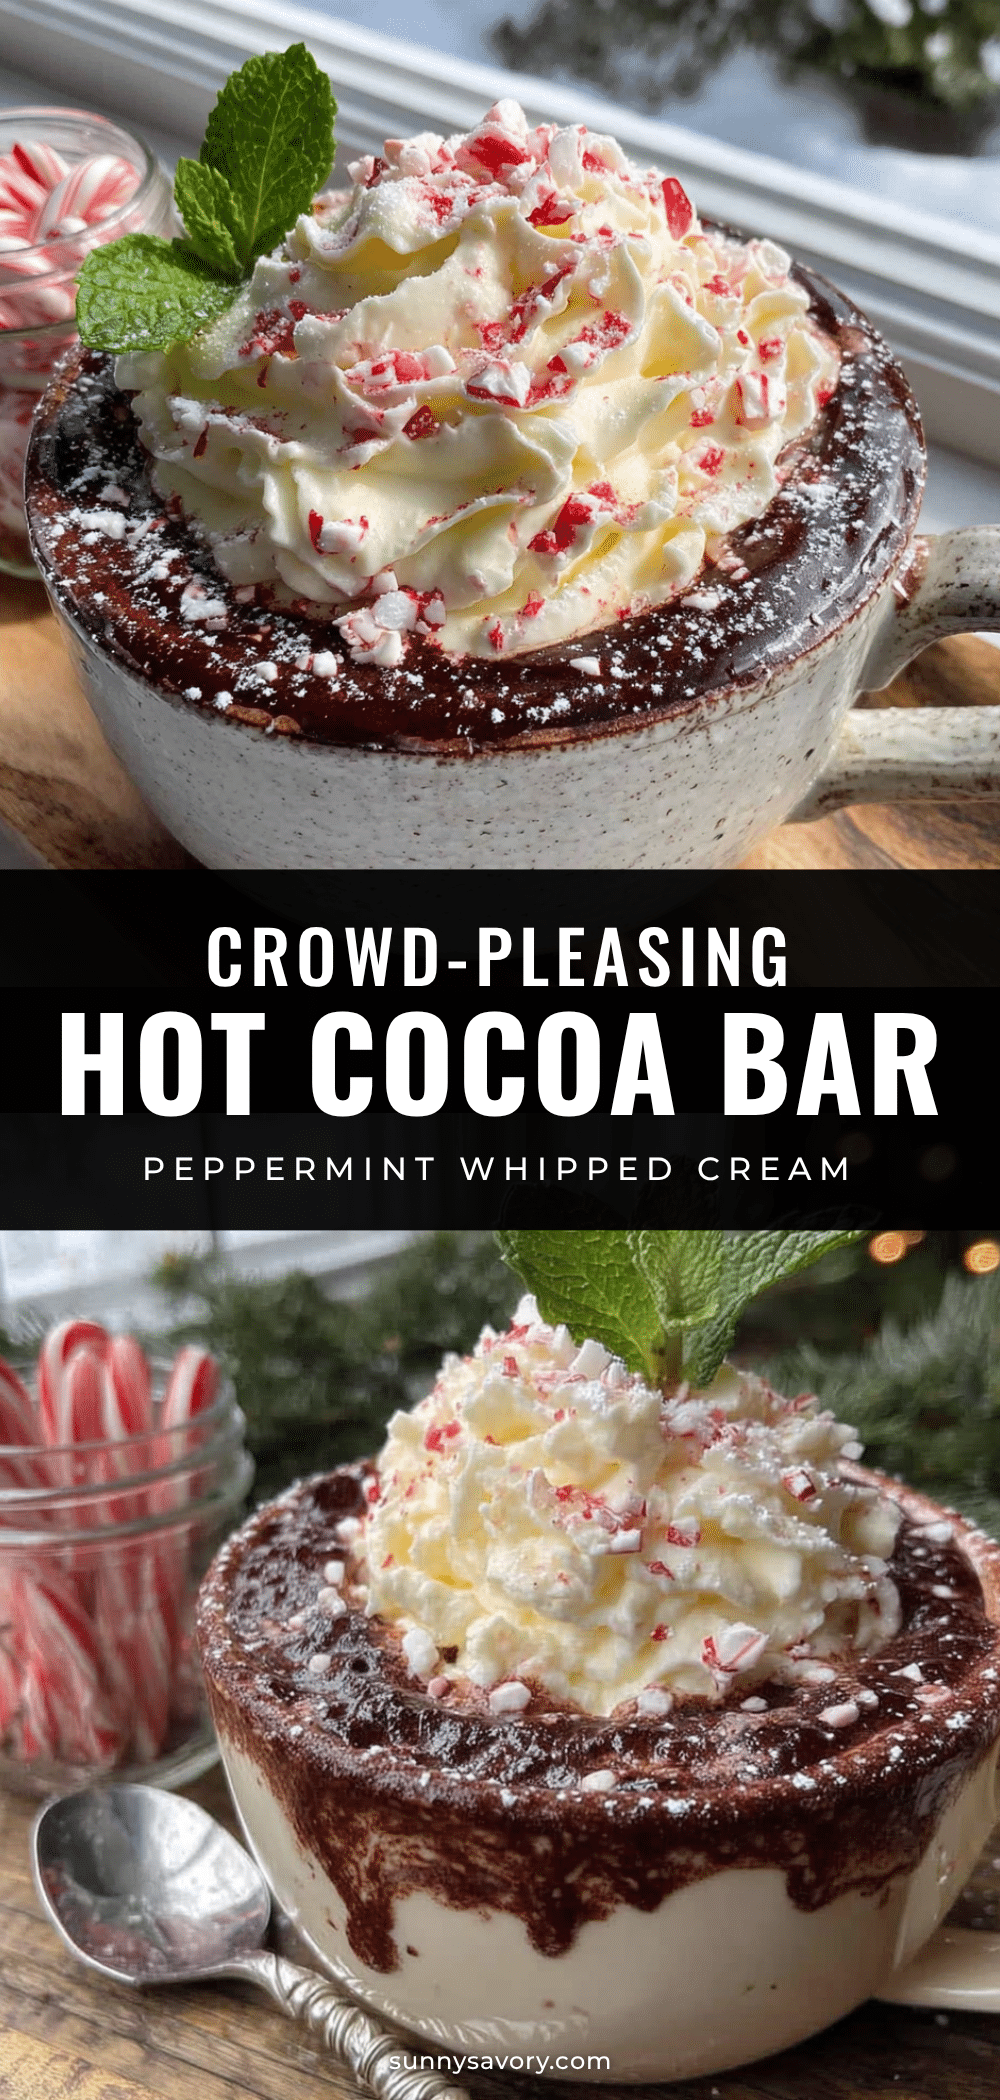
The Best Hot Cocoa Bar with Peppermint Whipped Cream
A rich, velvety hot cocoa bar with a light and fluffy peppermint whipped cream, perfect for holiday gatherings. Guests can customize their cups with a variety of toppings for a fun and interactive experience.
- Prep Time: 15 minutes
- Cook Time: 15 minutes
- Total Time: 30 minutes
- Yield: 6-8 servings 1x
- Category: Beverage
- Cuisine: American
Ingredients
- 1/2 cup unsweetened cocoa powder
- 1/2 cup granulated sugar
- 1/4 teaspoon salt
- 4 cups whole milk
- 1 cup heavy cream
- 4 ounces semi-sweet chocolate chips
- 1 teaspoon vanilla extract
- 1 cup heavy whipping cream (for whipped cream)
- 2 tablespoons powdered sugar
- 1/2 teaspoon peppermint extract
- 1/4 teaspoon vanilla extract (for whipped cream)
- 1/2 cup crushed candy canes or peppermint candies
- Mini marshmallows
- Chocolate shavings or curls
- Caramel sauce
- Chocolate syrup (optional)
- Sea salt flakes
Instructions
- In a large saucepan, whisk together cocoa powder, sugar, and salt until no lumps remain.
- Add about 1/2 cup of milk and whisk into a smooth paste (slurry).
- Pour in the remaining milk and heavy cream, whisking constantly. Heat over medium to a gentle simmer (do not boil), about 5-7 minutes, whisking occasionally.
- Remove from heat. Add chocolate chips, let sit for 30 seconds, then whisk until smooth and glossy. Stir in vanilla extract.
- Transfer cocoa to a slow cooker set on ‘warm’ or a thermal carafe to keep hot for up to 2 hours. Alternatively, keep on stovetop over lowest heat, stirring every 10 minutes.
- For the peppermint whipped cream: In a large bowl, combine cold heavy whipping cream, powdered sugar, peppermint extract, and vanilla extract. Beat with a hand mixer or stand mixer on medium-high until soft peaks form (2-3 minutes). Do not over-whip.
- Prepare toppings: Place crushed candy canes, mini marshmallows, chocolate shavings, sea salt, and sauces in separate small bowls or ramekins.
- Assemble the bar: Place the warm cocoa in the center. Surround with the bowl of peppermint whipped cream (keep on ice if serving over an hour) and topping bowls.
- Serve: Let guests ladle cocoa into mugs, add a dollop of whipped cream, and customize with desired toppings.
Notes
For best results, use full-fat dairy. Do not boil the milk to avoid graininess. Crush candy canes right before serving for maximum crunch. The cocoa base can be made up to 24 hours in advance and reheated. The whipped cream can be made a day ahead; re-whip briefly before serving. For a dairy-free version, use full-fat oat milk and coconut cream.
Nutrition
- Serving Size: 1 cup cocoa with 2 t
- Calories: 320380
- Sugar: 28
- Sodium: 180
- Fat: 22
- Saturated Fat: 14
- Carbohydrates: 34
- Fiber: 3
- Protein: 7
Keywords: hot cocoa, hot chocolate, peppermint whipped cream, holiday drink, cocoa bar, Christmas, winter, party drink



