Love this? Save it for later!
Share the inspiration with your friends
I was standing in the middle of a parking lot last October, juggling a bag of apples and my car keys, when the breeze shifted and carried the most specific smell—woodsmoke, damp leaves, and something sweet baking nearby. And just like that, I was ten years old again, standing in my aunt’s tiny kitchen in Vermont, watching her pour a thin ribbon of maple glaze over a cake that steamed in the cool morning air. She’d always made it on the first truly cold day of autumn, and she never wrote the recipe down. I didn’t realize then that I’d spend years trying to recreate that exact feeling—that warm, cozy, brown-buttery hug of a cake. Honestly, I’ve messed it up plenty. One time I forgot the apple cider entirely and ended up with a dry, sad spice cake. Another time I burned the brown butter so badly the whole kitchen smelled like a campfire gone wrong. But this version? This is the one. It’s not just a cake—it’s a memory you can eat. And maybe you’ve been there, chasing a taste you can almost but not quite hold onto. This is me finally catching it.
Why You’ll Love This Recipe
Let me tell you why this brown butter apple cider cake with maple glaze belongs in your fall baking rotation. I’ve tested this recipe six times to get the texture just right—moist but not dense, tender but sturdy enough to hold that gorgeous glaze. It’s the kind of cake that makes you close your eyes after the first bite.
- Simple Ingredients: No fancy grocery trips needed. You probably have most of this in your pantry right now—flour, sugar, eggs, butter, and apple cider. The maple glaze uses just three ingredients.
- Quick & Easy: From start to finish, this cake comes together in about an hour. The brown butter takes five minutes, and the rest is straightforward mixing. Perfect for a Sunday afternoon or a last-minute fall gathering.
- Perfect for Family Meals: This cake pleases everyone—picky kids love the sweet maple glaze, and adults appreciate the subtle nuttiness of brown butter. It’s not too fancy, but it feels special.
- Crowd-Pleaser: I brought this to a potluck last month, and three people asked for the recipe before I even got a slice. It’s that good.
- Unbelievably Delicious: The combination of brown butter and apple cider creates this deep, almost caramel-like flavor that’s perfectly balanced by the maple glaze. It’s comfort food at its finest—simple, warm, and soul-soothing.
What makes this recipe different from all the other apple cider cakes out there? It’s the brown butter. That one extra step transforms the entire cake, adding a nutty, toasty depth that regular melted butter just can’t match. And the maple glaze isn’t too sweet—it’s just enough to complement the cake without overwhelming it. This isn’t just another version; it’s the best version I’ve ever made, and I’ve made a lot of apple cakes over the years.
What Ingredients You Will Need
This recipe uses simple, wholesome ingredients to deliver bold flavor and satisfying texture without any fuss. Most of these are pantry staples, especially if you bake during the fall. Here’s what you’ll need:
For the Cake
- Unsalted butter, ½ cup (113g) — You’ll brown this first, so don’t skip that step. I prefer using a good-quality butter like Kerrygold for richer flavor.
- All-purpose flour, 2 cups (250g) — Spoon and level it for the most accurate measurement. Too much flour makes the cake dry.
- Granulated sugar, 1 cup (200g) — Regular white sugar works perfectly. You could also use cane sugar if you prefer.
- Light brown sugar, ½ cup (100g), packed — This adds moisture and a deeper flavor that complements the brown butter.
- Baking powder, 1½ teaspoons — Make sure it’s fresh. Old baking powder won’t give you the rise you need.
- Baking soda, ½ teaspoon — Helps the cake brown nicely.
- Salt, ½ teaspoon — I use fine sea salt. It balances the sweetness.
- Ground cinnamon, 1 teaspoon — The backbone of fall baking. I recommend a good-quality Vietnamese cinnamon for extra warmth.
- Ground nutmeg, ¼ teaspoon — Freshly grated if you have it, but pre-ground works fine.
- Ground ginger, ¼ teaspoon — Adds a subtle warmth that most people can’t quite place but notice.
- Large eggs, 2, room temperature — Room-temperature eggs incorporate better into the batter. Take them out 30 minutes before you start.
- Apple cider, ¾ cup (177ml) — Not apple juice! Apple cider has that tart, tangy flavor that makes this cake special. Look for fresh, unfiltered cider in the refrigerated section.
- Vanilla extract, 1 teaspoon — Pure vanilla, not imitation. It makes a difference.
- Whole milk, ½ cup (120ml), room temperature — You can substitute with buttermilk for an even more tender crumb. (Use dairy-free milk if needed.)
For the Maple Glaze
- Powdered sugar, 1 cup (120g) — Sift it if it’s lumpy.
- Pure maple syrup, 3 tablespoons — Please don’t use pancake syrup. Real maple syrup is worth the splurge here. I recommend Grade A Dark Amber for the strongest maple flavor.
- Whole milk or heavy cream, 1–2 tablespoons — Heavy cream makes a richer glaze, but milk works perfectly fine.
- Pinch of salt — Just a tiny pinch to balance the sweetness.
Equipment Needed
You don’t need anything fancy for this cake, which is part of why I love it. Here’s what you’ll need:
- 9-inch round cake pan — A standard metal pan works best. Glass or ceramic pans can cause the edges to bake too quickly. I’ve used the same USA Pan for years, and it never lets me down.
- Parchment paper — Cut a circle for the bottom of the pan. This guarantees the cake releases cleanly.
- Light-colored saucepan — This is crucial for browning butter. A dark pan makes it hard to see when the butter turns golden. A stainless steel pan is ideal.
- Medium mixing bowls (2) — One for dry ingredients, one for wet.
- Whisk — For mixing dry ingredients and the glaze.
- Hand mixer or stand mixer — You can mix this by hand if you’re patient, but a mixer makes it easier to cream the butter and sugars properly.
- Rubber spatula — For scraping down the bowl and folding in the final ingredients.
- Cooling rack — Essential for even cooling. If you don’t have one, you can use the inverted pan from your oven, but a wire rack is better.
- Measuring cups and spoons — The usual suspects.
Budget-friendly tip: If you don’t have a hand mixer, a wooden spoon and some elbow grease will work. The batter is forgiving, and a few lumps won’t ruin the cake.
Preparation Method
Let’s get baking. This process is straightforward, but I’ll walk you through every step so you feel confident.
- Preheat and prep the pan. Preheat your oven to 350°F (175°C). Grease your 9-inch round cake pan with butter or nonstick spray, then line the bottom with a circle of parchment paper. This step is non-negotiable if you want a clean release. Trust me—I learned the hard way after a cake stuck so badly I had to serve it as crumble.
- Brown the butter. Place the ½ cup of unsalted butter in your light-colored saucepan over medium heat. Stir it occasionally with a rubber spatula. After about 3–4 minutes, the butter will start to foam and bubble. Watch closely—you’ll see golden specks forming at the bottom. When the butter smells nutty and turns a deep amber color, remove it from the heat immediately. Pour it into a heatproof bowl to stop the cooking process. Let it cool for about 10 minutes. Don’t skip this step. Burnt butter is bitter, not nutty.
- Mix the dry ingredients. In a medium bowl, whisk together the 2 cups of all-purpose flour, 1½ teaspoons baking powder, ½ teaspoon baking soda, ½ teaspoon salt, 1 teaspoon cinnamon, ¼ teaspoon nutmeg, and ¼ teaspoon ginger. Set this aside.
- Cream the butter and sugars. In a large bowl, combine the cooled brown butter, 1 cup granulated sugar, and ½ cup packed brown sugar. Beat with a hand mixer on medium speed for about 2 minutes until the mixture looks light and fluffy. It won’t get as fluffy as with room-temperature butter, but that’s okay.
- Add the eggs and vanilla. Add the 2 room-temperature eggs one at a time, beating well after each addition. Then mix in the 1 teaspoon of vanilla extract. The batter should look smooth and glossy at this point.
- Alternate the dry ingredients and liquids. With the mixer on low speed, add about one-third of the dry ingredients, then half of the ¾ cup apple cider, then another third of the dry ingredients, then the remaining cider, and finally the last third of the dry ingredients. Mix until just combined after each addition. Then add the ½ cup room-temperature milk and mix until the batter is smooth. Be careful not to overmix—stop as soon as you don’t see any more flour streaks. Overmixing makes the cake tough.
- Pour and bake. Pour the batter into your prepared pan and spread it evenly with a spatula. Bake for 35–40 minutes, or until a toothpick inserted into the center comes out clean or with just a few moist crumbs. The top should be golden brown and spring back when you gently press it. Let the cake cool in the pan for 10 minutes, then run a knife around the edges and invert it onto a cooling rack. Peel off the parchment paper and let it cool completely—about 1 hour. Don’t glaze a warm cake, or the glaze will slide right off.
- Make the maple glaze. While the cake cools, whisk together 1 cup powdered sugar, 3 tablespoons maple syrup, and 1 tablespoon of milk or cream in a small bowl. If the glaze is too thick, add another tablespoon of milk. If it’s too thin, add a bit more powdered sugar. You want it thick enough to drizzle but thin enough to spread. Add a tiny pinch of salt.
- Glaze and serve. Once the cake is completely cool, pour the glaze over the top and spread it gently to the edges. Let it set for about 10 minutes before slicing. The glaze will firm up slightly but stay soft and shiny.
Cooking Tips & Techniques
I’ve made this cake enough times to know where things can go wrong. Here are the lessons I learned the hard way so you don’t have to.
Don’t walk away from browning butter. I once answered the phone while browning butter, and by the time I came back, it was black and smelled like burnt popcorn. Stay at the stove. It takes less than 5 minutes, and the difference between perfectly browned and burnt is about 30 seconds.
Room temperature ingredients matter. Cold eggs and milk can seize the brown butter and create a lumpy batter. I know it’s tempting to use them straight from the fridge, but trust me—take them out 30 minutes ahead. If you forget, place the eggs in a bowl of warm water for 5 minutes, and microwave the milk for 10 seconds.
Measure your flour correctly. The most common baking mistake is scooping flour directly from the bag with your measuring cup. This packs the flour and can add up to 25% more than you need. Instead, spoon the flour into the cup and level it off with a knife. Your cake will thank you.
Check for doneness early. Ovens vary wildly. Start checking your cake at 30 minutes. If the top is browning too quickly but the center isn’t done, tent the pan loosely with aluminum foil for the last 10 minutes.
Let the cake cool completely. I know it’s hard to wait, but glazing a warm cake is a disaster. The glaze will melt into a puddle and soak into the cake, leaving you with a sticky mess. Patience pays off here.
Variations & Adaptations
One of the best things about this cake is how adaptable it is. Here are some variations I’ve tried and loved.
- Gluten-Free Version: Substitute the all-purpose flour with a 1:1 gluten-free baking flour blend. I’ve used Bob’s Red Mill with great results. The texture will be slightly more crumbly, but the flavor is still there.
- Dairy-Free Version: Use a plant-based butter for browning (I like Miyoko’s), and substitute the milk with oat milk or almond milk. The brown butter flavor won’t be as rich, but it’s still delicious.
- Add Fresh Apples: Fold in 1 cup of finely diced apples (like Honeycrisp or Granny Smith) into the batter before baking. This adds little pockets of tender fruit throughout the cake. I did this for a fall brunch, and everyone raved about it.
- Spice It Up: Add ¼ teaspoon of cardamom or allspice to the dry ingredients for a more complex flavor profile. Cardamom pairs beautifully with apple and maple.
- Make It a Layer Cake: Double the recipe and bake in two 9-inch pans. Layer with maple buttercream or cream cheese frosting for a showstopper dessert.
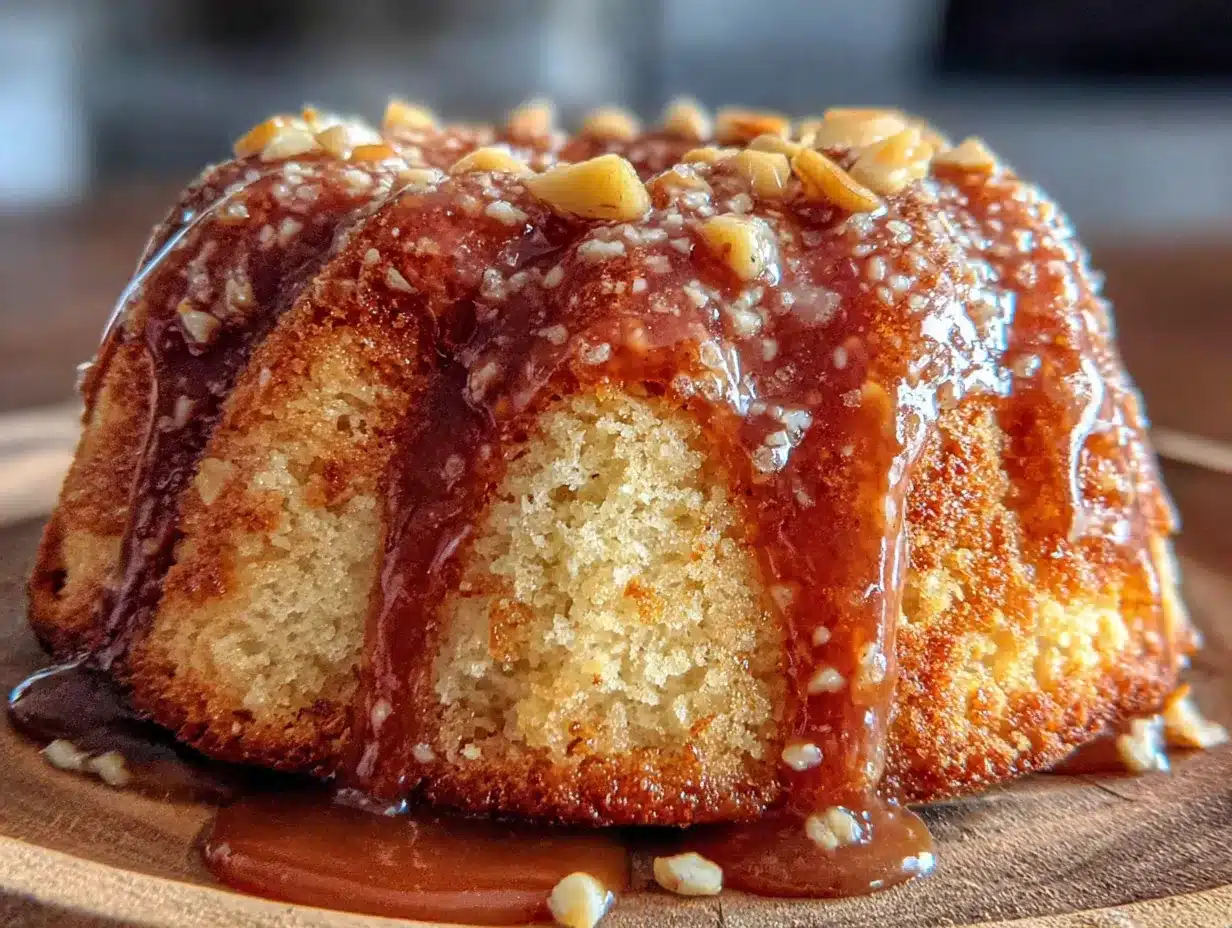
- Bundt Pan Version: Grease a 10-cup Bundt pan and bake for 45–50 minutes. The glaze will drip beautifully down the sides.
Serving & Storage Suggestions
This cake is fantastic at room temperature, but I actually prefer it slightly warm—just a quick 10-second zap in the microwave brings the brown butter flavor back to life. Serve it with a dollop of lightly sweetened whipped cream or a scoop of vanilla ice cream for the full experience.
For a cozy fall brunch, pair it with a hot cup of coffee or spiced chai. It also goes beautifully with a glass of cold apple cider—double down on the apple theme, you know?
Storage Instructions: Store the glazed cake in an airtight container at room temperature for up to 3 days. The glaze will stay soft and shiny. If you live in a humid climate, you might want to refrigerate it after the first day to prevent the glaze from getting sticky.
Freezer Instructions: This cake freezes beautifully. Wrap the unglazed cake tightly in plastic wrap, then in aluminum foil, and freeze for up to 3 months. When you’re ready to serve, thaw it overnight in the refrigerator, bring it to room temperature, and then add the glaze. The glaze doesn’t freeze well, so always add it fresh.
Reheating: For individual slices, microwave for 10–15 seconds. For a whole cake, warm it in a 300°F (150°C) oven for 10 minutes. The flavors actually deepen after a day or two—the brown butter and apple cider meld together beautifully overnight.
Nutritional Information & Benefits
Let’s be honest—this is a treat, not a health food. But it does have some redeeming qualities. Here’s the approximate nutritional breakdown per slice (based on 10 servings):
- Calories: 345
- Fat: 14g
- Carbohydrates: 52g
- Protein: 4g
- Fiber: 1g
- Sugar: 35g
Apple cider contains antioxidants and small amounts of vitamin C, and cinnamon has anti-inflammatory properties. The brown butter adds a touch of vitamin A from the dairy. But really, this cake is about joy and comfort, not nutrition. I believe in balance—enjoy a slice, savor every bite, and don’t feel guilty about it. Life is too short for bad cake.
Dietary Considerations: This recipe contains dairy, eggs, and gluten. See the variations section for dairy-free and gluten-free adaptations. It is nut-free as written.
Conclusion
This brown butter apple cider cake with maple glaze is more than just a recipe—it’s a little slice of autumn that you can make any time you need a warm, cozy hug. The nutty brown butter, the tangy apple cider, the sweet maple glaze—every bite tastes like October in the best possible way.
I hope you make this cake and love it as much as I do. Don’t be afraid to tweak it to your liking—add more cinnamon, swap the glaze for cream cheese frosting, or throw in some chopped pecans. This recipe is a starting point, not a rulebook.
If you make it, I’d love to hear how it turned out. Leave a comment below, tag me in your photos, or share your own variations. Happy baking, friends. And remember—the best cakes are the ones you share with the people you love.
Frequently Asked Questions
Can I use apple juice instead of apple cider?
I wouldn’t recommend it. Apple juice is sweeter and less tangy than apple cider, which means you’ll lose that signature tartness that balances the brown butter and maple glaze. If you absolutely have to substitute, use a combination of apple juice and a squeeze of lemon juice to mimic the acidity.
Why did my brown butter burn?
Brown butter goes from perfectly golden to burnt very quickly. Make sure you’re using a light-colored saucepan so you can see the color change, and remove it from the heat as soon as you see golden specks forming at the bottom. Stir constantly during the last minute of cooking.
Can I make this cake ahead of time?
Absolutely! You can bake the cake a day ahead and store it tightly wrapped at room temperature. Add the glaze on the day you plan to serve it for the best presentation. The cake actually tastes even better the next day as the flavors have time to meld.
My cake came out dry. What went wrong?
This usually happens for one of three reasons: you overmeasured the flour, you overbaked the cake, or you used apple juice instead of apple cider. Make sure you’re spooning and leveling your flour, checking for doneness early, and using real apple cider for the best moisture.
Can I double this recipe?
Yes! This recipe doubles beautifully. Use a 9×13-inch pan and bake for 40–45 minutes, or use two 9-inch round pans for a layer cake. Just make sure you have a large enough bowl for the batter—this recipe makes a generous amount.
Pin This Recipe!
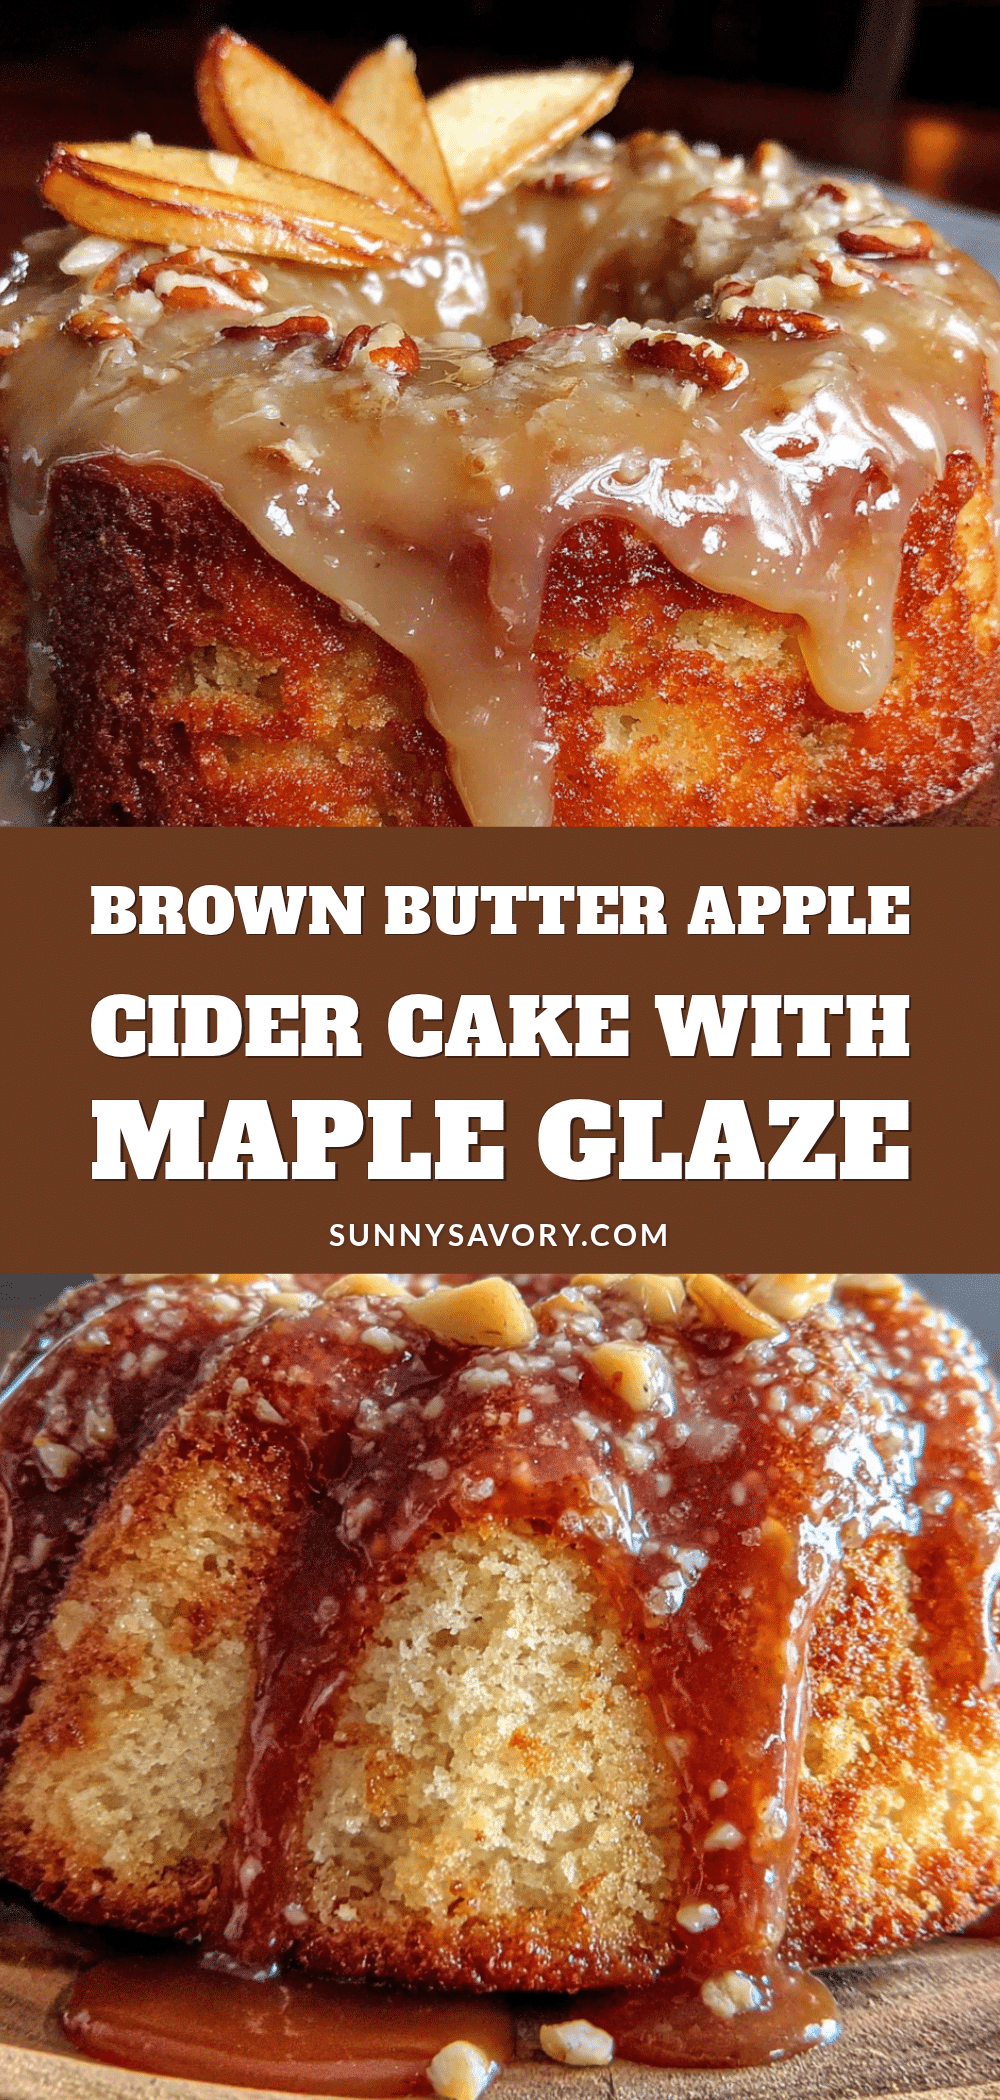
Cozy Brown Butter Apple Cider Cake with Easy Maple Glaze
A moist, tender apple cider cake with nutty brown butter and a sweet maple glaze. This fall favorite is simple to make and perfect for cozy gatherings.
- Prep Time: 15 minutes
- Cook Time: 35 minutes
- Total Time: 1 hour 10 minutes
- Yield: 10 servings
- Category: Dessert
- Cuisine: American
Ingredients
- Unsalted butter, ½ cup (113g)
- All-purpose flour, 2 cups (250g)
- Granulated sugar, 1 cup (200g)
- Light brown sugar, ½ cup (100g), packed
- Baking powder, 1½ teaspoons
- Baking soda, ½ teaspoon
- Salt, ½ teaspoon
- Ground cinnamon, 1 teaspoon
- Ground nutmeg, ¼ teaspoon
- Ground ginger, ¼ teaspoon
- Large eggs, 2, room temperature
- Apple cider, ¾ cup (177ml)
- Vanilla extract, 1 teaspoon
- Whole milk, ½ cup (120ml), room temperature
- Powdered sugar, 1 cup (120g)
- Pure maple syrup, 3 tablespoons
- Whole milk or heavy cream, 1–2 tablespoons
- Pinch of salt
Instructions
- Preheat oven to 350°F (175°C). Grease a 9-inch round cake pan and line the bottom with parchment paper.
- Brown the butter: Place ½ cup unsalted butter in a light-colored saucepan over medium heat. Stir occasionally until it foams, turns golden, and smells nutty (about 3–4 minutes). Remove from heat and pour into a heatproof bowl to cool for 10 minutes.
- In a medium bowl, whisk together flour, baking powder, baking soda, salt, cinnamon, nutmeg, and ginger.
- In a large bowl, beat the cooled brown butter, granulated sugar, and brown sugar with a hand mixer on medium speed until light and fluffy (about 2 minutes).
- Add eggs one at a time, beating well after each. Mix in vanilla extract.
- With mixer on low, add dry ingredients and apple cider alternately, starting and ending with dry ingredients. Mix until just combined. Then add milk and mix until smooth. Do not overmix.
- Pour batter into prepared pan and spread evenly. Bake for 35–40 minutes, until a toothpick inserted in the center comes out clean. Cool in pan for 10 minutes, then invert onto a wire rack. Remove parchment and cool completely (about 1 hour).
- Make the glaze: Whisk together powdered sugar, maple syrup, and 1 tablespoon milk or cream. Add more milk if too thick, more powdered sugar if too thin. Add a pinch of salt.
- Once cake is completely cool, pour glaze over top and spread to edges. Let set for 10 minutes before slicing.
Notes
Don’t walk away from browning butter; it can burn quickly. Use room temperature ingredients for best results. Measure flour by spooning and leveling. Check for doneness at 30 minutes. Let cake cool completely before glazing.
Nutrition
- Serving Size: 1 slice
- Calories: 345
- Sugar: 35
- Sodium: 280
- Fat: 14
- Saturated Fat: 8
- Carbohydrates: 52
- Fiber: 1
- Protein: 4
Keywords: brown butter, apple cider cake, maple glaze, fall dessert, easy cake, autumn baking



