Love this? Save it for later!
Share the inspiration with your friends
There used to be a little bakery-café in downtown Portland called The Witch’s Pantry that made the most incredible savory pastries. When they closed their doors back in 2019, I was genuinely heartbroken. Not just because their coffee was perfect, but because they had this one item on their menu that I still dream about—their “Mummy Dogs.” Yes, you read that right. They took humble hot dogs, wrapped them in the flakiest homemade dough, and baked them until they looked like little mummies. The eyes were made of mustard, and they stared up at you from the plate, almost too cute to eat. Almost.
After the café shut down, I spent an embarrassing amount of time trying to recreate those mummy hot dogs. I mean, honestly, I must have made six or seven batches before I got it right. The first batch? The dough was too thick and puffed up like a balloon. The second batch? I forgot to add the eyes before baking and ended up drawing them on with a toothpick afterward (don’t ask). But the third batch—that was the one. The dough was golden and crispy, the hot dogs were juicy, and the mustard eyes stayed perfectly in place. I literally did a little dance in my kitchen.
So here I am, sharing my version with you. Maybe you’ve been there—obsessed with a dish from a place that no longer exists, determined to bring it back to life in your own kitchen. Or maybe you just need a ridiculously fun, easy Halloween appetizer that will make everyone at your party smile. Either way, these easy mummy hot dogs are for you. They’re simple, they’re silly, and they taste way better than anything you’d buy at a store. Let me tell you, once you make these, you’ll never go back to plain hot dogs for Halloween night.
Why You’ll Love This Recipe
Let’s be real for a second—Halloween party food can be a total pain. You want something festive, but you also don’t want to spend three hours in the kitchen while your guests are having fun. That’s where these mummy hot dogs come in. They are the perfect balance of adorable and ridiculously easy. Here’s why they’ll become your go-to Halloween appetizer:
- Quick & Easy: These come together in under 30 minutes. Seriously, from start to finish, you’re looking at about 25 minutes. Perfect for last-minute party prep or when the kids are getting hangry and you need something fast.
- Simple Ingredients: You probably already have everything in your kitchen right now. Hot dogs, crescent roll dough, and mustard. That’s it. No fancy grocery trips required.
- Perfect for Halloween Gatherings: Whether you’re hosting a costume party, a spooky movie night, or just want to surprise your family on October 31st, these little guys steal the show. They’re a crowd-pleaser for both kids and adults.
- Crowd-Pleaser: I’ve served these at three different Halloween parties now, and they disappear faster than anything else on the table. People love the presentation, and they love the taste even more. It’s comfort food with a spooky twist.
- Unbelievably Delicious: The combination of flaky, buttery dough wrapped around a juicy hot dog is just plain satisfying. And when you add that little pop of tangy mustard for the eyes? Chef’s kiss.
What makes this recipe different from all the other mummy hot dog recipes out there? It’s the little details. I’ve tested this with different doughs—puff pastry, homemade biscuit dough, even pizza dough—and crescent roll dough wins every single time. It bakes up perfectly golden, stays soft but not soggy, and the mustard eyes don’t slide off. Trust me, I learned the hard way. This isn’t just another version; it’s the best version.
What Ingredients You Will Need
This recipe uses simple, everyday ingredients to deliver maximum flavor and adorable presentation without any fuss. Here’s what you’ll need to gather before you start wrapping those mummies:
- 1 package (8-count) refrigerated crescent roll dough — This is the secret weapon. I prefer Pillsbury Original Crescents for their consistent texture and buttery flavor. Make sure you get the seamless sheet style if you can find it, but the regular perforated ones work just fine too.
- 8 hot dogs — Use your favorite brand. I personally love Hebrew National or Oscar Mayer for their classic taste. You can also use turkey or chicken hot dogs if you prefer a lighter option. Just make sure they’re standard size, not jumbo.
- Mustard for the eyes — Yellow mustard works best because it has that perfect bright yellow color that stands out against the golden dough. You can use a squeeze bottle or just dip a toothpick for precise application. If you’re not a mustard fan, you can use ketchup or even small dots of cream cheese mixed with food coloring.
- 1 large egg, beaten (optional) — For an extra golden, shiny finish. I skip this sometimes when I’m in a hurry, but it does make them look more bakery-quality. If you don’t have eggs, you can use a little milk or melted butter instead.
- Salt and pepper to taste (optional) — A light sprinkle of salt before baking can enhance the flavors, but honestly, the hot dogs and dough are already pretty salty on their own.
That’s it! No crazy ingredients, no long shopping list. This is the kind of recipe you can make on a whim, which is exactly why I love it. If you want to get fancy, you could add a sprinkle of everything bagel seasoning or sesame seeds on top before baking. But for the classic mummy look, keep it simple.
Equipment Needed
You don’t need any special equipment for this recipe, which is one of the reasons I make it so often. Here’s what you’ll need:
- Baking sheet — A standard half-sheet pan works perfectly. Line it with parchment paper or a silicone baking mat for easy cleanup. Trust me, you’ll thank yourself later.
- Sharp knife or pizza cutter — For cutting the crescent roll dough into strips. A pizza cutter makes it super fast, but a sharp knife works just as well. I’ve used both, and honestly, the pizza cutter is my favorite because it doesn’t drag the dough.
- Small bowl — For the beaten egg wash if you’re using it. A shallow dish works best for easy dipping.
- Pastry brush — For applying the egg wash. If you don’t have one, you can use a paper towel or even your fingers. I’ve done it both ways, and the pastry brush gives a more even coat.
- Toothpicks — Optional, but helpful for applying the mustard eyes with precision. You can also use a squeeze bottle if you have one.
- Cooling rack — Optional, but recommended if you want to keep the bottoms from getting soggy. I usually just let them cool on the baking sheet for a few minutes, then transfer them to a plate.
That’s really all you need. No stand mixer, no fancy gadgets. Just basic kitchen tools and a little bit of patience while you wrap those mummies.
Preparation Method
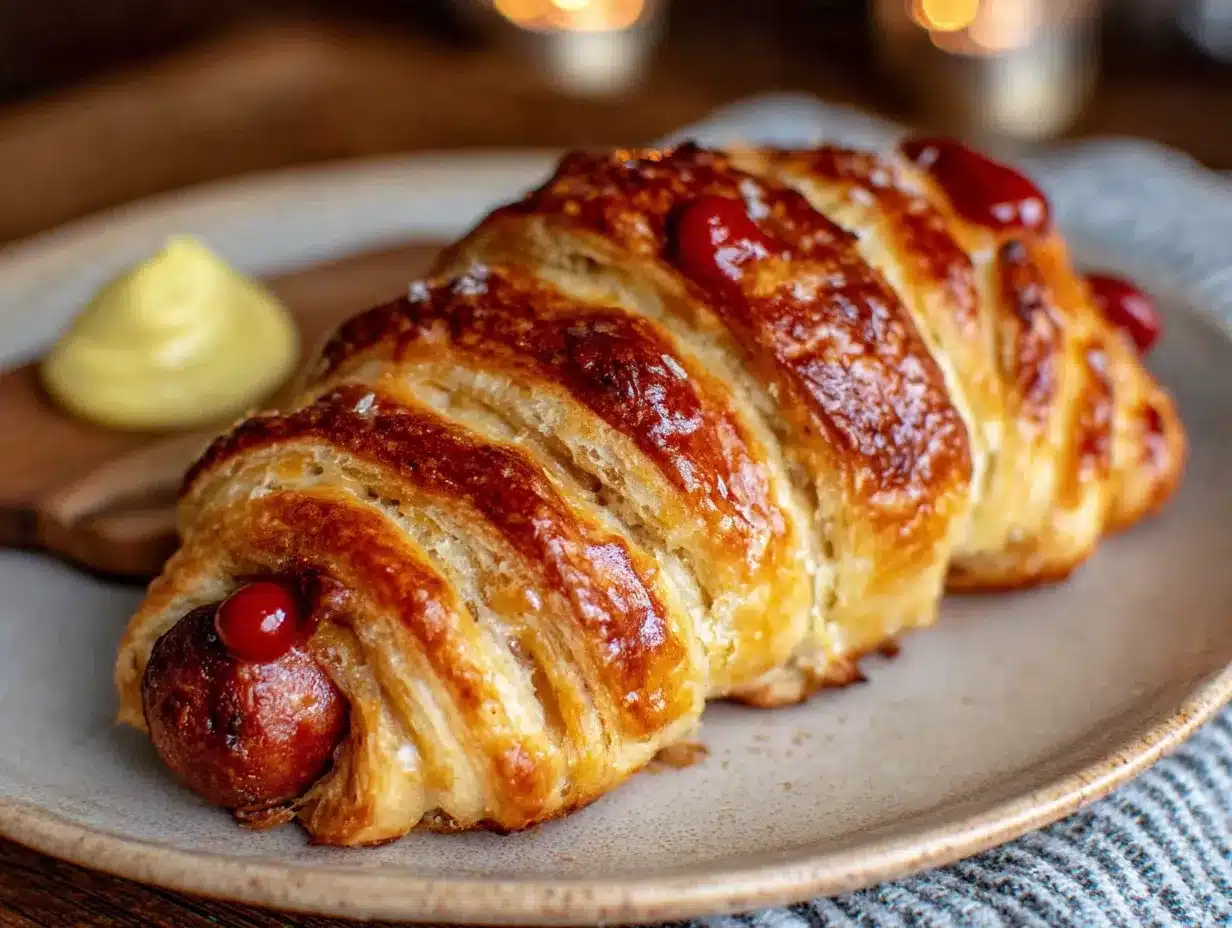
Alright, let’s get to the fun part! Follow these steps, and you’ll have a tray of adorable, delicious mummy hot dogs in no time.
- Preheat your oven to 375°F (190°C). Line a baking sheet with parchment paper or a silicone baking mat. This is non-negotiable for easy cleanup. Trust me, melted cheese or dough stuck to the pan is not a fun Halloween surprise.
- Unroll the crescent roll dough. If you’re using the perforated kind, press the seams together gently to create a solid sheet. If you have the seamless sheet, you’re already ahead of the game. Place the dough on a clean cutting board or countertop.
- Cut the dough into thin strips. Using a sharp knife or pizza cutter, cut the dough lengthwise into about 8 to 10 strips per sheet. The strips should be about 1/2 inch wide. Don’t worry if they’re not perfectly even—mummies are supposed to look a little messy, right?
- Prepare the hot dogs. If you want, you can cut a small slit in each hot dog to create a “mouth” or leave them plain. I usually leave them plain because the dough wrapping is the star. Pat the hot dogs dry with a paper towel to help the dough stick better.
- Wrap the mummies. Take one hot dog and start wrapping a strip of dough around it, slightly overlapping as you go. Leave a small space near the top for the eyes. Don’t wrap too tightly—the dough will expand slightly as it bakes. Repeat with the remaining hot dogs and dough strips. You should get about 8 mummies from one package of crescent rolls.
- Place the mummies on the baking sheet. Arrange them about 2 inches apart to allow for even baking. If you’re using egg wash, brush a thin layer over each mummy now. This will give them that beautiful golden color.
- Bake for 12 to 15 minutes. Keep an eye on them—you want the dough to be golden brown and cooked through, but not burnt. The hot dogs should be heated through and slightly plump. Every oven is different, so start checking at 12 minutes.
- Let them cool slightly. Allow the mummy hot dogs to cool on the baking sheet for about 2 to 3 minutes. This is important because the dough is very hot and the mustard eyes will slide off if you add them too soon.
- Add the eyes. Using a toothpick or squeeze bottle, add two small dots of mustard to the exposed area near the top of each mummy. You can also add a tiny dot of ketchup for a “bloodshot” look if you’re feeling extra festive.
- Serve immediately. These are best enjoyed warm, right out of the oven. Arrange them on a platter and watch them disappear!
A quick note from experience: don’t overthink the wrapping. I spent way too long on my first batch trying to make every strip perfectly even. They’re mummies—they’re supposed to look a little rough around the edges. Embrace the imperfection!
Cooking Tips & Techniques
After making these mummy hot dogs more times than I care to admit, I’ve picked up a few tricks that make the process smoother and the results better. Here are my top tips:
- Don’t overwork the dough. Crescent roll dough is delicate. If you handle it too much, it becomes tough and doesn’t puff up as nicely. Cut the strips quickly and wrap gently. You’re not kneading bread here.
- Space them out. I made the mistake of crowding the baking sheet once, and the mummies ended up touching each other as they baked. They looked like a pile of tangled bandages. Give them room to breathe!
- Use room temperature hot dogs. If your hot dogs are straight from the fridge, the dough might cook faster than the center heats up. Let them sit on the counter for 10 minutes before wrapping. This ensures everything cooks evenly.
- Check the bottoms. The first time I made these, the tops were perfectly golden, but the bottoms were pale and doughy. Make sure your baking sheet is positioned in the center of the oven, and if your oven runs hot, consider flipping the pan halfway through.
- Make ahead tip. You can assemble the mummies up to the baking step, then cover and refrigerate for up to 4 hours. When you’re ready to serve, just pop them in the oven. This is a lifesaver for parties when you want to spend time with your guests.
I also learned the hard way that you should never, ever use spicy mustard for the eyes. I tried it once because it was all I had, and the color was too dark—they looked like sad, angry mummies. Stick with yellow mustard for that classic, cute look.
Variations & Adaptations
One of the best things about this recipe is how easy it is to customize. Here are a few variations I’ve tried and loved:
- Cheesy Mummies: Before wrapping the hot dog, cut a slit lengthwise and stuff it with a strip of cheddar or mozzarella cheese. The cheese will melt and ooze out slightly as it bakes, giving your mummies a gooey, delicious surprise. Just be careful—the cheese gets hot!
- Spicy Mummies: Use spicy jalapeño or cheddarwurst hot dogs instead of regular ones. You can also add a tiny smear of sriracha or hot sauce under the dough for an extra kick. My husband loves this version for game day.
- Vegetarian Mummies: Swap the hot dogs for vegetarian or vegan sausages. I’ve tried this with plant-based hot dogs, and they work great. Just make sure to adjust the baking time if the sausages are thicker.
- Puff Pastry Mummies: If you want a flakier, more buttery texture, use frozen puff pastry instead of crescent roll dough. Thaw it according to package directions, cut into strips, and wrap as usual. The baking time might be a little longer—about 15 to 18 minutes.
- Breakfast Mummies: Use breakfast sausage links instead of hot dogs, and serve them with a side of maple syrup for dipping. I made these for a Halloween brunch once, and they were a huge hit. The sweet and savory combo is irresistible.
Don’t be afraid to experiment! I once made a batch with mini hot dogs for a kids’ party, and they were absolutely adorable. The smaller size also meant they cooked faster—only about 10 minutes in the oven.
Serving & Storage Suggestions
These mummy hot dogs are best served warm, right after baking. The dough is at its flakiest, and the hot dogs are perfectly juicy. Here are some serving ideas:
- Presentation: Arrange the mummies on a large platter and add a few “spooky” touches—some fake spider webs, plastic spiders, or a bowl of “blood” (ketchup) for dipping. Your guests will love the effort.
- Dipping Sauces: Serve with a variety of dips like ketchup, mustard, barbecue sauce, or even a spicy sriracha mayo. I like to set out small bowls of each so people can customize.
- What to Serve Alongside: These pair perfectly with other Halloween snacks like pumpkin-shaped cheese crackers, veggie sticks with ranch dip, or a simple salad. For a full party spread, add some mummy-themed cupcakes or cookies for dessert.
- Storage: If you have leftovers (unlikely, but possible), store them in an airtight container in the refrigerator for up to 2 days. The dough will soften slightly, but they’ll still taste great.
- Reheating: To bring back the crispiness, reheat the mummies in a 350°F oven for about 5 minutes. Avoid the microwave—it makes the dough soggy and sad.
One thing I’ve noticed is that the flavors actually get better after a few hours. The mustard soaks into the dough just a little, creating a nice tangy contrast. So if you’re making these for a party, you can bake them an hour ahead and keep them warm in a low oven.
Nutritional Information & Benefits
Let’s be honest—these mummy hot dogs are a treat, not a health food. But that doesn’t mean they can’t fit into a balanced diet, especially when enjoyed in moderation. Here’s the estimated nutritional breakdown for one mummy hot dog (using standard ingredients):
- Calories: Approximately 220-250 calories per serving
- Protein: About 8-10 grams, thanks to the hot dog
- Carbohydrates: Around 18-22 grams, mostly from the crescent roll dough
- Fat: Roughly 14-16 grams, depending on the brand of hot dog and dough
If you’re looking to make them a little lighter, try using turkey or chicken hot dogs and low-fat crescent roll dough. You can also skip the egg wash to save a few calories. But honestly, Halloween comes once a year—I say enjoy the full experience!
As for allergens, this recipe contains wheat (gluten) and dairy (in the crescent roll dough). If you have dietary restrictions, look for gluten-free crescent roll dough or use gluten-free hot dogs. I’ve also seen dairy-free crescent roll options at some specialty grocery stores.
Conclusion
I’ll be honest—when I first started making these mummy hot dogs, I thought they were just a silly Halloween gimmick. But after serving them at party after party, watching kids and adults alike light up when they see them, I’ve come to realize they’re so much more than that. They’re a conversation starter. They’re a little piece of nostalgia. And honestly, they’re just plain fun.
This recipe is proof that you don’t need fancy ingredients or hours in the kitchen to create something memorable. Whether you’re hosting a big Halloween bash or just looking for a quick weeknight dinner that will make your kids smile, these mummy hot dogs deliver every single time. So go ahead—give them a try. Customize them with your favorite toppings, experiment with different dips, and don’t forget to snap a photo before they disappear. I promise you’ll be making them again next year.
Have you tried this recipe? I’d love to hear how it turned out! Drop a comment below and let me know if you added any fun twists. And if you’re looking for more Halloween inspiration, check out my recipe for spider web dip—it’s the perfect sidekick for these mummies. Happy Halloween, friends!
Frequently Asked Questions
Can I make these mummy hot dogs ahead of time?
Absolutely! You can assemble the mummies up to the baking step, then cover and refrigerate for up to 4 hours. When you’re ready, just pop them in the oven as directed. This is perfect for parties when you want to minimize last-minute prep.
Can I use a different type of dough?
Yes! While crescent roll dough works best for its buttery flavor and easy handling, you can also use puff pastry, pizza dough, or even homemade biscuit dough. Just adjust the baking time as needed—puff pastry might take a few minutes longer.
How do I keep the mustard eyes from sliding off?
Wait until the mummies have cooled for at least 2-3 minutes before adding the mustard eyes. The dough should be warm but not hot. You can also use a toothpick to gently press the mustard into the dough for better adhesion.
Can I freeze these mummy hot dogs?
Yes, you can freeze them either before or after baking. To freeze unbaked mummies, place them on a baking sheet and freeze until solid, then transfer to a freezer bag. Bake from frozen, adding a few extra minutes. Baked mummies can be frozen and reheated in the oven at 350°F for about 5-7 minutes.
What other toppings can I use for the eyes?
If you’re not a mustard fan, you can use ketchup, sriracha, or even small dots of cream cheese mixed with a little food coloring. For a sweet version, use icing or melted white chocolate. The possibilities are endless!
Pin This Recipe!
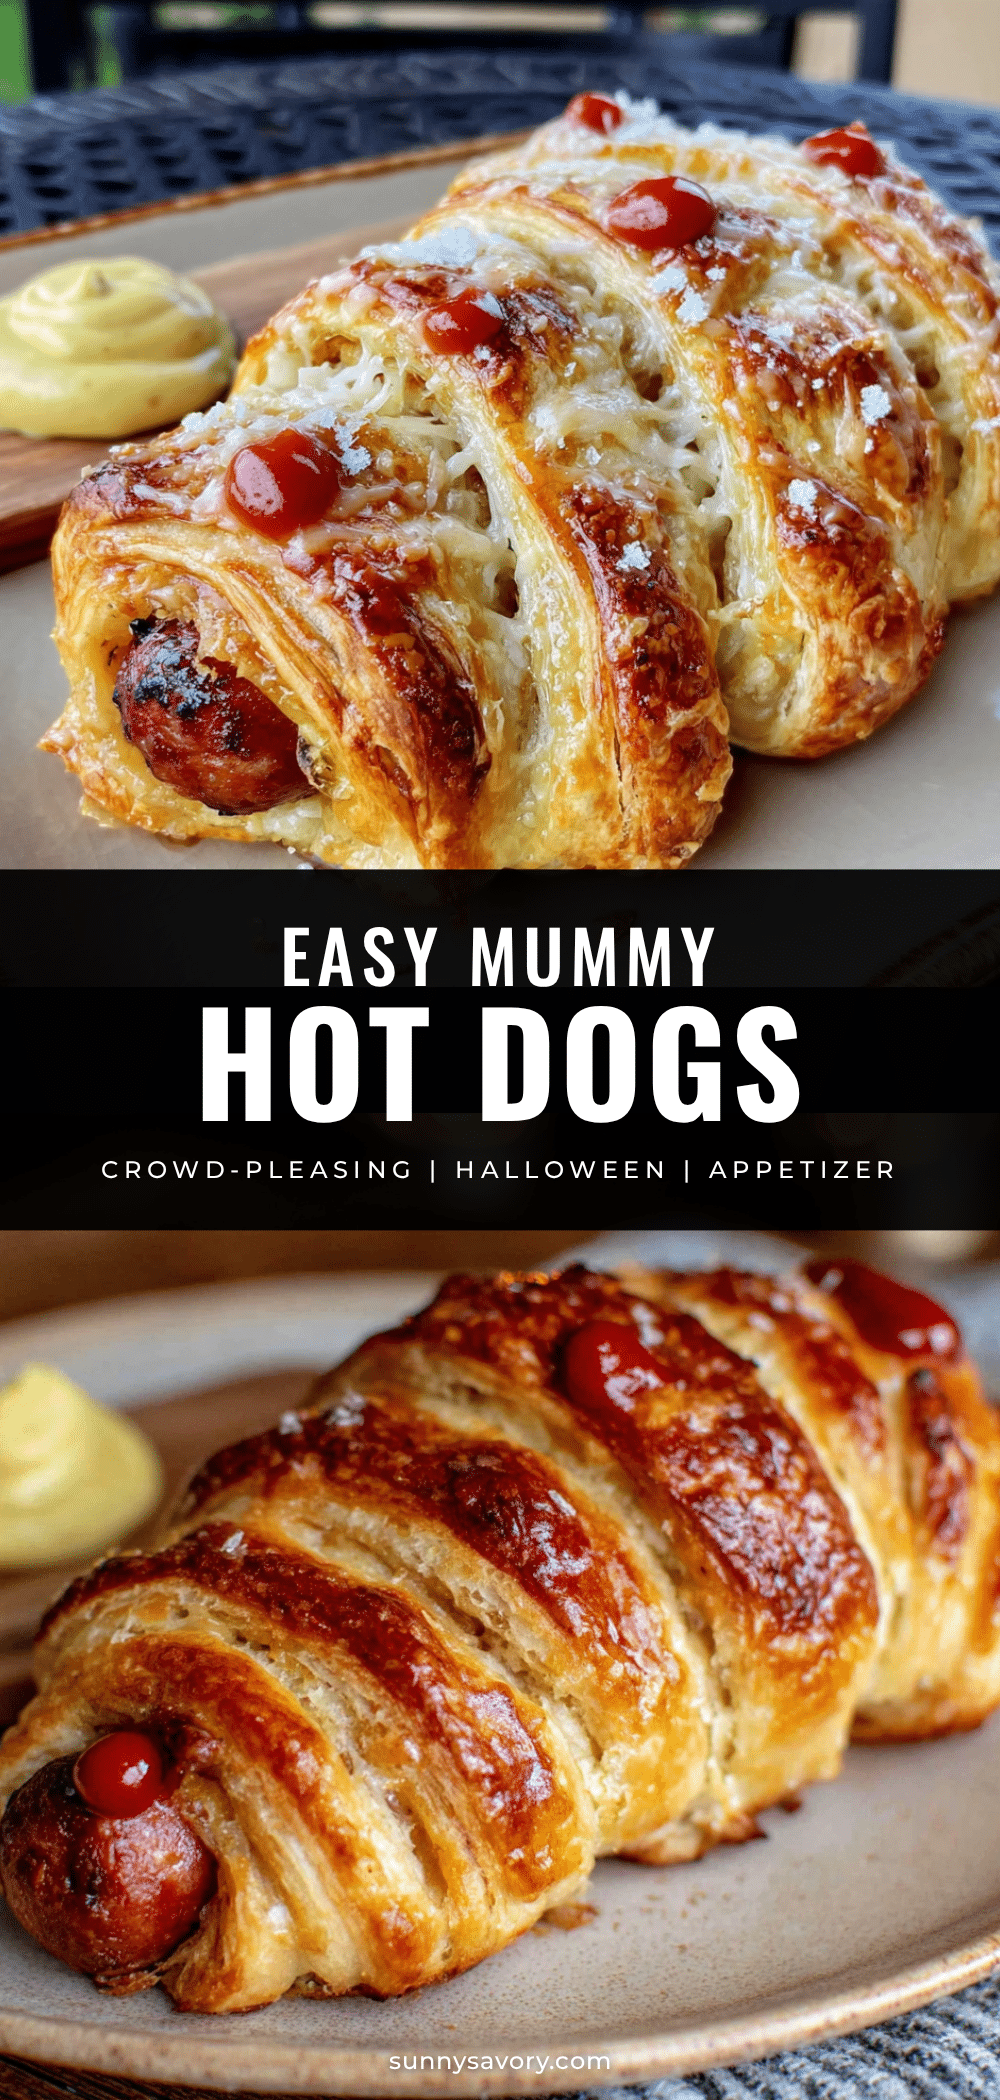
Easy Mummy Hot Dogs: Best Halloween Appetizer Recipe

These easy mummy hot dogs are a fun and delicious Halloween appetizer made with crescent roll dough, hot dogs, and mustard eyes. Ready in under 30 minutes, they’re perfect for parties and guaranteed to be a crowd-pleaser.
- Prep Time: 10 minutes
- Cook Time: 15 minutes
- Total Time: 25 minutes
- Yield: 8 servings 1x
- Category: Appetizer
- Cuisine: American
Ingredients
- 1 package (8-count) refrigerated crescent roll dough
- 8 hot dogs
- Mustard for the eyes (yellow mustard recommended)
- 1 large egg, beaten (optional, for egg wash)
- Salt and pepper to taste (optional)
Instructions
- Preheat your oven to 375°F (190°C). Line a baking sheet with parchment paper or a silicone baking mat.
- Unroll the crescent roll dough. If using perforated dough, press the seams together to create a solid sheet.
- Cut the dough lengthwise into thin strips, about 1/2 inch wide (8 to 10 strips per sheet).
- Pat the hot dogs dry with a paper towel. Optionally, cut a small slit in each hot dog for a ‘mouth’.
- Wrap a strip of dough around each hot dog, slightly overlapping, leaving a small space near the top for the eyes. Repeat for all hot dogs.
- Place the wrapped mummies on the prepared baking sheet, spacing them about 2 inches apart. Brush with beaten egg if desired.
- Bake for 12 to 15 minutes, until the dough is golden brown and the hot dogs are heated through.
- Let the mummies cool on the baking sheet for 2 to 3 minutes.
- Add two small dots of mustard to the exposed area near the top of each mummy for eyes.
- Serve immediately.
Notes
For best results, use room temperature hot dogs and avoid overworking the dough. You can assemble the mummies up to 4 hours ahead and refrigerate before baking. For a shiny finish, brush with egg wash. Leftovers can be stored in an airtight container in the refrigerator for up to 2 days and reheated in a 350°F oven for 5 minutes.
Nutrition
- Serving Size: 1 mummy hot dog
- Calories: 235
- Sugar: 3
- Sodium: 650
- Fat: 15
- Saturated Fat: 5
- Carbohydrates: 20
- Protein: 9
Keywords: mummy hot dogs, Halloween appetizer, easy Halloween recipe, crescent roll hot dogs, spooky snacks



