Love this? Save it for later!
Share the inspiration with your friends
My neighbor, an older woman named Clara, watched me hacking up a lung on my front porch one chilly October morning. She didn’t say anything at first. She just shook her head, disappeared into her house, and came back with a small mason jar filled with the darkest, most mysterious-looking liquid I had ever seen. “Drink a tablespoon of that every morning,” she said, handing it over like it was no big deal. I was desperate enough to try anything, honestly. That jar was my first introduction to homemade elderberry syrup, and let me tell you, it changed how I approach cold and flu season forever.
I had been sick for what felt like weeks. You know that feeling when you are just done with being sick? That was me. I had tried every over-the-counter remedy in the drugstore, and nothing was touching the deep, rattling cough that had taken up residence in my chest. Clara’s syrup tasted like tart berries and honey with a hint of something warm and spicy. It was comforting in a way that no pill could ever be. I took it every morning, and within a few days, I actually started feeling human again.
I asked Clara for the recipe, and she laughed. “There is no real recipe,” she said. “You just put the berries in a pot, add some stuff, and let it do its thing.” That was not helpful at all. So I did what I always do when I want to figure something out. I researched, I tested, and I probably made a few disastrous batches along the way. I burned the first one. The second one was too watery. The third one? That was the one. It was the perfect balance of tart elderberries, sweet honey, and warming spices that actually made you feel like you were doing something good for your body. This recipe is the result of all that trial and error, and it is the one I have been making every single fall for the past six years.
The thing about homemade elderberry syrup is that it is not just about the ingredients. It is about the ritual of making it. The way your kitchen fills with the smell of simmering berries and cinnamon. The satisfaction of pouring that deep purple syrup into jars, knowing you have created something that will help your family stay healthy through the winter. It is a small act of care that makes a big difference. I make a big batch every September, and I have never regretted it. Once you start making your own, you will never go back to the store-bought stuff.
Why You Will Love This Recipe
Let me be real with you. There are a lot of elderberry syrup recipes out there, but this one is different. I have tested it more times than I can count, tweaking the ratios and the cooking time until everything was just right. This is not a recipe that you have to babysit or stress over. It is forgiving, it is simple, and it works.
- Super Simple Ingredients: You only need a handful of things. Dried elderberries, honey, and a few spices that you probably already have in your pantry. No weird extracts or hard-to-find herbs.
- Quick to Make: The actual hands-on time is maybe 15 minutes. The rest is just simmering and waiting. You can do it while you are catching up on a podcast or folding laundry.
- Budget-Friendly: Store-bought elderberry syrup can cost an arm and a leg. Making it at home costs a fraction of the price, and you get way more syrup for your money.
- Customizable: Want it spicier? Add more ginger. Prefer it milder? Dial back the cloves. This recipe is a starting point, not a rigid rule.
- Actually Effective: I am not a doctor, but I have been making this syrup for years, and I swear by it. My family gets sick less often, and when we do catch something, it never hits as hard. There is real science behind elderberries, and this syrup puts that science to work.
What makes this recipe stand out from the crowd is the balance. A lot of recipes are either too sweet or too medicinal tasting. This one hits that sweet spot where it actually tastes good enough to take willingly, but it still packs a punch. The combination of cinnamon, ginger, and cloves warms you from the inside out, and the raw honey adds a floral sweetness that perfectly complements the tartness of the elderberries. It is the kind of syrup that makes you close your eyes after the first spoonful. It is comfort in a jar, and it is exactly what you need when cold and flu season rolls around.
What Ingredients You Will Need
This recipe uses simple, wholesome ingredients that come together to create something truly powerful. You do not need a trip to a specialty store for this. Most of these things are pantry staples or easy to find at any grocery store.
- Dried Elderberries (1 cup / 120 grams): These are the star of the show. You can find dried elderberries online or at health food stores. I personally recommend the brand Starwest Botanicals for consistent quality. Do not use fresh elderberries for this recipe. They need to be cooked before eating, and dried ones are much easier to work with. Look for berries that are deep purple and smell slightly sweet and earthy.
- Water (4 cups / 960 ml): Just regular tap water or filtered water. Nothing fancy here. The water extracts all the good stuff from the berries and spices.
- Raw Honey (1 cup / 340 grams): This is important. Use raw, unfiltered honey if you can find it. It has natural antibacterial properties that work together with the elderberries. Plus, it tastes amazing. Local honey is even better because it can help with seasonal allergies. If you are vegan, you can substitute with maple syrup or agave nectar, but the texture will be a bit thinner.
- Cinnamon Sticks (2 sticks): Cinnamon adds warmth and a little bit of sweetness. It also has anti-inflammatory properties, which is a nice bonus. If you only have ground cinnamon, use 1 teaspoon, but be aware that it will make the syrup a bit cloudy.
- Fresh Ginger (1-inch piece, sliced): Ginger is a powerhouse when it comes to fighting off colds. It adds a gentle heat and a zesty kick. Peel the skin off before slicing. You do not need to chop it finely since it will be strained out later.
- Whole Cloves (1 teaspoon): Cloves are strong, so a little goes a long way. They add a deep, aromatic flavor that makes the syrup taste like a winter hug. Be careful not to overdo it, or the syrup will taste like a dentist’s office.
- Optional: Star Anise (1 pod): This is not essential, but I love the subtle licorice note it adds. It makes the syrup feel a little more complex and sophisticated. If you do not have it, do not worry about it.
- Optional: Orange Peel (from 1 orange): A strip of orange peel adds a bright, citrusy note that cuts through the sweetness. Use a vegetable peeler to remove just the orange part, not the white pith, which can be bitter.
That is it. Seven ingredients, most of which you probably already have. The beauty of this recipe is that it is incredibly forgiving. If you are out of cloves, you can skip them. If you want more ginger, add more. The syrup will still turn out delicious and effective.
Equipment Needed
You do not need any fancy kitchen gadgets to make this syrup. Here is what you will need:
- A Medium Saucepan: A 3-quart or 4-quart saucepan works perfectly. You want something with a heavy bottom to prevent scorching. I use a stainless steel pot, but enameled cast iron works great too.
- A Fine-Mesh Strainer: This is essential for straining out all the berries and spices. A cheesecloth-lined strainer works even better if you want a perfectly clear syrup. I have used a regular mesh strainer for years, and it works just fine.
- A Glass Measuring Cup or Bowl: Something to catch the strained liquid. A large Pyrex measuring cup is ideal because it has a spout for easy pouring.
- A Funnel: This makes transferring the syrup into jars so much easier and less messy. A small canning funnel is perfect.
- Glass Jars or Bottles: Mason jars work great. Make sure they are clean and completely dry before you pour in the syrup. I use 8-ounce or 16-ounce jars with tight-fitting lids.
- A Wooden Spoon or Silicone Spatula: For stirring. Avoid metal spoons if you are using a non-stick pot.
If you do not have a fine-mesh strainer, you can use a colander lined with a clean kitchen towel or a few layers of cheesecloth. It is not rocket science. Just make sure you get all the solids out so your syrup is smooth.
Preparation Method
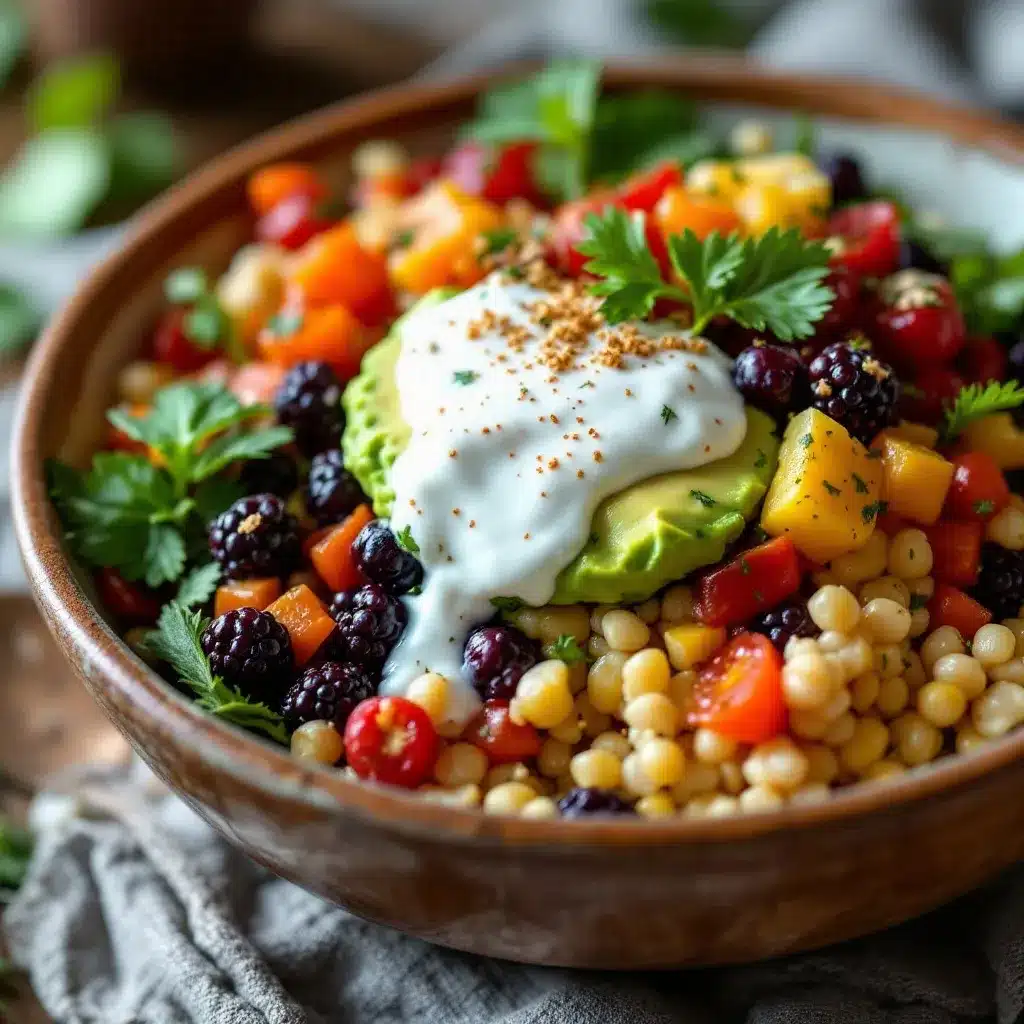
Making this syrup is almost meditative. It is one of those recipes that fills your kitchen with the most comforting smell and makes you feel like you are taking care of yourself. Here is how to do it, step by step.
- Combine the berries, water, and spices (5 minutes): In your medium saucepan, add the dried elderberries, water, cinnamon sticks, sliced ginger, cloves, and star anise and orange peel if you are using them. Give everything a quick stir. The water will turn a deep purple almost immediately. That is a good sign.
- Bring to a boil (5-10 minutes): Place the pot over high heat and bring the mixture to a rolling boil. Do not walk away at this point. Keep an eye on it. Once it reaches a boil, reduce the heat to low and let it simmer.
- Simmer gently (45 minutes): Let the mixture simmer uncovered for about 45 minutes. You want it to be at a gentle bubble, not a vigorous boil. The liquid will reduce by about half. The berries will soften and release all their goodness into the water. Your kitchen will start smelling amazing at this point. If the liquid reduces too quickly, add a little more water. You want to end up with about 2 cups of liquid.
- Strain the liquid (5 minutes): Place your fine-mesh strainer over a glass measuring cup or bowl. Carefully pour the hot liquid through the strainer. Use a spoon to press down on the berries and spices to extract every last drop of liquid. Do not rush this step. You want to get as much of that concentrated goodness as possible. Let it cool for about 10 minutes.
- Add the honey (2 minutes): This is the most important step. Do NOT add the honey while the liquid is still hot. High heat destroys the beneficial enzymes in raw honey. Let the strained liquid cool until it is warm to the touch, like a cup of tea you can comfortably sip. Then, whisk in the honey until it is completely dissolved. The syrup will be thin at this point, but it will thicken slightly as it cools.
- Bottle and store (5 minutes): Using your funnel, pour the syrup into clean, dry glass jars. Leave about a half-inch of headspace at the top. Screw on the lids tightly. Let the jars cool completely to room temperature before moving them to the refrigerator.
That is it. Six simple steps, and you have a batch of homemade elderberry syrup that will last you for weeks. The hardest part is waiting for it to cool down so you can add the honey. Trust me on that one. I learned the hard way when I killed all the good stuff in my first batch by pouring honey into boiling liquid. Don’t be like me.
Cooking Tips and Techniques
Over the years, I have made this recipe more times than I can count. I have made mistakes, and I have learned from them. Here are the things I wish someone had told me before I started.
Do not skip the cooling step. I know I said this already, but it bears repeating. Raw honey is full of natural enzymes and antioxidants that are sensitive to heat. If you add it to boiling liquid, you are basically turning it into sugar syrup with no health benefits. Let the liquid cool until it is warm, not hot. Think baby bottle temperature. You should be able to dip your finger in it comfortably.
Simmer, do not boil. Once you bring the mixture to a boil, turn the heat down. A gentle simmer is all you need. Boiling the berries too aggressively can make the syrup bitter and destroy some of the beneficial compounds. You want to coax the goodness out of the berries, not beat it out of them.
Strain thoroughly. Those little berry skins and spice bits can be annoying if they end up in your syrup. I like to strain the liquid through a fine-mesh strainer first, and then if I am feeling fancy, I pour it through a cheesecloth-lined strainer a second time. It makes for a much cleaner, more pleasant syrup.
Adjust the sweetness to your taste. Some people like their syrup sweeter, some like it more tart. Start with the recommended amount of honey, taste it, and add more if you want. Just remember that honey is a natural preservative, so reducing it too much might shorten the shelf life of your syrup.
Label your jars. This sounds silly, but I cannot tell you how many times I have pulled a random jar out of the fridge and had no idea what was in it. Write the date on the lid or use a piece of masking tape. You will thank yourself later.
Double the recipe. Elderberry syrup freezes beautifully. I always make a double batch and freeze half in ice cube trays. Once they are frozen, I pop the cubes out and store them in a freezer bag. That way, I have individual servings ready to go whenever I feel a tickle in my throat.
Variations and Adaptations
One of the best things about this recipe is how easy it is to tweak. Here are some variations I have tried over the years.
- Spicy Kick Version: Add a small piece of fresh turmeric root (about 1 inch, peeled and sliced) along with the ginger. Turmeric is a powerful anti-inflammatory, and it pairs beautifully with the elderberries. It will turn your syrup a slightly brighter shade of orange-red.
- Mild and Kid-Friendly Version: If you are making this for little ones, reduce the ginger to a half-inch piece and leave out the cloves entirely. Kids can be sensitive to strong spices. You can also add a cinnamon stick and a splash of vanilla extract after the syrup has cooled for a more pleasant flavor.
- Herbal Boost Version: Add a tablespoon of dried echinacea or dried rose hips along with the elderberries. Both are known for their immune-boosting properties. Just make sure to strain them out thoroughly at the end.
- Low-Sugar Version: If you are watching your sugar intake, you can reduce the honey to half a cup. The syrup will be thinner and more tart, but it will still be effective. You can also use a sugar-free honey substitute, but I have not tested that myself.
- Slow Cooker Method: If you do not want to babysit a pot on the stove, you can make this in a slow cooker. Combine all the ingredients except the honey in the slow cooker. Cook on low for 6-8 hours or on high for 3-4 hours. Strain and proceed as usual. The flavor will be a little deeper and more mellow.
I personally love the spicy kick version. The turmeric adds an earthy depth that I find really comforting when I am feeling under the weather. My husband prefers the kid-friendly version because he has a sensitive palate. The beauty of this recipe is that you can make it your own.
Serving and Storage Suggestions
This syrup is incredibly versatile. Here is how I use it in my household.
Daily Maintenance Dose: During cold and flu season, I take one tablespoon every morning. It is like a little insurance policy for my immune system. I just take it straight from a spoon, but you can also stir it into a cup of hot tea or warm water.
At the First Sign of Illness: If I feel a scratchy throat or a runny nose coming on, I increase the dose to one tablespoon three times a day. I take it first thing in the morning, in the afternoon, and right before bed. It really seems to help nip things in the bud.
For Kids: For children ages 1 and up, the dose is one teaspoon per day for maintenance and one teaspoon three times a day if they are sick. Always consult with your pediatrician before giving any herbal remedy to children.
Storage: Keep your syrup in the refrigerator at all times. Because it contains raw honey and no preservatives, it can spoil if left at room temperature. It will keep for up to 3 months in the fridge. If you see any mold or if it starts to smell funky, toss it out and make a fresh batch.
Freezing: As I mentioned earlier, this syrup freezes beautifully. Pour it into ice cube trays, freeze, and then transfer the cubes to a freezer bag. They will keep for up to 6 months. Just thaw a cube in the fridge overnight or pop it into a cup of hot tea.
How to Serve: I love adding a tablespoon to a mug of hot water with a squeeze of lemon. It makes a delicious and soothing tea. You can also drizzle it over pancakes or yogurt for a healthy breakfast. My kids love it on vanilla ice cream, which I pretend is medicinal.
Nutritional Information and Benefits
I am not a nutritionist or a doctor, so take this with a grain of salt. But I have done my research, and the science behind elderberries is pretty impressive.
Elderberries are packed with antioxidants, specifically anthocyanins, which give them their deep purple color. These compounds help reduce inflammation and support the immune system. Some studies suggest that elderberries can shorten the duration of cold and flu symptoms by up to four days.
Raw Honey is a natural antibacterial and antiviral agent. It soothes sore throats and coughs and provides a quick source of energy. Local honey can also help desensitize your body to local pollen, which is great for seasonal allergies.
Ginger and Cinnamon are both anti-inflammatory and warming. They help improve circulation and can soothe an upset stomach. Ginger is also known for its ability to reduce nausea.
Here is an approximate nutritional breakdown for a 1-tablespoon serving (15 ml):
- Calories: 45
- Total Fat: 0g
- Sodium: 2mg
- Total Carbohydrates: 12g
- Sugars: 11g
- Protein: 0g
This syrup is naturally gluten-free, dairy-free, and vegetarian. If you use maple syrup instead of honey, it is also vegan. The only potential allergen is honey, which should not be given to infants under 1 year of age.
Conclusion
Making your own elderberry syrup is one of those small acts of self-care that makes a big difference. It is not complicated, it does not require a lot of fancy equipment, and the payoff is enormous. Every time I open my fridge and see that row of deep purple jars, I feel a little bit more prepared for whatever winter throws at me.
This recipe has become a fall tradition in my house. I make a big batch while listening to a podcast, and the smell of simmering spices fills the kitchen. It is a reminder that taking care of ourselves does not have to be hard. Sometimes, it is as simple as putting berries in a pot and letting them do their thing.
I would love to hear how this recipe works for you. Do you add any secret ingredients? Do you take it differently than I do? Leave a comment below and let me know. Your tweaks might inspire someone else to try something new. And if you found this helpful, please share it with a friend who could use a little immune support this season. Stay healthy out there!
Frequently Asked Questions
Can I use fresh elderberries instead of dried?
Technically, yes, but I do not recommend it for this recipe. Fresh elderberries must be cooked thoroughly before eating because they contain a compound that can cause stomach upset. Dried elderberries are much more convenient and consistent. Stick with dried for best results.
How long does homemade elderberry syrup last?
In the refrigerator, it will keep for up to 3 months. Make sure your jars are clean and dry before filling them. If you freeze it in ice cube trays, it will last for up to 6 months. Always check for signs of mold or an off smell before using.
Can I give this syrup to my children?
Yes, but with some caveats. Do not give honey to infants under 1 year old due to the risk of botulism. For children over 1, the dose is one teaspoon per day for maintenance and one teaspoon three times a day if they are sick. Always consult your pediatrician before starting any new supplement.
Is this syrup safe to take with other medications?
I am not a doctor, so I cannot give medical advice. Elderberries can interact with certain medications, particularly immunosuppressants and diuretics. If you are on any prescription medications, please talk to your doctor before adding elderberry syrup to your routine.
Can I make this syrup without honey?
Absolutely. If you are vegan or avoiding sugar, you can substitute the honey with maple syrup, agave nectar, or even a sugar-free sweetener like stevia. Keep in mind that honey acts as a natural preservative, so the shelf life may be shorter. Store it in the fridge and use it within 4-6 weeks.
Pin This Recipe!
Homemade Elderberry Syrup Recipe for Cold & Flu Season
This homemade elderberry syrup is a comforting, immune-boosting remedy made with dried elderberries, raw honey, and warming spices. It’s simple to make, budget-friendly, and perfect for cold and flu season.
- Prep Time: 15 minutes
- Cook Time: 45 minutes
- Total Time: 1 hour
- Yield: 4 servings 1x
- Category: Remedy
- Cuisine: American
Ingredients
- 1 cup (120 grams) dried elderberries
- 4 cups (960 ml) water
- 1 cup (340 grams) raw honey
- 2 cinnamon sticks
- 1-inch piece fresh ginger, sliced
- 1 teaspoon whole cloves
- 1 pod star anise (optional)
- Peel from 1 orange (optional)
Instructions
- In a medium saucepan, combine the dried elderberries, water, cinnamon sticks, sliced ginger, cloves, and optional star anise and orange peel. Stir briefly.
- Place the pot over high heat and bring to a rolling boil. Once boiling, reduce the heat to low and let it simmer.
- Simmer gently, uncovered, for about 45 minutes. The liquid should reduce by about half. If it reduces too quickly, add a little more water. Aim for about 2 cups of liquid remaining.
- Place a fine-mesh strainer over a glass measuring cup or bowl. Carefully pour the hot liquid through the strainer. Use a spoon to press down on the berries and spices to extract as much liquid as possible. Let the strained liquid cool for about 10 minutes.
- Once the liquid is warm to the touch (like a comfortably drinkable cup of tea), whisk in the raw honey until completely dissolved.
- Using a funnel, pour the syrup into clean, dry glass jars, leaving about half an inch of headspace. Screw on the lids tightly. Let the jars cool completely to room temperature before refrigerating.
Notes
Do not add honey to hot liquid; let it cool to warm first to preserve beneficial enzymes. Simmer gently, do not boil aggressively, to avoid bitterness. Strain thoroughly for a smooth syrup. Adjust sweetness to taste. Label jars with the date. The syrup can be frozen in ice cube trays for up to 6 months.
Nutrition
- Serving Size: 1 tablespoon (15 ml)
- Calories: 45
- Sugar: 11
- Sodium: 2
- Carbohydrates: 12
Keywords: elderberry syrup, homemade elderberry syrup, immune booster, cold remedy, flu remedy, elderberry recipe, natural remedy



