Love this? Save it for later!
Share the inspiration with your friends
This was supposed to be a classic pumpkin cheesecake—smooth, elegant, the kind you’d serve at a fancy Thanksgiving dinner with a side of self-satisfaction. But the power went out halfway through preheating my oven last October, and I was already committed. The cheesecake batter was mixed, the pumpkin puree was stirred in, and I had exactly forty-five minutes before my neighbor Karen came over to drop off her kids for a Halloween movie night. I mean, honestly, I could have cried. Instead, I grabbed my hand mixer, threw the batter into a square pan, and decided to make bars instead of a full cheesecake. Then I spotted the leftover melted white chocolate from a failed cookie experiment sitting on my counter, and something clicked. I drizzled it on top, dragged a toothpick through the chocolate in a panic, and out came these spiderweb swirls that looked like they belonged on a Pinterest board. The bars came out creamy, spiced, and somehow more beautiful than the original plan. I stood there in my dim kitchen, tasting one warm bar, and realized that sometimes the best recipes come from the moments when everything goes wrong. Maybe you’ve been there—standing over a half-finished dish, convinced you’ve ruined it, only to discover you’ve accidentally created something magical. That’s exactly how these Perfect Spiderweb Halloween Pumpkin Cheesecake Bars were born, and I keep making them every October because they remind me that kitchen disasters can turn into your most cherished recipes.
Why You’ll Love This Recipe
Let me tell you why these pumpkin cheesecake bars have become my most-requested Halloween dessert. I’ve tested this recipe at least six times across three different ovens, adjusted the spice ratios twice, and even burned one batch trying to get the spiderweb effect just right. The version I’m sharing with you today is the one my friend Sarah—who claims she can’t bake—made successfully on her first try. That’s the kind of reliability I wanted to deliver.
- Quick & Easy: No water bath, no springform pan, no complicated techniques. These bars come together in under an hour, including baking time. Perfect for last-minute Halloween parties or when you realize at 8 PM that you need something for tomorrow’s school bake sale.
- Simple Ingredients: You probably have most of these in your pantry right now. Cream cheese, pumpkin puree, graham crackers, eggs, sugar, and basic spices. No weird extracts or specialty items that cost fifteen dollars.
- Perfect for Halloween: The spiderweb design is genuinely impressive without requiring artistic talent. I swear, if I can make it look good, anyone can. It’s the kind of dessert that makes people say, “Wait, you made this?”
- Crowd-Pleaser: Kids love the spooky design, adults love the rich pumpkin flavor, and everyone loves that it’s not overly sweet. I’ve brought these to three different Halloween gatherings, and they’ve disappeared every single time.
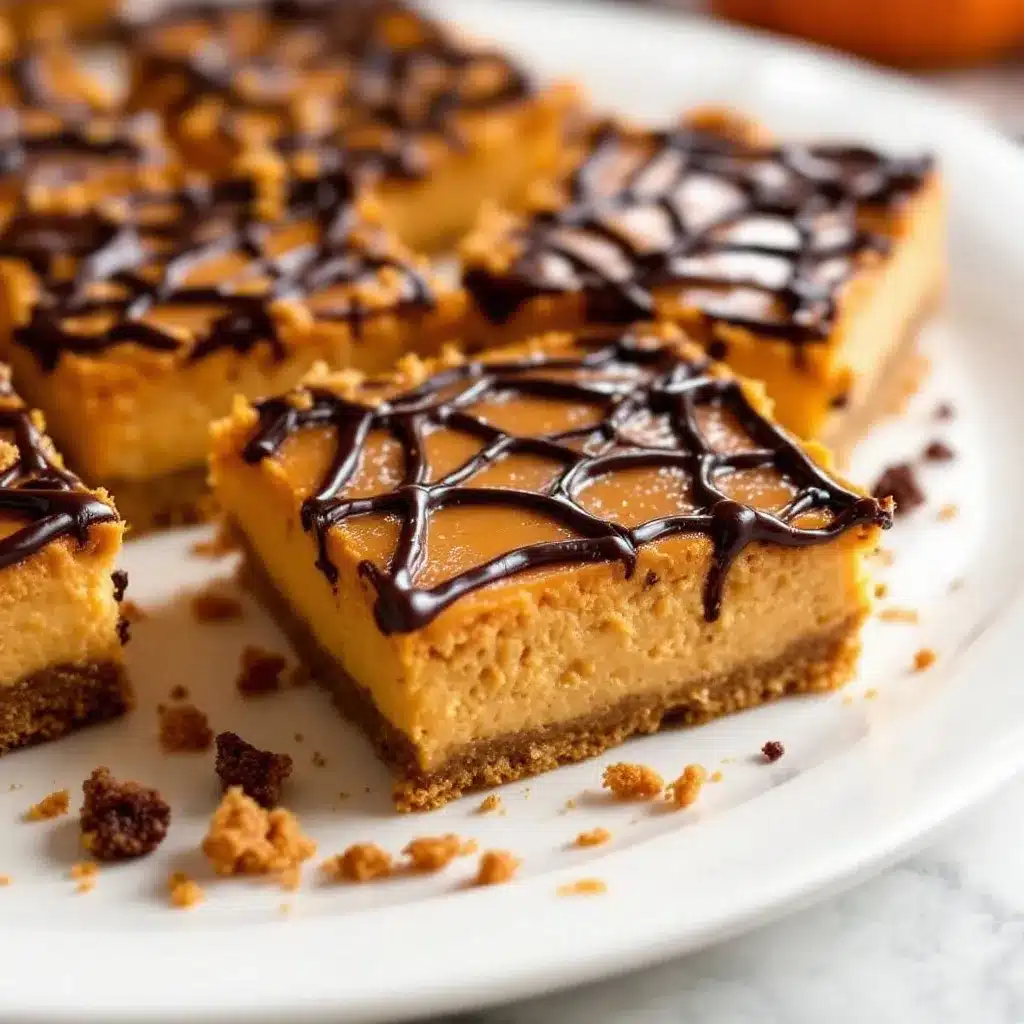
- Unbelievably Delicious: The texture is what gets me—creamy cheesecake layer on top of a buttery crust, with that subtle pumpkin spice warmth that just feels like fall. The white chocolate spiderweb adds just enough sweetness without overwhelming the pumpkin.
What makes these bars different from other pumpkin cheesecake recipes is the technique. Instead of baking a full cheesecake that cracks and requires careful cooling, we’re using a bar format that’s practically foolproof. The cream cheese layer stays silky because we’re not overbaking it, and the pumpkin layer has just enough structure to hold those beautiful spiderweb swirls. This isn’t just another pumpkin dessert—it’s the one that makes you close your eyes after the first bite and forget about all those complicated recipes you’ve been saving on Pinterest.
What Ingredients You Will Need
This recipe uses simple, wholesome ingredients to deliver that rich, spiced pumpkin flavor and creamy cheesecake texture without any fuss. Most of these are pantry staples, especially if you do any fall baking.
For the Crust
- 1 ½ cups graham cracker crumbs (about 12 full sheets, crushed fine)
- ¼ cup granulated sugar
- 6 tablespoons unsalted butter, melted (I prefer Kerrygold for the richness)
- Pinch of salt
For the Cheesecake Layer
- 16 ounces cream cheese, softened to room temperature (Philadelphia is my go-to—it gives the smoothest texture)
- ½ cup granulated sugar
- 2 large eggs, room temperature
- 1 teaspoon vanilla extract
- ½ cup sour cream, room temperature (adds tanginess and prevents cracking)
For the Pumpkin Layer
- 1 cup pumpkin puree (not pumpkin pie filling—make sure you grab the right can)
- ¼ cup brown sugar, packed
- 1 teaspoon pumpkin pie spice (or make your own with ½ tsp cinnamon, ¼ tsp ginger, ¼ tsp nutmeg, pinch of cloves)
- ½ teaspoon cinnamon
- 1 tablespoon all-purpose flour (helps stabilize the pumpkin layer)
For the Spiderweb Decoration
- ½ cup white chocolate chips (I recommend Ghirardelli—they melt smoother)
- 1 teaspoon coconut oil or vegetable shortening (helps thin the chocolate for drizzling)
A few ingredient notes before we start: Make sure your cream cheese is truly softened. I learned this the hard way when I tried to rush the process and ended up with lumpy cheesecake batter. Let it sit on the counter for at least an hour. For the graham cracker crust, you can use store-bought crumbs if you’re in a hurry, but crushing your own gives a better texture. And please don’t skip the sour cream—it’s the secret to that silky, crack-free cheesecake texture that makes these bars so addictive.
Equipment Needed
You don’t need a professional kitchen to make these bars, but having the right tools makes the process smoother. Here’s what you’ll need:
- 9×9 inch square baking pan (an 8×8 works too, but your bars will be slightly thicker and need a few extra minutes of baking time)
- Electric hand mixer or stand mixer (you can do this by hand, but your arm will thank you for using a mixer)
- Mixing bowls (at least two medium-sized ones)
- Toothpick or wooden skewer (for creating the spiderweb design)
- Piping bag or small zip-top bag (for drizzling the white chocolate)
- Parchment paper (trust me on this—it makes lifting the bars out so much easier)
- Measuring cups and spoons
- Rubber spatula
If you don’t have a 9×9 pan, you can use a 9×13 pan for thinner bars—just reduce the baking time by about 5-7 minutes. I’ve also made these in a disposable aluminum pan for potlucks, and they turned out perfectly fine. For the piping bag, a simple zip-top bag with the corner snipped off works just as well as anything fancy. I actually prefer it because there’s less cleanup.
Preparation Method
- Preheat and Prep (5 minutes): Preheat your oven to 325°F (163°C). Line your 9×9 baking pan with parchment paper, leaving some overhang on two opposite sides. This creates handles that make lifting the bars out effortless later. Lightly grease the parchment with non-stick spray.
- Make the Crust (10 minutes): In a medium bowl, combine the graham cracker crumbs, sugar, and salt. Pour the melted butter over the mixture and stir with a fork until every crumb is moistened. The texture should resemble wet sand that holds together when squeezed. Press this mixture firmly into the bottom of your prepared pan. I use the bottom of a flat measuring cup to really pack it down—this prevents the crust from crumbling when you cut the bars later. Bake for 10 minutes, then set aside to cool slightly while you make the filling.
- Make the Cheesecake Batter (10 minutes): In a large bowl, beat the softened cream cheese with an electric mixer on medium speed until smooth and creamy—about 2 minutes. Scrape down the sides of the bowl with a rubber spatula. Add the sugar and beat for another minute until fluffy. Add the eggs one at a time, beating on low speed after each addition just until combined. Overmixing at this stage incorporates too much air and can cause cracks. Fold in the vanilla extract and sour cream gently with the spatula.
- Make the Pumpkin Layer (5 minutes): In a separate bowl, whisk together the pumpkin puree, brown sugar, pumpkin pie spice, cinnamon, and flour until smooth. Take about 1 cup of the plain cheesecake batter and stir it into the pumpkin mixture until fully combined. You’ll end up with two batters—one plain cheesecake and one pumpkin cheesecake.
- Layer the Batters (10 minutes): Pour the plain cheesecake batter over the crust and spread it evenly. Then, drop spoonfuls of the pumpkin batter on top of the plain batter. Don’t spread it—just let the spoonfuls sit there. Use a butter knife or offset spatula to gently swirl the two batters together. You want a marbled effect, but don’t over-swirl or you’ll lose the distinct layers. I like to leave some pockets of pure white cheesecake visible for contrast.
- Create the Spiderweb Design (15 minutes): Melt the white chocolate chips and coconut oil together in a microwave-safe bowl in 20-second intervals, stirring between each, until smooth. Transfer the melted chocolate to a small piping bag or zip-top bag. Snip a tiny corner off the bag. Pipe concentric circles on top of the batter—start in the center and work your way outward, spacing the circles about an inch apart. Then, take a toothpick and drag it from the center outward through all the circles, like drawing spokes on a wheel. Wipe the toothpick clean between each spoke for clean lines. This creates the spiderweb effect that makes these bars so Halloween-perfect.
- Bake (35-40 minutes): Place the pan in the preheated oven and bake for 35-40 minutes, or until the edges are set and the center jiggles slightly when you gently shake the pan. The center should still have a slight wobble—it will continue to set as it cools. Don’t overbake or the cheesecake will become dry and crack. I learned this the hard way when I left my first batch in for an extra five minutes and ended up with a canyon running through the middle.
- Cool and Chill (4 hours minimum): Let the bars cool completely on a wire rack at room temperature—about 1 hour. Then transfer the pan to the refrigerator and chill for at least 4 hours, preferably overnight. This is the hardest part, I know, but it’s non-negotiable for clean slices and the best texture. The bars need time to fully set and develop their flavor.
- Slice and Serve (10 minutes): Once fully chilled, lift the bars out of the pan using the parchment paper handles. Place on a cutting board and use a sharp knife to slice into squares. For the cleanest cuts, wipe the knife clean between each slice. I like to cut 16 small bars for parties or 9 larger bars for a more indulgent serving.
Cooking Tips & Techniques
After making these bars more times than I care to count, I’ve picked up a few tricks that make a real difference. Let me share them so you don’t have to learn the hard way like I did.
Room temperature ingredients matter. I cannot stress this enough. Cold cream cheese creates lumps that no amount of beating will fully smooth out. Cold eggs can cause the batter to curdle. Set everything out on the counter at least an hour before you start. If you’re in a hurry, you can soften cream cheese in the microwave on 50% power for 15-second intervals, but it’s not quite the same.
Don’t overmix the cheesecake batter. I know it’s tempting to keep beating until everything is perfectly smooth, but overmixing incorporates too much air into the batter. Those air bubbles expand during baking and then collapse, leaving cracks in your cheesecake. Mix just until the ingredients come together, then stop.
The toothpick technique takes practice. My first spiderweb looked more like a sad scribble than a web. The key is to start from the center and drag outward in one continuous motion, wiping the toothpick clean between each spoke. Don’t press too hard or you’ll drag the chocolate through the batter instead of just through the chocolate circles. A light touch is everything here.
Watch the baking time closely. Every oven runs differently. Start checking at the 30-minute mark by gently shaking the pan. The edges should be set and slightly puffed, but the center should still wobble like Jell-O. If you insert a toothpick near the center, it should come out with a few moist crumbs attached—not wet batter, but not completely clean either.
Patience with chilling is non-negotiable. I once tried to cut these bars after only two hours of chilling because I needed them for a party, and the slices were a mess. The cheesecake layer was still too soft, and the crust crumbled everywhere. Give them the full four hours, or better yet, make them the night before. They actually taste better the next day anyway.
Variations & Adaptations
One of the things I love about this recipe is how flexible it is. Here are some variations I’ve tried and loved:
Gluten-Free Version: Swap the graham cracker crumbs for gluten-free graham crackers or crushed gluten-free shortbread cookies. The rest of the recipe is naturally gluten-free as long as you use gluten-free flour in the pumpkin layer. I tested this with Schär brand graham crackers, and honestly, nobody could tell the difference.
Dairy-Free Adaptation: Use dairy-free cream cheese (Tofutti or Kite Hill work well), dairy-free sour cream, and a plant-based butter substitute for the crust. For the white chocolate, look for dairy-free white chocolate chips—they’re available at most health food stores. The texture will be slightly less creamy, but the flavor is still fantastic.
Chocolate Spiderweb: Instead of white chocolate, use dark or milk chocolate for the spiderweb design. The contrast against the orange pumpkin layer is striking, and it adds a rich chocolate flavor that pairs beautifully with the pumpkin spice. I actually prefer this version when I’m feeling extra indulgent.
Pumpkin Spice Latte Twist: Add 1 tablespoon of instant espresso powder dissolved in 1 tablespoon of hot water to the pumpkin layer. The coffee flavor enhances the pumpkin spice and gives these bars a subtle mocha undertone. It’s my secret weapon for impressing coffee lovers.
Mini Bar Version: Use a mini muffin tin lined with paper liners for bite-sized treats. Press about a tablespoon of crust mixture into each cup, then fill with the cheesecake and pumpkin batters. Bake for 15-18 minutes instead of 35-40. These are perfect for Halloween parties where guests want to sample multiple desserts.
Serving & Storage Suggestions
These bars are best served chilled, straight from the refrigerator. The cold temperature keeps the cheesecake layer firm and the crust crisp. I like to let them sit at room temperature for about 5 minutes before serving—just enough to take the chill off without compromising the texture.
For presentation, arrange the bars on a black or dark orange platter to make the spiderweb design pop. You can garnish with a few candy spiders or edible glitter for extra Halloween flair. I once served these on a slate cheese board with small pumpkins scattered around, and it looked like something from a magazine.
Storage: Store leftover bars in an airtight container in the refrigerator for up to 5 days. Layer them between sheets of parchment paper to prevent sticking. The flavor actually improves after a day or two as the spices meld together.
Freezing: These bars freeze beautifully. Place the fully chilled and sliced bars on a baking sheet and freeze for 1 hour until solid. Then transfer them to a freezer-safe container or zip-top bag, separating layers with parchment paper. They’ll keep for up to 3 months. To thaw, transfer to the refrigerator overnight or let sit at room temperature for about 30 minutes.
Reheating: I don’t recommend reheating these bars—they’re meant to be served cold. But if you want a warm dessert experience, you can microwave a single bar for about 10-15 seconds. The cheesecake will soften slightly, and the flavors become more pronounced. Just don’t overdo it or the crust will get soggy.
One note on how flavors develop: These bars are good the day you make them, but they’re amazing the next day. The spices have time to infuse the cheesecake, and the texture becomes even creamier. If you can plan ahead, make them a day before you need them.
Nutritional Information & Benefits
Here’s the approximate nutritional breakdown for one bar (based on 16 servings):
| Nutrient | Amount per Serving |
|---|---|
| Calories | 285 |
| Total Fat | 18g |
| Saturated Fat | 10g |
| Cholesterol | 65mg |
| Sodium | 220mg |
| Total Carbohydrates | 28g |
| Dietary Fiber | 1g |
| Sugars | 20g |
| Protein | 5g |
| Vitamin A | 45% DV |
| Calcium | 6% DV |
| Iron | 4% DV |
While these are definitely a treat, they do offer some nutritional benefits. Pumpkin is packed with vitamin A, which supports eye health and immune function. The cream cheese provides calcium and protein, and the eggs add additional protein and healthy fats. The spices—cinnamon, ginger, nutmeg—have anti-inflammatory properties and can help regulate blood sugar.
If you’re watching your sugar intake, you can reduce the sugar in the cheesecake layer to ⅓ cup without significantly affecting the texture. For a lower-fat version, use reduced-fat cream cheese and sour cream—just note that the texture will be slightly less creamy. And as always, this recipe contains dairy, eggs, and gluten (from the graham crackers), so it’s not suitable for those with allergies to those ingredients.
Conclusion
These Perfect Spiderweb Halloween Pumpkin Cheesecake Bars have become my signature fall dessert, and I honestly think they’ll become yours too. They’re the kind of recipe that looks impressive enough for a Halloween party but comes together with minimal stress. The spiderweb design is genuinely fun to create, and there’s something deeply satisfying about pulling that toothpick through the chocolate and watching the pattern emerge.
What I love most about these bars is how they capture the spirit of Halloween without being overly complicated or gimmicky. They’re not just a novelty—they’re a genuinely delicious cheesecake that happens to look like it came from a haunted bakery. The pumpkin flavor is warm and comforting, the cheesecake is silky and rich, and that buttery graham cracker crust ties everything together perfectly.
I’d love to hear how yours turn out. Did you try a different variation? Did your spiderweb design come out beautifully or hilariously? Share your photos and stories in the comments below—I read every single one, and nothing makes me happier than seeing these bars bring joy to someone else’s Halloween celebration. Happy baking, and don’t forget to save a bar for yourself before they disappear!
Frequently Asked Questions
Can I use pumpkin pie filling instead of pumpkin puree?
No, please don’t. Pumpkin pie filling is pre-sweetened and spiced, which will throw off the sugar and spice balance in this recipe. Stick with pure pumpkin puree for the best results.
Why did my cheesecake crack?
Cracking usually happens from overbaking or overmixing the batter. Make sure you remove the bars from the oven while the center still has a slight jiggle, and avoid beating the batter on high speed after adding the eggs.
Can I make these bars without a mixer?
Absolutely. You’ll need some elbow grease, but you can mash the cream cheese with a fork until soft, then whisk in the remaining ingredients. The texture might be slightly less smooth, but the flavor will be the same.
How do I get clean slices?
Use a sharp knife and wipe it clean between each cut. For the cleanest slices, chill the bars for at least 4 hours, or even overnight. Running the knife under hot water and drying it before cutting also helps.
Can I double this recipe for a larger crowd?
Yes, double all ingredients and use a 9×13 inch baking pan. The baking time will be similar, but start checking at the 35-minute mark. You may need to extend the baking time by 5-10 minutes depending on your oven.
Pin This Recipe!
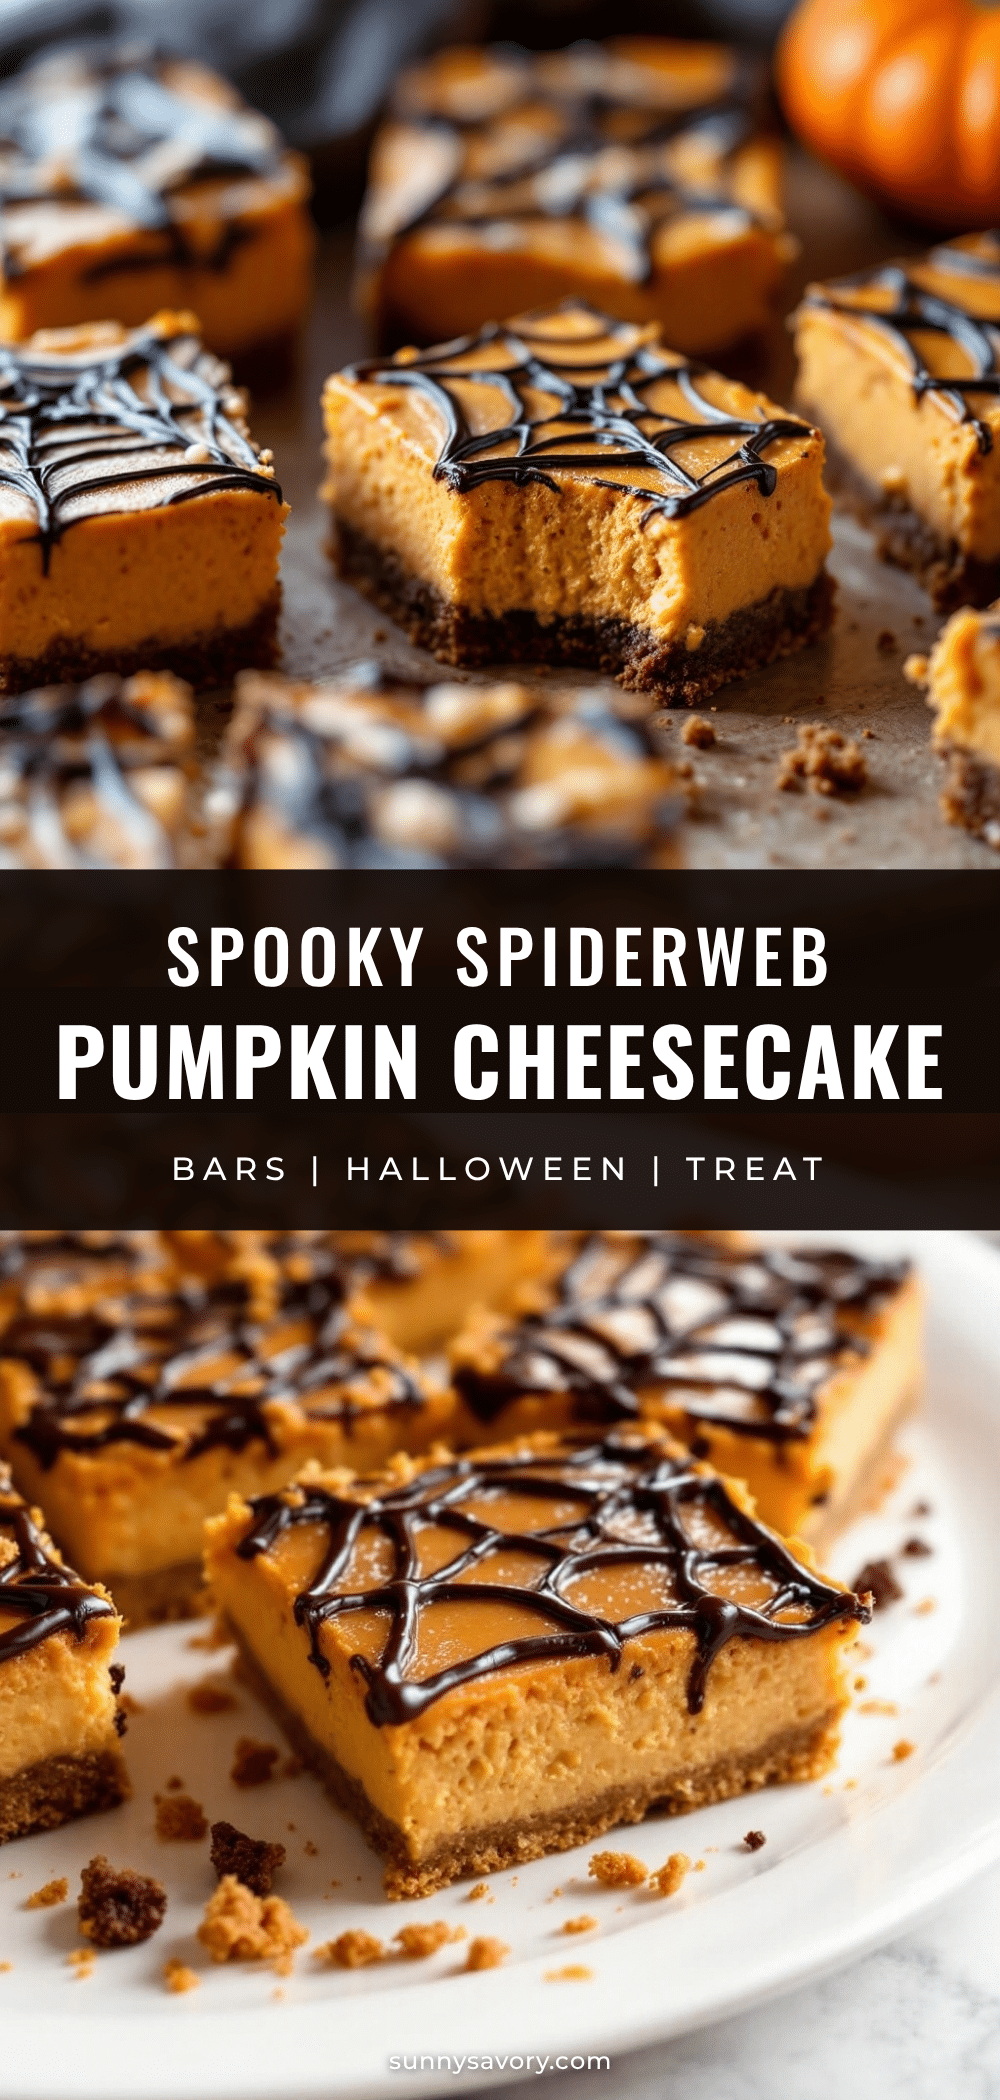
Perfect Spiderweb Pumpkin Cheesecake Bars: Easy Halloween Recipe
These creamy pumpkin cheesecake bars feature a buttery graham cracker crust, a silky cheesecake layer, and a spiced pumpkin layer topped with a stunning white chocolate spiderweb design. They’re easy to make, require no water bath, and are perfect for Halloween parties or fall gatherings.
- Prep Time: 20 minutes
- Cook Time: 35 minutes
- Total Time: 4 hours 55 minutes (includes chilling)
- Yield: 16 servings 1x
- Category: Dessert
- Cuisine: American
Ingredients
- 1 ½ cups graham cracker crumbs (about 12 full sheets, crushed fine)
- ¼ cup granulated sugar
- 6 tablespoons unsalted butter, melted
- Pinch of salt
- 16 ounces cream cheese, softened to room temperature
- ½ cup granulated sugar
- 2 large eggs, room temperature
- 1 teaspoon vanilla extract
- ½ cup sour cream, room temperature
- 1 cup pumpkin puree (not pumpkin pie filling)
- ¼ cup brown sugar, packed
- 1 teaspoon pumpkin pie spice
- ½ teaspoon cinnamon
- 1 tablespoon all-purpose flour
- ½ cup white chocolate chips
- 1 teaspoon coconut oil or vegetable shortening
Instructions
- Preheat oven to 325°F (163°C). Line a 9×9 inch baking pan with parchment paper, leaving overhang on two sides. Lightly grease the parchment.
- In a medium bowl, combine graham cracker crumbs, ¼ cup sugar, and salt. Pour in melted butter and stir until moistened. Press firmly into the bottom of the prepared pan. Bake for 10 minutes, then set aside to cool slightly.
- In a large bowl, beat softened cream cheese with an electric mixer on medium speed until smooth (about 2 minutes). Add ½ cup sugar and beat for another minute. Add eggs one at a time, beating on low just until combined. Fold in vanilla and sour cream gently.
- In a separate bowl, whisk together pumpkin puree, brown sugar, pumpkin pie spice, cinnamon, and flour until smooth. Stir 1 cup of the plain cheesecake batter into the pumpkin mixture until combined.
- Pour the plain cheesecake batter over the crust. Drop spoonfuls of pumpkin batter on top. Gently swirl with a butter knife or offset spatula to create a marbled effect.
- Melt white chocolate chips and coconut oil together in a microwave-safe bowl in 20-second intervals, stirring between each, until smooth. Transfer to a piping bag or zip-top bag. Snip a tiny corner and pipe concentric circles on top of the batter. Drag a toothpick from the center outward through all circles to create a spiderweb design. Wipe toothpick clean between each spoke.
- Bake for 35-40 minutes, until edges are set and center jiggles slightly. Cool completely on a wire rack (about 1 hour), then refrigerate for at least 4 hours, preferably overnight.
- Lift bars out using parchment handles. Slice into squares with a sharp knife, wiping clean between cuts.
Notes
Make sure cream cheese is truly softened (at least 1 hour at room temperature). Don’t overmix the cheesecake batter to avoid cracks. The toothpick technique takes practice—use a light touch. Watch baking time closely; center should still wobble. Chilling for at least 4 hours is non-negotiable for clean slices. Bars can be stored in the refrigerator for up to 5 days or frozen for up to 3 months.
Nutrition
- Serving Size: 1 bar
- Calories: 285
- Sugar: 20
- Sodium: 220
- Fat: 18
- Saturated Fat: 10
- Carbohydrates: 28
- Fiber: 1
- Protein: 5
Keywords: pumpkin cheesecake bars, Halloween dessert, spiderweb cheesecake, fall dessert, easy cheesecake bars, pumpkin dessert, Halloween recipe



